How to use Personal Hotspot on iPhone and Mac
It’s common to think of our phones as tiny computers that we can put in our pocket, but they can also become tiny routers for our Macs or other devices when the Personal Hotspot is turned on. This feature was first introduced with the iPhone 4 and became a top solution for students, professionals, and anyone who is constantly on the go.
Personal Hotspot lets you use your iPhone’s cellular connectivity as a link to the internet for devices which only have the WiFi option. This provides a convenient and reliable way to stay connected wherever you are as long as you have enough cellular data on your iPhone.
Wondering where is hotspot on iPhone located or how do I turn on my hotspot? Let’s take a look at these and other questions in the guide below.
How to turn on Personal Hotspot on iPhone
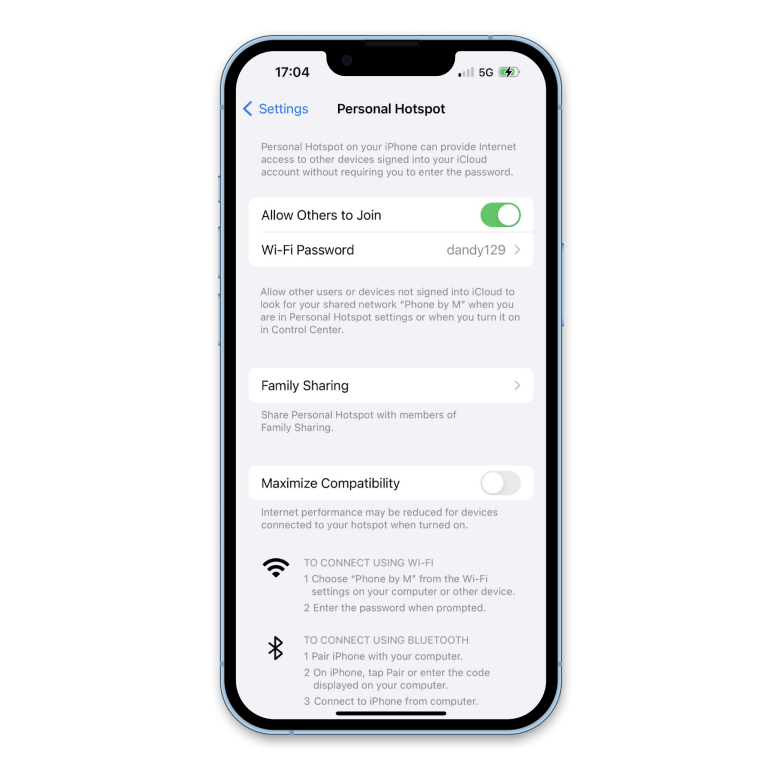
Here’s how to turn on hotspot on iPhone 11 or newer models. It’s quite simple — just enable cellular data in Settings if you haven’t already and follow these steps:
- Open Settings on your iPhone.
- Tap Personal Hotspot and toggle it on.
- Toggle Allow Others to Join on and note the password.
Although this feature can help get your Mac online almost anywhere, a hotspot is rarely as solid as WiFi or a wired connection to a router in your home or office. Plus, it especially degrades if your Mac isn’t running smoothly already because its storage is occupied by a lot of unnecessary stuff. That’s why you need CleanMy®Phone.
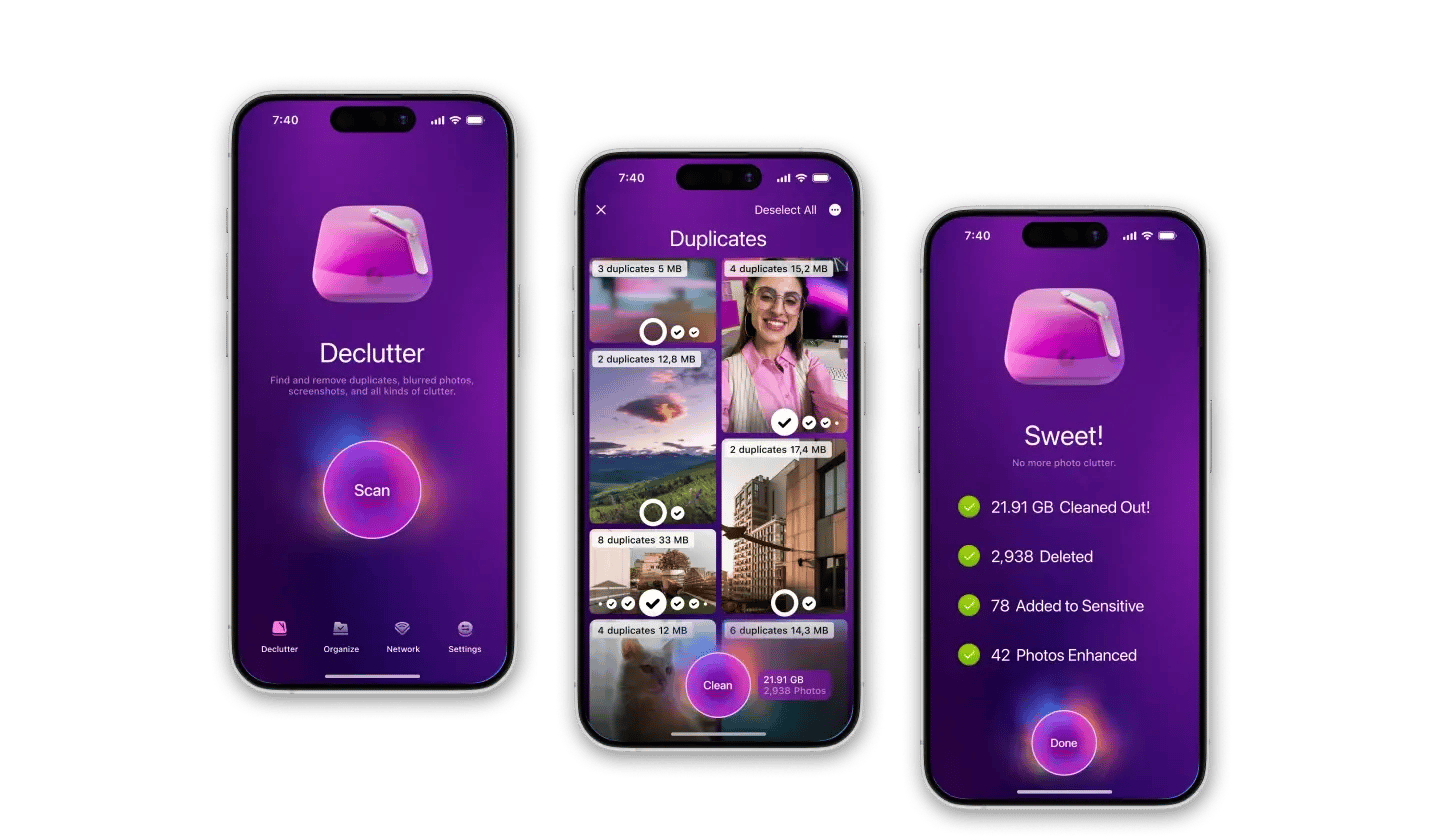
CleanMy®Phone is a duplicate file finder and cleaner that can free up gigabytes of storage in a single run by removing files you don’t need. With a self-learning algorithm in charge, CleanMy®Phone knows and remembers what you’ve selected for removal and will suggest it after the next scan to save your time. Customize the app’s features the way you want them and get rid of duplicate and similar files in seconds!
How to share your Personal Hotspot with Family Sharing
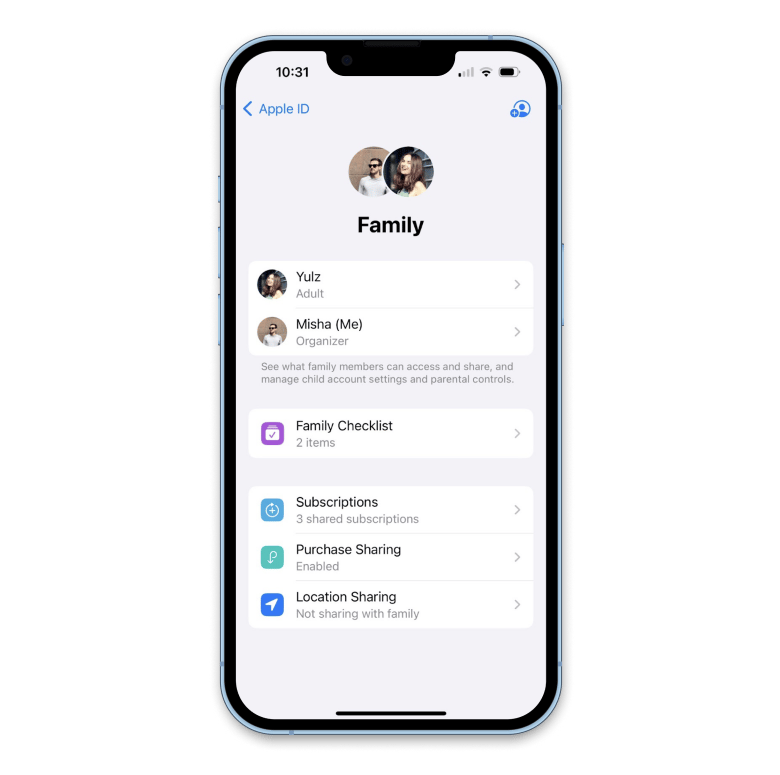
Once you know how to turn on personal hotspot, you can also set it up in a way that family members can automatically connect to it without a password. This setting only works with Apple’s Family Sharing feature, so you need to set that up first. Here’s how:
- Go to Settings on your iPhone and tap your name.
- Tap Family Sharing and choose to Set Up Your Family.
- Follow onscreen instructions and invite members.
Now here are the steps for how to turn hotspot on iPhone and enable Family Sharing:
- Open Settings on your iPhone and tap Personal Hotspot.
- Select Family Sharing and toggle it on.
- Tap a family member and select Automatic or Ask for Approval.
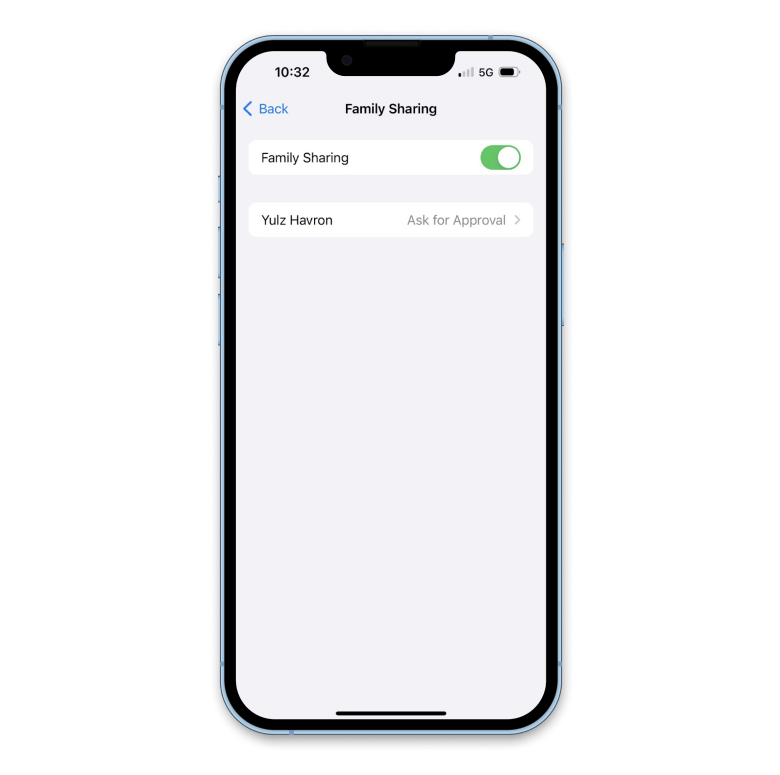
Now when your family member wants to use your Personal Hotspot, they can go to Settings and choose your hot spot iPhone from the WiFi list. Depending on how you set it up, they’ll either join automatically or ask your permission. But either way, they won’t need a password.
How to change your hotspot password
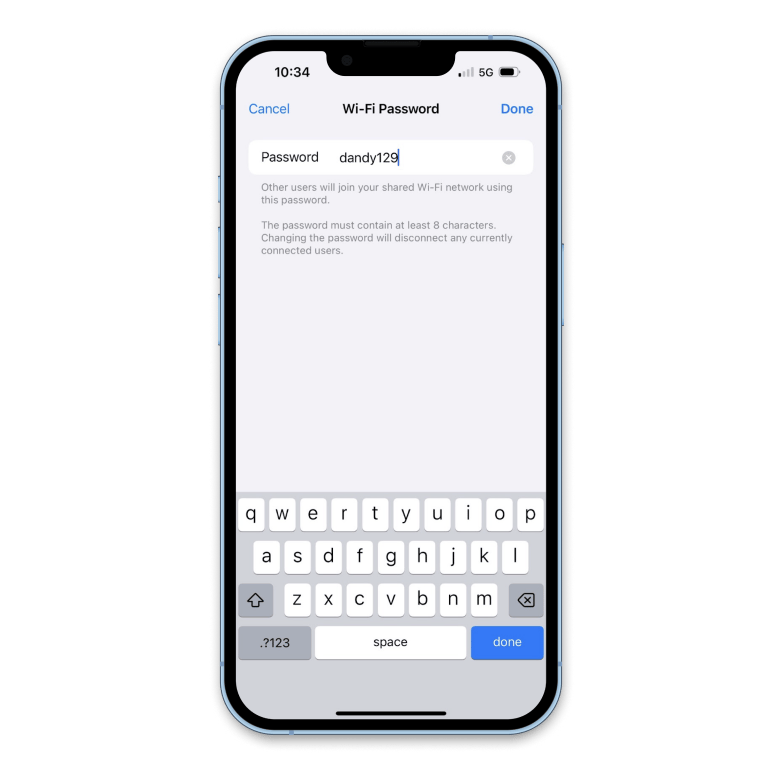
The default iPhone mobile hotspot passwords are generally hard to crack, which is good, but also tough to remember. So if you want to change it for ease of use, you can. Here’s how:
- Open Settings on your iPhone and tap Personal Hotspot.
- Toggle Allow Others to Join on.
- Tap WiFi Password.
- Change the password to one you can remember easily.
- Tap Done.
How to use Personal Hotspot on iPhone with your Mac
What makes Personal Hotspot such a great feature is the ability to turn your phone into a local WiFi router for any devices nearby. Usually, that’s your MacBook. So now that you know how to turn hotspot on iPhone, below are some suggestions for how you can connect to it from your Mac.
How to connect to iPhone hotspot from Mac using WiFi
Once you know the answer to the question “how do I turn on my hotspot?” and have it set up on your iPhone, you can use it as a network for your Mac. Connecting your Mac to an iPhone’s hotspot is simple, just follow these steps:
- Click on the WiFi icon in your Mac menu bar.
- Choose your iPhone from the list of connections under Personal Hotspots.
- Enter the password if prompted and click Join.
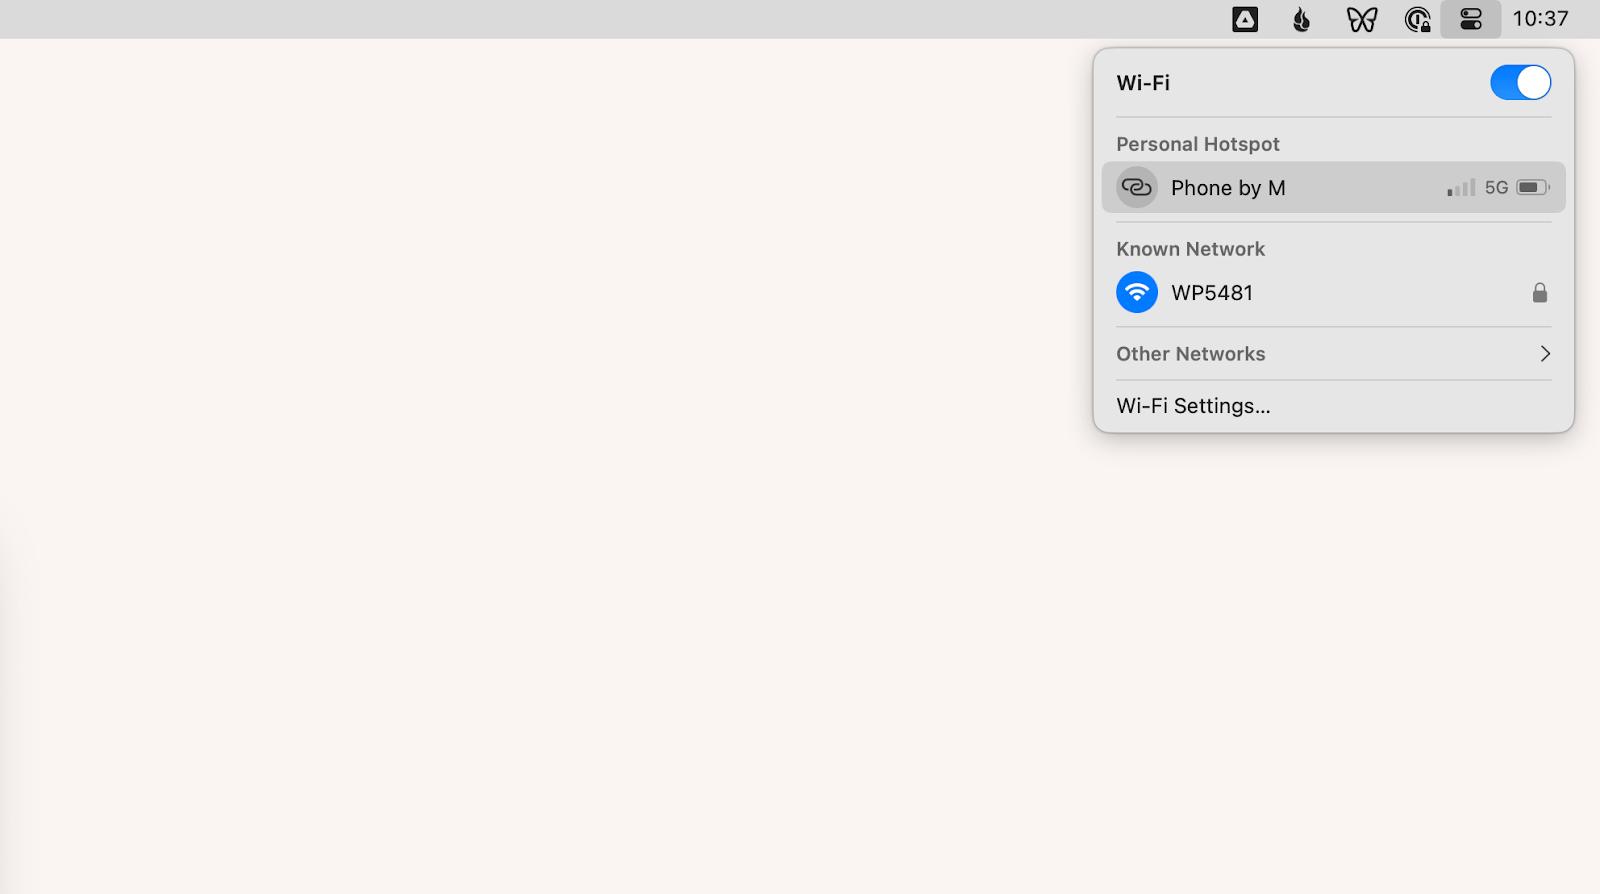
Note: If you’re using the same Apple ID on your Mac and iPhone, you won’t need to enter the password to join a personal hotspot.
In case you can’t find your iPhone from the list of Personal Hotspots on your Mac because you’re not sure about its name, you can check it by going to the About section in the General tab of your phone’s Settings.
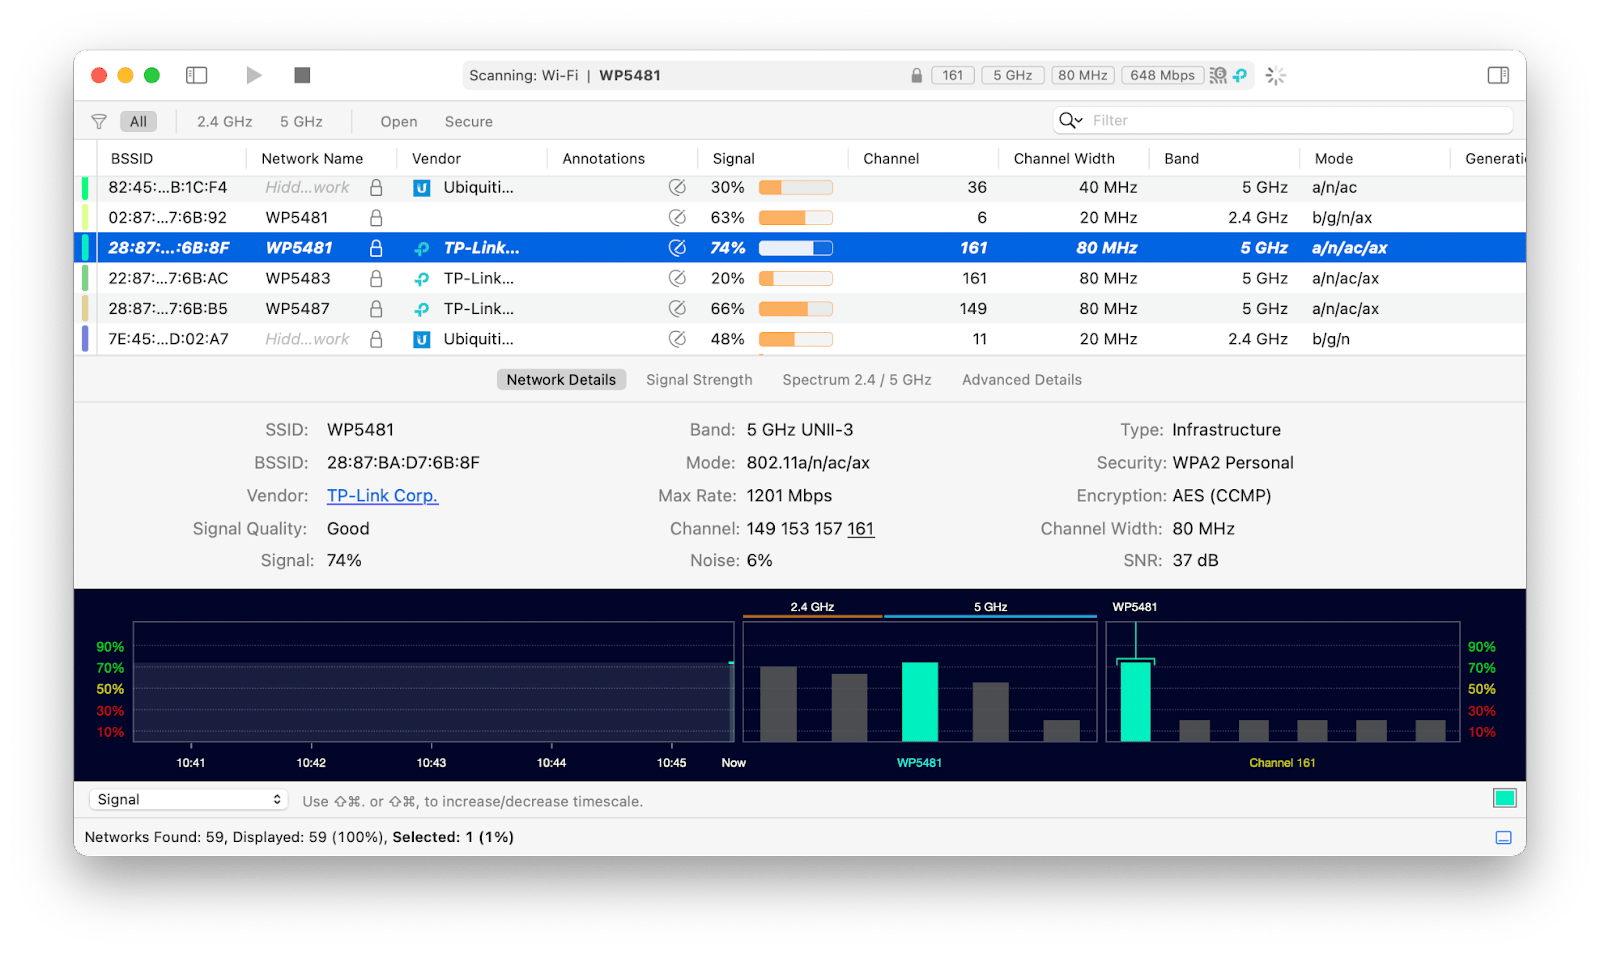
Since connecting a Mac to a personal hotspot is usually a last resort at a time when the regular WiFi connection isn’t working, you need WiFi Explorer to help troubleshoot and fix any possible network problems before they arise.
WiFi Explorer is an app that brings a range of details about all the networks in the vicinity like their band, range, signal quality, security status and more to you in a clear, readable format. One of the main benefits of this network analyzer is that it helps you check your own connections in the workplace or at home without any professional skills. With its set of simple, powerful features, WiFi Explorer is a perfect way to always know what’s going on with your network and how to fix it if needed!
How to connect to iPhone hotspot from Mac using Bluetooth
Bluetooth is another convenient wireless way of getting WiFi from your iPhone to your Mac. One downside is that the internet speed is limited to 2 Mbps for Bluetooth 5, so if you have fast mobile LTE (or 5G), you’ll be better off connecting to the hotspot on iPhone through WiFi or USB.
Note: Apple removed the Bluetooth tethering feature in newer versions of macOS starting with Monterey.
To connect your Mac to a hotspot using Bluetooth, make sure your iPhone mobile hotspot is on and follow these steps on your Mac:
- Go to System Preferences ➙ Bluetooth, and select your iPhone.
- Click the Network tab and select Bluetooth PAN from the left menu.
- Find your iPhone from the devices pop-up and click Connect.
There’s also a way to turn Bluetooth on and connect to your iPhone by clicking the corresponding icons from the Mac menu bar. That panel was designed to be the shortcut to all of Mac’s most often-used features, but sometimes it gets so convoluted with icons that it’s almost impossible to navigate. If you find yourself in such a situation, you need the help of Bartender.
Bartender is a slick utility that can quickly clean up the mess and bring order to your Mac menu bar. This app will organize your desktop in seconds by hiding all the various icons behind a single three-dot expandable menu. If you use several apps routinely, Bartender has the option to bring them up using hotkeys, and if there are just way too many apps to remember, Bartender has a handy Search feature for quicker navigation!

How to join iPhone hotspot from Mac using USB
Everyone has used a USB cable to connect their iPhone to their Mac for charging, backups, or quick file transfers, but that simple wired connection can also let your Mac join hot spot iPhone and access the internet on the go.
Here’s how to use personal hotspot to connect a Mac:
- Connect your iPhone to your Mac with a USB cable.
- Turn on hotspot on iPhone.
- Open System Settings on your Mac and select Network.
- Select iPhone USB under Other Services.
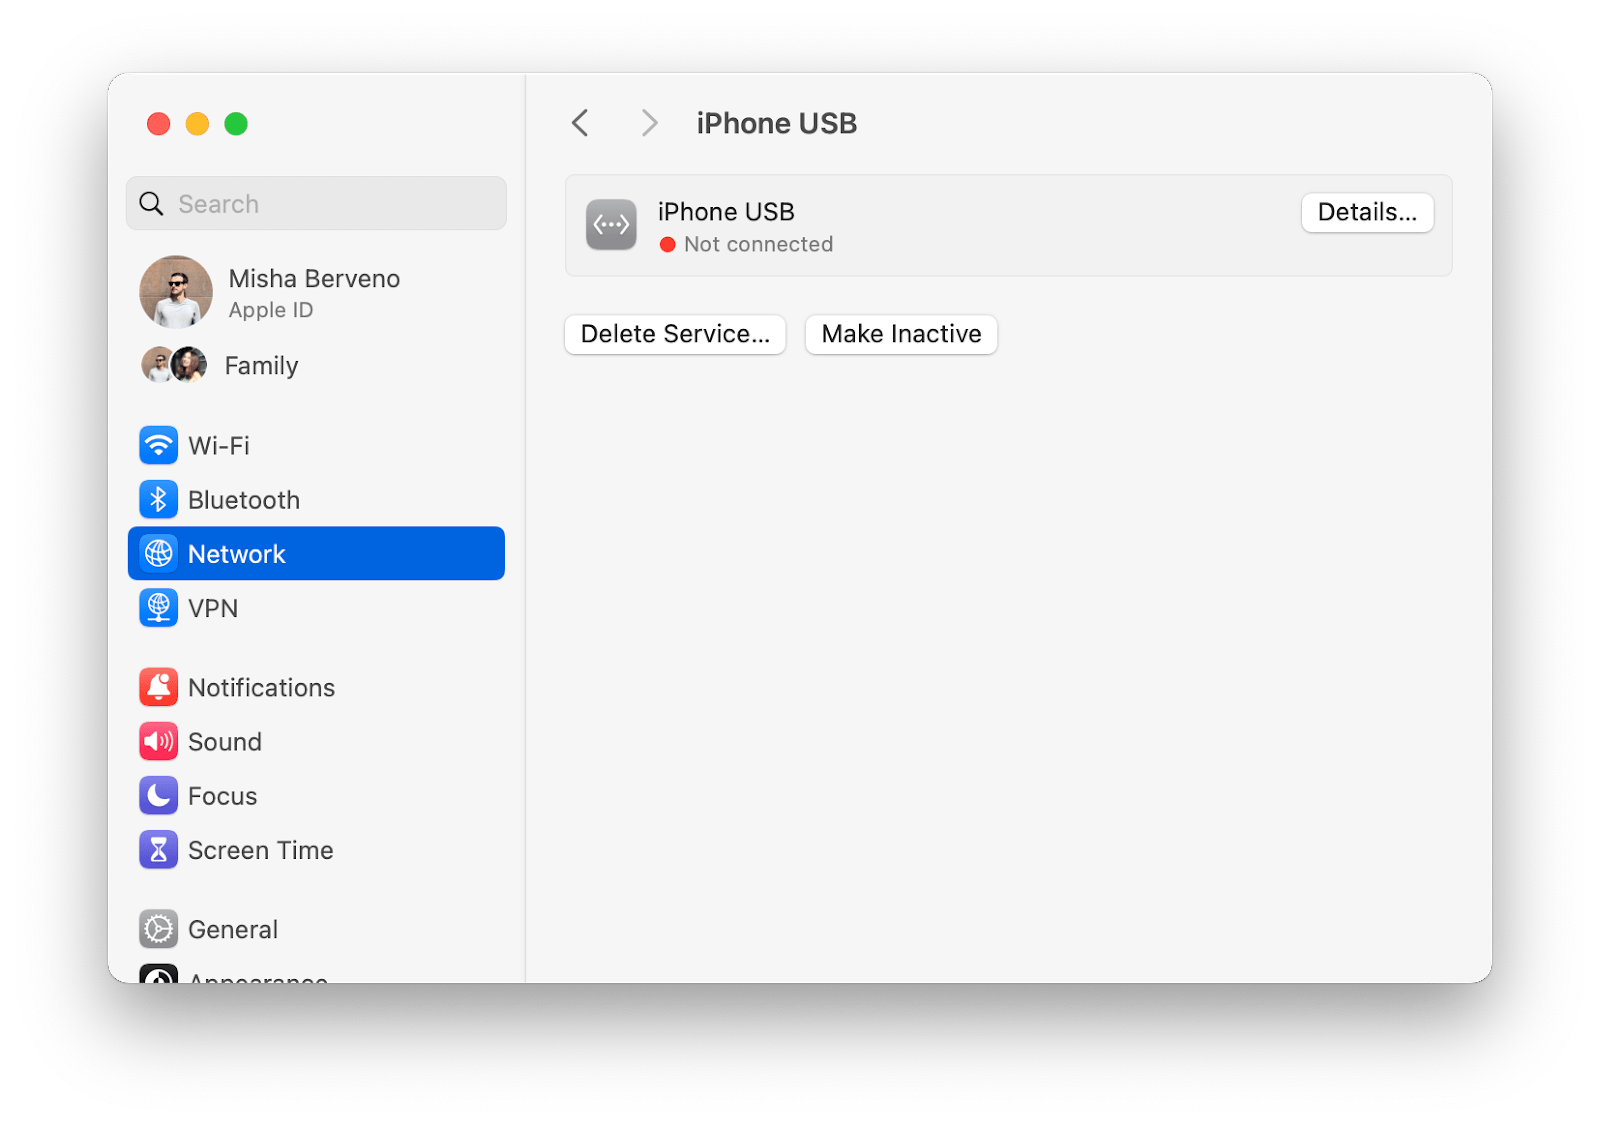
If your Mac is already connected to another WiFi, the status symbol under iPhone USB will be a yellow dot “Attached”, but when your Mac disconnects from WiFi, the status will change to a green dot “Connected.”
Note: If you don’t see iPhone USB as an option in the Network menu, click on the three-dots icon in the bottom right, select Add Service, choose iPhone USB, and click Create.
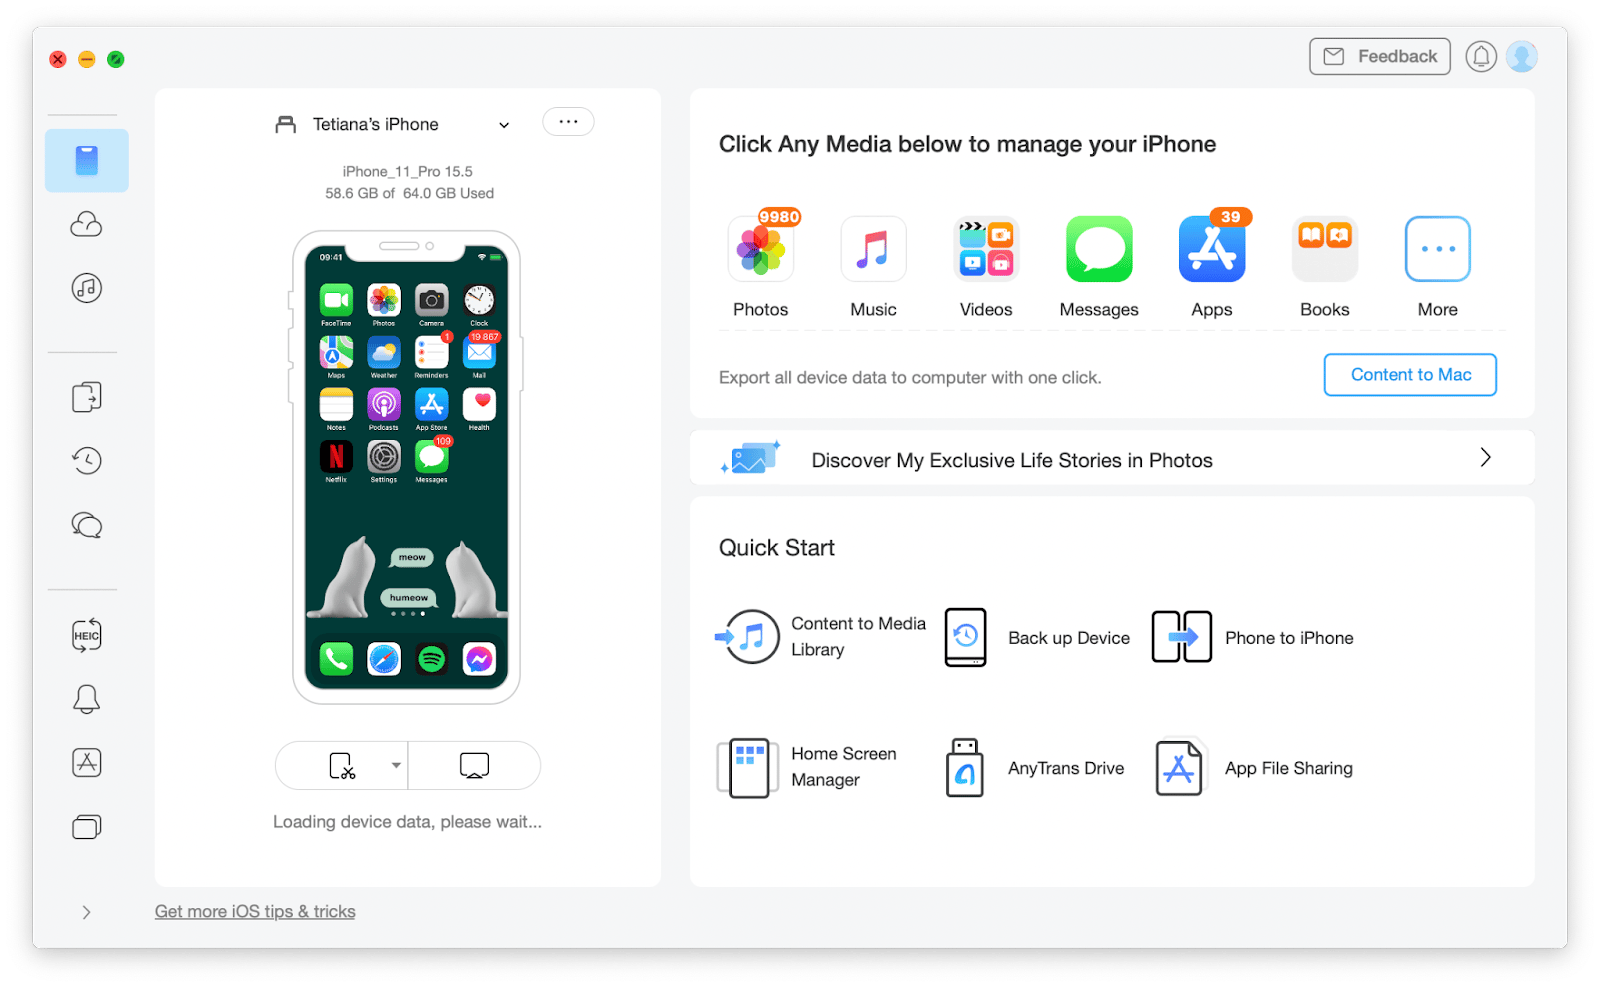
To avoid having to manually connect your Mac and iOS devices for things like routine backups and file transfers, try a smart file manager like AnyTrans.
AnyTrans is an app that can bring your devices into sync with seamless data migration and secure management of backups. A great alternative to Apple’s iTunes, AnyTrans can instantly copy your iPhone content to Mac, as well as transfer data across your iCloud. A great bonus is this app’s built-in Media Downloader that gives you access to content from more than 900+ sites!
Generally, an iPhone hotspot is a humble feature that goes unnoticed most of the time until you really need to use it. Since you’re now a pro at how to turn on hotspot on iPhone 11 and other models, as well as how to share it with your Mac, it’s time to clean up and organize your Mac with CleanMy®Phone and Bartender, while WiFi Explorer looks after your network.
Great news! All four apps — CleanMy®Phone, Bartender, and WiFi Explorer — are available to you right away and for free. How? Through a seven-day trial of Setapp, a platform giving you access to more than 240 utilities that can help improve your life and the life of your Mac and iOS devices. Use Setapp’s Search feature to find the right apps for your needs in no time!
FAQs about your iPhone mobile hotspot
The above methods and solutions make up a complete guide on how to turn on personal hotspot, but here are a few more answers to the most common questions about hotspot on iPhone.
Why can’t I turn on my hotspot on my iPhone?
You won’t be able to find or turn on hot spot iPhone if your wireless carrier disabled it or the plan doesn’t support it, if there’s a glitch in the system (which can can be solved by restarting your devices), or if your iOS is outdated.
How can I use my iPhone as a hotspot for my laptop?
Open Settings on your iPhone, tap Personal Hotspot, make sure it’s on, and note the network name and password. Then go back to your Mac, open the WiFi menu, and connect to your phone like you would to a regular network.
Why does my iPhone hotspot keep disconnecting?
This is likely happening due to inactivity on your connected device. Some other reasons for this issue include running out of mobile data on your active carrier plan, or having low power mode turned on.


