Time-lapse shows change over time quickly.
By capturing frames at intervals and playing them fast, you can visualize motion and changes that are too slow to notice in real time.
iPhone makes time-lapse easy.
Use the built-in Camera app’s Time-Lapse mode with stable lighting and a tripod for smooth results, or adjust speed with iMovie for added control.
Mac apps give more creative control. GlueMotion lets you turn photos into professional time-lapses, while Hustl enables precise screen time-lapses for tutorials or demos.
Time-lapse enhances storytelling.
It’s perfect for travel videos, creative projects, tutorials, or events, making ordinary scenes dynamic and engaging.
Setapp simplifies access to tools.
Hustl and GlueMotion are available on Setapp, giving you dozens of apps for creative projects and productivity. Get a free trial.
A time-lapse video is a simple way to show change over time — fast. You record a scene slowly, then play it back quickly to reveal motion you’d normally miss. Think sunsets, city traffic, clouds rolling in, or a creative project coming together.
If you’re searching for how to make a time-lapse video, this guide walks you through it step by step. You’ll learn how to time-lapse a video on both Mac and iPhone, including how to turn a video into a time-lapse iPhone style.
Small tip: To keep Instagram time-lapses for offline viewing or editing, try Download Instagram Videos tool. It recommends various apps and approaches for downloading, making the process really simple.
How to make a time-lapse video on iPhone or Mac (using built-in tools)
Creating a time-lapse video is easier than it sounds. Here’s a clear workflow for both iPhone and Mac.
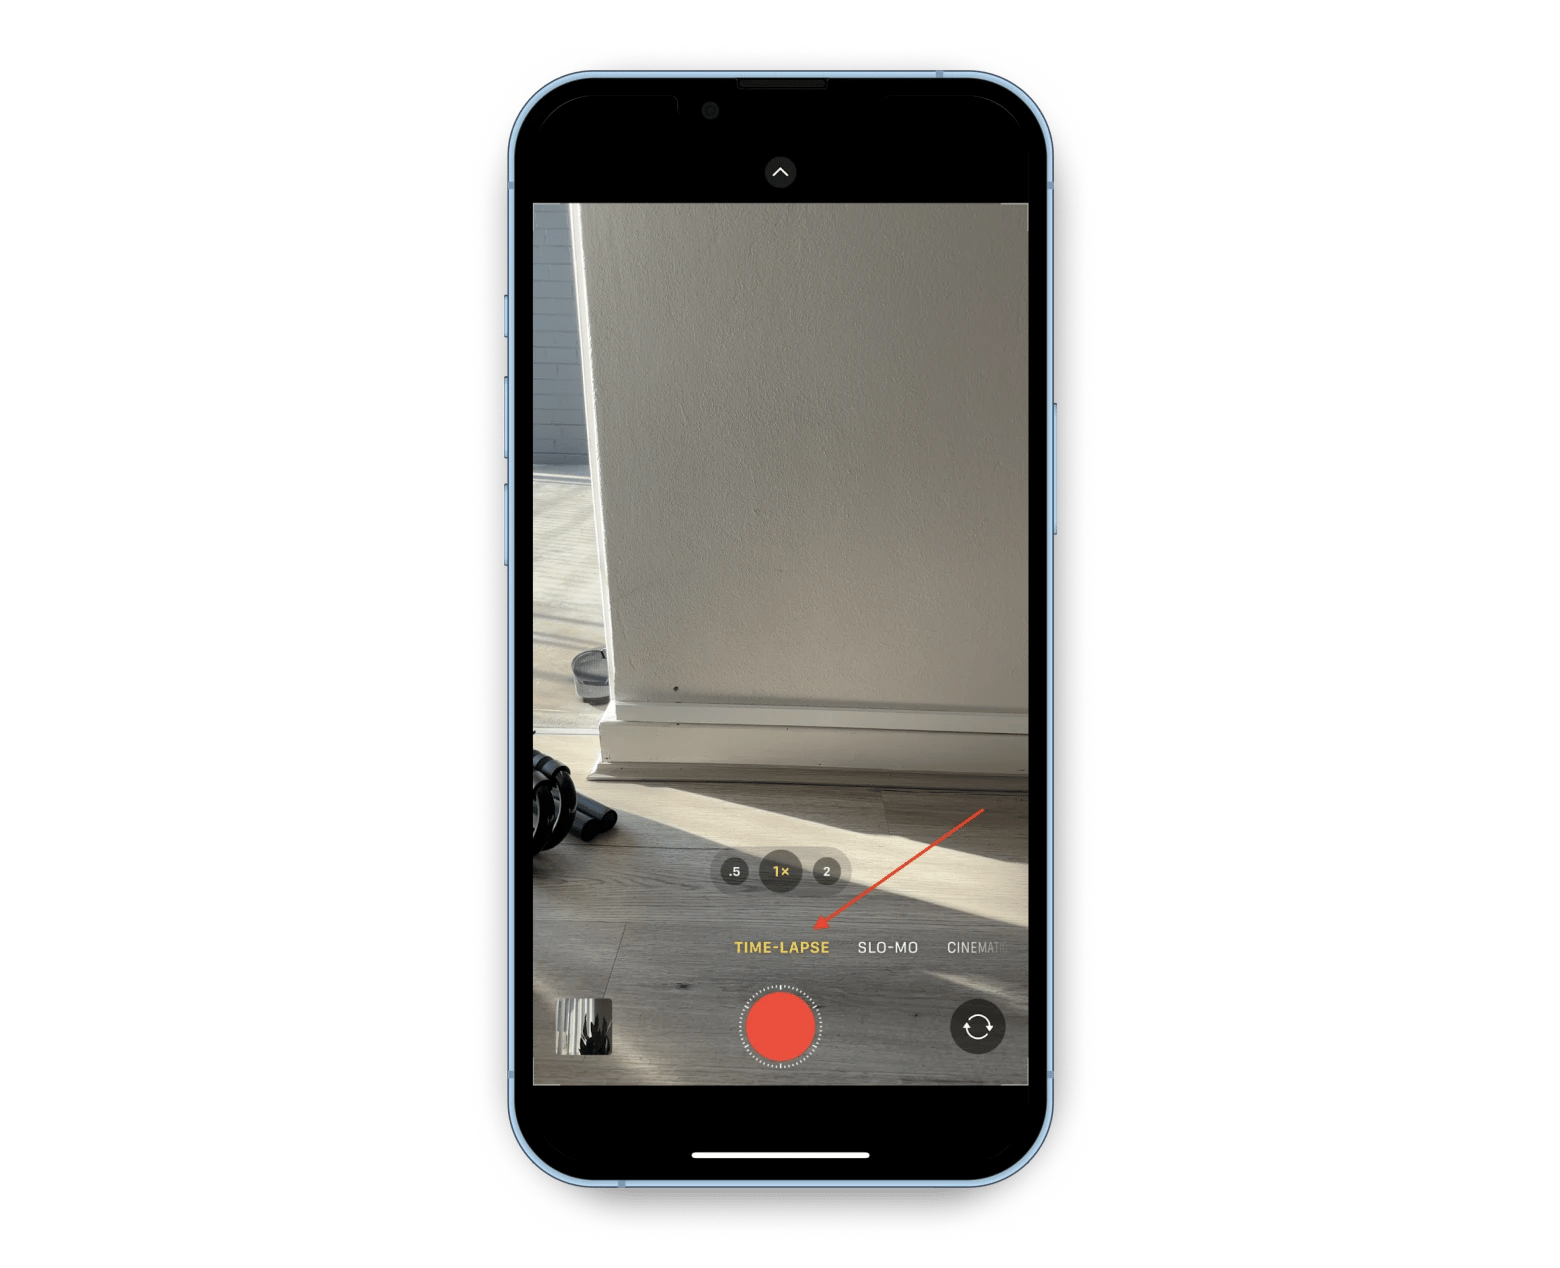
On iPhone (using the built-in Camera app):
Open the Camera app.
Swipe to Time-Lapse mode.
Set up your shot and stabilize your phone (use a tripod if possible).
Tap Record and let it capture the scene.
For best results, ensure good lighting and a clear composition.
To turn video into a time-lapse on iPhone, the app automatically compresses hours into seconds.
On Mac (using GlueMotion or Hustl):
Gather your photos or a standard video you want to speed up.
Install and open GlueMotion to turn photos into a time-lapse (supports RAW and up to 100,000 images).
Export your project in the desired video format.
GlueMotion is an app that turns photos into time-lapses. All you have to do is add your photos, and the app will create videos from your static images. GlueMotion allows you to make time-lapses out of up to 100,000 images, supports RAW format, and offers a selection of video formats for your end product.
How to turn a regular video into a time-lapse on Mac
If you already have a recorded video ,you can turn the video into a time-lapse using iMovie, the best free Mac tool for editing your video. It’s simple and effective for beginners and pros alike.
Here’s how to do it:
Open iMovie and import your video.
Select the clip and press Command + R to open the speed editor.
Click the timer icon in the top-left corner and choose Speed > Fast.
Pick a speed: 2x, 4x, 8x, or 20x, depending on how fast you want your time-lapse.
Preview the clip and make adjustments as needed.
Export your video in the desired format.
How to record a screen time-lapse on Mac
If you want to create tutorials, design project demos, or coding time-lapses, Hustl is the go-to app for time-lapse Mac screen recording. It makes how to time lapse a video of your screen simple and precise.
Here’s how to get started:
Open Hustl and select the portion of your screen you want to record (or choose full screen).
Set the time interval between frames — 1 second works well for most projects.
Adjust the aspect ratio to match your final video output.
Choose the recording quality and frame rate for smooth playback.
Press Record and let Hustl capture your screen in time-lapse mode.
How to slow down a time-lapse video using iMovie
If you want to restore a time-lapse to normal speed or adjust it for storytelling, iMovie on iPhone makes it easy. This is helpful when you’ve already turned video into time-lapse iPhone style, but need parts to slow down for clarity or effect. Learning how to time-lapse a video also lets you experiment with pacing and emphasis in your projects.
Step-by-step guide:
Open iMovie (download from the App Store if needed).
Tap Start New Project > Movie.
Select your time-lapse clip from the Photos app and tap Create Movie.
Tap the clip in the timeline to select it.
Tap the speed icon at the bottom.
Move the toggle between the turtle (slower) and rabbit (faster) icons to adjust playback speed.
Preview and fine-tune until you get the desired timing.
Export your clip once finished.
How to make a time-lapse drawing or art video
To create a time-lapse of a drawing, you can use your iPhone and a tripod.
Prepare your drawing environment first, then attach your iPhone to your tripod and turn it towards your table or easel to capture the canvas in the frame. Take a few test videos to check lighting and composition, adjust if necessary. Make sure your lighting will remain the same or similar throughout the recording timeline. Pick the time-lapse mode in your iPhone camera app and hit the red button to start recording.
What is a time-lapse video and how does it work?
What is a time-lapse? A time-lapse video is a video created by capturing frames at set intervals, making motion appear faster than in real life.
Instead of recording every moment like a normal video, you take snapshots over time and play them in sequence. This is how filmmakers turn video into time-lapse to show sunsets, busy city streets, or clouds rolling by — compressing hours into seconds.
What is time-lapse photography, and why should you try it?
Time-lapse photography captures sequential photos at intervals longer than normal video, creating the effect of motion speeding up. It’s a simple way to visualize gradual changes that are too slow to notice in real time. Learning how to make a time-lapse video lets you turn ordinary scenes into dynamic stories.
Benefits of time-lapse photography:
Show natural changes: Sunsets, clouds, tides, or blooming flowers
Document progress: Construction, creative projects, or travel adventures
Engage viewers: Perfect for tutorials, marketing content, and documentaries
Save time: Compress hours or days into seconds for storytelling
For post-processing, you can also convert video files to make time-lapse editing easier.
Creative ideas and tips for making stunning time-lapse videos
Now that you know how to make a time-lapse video, it’s time to get creative and tell stories in a visually striking way. Time-lapses make travel videos pop with shifting skies, bustling city streets, or breathtaking sunsets. DIY and building projects become mesmerizing when each step is compressed into seconds. Artists can showcase drawing, painting, or calligraphy processes, while events, workshops, and parties gain dynamic energy when captured in time-lapse.
On iPhone, you can easily turn video into a time-lapse iPhone using Time-Lapse mode with stable lighting. On Mac, apps like Hustl and Glue Motion let you record screens or turn photos into professional time-lapses. Both are available on Setapp, a subscription that gives you access to dozens of creative and productivity apps for Mac and iPhone.
FAQ
What are some uses of the time-lapse format?
Some of the most popular uses of the time-lapse format are captures of clouds or night sky, videos of busy streets, crowds, construction, plants growing or flowers wilting, sunsets and sunrises, seasons changing, moving shadows, as well as time-lapses of projects like drawing, sewing, painting, decorating, etc.
How long should a time-lapse video be?
Your time-lapse video should cover the duration of the process you are trying to capture. Depending on your subject, the duration may vary, but you can set the frequency of your shots to correspond to the end-product video length you are after.
If you are filming a night sky, filming intervals can start at 15 seconds. For a sunset or sunrise, you can film at a 1-3 second interval. For crowds and traffic, a 1-second interval should work. Experiment to get the best setting for your desired end result.
Can I reverse a time-lapse video to normal speed?
You can reverse a time-lapse you filmed with your iPhone using the iMovie app on your iPhone. Download iMovie from the App Store, create a movie in the app using your time-lapse clip, tap the video in your editing mode, then tap the speed icon at the bottom of the app and adjust video speed by toggling the slider between turtle and rabbit icons.