Top tidying tips to help organize your Mac desktop
Keeping your Mac desktop organized isn’t just about aesthetics since it’s also a way for you to boost your productivity. On top of that, you can also ensure your system performs smoothly without any random lag spikes or drops in frame rate. If you’ve ever wondered how to organize your desktop effectively, you’re in the right place.
I’ll walk you through practical steps to tidy up Mac desktops, recommend handy apps, and show you a few proven methods to organize desktop Mac like a pro.
But first, let’s quickly overview ways to tidy up your Mac:
| I want to | What to do |
|---|---|
| Remove desktop clutter | Use Stacks (Finder > View) to auto-group files. |
| Sort files automatically | Use Spotless to set up an automatic file-sorting rule. |
| Locate copied text and frequently used files easily | Use Unclutter to store everything in a swipe-down panel. |
| Have organized and structured file storage | Use structured folders in Finder. |
| Get easy-to-see icons on desktop | Adjust icon size and grid spacing (Finder > Right-click > Show View Options). |
| Get less crowded menu bar & dock | Hide unused icons in the menu bar with Bartender and rearrange apps with uBar. |
| Control too many open windows | Use Mosaic to arrange windows efficiently. |
| Get more local storage | Store large files in the cloud, like iCloud Drive, Google Drive, Dropbox, etc. |
Best ways to organize your Mac desktop
Ultimately, it feels absolutely amazing to open my Mac and see a clean backdrop. A little planning goes a long way, and it’s surprising how much time I save overall. See what tricks and apps you’ll get the most joy out of below.
Use stacks to automatically group files
One of the simplest ways to organize a desktop Mac is using stacks. This built-in macOS feature automatically groups files by type (e.g., images, documents) or tags and dates.
Here’s how to set it up:
- Right-click on your desktop or click View in the Finder menu).
- Choose Use Stacks.
- Your files will now neatly collapse into stacks based on default settings.
- To change how your stacks are grouped, right-click the desktop again, choose Group Stacks By, and pick your preference (Kind, Date Last Opened, Tags, etc.).
This feature immediately tidies up icons on your screen. Whenever you save new files to the desktop, they’ll automatically fall into the correct stack.
Organize your files instantly with Spotless
By using Spotless, you’ll never have to worry about manually transferring items into subfolders every time you download or create something.
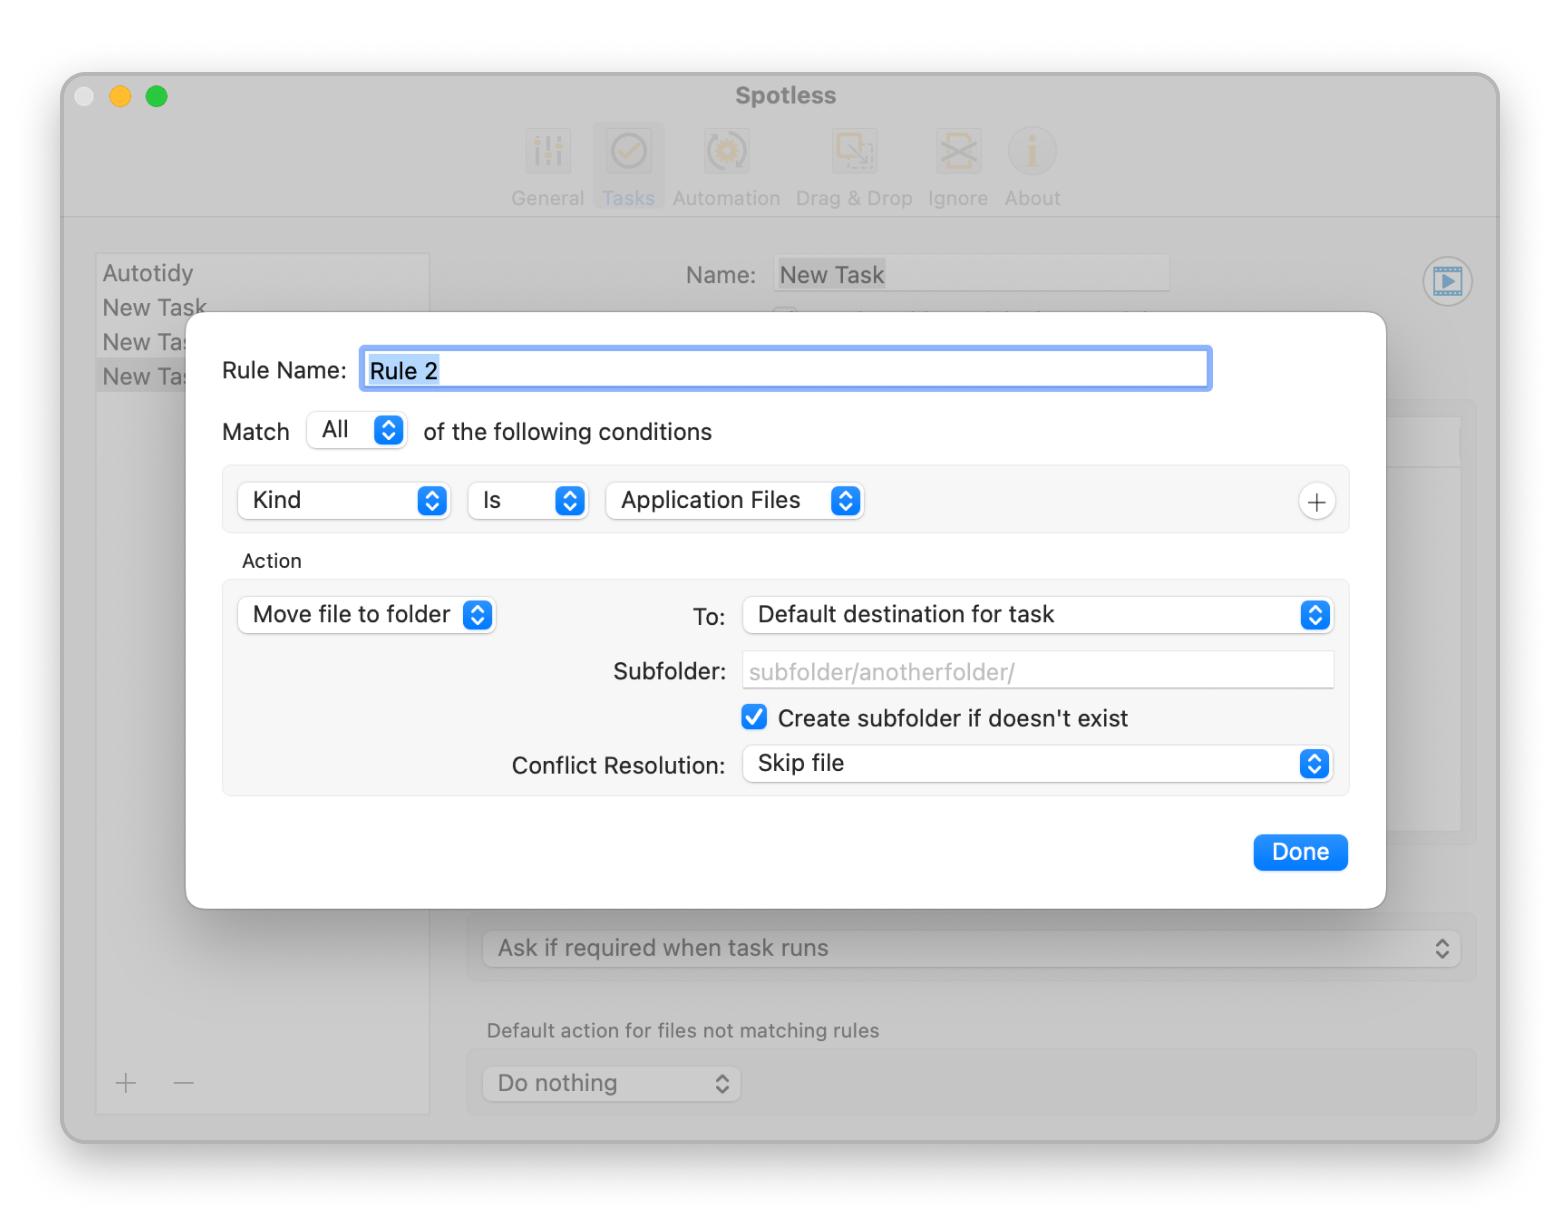
I use Spotless whenever I need more control than what Stacks offers. It’s super simple: I set up rules to automatically sort my files, so screenshots, for example, go straight into a Screenshots folder. After that, Spotless just quietly runs in the background and keeps your desktop (and any other folder) organized.
Here's how it works:
- Install and open Spotlles.
- Click the app menu bar icon and then click the burger icon on the top right > Choose Preferences.
- Click the Tasks Tab.
- Click “+” to create a new task > Click “+” to create a new rule under File processing rules.
- Set up conditions > Click Done. Spotless will start sorting files automatically in the background.
- If you want to clean up your files right away, drag and drop them onto the Spotless menu bar icon.
- Spotless will instantly move them based on your rules.
Want a tidier workspace? Learn how widgets on your Mac can keep you organized and efficient.
Keep notes, clipboard, and files in one place with Unclutter
I love having quick notes and frequently used files right at my fingertips, but with all the various documents and audio files I’ve got on my desktop. It gets messy pretty quickly.
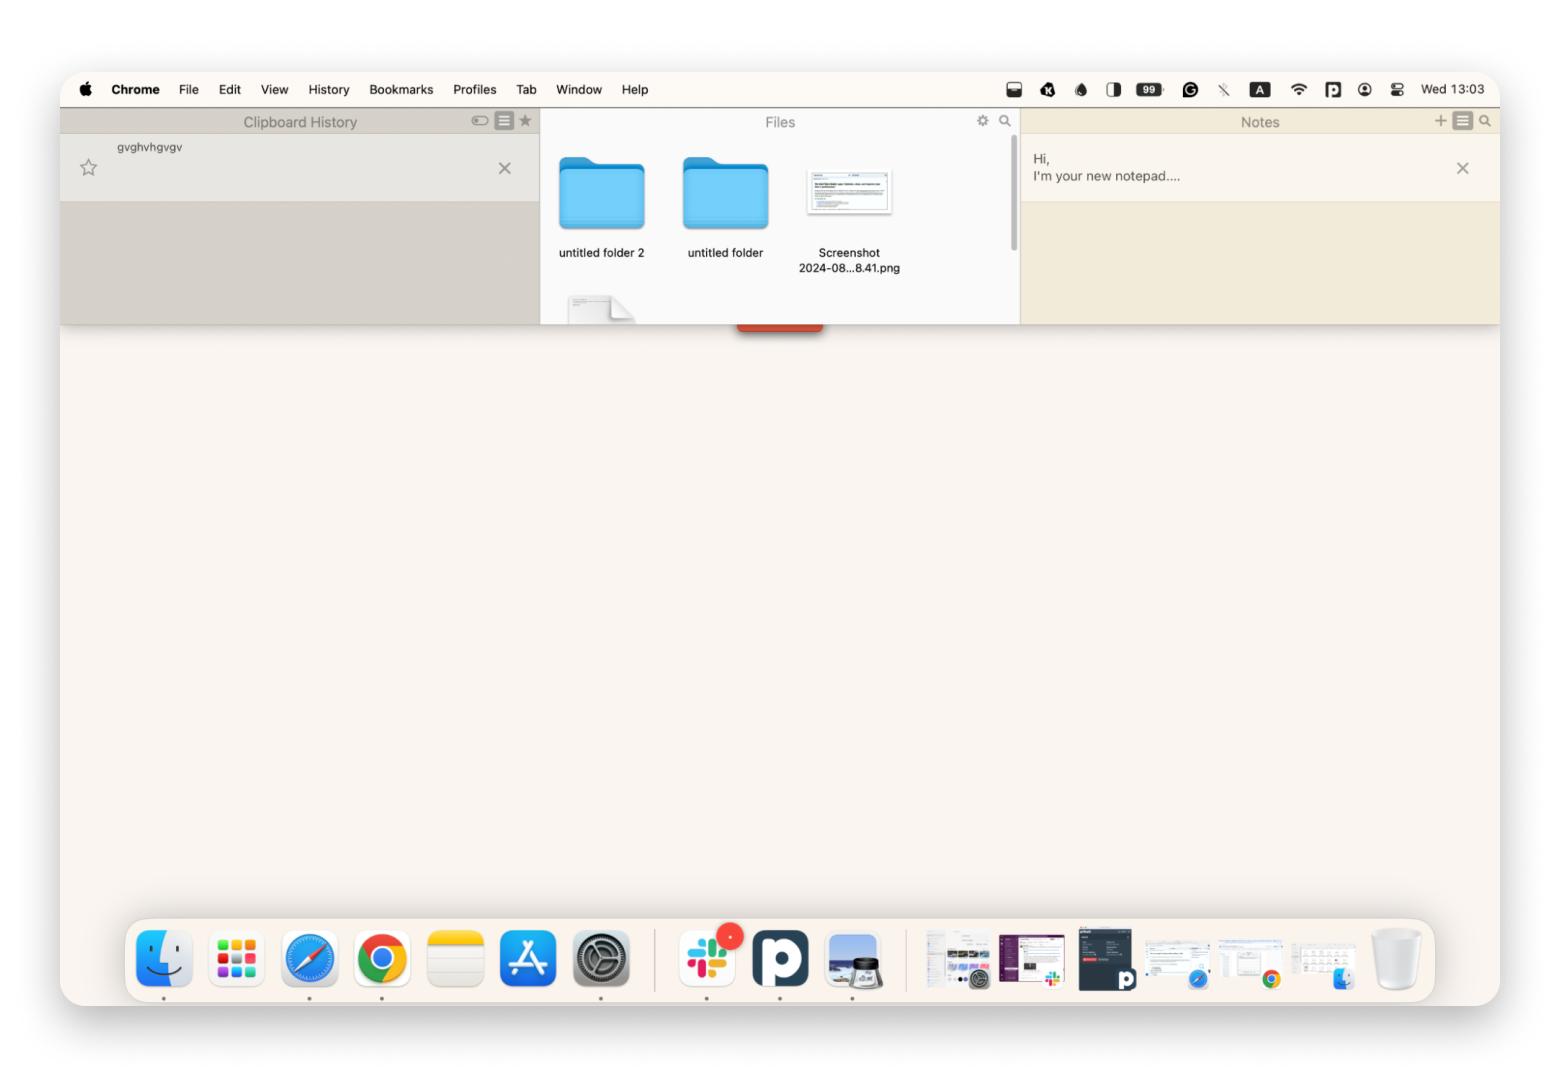
But I’ve started to use Unclutter to give me a hand with this, and I’m really liking how it keeps everything organized in one place with three main features.
- First, there’s a Clipboard History for tracking multiple copied items, so I don’t have to copy and paste the same thing over and over.
- Next, it has Quick Notes, which I find pretty useful for jotting down ideas and snippets on the fly before I inevitably forget them. No extra apps are needed.
- Finally, there’s a File Drawer where I can drag important documents or images for easy access.
I basically just drop all my text files straight into Unclutter instead of scattering them across my desktop. Then I can just swipe down from the top of my screen whenever I need something fast, and it’s all there.
Create a folder system that works for you
If automation tools and built-in solutions aren’t enough, take a more hands-on approach by designing a folder structure tailored to your workflow.
For instance:
- Work projects: Create subfolders for each client or project.
- Personal files: Keep photos, videos, and personal documents separate.
- Archived items: Maintain an “Archive” folder for older files you don’t need daily access to.
Label folders clearly, and consider adding color tags (right-click a folder > Tags) in Finder to make them stand out.
Customize your desktop icons for better visibility
If you have trouble finding icons on a busy background, customizing icon size and spacing can be a game-changer.
- Right-click on your desktop and select Show View Options.
- Adjust Icon Size, Grid Spacing, and Text Size to your liking.
- Experiment with different settings until your icons are clear and evenly spaced.
If you have a favorite wallpaper, choose icons and text colors that contrast nicely for better visibility.
![]()
Declutter your Mac’s dock and menu bar
My dock used to be crammed with apps I rarely used. It was distracting, and I wasted time hunting for the right icon. Now, I try to keep only my most-used apps visible and tuck everything else away. The same goes for my menu bar. I remove icons that aren’t essential or hide them using third-party tools, like some of the options I’m about to go over.
Streamline your menu bar with Bartender
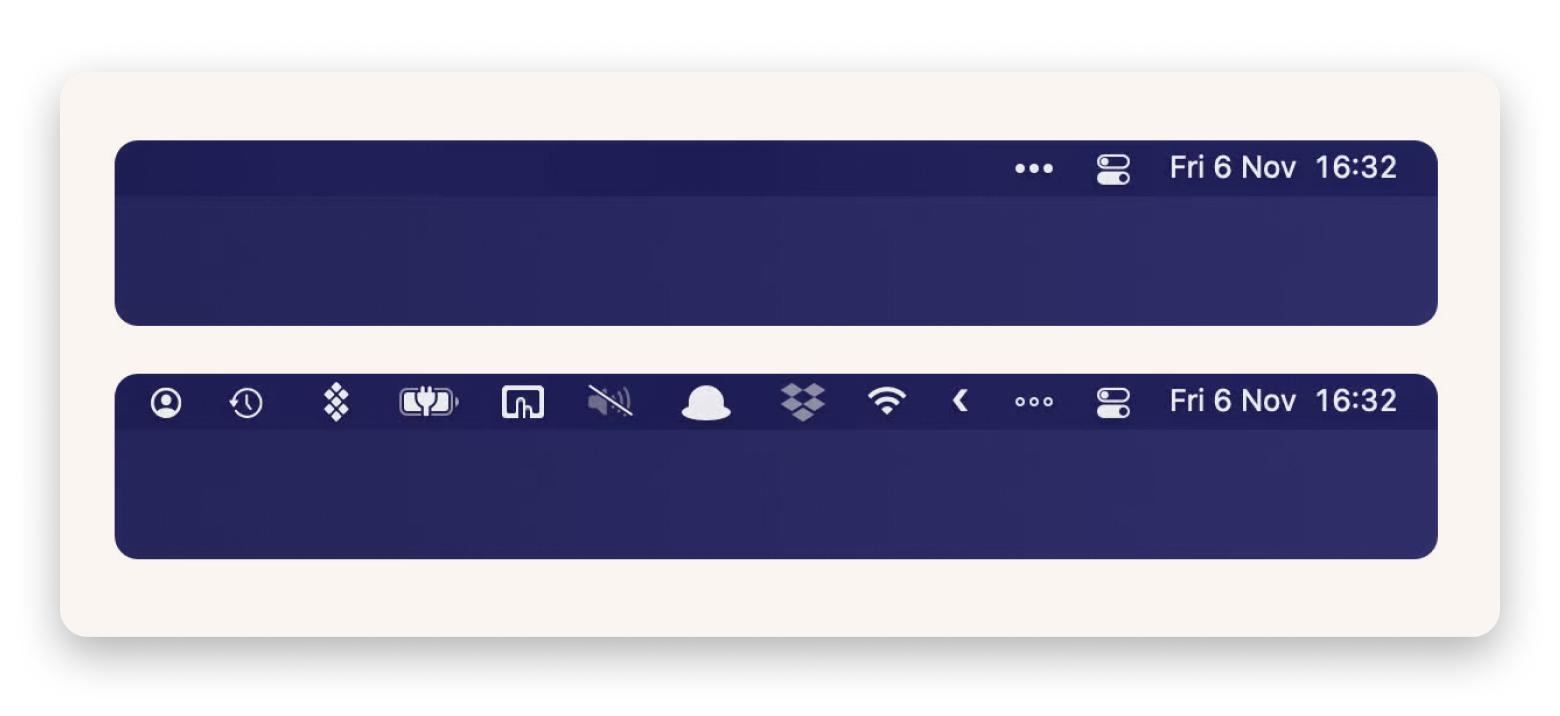
My menu bar used to be packed with icons for Wi-Fi, Bluetooth, Dropbox, and more. Bartender makes it easy for me to keep things clean by hiding the icons I don’t use often.
I can also rearrange everything to keep the tools I actually need front and center, plus there’s a quick search if I need something that’s tucked away. It’s ideal if you want a minimal setup without losing fast access to important items.
Replace the dock with a more efficient app switcher like uBar
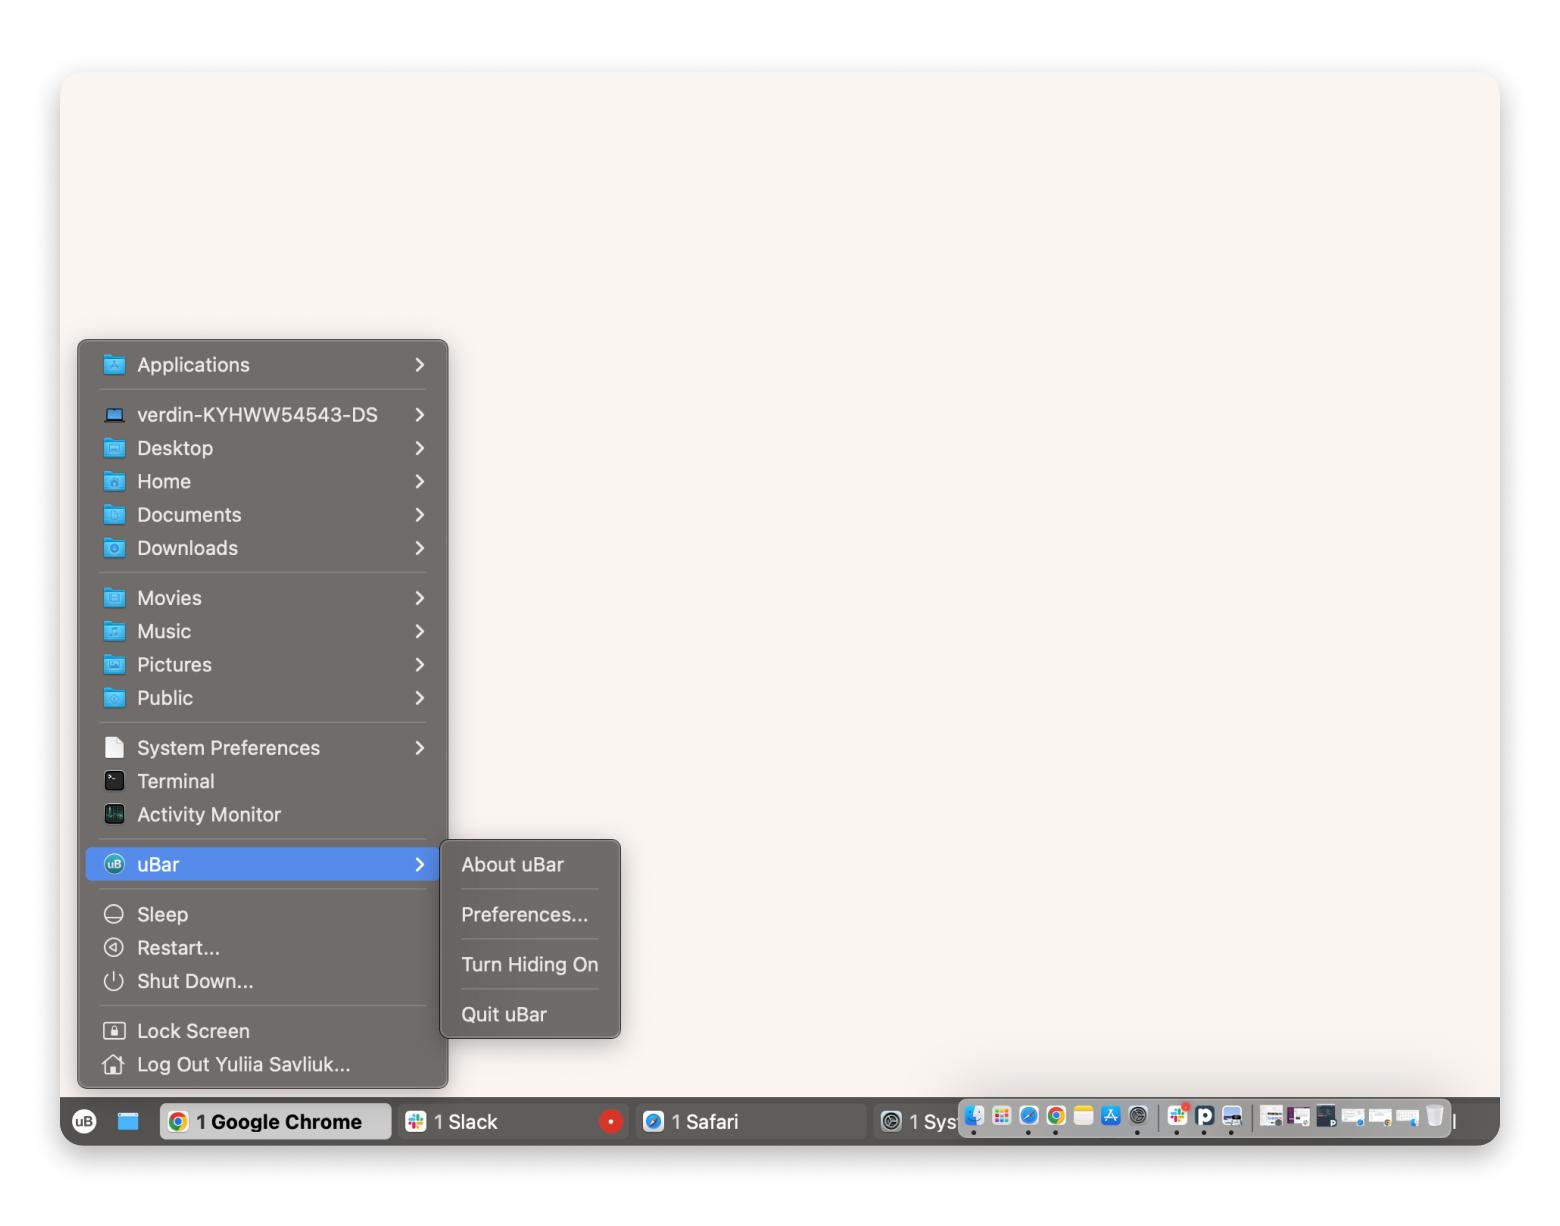
I’ve found the default macOS Dock a bit limiting when I have tons of apps open, so I use uBar as a more powerful alternative. It gives me a Windows-style taskbar feel while still blending in with my Mac. I can resize it, pin the apps I use all the time, and see everything I’m working on at a glance.
I also like that it lets me group all the apps I currently have open — which can be a lot when I’m working — by name or category, which is perfect for juggling multiple projects simultaneously.
Optimizing your workflow for a cleaner desktop
A smooth workflow also tends to keep me from scattering files everywhere. It means I can get back to work faster after a break. It also helps me keep my Mac tidy without extra effort. I tend to use a range of different apps to make all this a bit easier for myself:
Arrange open windows like a pro with Mosaic
I often have loads of windows open, so Mosaic tends to be pretty helpful for snapping and arranging them exactly how I like.
If I drag a window to the edge, the tool automatically fits it into half or a quarter of my screen, which is super useful if you don’t have any spare monitors. I can also create custom layouts—one-third for my browser and two-thirds for my text editor, for example — so they match whatever I’m currently working on.
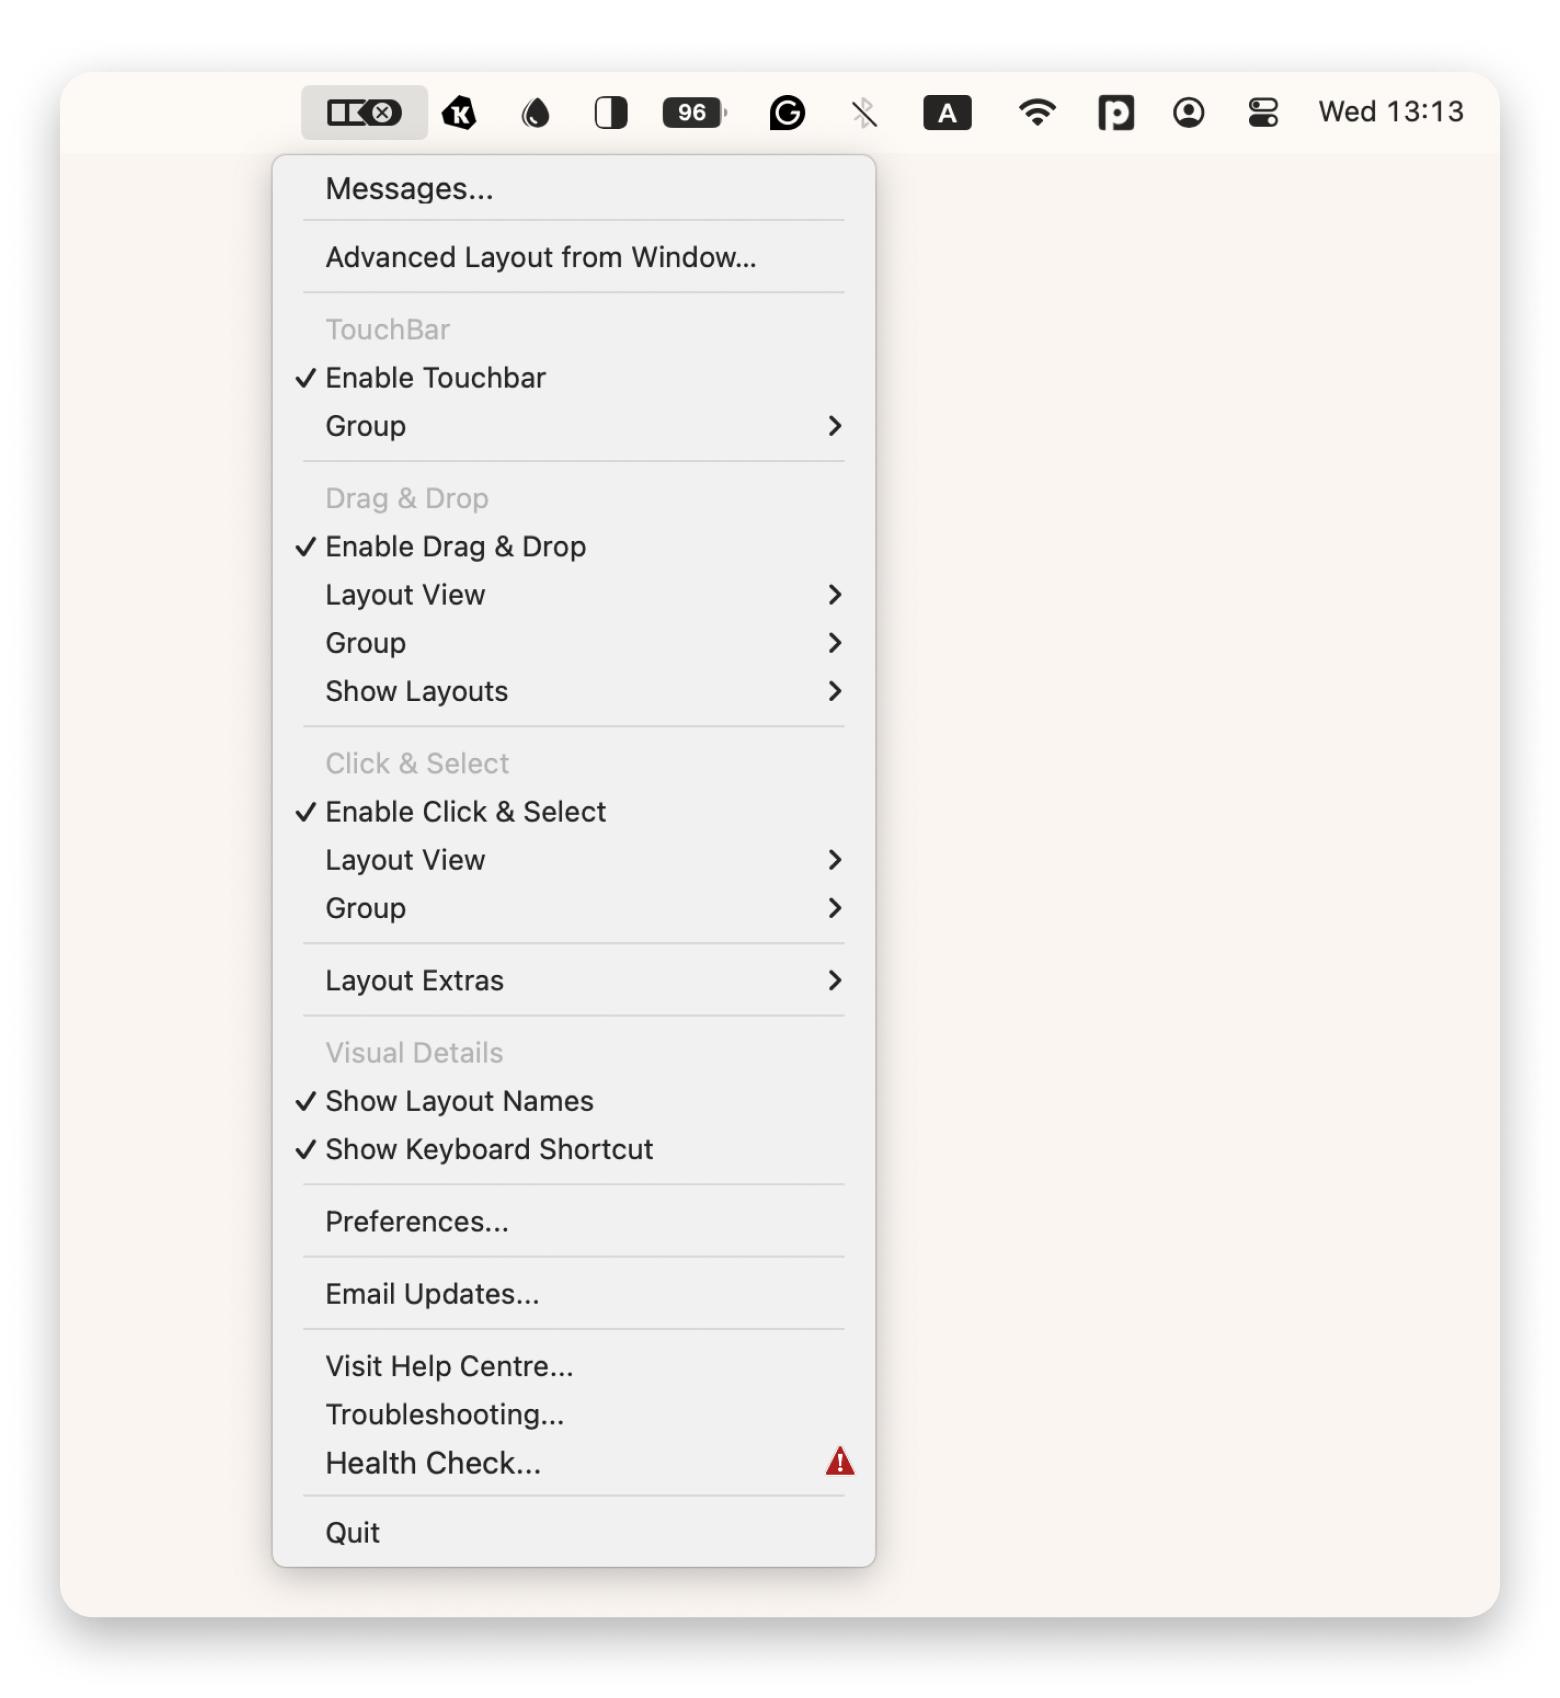
Automate regular cleanups for a stress-free experience
Manual tidy-ups can become tedious. That’s where automation shines. I’ve already touched on Spotless, but it’s worth re-emphasizing:
- Scheduled maintenance: Set Spotless to run every day or every week, organizing any new desktop items into designated folders.
- Batch cleanup: If you prefer a monthly purge, simply drag everything on your desktop into Spotless and let it work its magic.
By automating these processes, you free up mental space to focus on work and creativity rather than housekeeping.
Keeping your Mac desktop organized long-term
Consistency is key, so I set reminders to tidy up at the end of each week. Over time, it becomes second nature to move files as soon as I’m done with them. I don’t have to waste hours sorting an endless backlog.
It’s really helpful to occasionally review old folders and delete anything unnecessary. Keeping my Mac desktop neat is an ongoing process, but it doesn’t have to be difficult:
Set a weekly routine to tidy up
Staying organized is easier if you make it a habit. Consider:
- Weekly review: Every Friday, spend five minutes reviewing your desktop.
- Trash unneeded files: Delete duplicate screenshots or random downloads you no longer need.
- File everything else: Move the remaining items to relevant folders or your Unclutter panel.
Building a weekly routine ensures clutter never piles up to overwhelming levels.
Leverage cloud storage to reduce local clutter
I keep large files — like videos or high-res images — off my Mac and store them in the cloud through a service like iCloud Drive, Google Drive, or Dropbox instead. My Mac does not have the most memory, so this setup means my desktop stays clear, and I can still access what I need on any device with an internet connection — all without having to pay for an external hard drive or upgrade my Mac.
I find this is one of the simplest way you can avoid clutter while also freeing up a bit of storage space. Combining cloud storage with a good folder system just helps my Mac run smoother and look tidier overall.
Why keeping your Mac desktop organized matters
I love having a clean Mac desktop. It helps me focus when I’m not hunting for scattered icons or random files — which I’ll delve into more shortly. There’s something refreshing about knowing exactly where each folder sits.
Over time, I’ve realized that my mind feels less cluttered when my screen is tidy. Fewer distractions mean I can tackle tasks faster and more confidently. It might seem obvious, but small details like consistent folder names have also really made a difference. My Mac runs more smoothly, too — take a look at how it’s helped me:
How a clutter-free desktop boosts productivity
A clutter-free workplace — digital or physical — has been shown to help people focus on the tasks at hand. When you organize MacBook desktop icons and folders, you instantly reduce visual distractions. Instead of sifting through a sea of random files, you can quickly access what you need, saving precious time and mental energy:
- Faster focus: A neat desktop means fewer visual elements vying for your attention.
- Increased efficiency: Quickly locate important documents or apps.
- Reduced stress: A tidy space (even on a screen) can have a calming effect and promote clearer thinking.
The impact of too many files on Mac performance
A crowded desktop can directly affect your Mac’s speed. Each file or folder icon on your desktop is rendered in real-time, so a large number of icons can strain your system resources. This leads to slower navigation, delayed startup times, and a generally sluggish feel.
- System rendering overload: Multiple icons on the desktop force macOS to keep refreshing thumbnails.
- Hard drive management: Large files dumped on the desktop often go unorganized, hogging storage and potentially slowing down system processes.
- Lost productivity: Wasted seconds (or minutes) hunting for files add up over time.
If you’re curious about how to organize your desktop in a way that also optimizes performance, read on for some tested techniques and app recommendations.
Ready to tidy up your Mac desktop?
A tidy desktop is about more than a pretty wallpaper. It’s about:
- Improving your workflow
- Staying focused
- Maintaining a snappy Mac experience
Use built-in tools like stacks and apps like Unclutter, Spotless, Bartender, uBar, and Mosaic, and you can organize your desktop Mac for peak productivity. Combine regular cleanups and automated file sorting to ensure your Mac desktop remains clutter-free in the long run.
All the apps are available on Setapp with a free trial period, so you can test them out without commitment. Setapp is a quality platform where you can access a wide range of Mac and iOS apps (over 250 of them) without having to pay for them all individually.


