How to create, change, and delete Apple Account (ID) on your Mac: 2025 update
Have you ever noticed how your Mac, iPhone, and other Apple gadgets just work together seamlessly, sharing photos, messages, and settings without a hitch? That’s your Apple Account (formerly Apple ID) in action. It’s essentially your one-stop login for everything Apple.
From setting up a fresh Apple Account to tweaking your password or even deleting your account for good, I'll cover everything in this guide.
But first, here’s a quick look at the most common Apple ID actions and how to do them:
I want to | Do this |
Create a new Apple Account | Use System Settings, the App Store, or go to account.apple.com. |
Change the email or phone number on my Apple Account | Sign in at account.apple.com, go to Email & Phone Numbers, edit, and verify. |
Reset a forgotten Apple Account password | Tap Forgot Apple Account or Password on any login screen or visit iforgot.apple.com. |
Change the Apple Account used on my Mac | In System Settings > Apple Account, click Sign Out, then Sign In with your new Apple Account. |
Back up specific files before deleting my account | Use Dropshare to drag and drop important files into the cloud. |
Remove a device from my Apple Account | Visit account.apple.com, go to Devices, select your Mac, and click Remove. |
Permanently delete my Apple Account | Go to privacy.apple.com, sign in, and follow the Delete Your Account steps. |
What’s my Apple ID?
Your Apple ID, which is now Apple Account, is key to accessing Apple services like iCloud, App Store, iMessage, and more. Even if you only have one device, Apple will encourage you to set one up (and for good reason).
Creating a new Apple Account on a Mac is simple: just use the App Store, open System Settings, or go to account.apple.com in your browser. Make sure you have these details on hand: your name, birthday, email address, password, and billing address.
Step-by-step guide to creating an Apple ID on your Mac
Now, I'll walk you through three easy methods you can use to set up a brand-new Apple ID on your Mac. Figure out which of the three options works best for you, then follow the steps to create your new Apple Account.
How to create Apple Account from System Settings
To create an Apple Account from System Settings:
- Open System Settings.
- Click Sign in with your Apple Account at the top of the sidebar.
- Click Create Apple Account.
- Enter your name, birthday, email address, password, and billing address when prompted.
- Follow the on-screen instructions to verify your email and finish setting up your new Apple Account.
And that's it. You've created your Apple Account!
How to create Apple Account using the App Store
Another way to create a new Apple Account is via the App Store on your Mac. Here's how:
- Go to the App Store.
- Click Sign In.
- Select the Create Apple Account from the sign-in pop-up.
From there, you’ll be walked through entering your name, birthdate, email, password, and billing details.
How to create Apple Account from your browser
You can also create an Apple ID from your browser. Simply:
- Go to account.apple.com.
- Choose Create Your Apple Account in the top-right part of the screen.
- Complete all required fields (name, birthday, email, password, billing address) and follow the on-screen prompts to verify your email and finish setup.
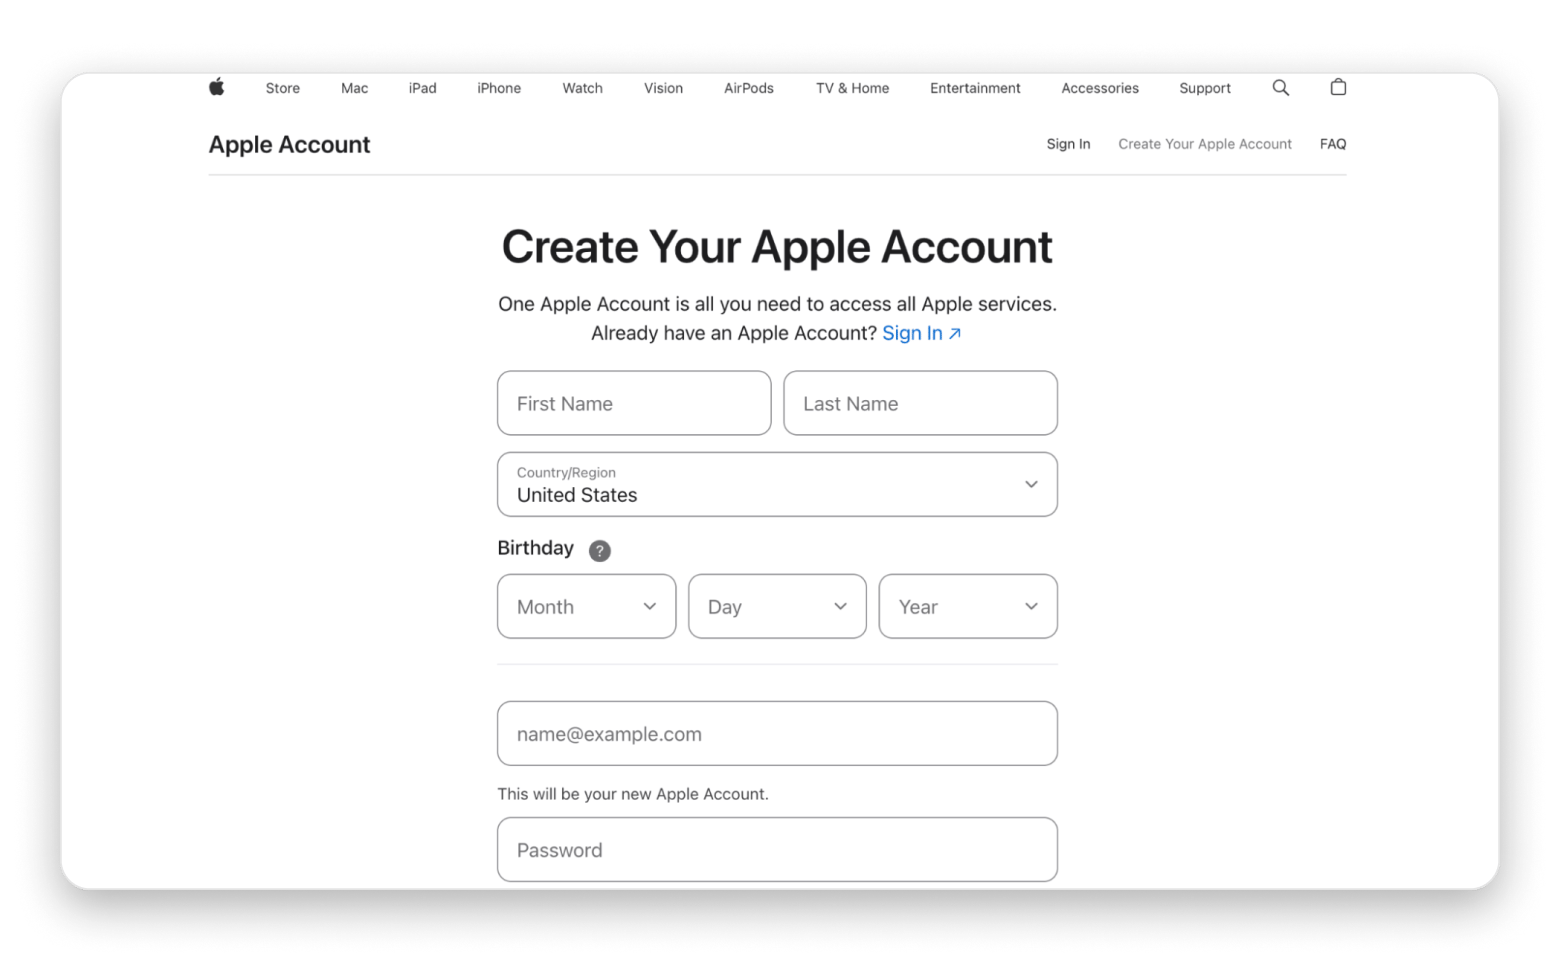
source: account.apple.com
Reset Apple password when you can't remember it
Let’s say you forgot your Apple Account password, or it was compromised. Whatever the reason, you can change your Apple Account password easily:
- Choose Sign In from the Accounts menu in the App Store or the Apple Account website.
- Click Forgot password.
- Enter all the necessary information to reset your Apple password.
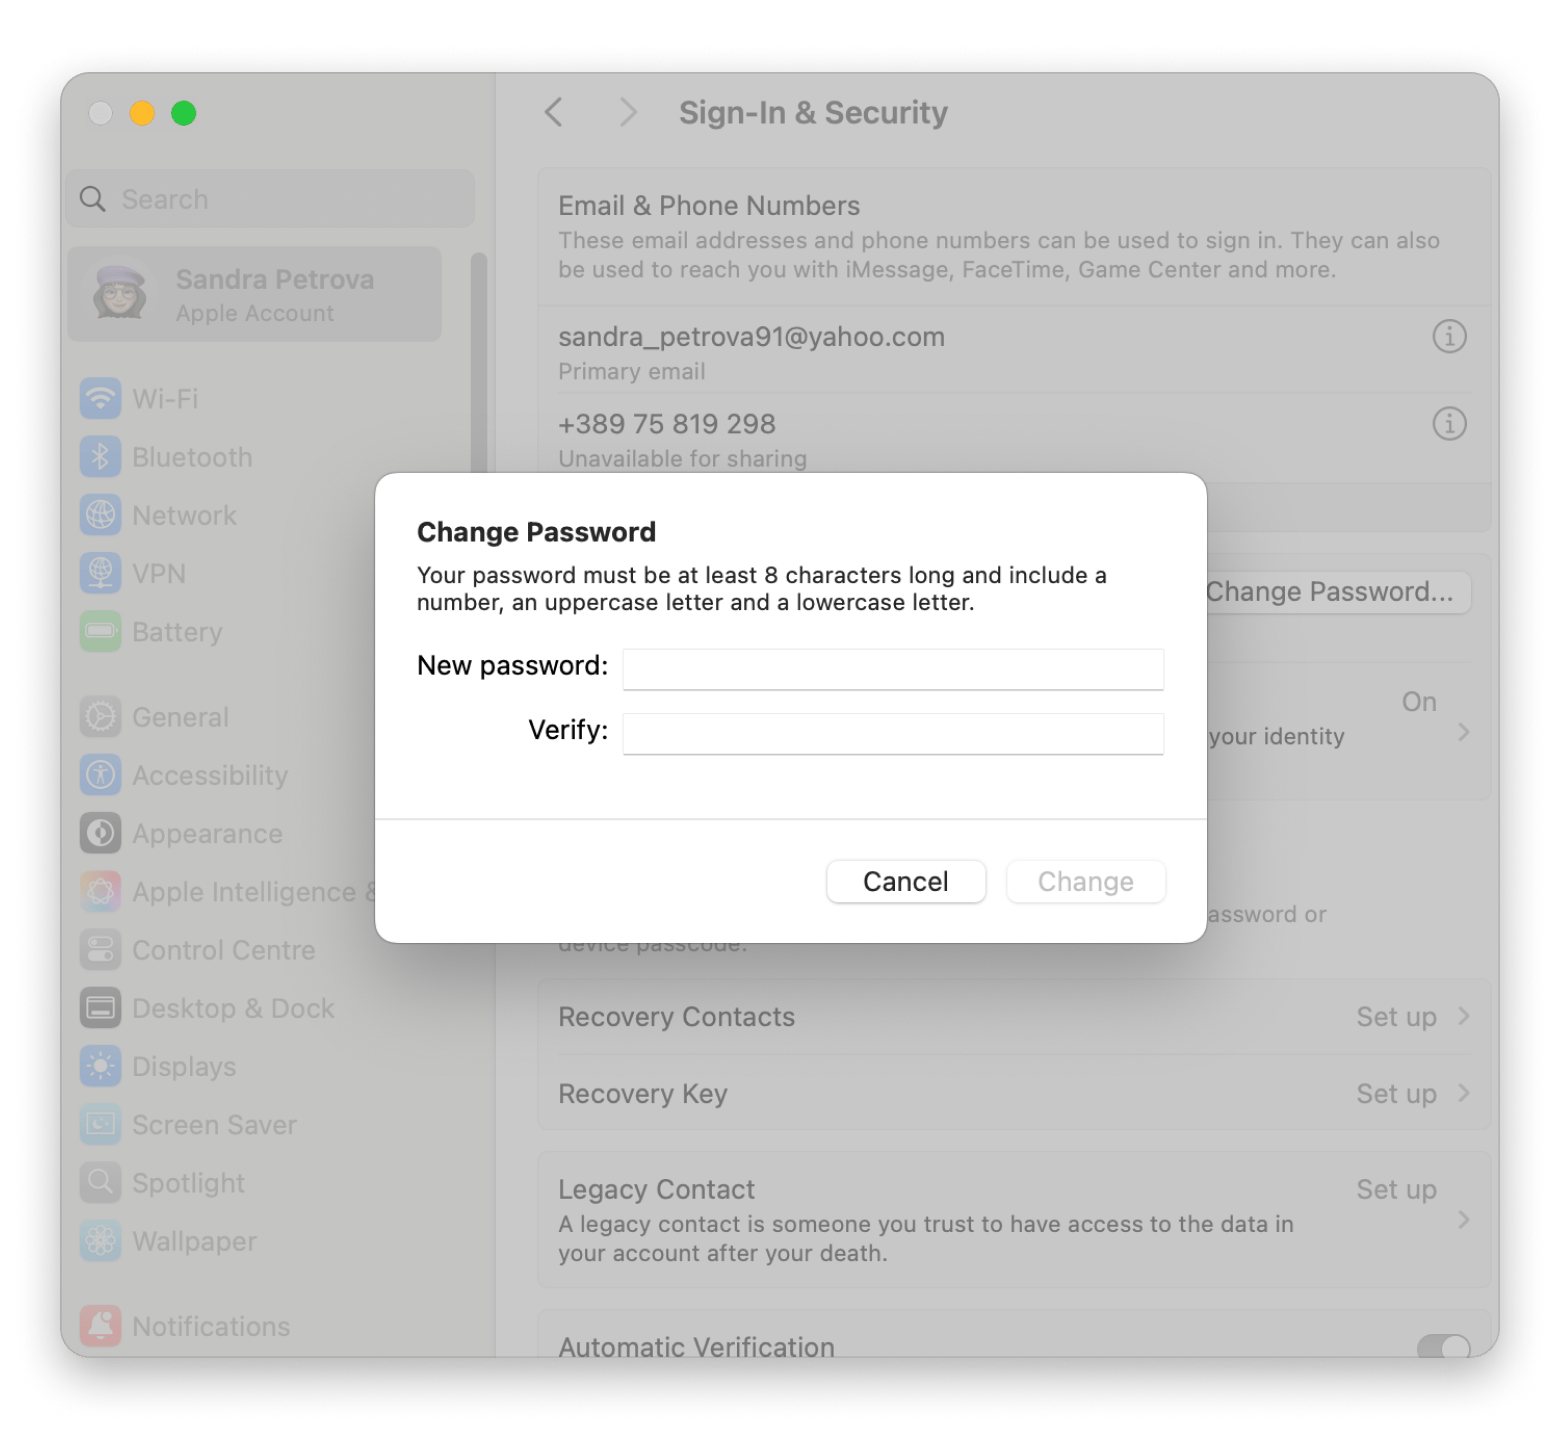
In System Settings:
- Open System Settings.
- At the top of the sidebar, click your Apple Account.
- Select Sign-in & Security.
- Click Change Password.
- Follow the prompts (you may need to enter your Mac’s login password first), then set a new Apple Account password.
How to change Apple Account on Mac
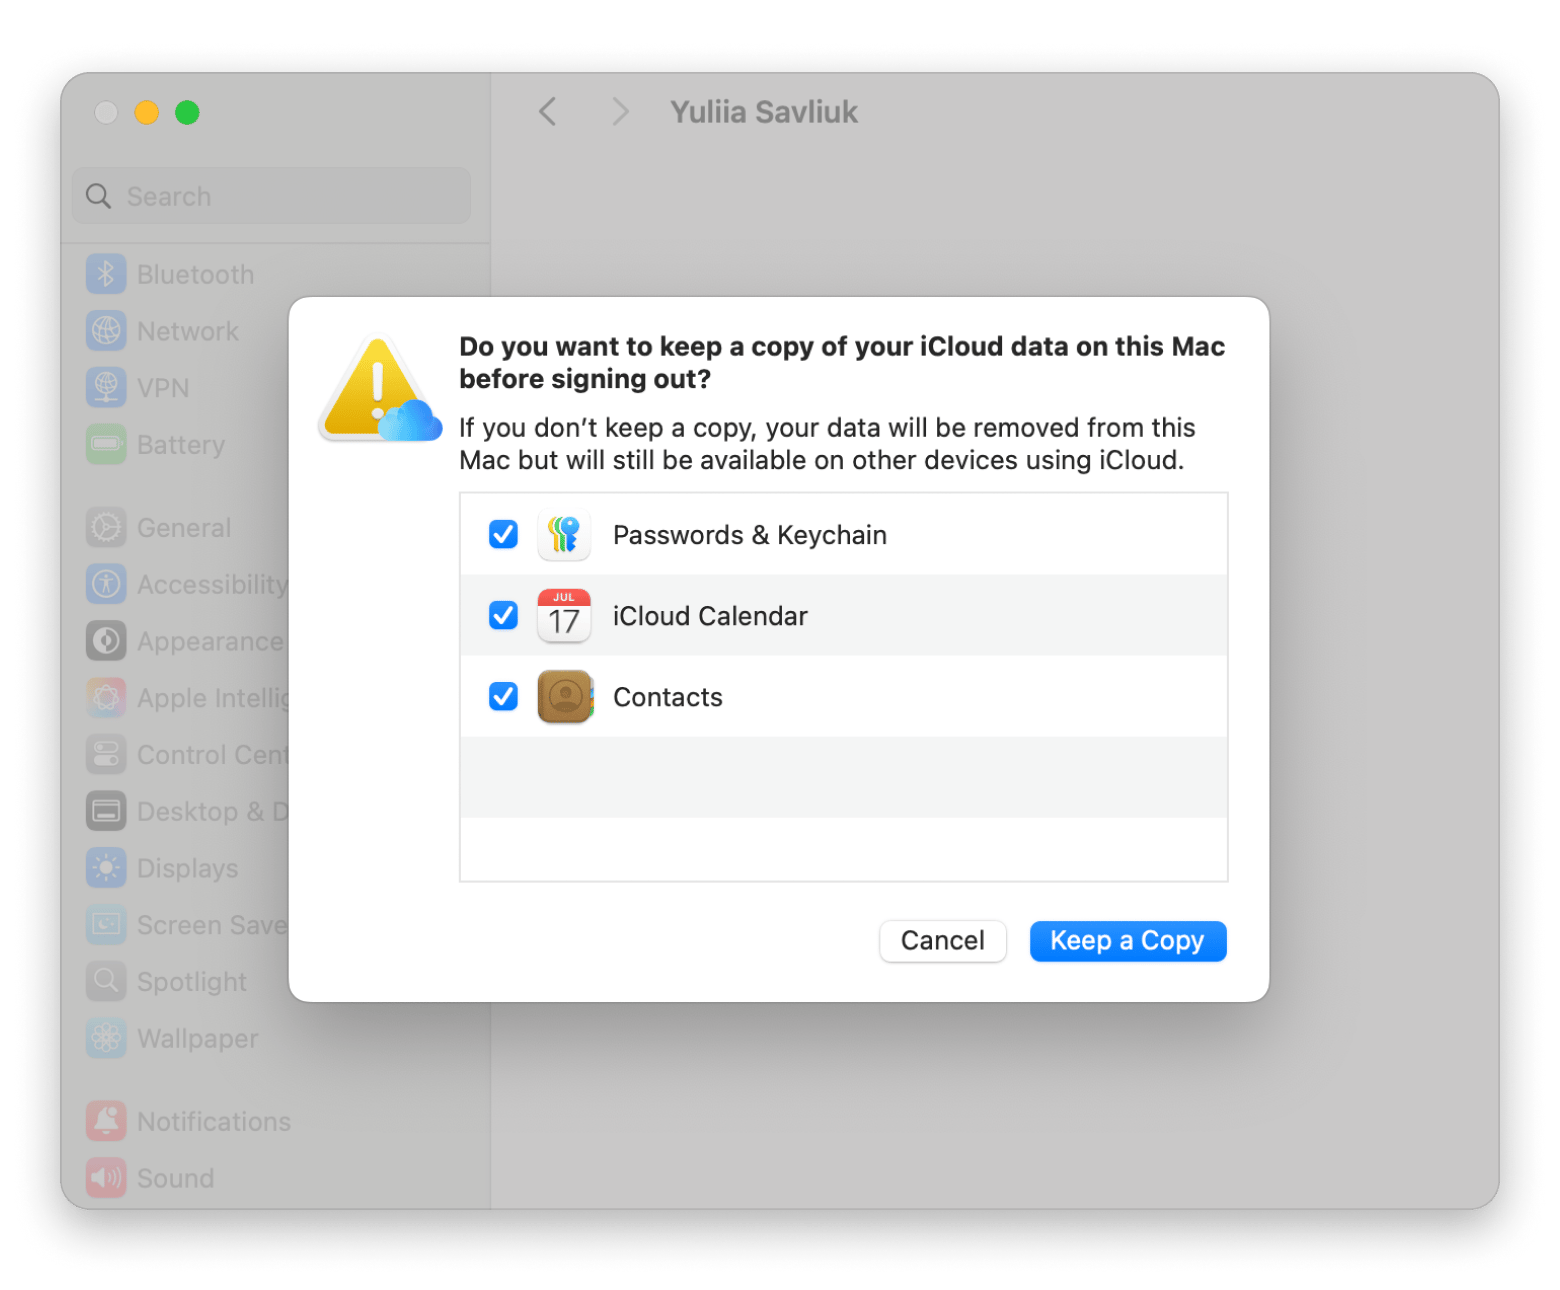
First, you need to sign out of your current Apple Account. Here's how:
- Open System Settings.
- Click Apple Account at the top of the sidebar.
- Scroll to the bottom and click Sign Out.
- Choose whether to keep a local copy of your iCloud data (Contacts, Calendars, Photos, etc.). Click Keep a Copy or Remove from Mac as needed, then enter your Apple Account password and confirm.
Next, sign in with the new Apple Account. Here's how:
- Go to System Settings > Apple Account, then click Sign In.
- Enter the email and password for the Apple Account you want to use, then click Next.
- Complete any two-factor authentication prompts on your trusted device.
- Choose which iCloud data you’d like to merge or keep on your Mac, then click Continue.
That's it! You've successfully changed your Apple ID.
How to change your Apple ID email or phone number
If you ever need to edit your Apple Account details, including the email you use to log in to your Apple account, you definitely can.
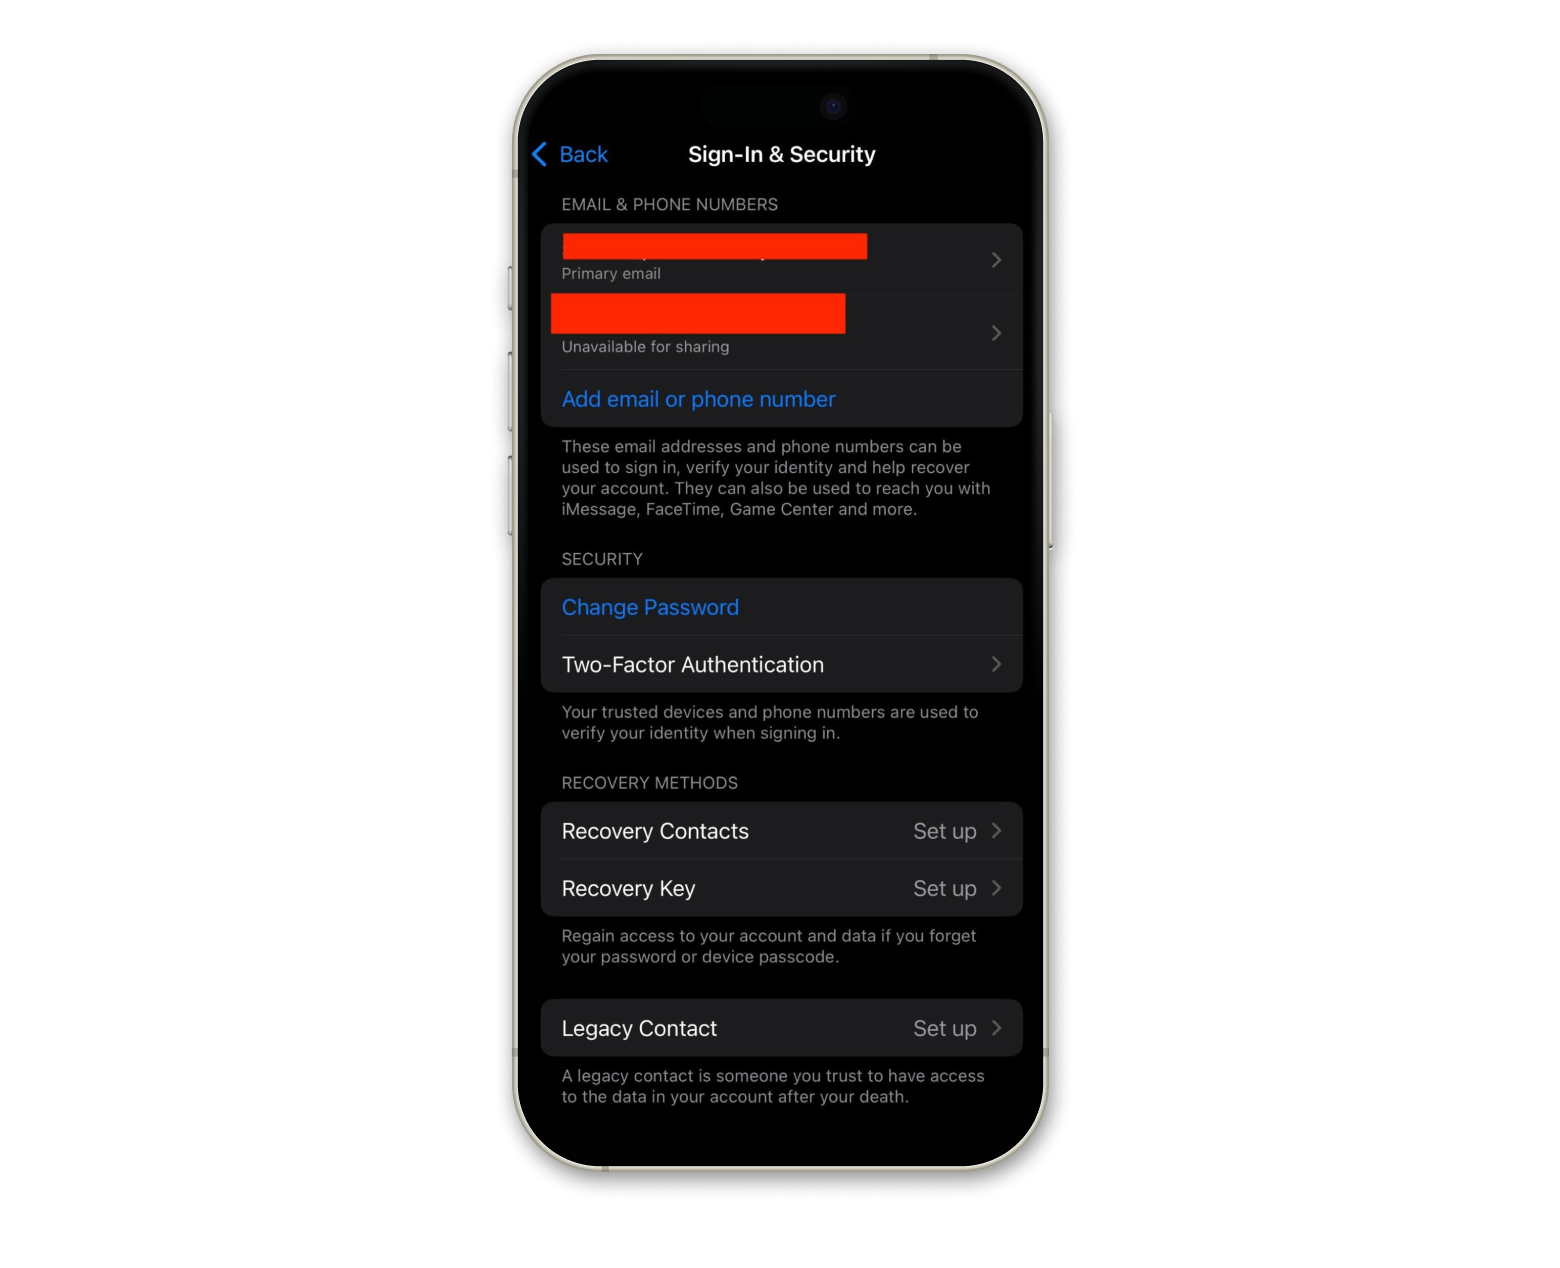
Here's how to do it on your iPhone or iPad:
- Go to Settings > Apple Account > Sign-In & Security.
- Tap Add email or phone number.
- Remove any unwanted emails or phone numbers associated with the account.
And here's how to do it on your Mac:
- Navigate to account.apple.com in your browser.
- Sign in with your Apple Account and password.
- Click the Email & Phone Numbers box.
- Enter your new email or phone number and verify it with the code Apple sends you.
- Go to System Settings > Apple Account, click Sign Out, then Sign In again using your updated information.
How to delete Apple Account: Step-by-step process
Until 2018, you couldn’t fully delete your Apple Account; you could only deactivate it. Now, Apple’s privacy portal lets you permanently delete your ID.
Precautions before deleting your Apple Account
Deleting your Apple Account is permanent. It wipes your data, media, subscriptions, balance, and linked accounts. Here are a few things you need to do before removing the account permanently:
- Back up all the data you want to keep
- Sign out of all your devices
- Cancel any active subscriptions and services like Apple Music or Apple TV+
- Spend any store credit
- Update your linked accounts to a different email address
Taking care of these steps ahead of time can help you avoid any regrets later on.
Back up your files on Mac
Before you make any big changes to your Apple Account, it’s a smart move to back up your files. Once your account is gone, there’s no way to get that stuff back: photos, notes, documents, all of it. Backing up takes a few minutes, but it saves you from a lot of stress later.
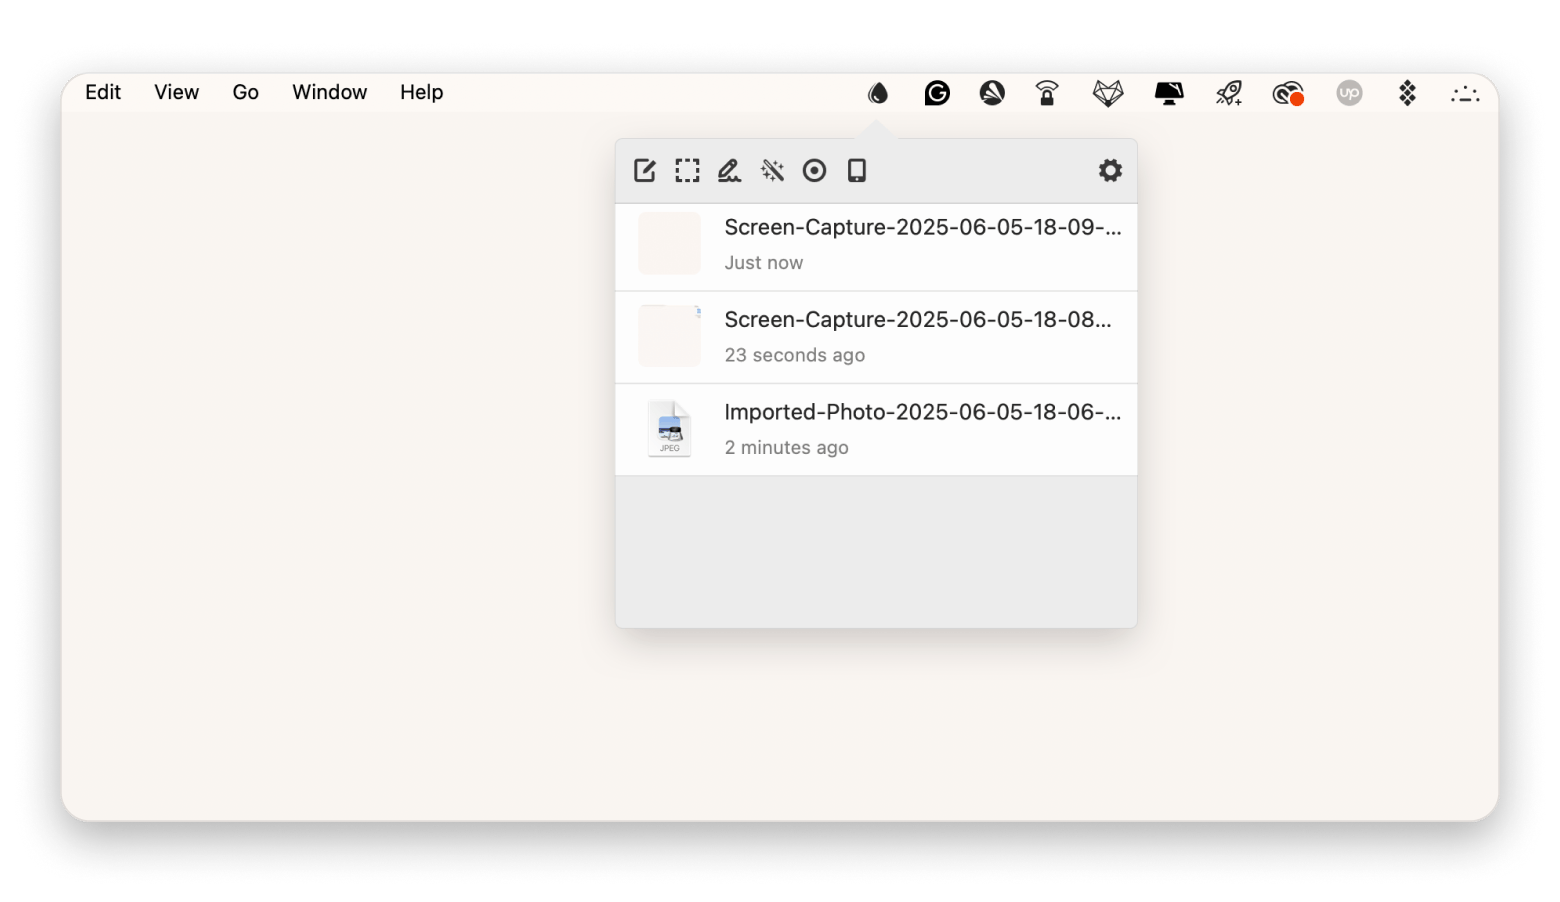
Rather than creating a full backup of your computer, you can use an app like Dropshare to preserve your important documents or media files.
What makes Dropshare different than other apps is that, while it has its own cloud storage you can use with the app, you can also easily configure it to use other cloud storage providers like Dropbox, Google Drive, Amazon S3, and more. The app is incredibly flexible.
Just drag and drop files into Dropshare’s client to back them up to the cloud. Once backed up, you can safely delete your Apple ID.
Deauthorize iTunes on your Mac
Since iTunes is gone on modern macOS, here’s how to unlink your Mac from Apple services before deleting your Apple Account:
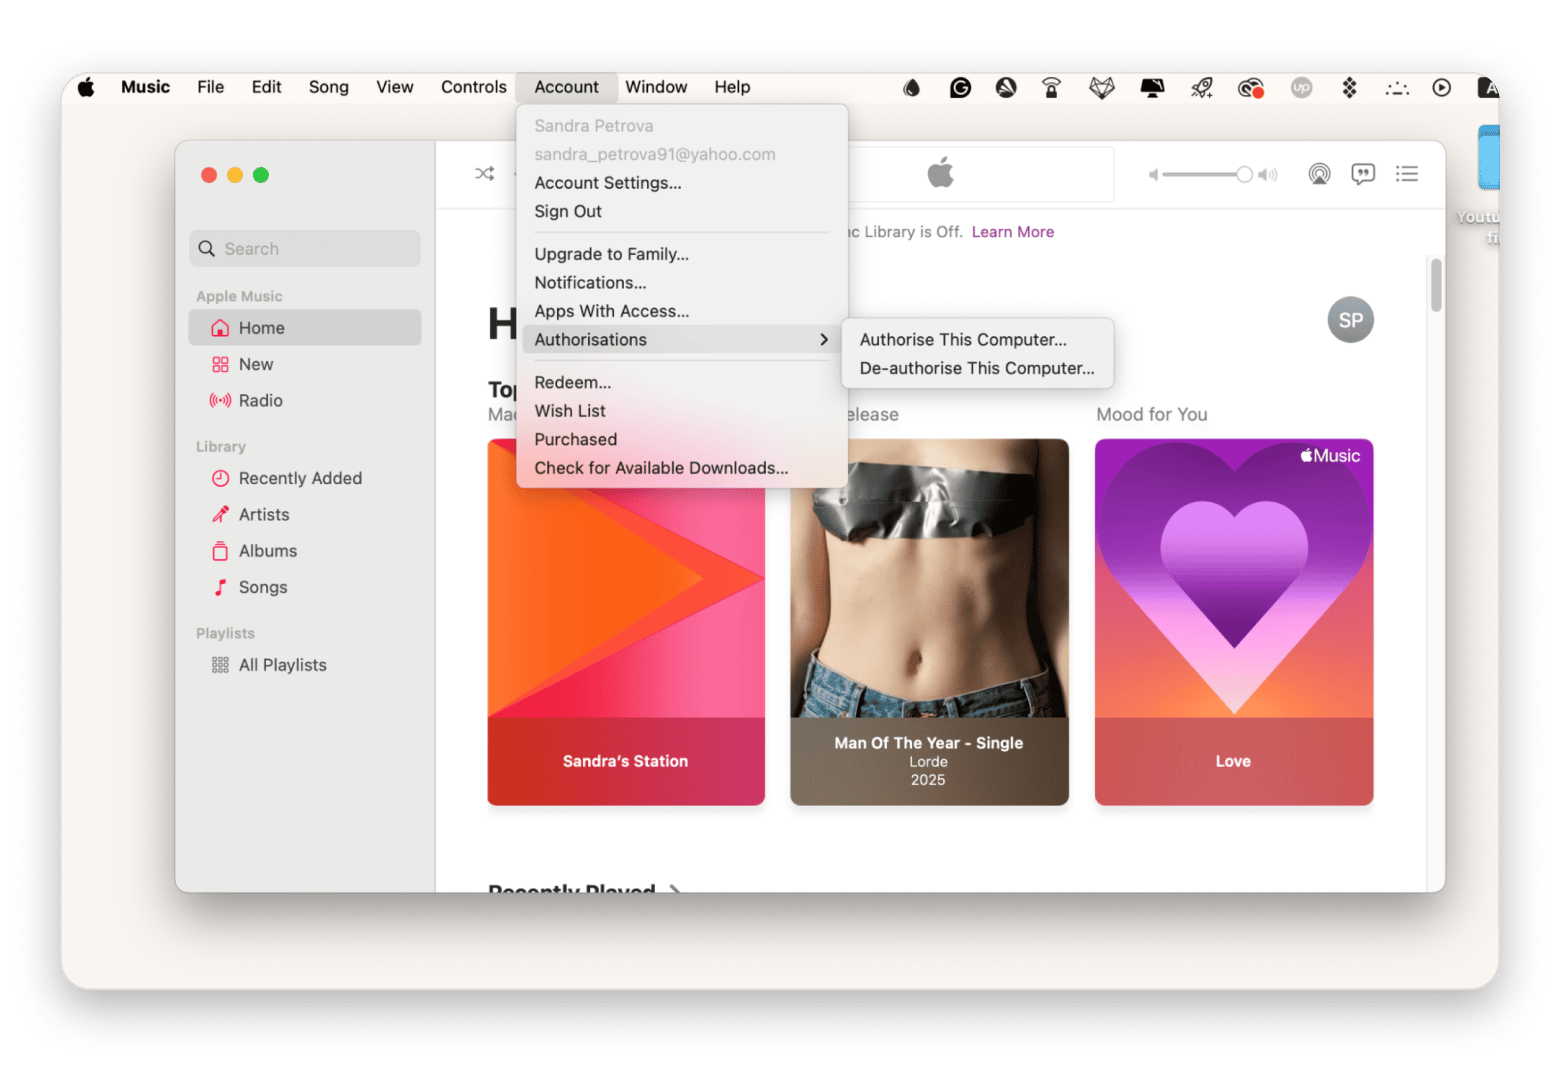
First, deauthorize your Mac in any Apple media apps (like Music or TV):
- Open the Music or TV app (or Books, if you use it for audiobooks).
- Click on the menu bar, then choose Account > Authorizations > Deauthorize This Computer.
- Enter your Apple Account password when prompted and hit Deauthorize.
Next, sign out of iCloud entirely:
- Go to System Settings, click Apple Account in the sidebar, then scroll down and click Sign Out.
- You’ll be asked if you want to keep a local copy of things like contacts or calendars. Pick whichever makes sense for you, then confirm.
- Finally, remove the Mac from your Apple Account’s device list. Go to account.apple.com and sign in.
- Choose Devices from the left-side menu, find your Mac, and click Remove from account.
Repeat that last step for any other device you’re no longer using. Once these steps are done, your Mac won’t be tied to your Apple Account anymore.
Read also:
How to delete your Apple Account
Once you have backed up your files, you can proceed to remove your Apple Account. Here's how to do it:
- Go to privacy.apple.com in your browser.
- Log in with your Apple Account and password.
- Go to Delete Your Account, then click Get Started.
- Choose the appropriate option from the pull-down menu, answering why you’re deleting your Apple Account login.
- Provide a contact method to get updates on the status of your account, and click Continue.
- Write down the access code used to verify your identity to Apple support.
- Enter the access code when prompted and then click Continue.
- Click Delete Account and confirm.
Apple will begin a week-long verification process before destroying your account and all associated data, so you can change your mind and cancel during that time with your access code. After the verification process is over, your account will be gone forever.
Common issues while managing your Apple ID and how to fix them
Here are a few of the headaches you might run into with your Apple ID, and simple, quick fixes to get you back on track.
- Can’t remember your password? Tap Forgot password wherever you try to sign in. Follow the steps, grab the code Apple sends to your email or phone, and pick a new password.
- Locked out after too many login attempts? Head to iforgot.apple.com and enter your Apple ID. Verify it’s really you (via email or text), and Apple will unlock your account so you can reset your password.
- Never see that verification code? Make sure your “trusted” phone number or device is up to date. On iPhone/iPad or your Mac, go to Settings > [Your Name] > Sign-in & Security. Update anything that’s old, then request the code again.
- Activation Lock won’t let you sign out? First, try signing out at System Settings > Apple Account on that device (enter your password if needed). If it still shows Activation Lock, reach out to Apple Support with proof of purchase, and they’ll help you remove it.
Final thoughts on how to manage Apple Account on Mac
You now know how to set up a new Apple Account, swap out your email or phone number, and even delete your account if you’re ready to start fresh. Just don’t forget: before you make any major moves, back up your data so you don’t lose those irreplaceable photos or docs.
If you’d rather skip a full system backup, Dropshare has your back. Instead of cloning your entire drive, you can drag and drop folders or individual files straight to the cloud.
Want to try Dropshare without buying it outright? You can get it on Setapp! Setapp is a platform where you can find 260+ premium Mac and iOS apps under one subscription. There's a free seven-day trial, so you can explore all the apps without making a commitment.
FAQ
Can I change the Apple ID on my Mac?
Yes, you can change your Apple ID on your Mac. Go to System Settings and click your Apple ID name, and sign out from there. Then, log in again with your new ID.
How can I remove an Apple ID from my Mac?
To remove an Apple ID from your Mac, all you have to do is sign out. Head over to your System Settings, then Apple Account. Finally, scroll all the way down and click Sign Out.
Can I delete my Apple ID and create a new one?
To delete your Apple ID, go to privacy.apple.com and log in to your account. Then, go under the Delete Your Account section, click Get Started, and follow the instructions. Afterward, you can instantly create a new Apple ID account at account.apple.com. Don’t forget to back up before deleting it.
How do I change my Apple ID on my Mac without losing everything?
To change your Apple ID on your Mac, all you have to do is log out of the existing one and log in to another.


