Easy ways to sync, share, and transfer files between Macs: Tried and tested
Picture this: you’re working away on a file on your Mac at home, making all sorts of great changes, and then you find out that the one on your Mac is an older version. Very annoying, right?! I know you don’t want to feel disorganized, so I’ll show you different ways to transfer files from Mac to Mac and keep your Macs synchronized.
| Ways to manage files between Macs | How to do it |
| Online services | Use iCloud Drive, Dropbox, and Google Drive. |
| With AirDrop | Turn on AirDrop on both Macs > Select files > Share > AirDrop. |
| With File Sharing | Go to System Settings > File Sharing. Set up folders and users > Share. |
| File synchronization | Use ChronoSync Express on both Macs for instant file synchronization. |
| Move content to a new Mac | Use Migration Assistant. |
| External drives | Transfer files to an external drive from the old Mac > Connect the drive to a new Mac > Drag and drop files. |
Transfer data between Macs online
Cloud services like iCloud, Dropbox, and Google Drive are super handy, almost like having a wallet or bag you can’t lose because they’re always online. Here’s the lowdown on how to use them to transfer data and get to your files on any of your Macs whenever you need to.
Method 1: Use iCloud Drive
iCloud Drive gives you unprecedented control over what you synchronize, how often the transfers happen and many other options.
To synchronize two Macs using iCloud Drive:
- Click the Apple menu > Choose System Settings.
- Click Apple Account > iCloud.
- Click Drive under the Saved to iCloud section and turn on Sync this Mac. Do this on both Macs.
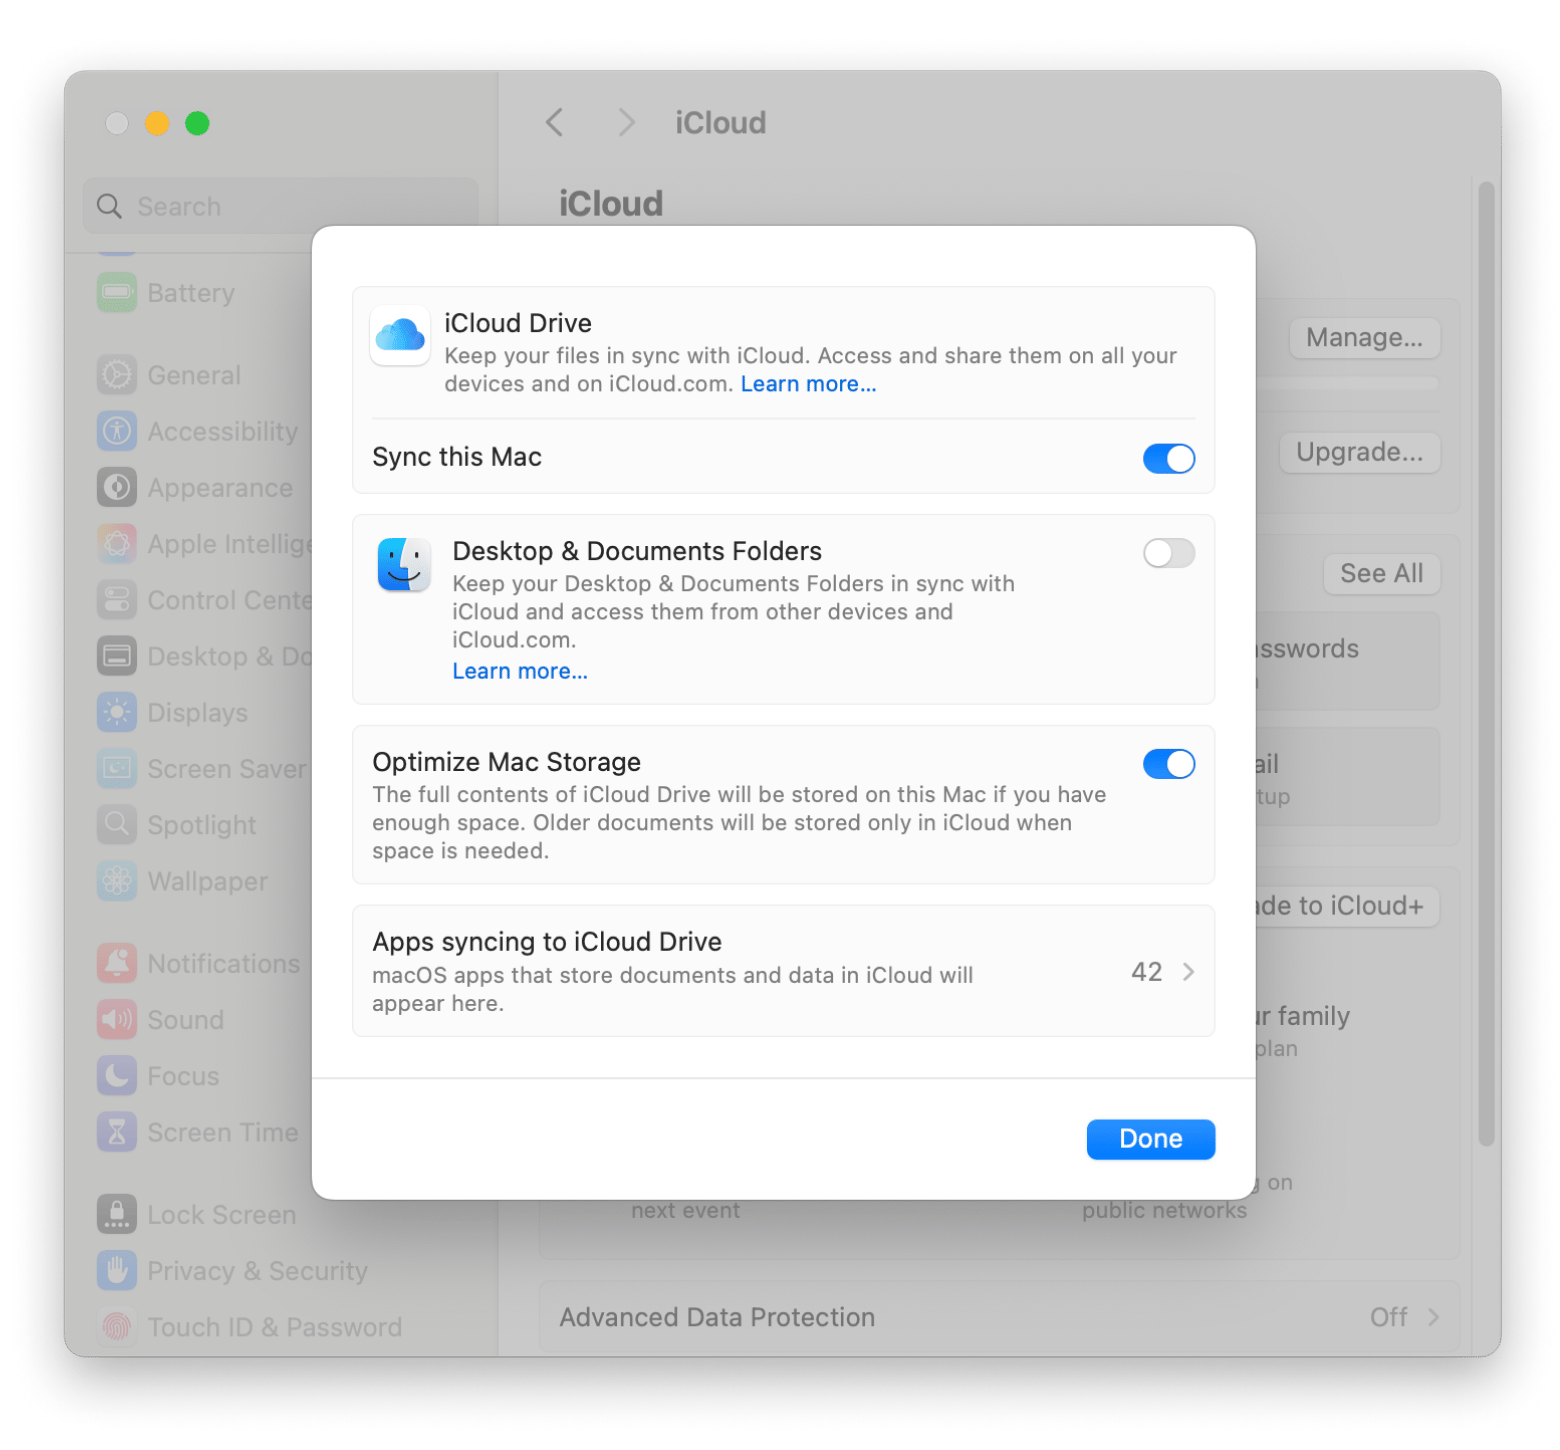 4. Then, open Finder on the Mac with the files you want to transfer and choose iCloud Drive in the left-hand menu.
5. Drag and drop the files you want to transfer into this location.
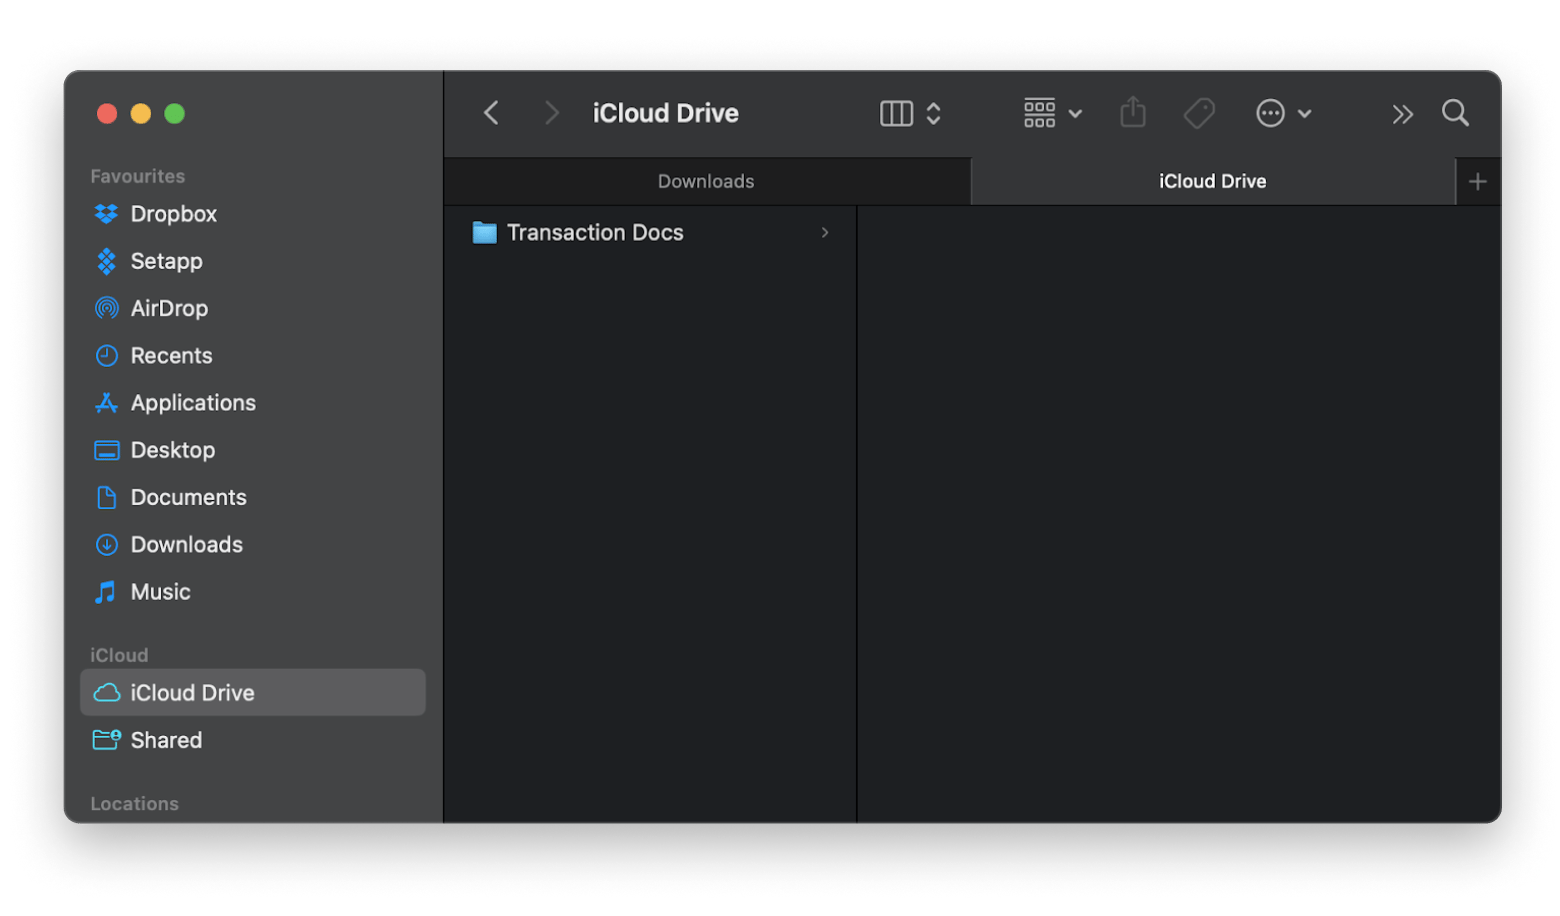 6. Open Finder on the receiving Mac, choose iCloud Drive from the left-hand menu, and you'll see the files.
Remember, this only works if both Macs log into the same Apple Account.
By the way, if your notes aren’t syncing properly across your devices, this guide on fixing iCloud Notes syncing issues provides troubleshooting steps.
Method 2: Use Dropbox
Dropbox is great for Mac users who work with folks on other devices and operating systems. It’s a handy tool that brings everything together, so let’s dive into how to get the best out of it:
- Download Dropbox and install it on both Macs.
- Log in to your Dropbox account, or sign up if you don't have one.
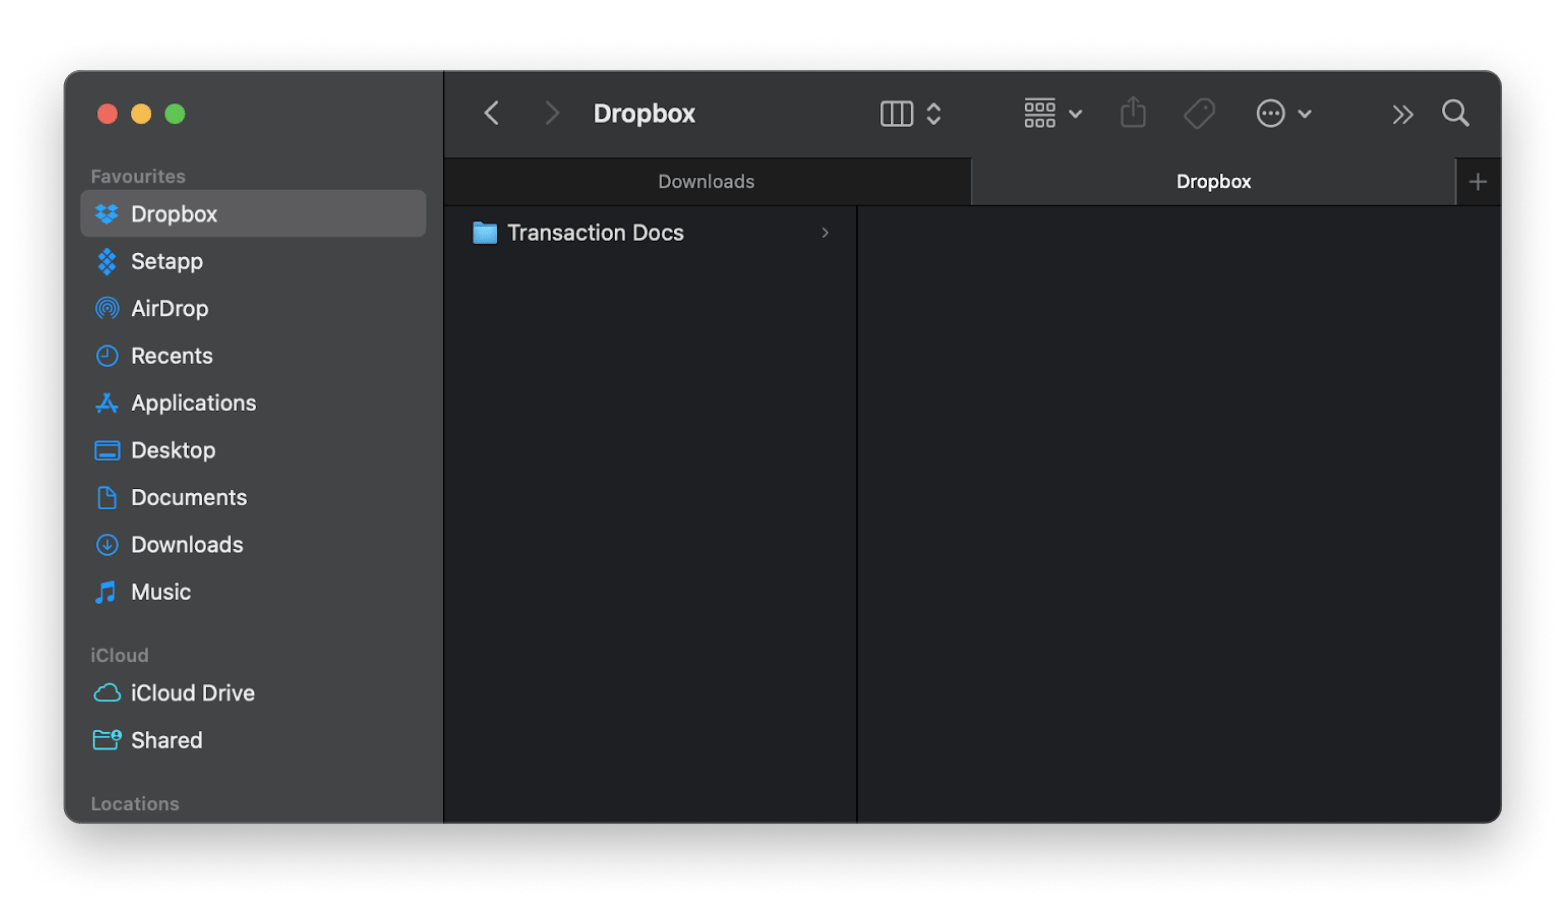
- Open Finder and choose Dropbox from the left-hand menu.
- Drag and drop the files you want to transfer into this location.
- On the receiving Mac, log in to the same Dropbox account.
- Open Finder, choose Dropbox from the left-hand menu, and your files will be waiting there.
Method 3: Use Google Drive
Google Drive is great for managing files and space, plus it works well with other apps, so it’s definitely worth checking out. Here’s how you can use it to sync your Macs:
- Download Google Drive and install it on both Macs.
- Log into your account, or sign up if you don't have one.
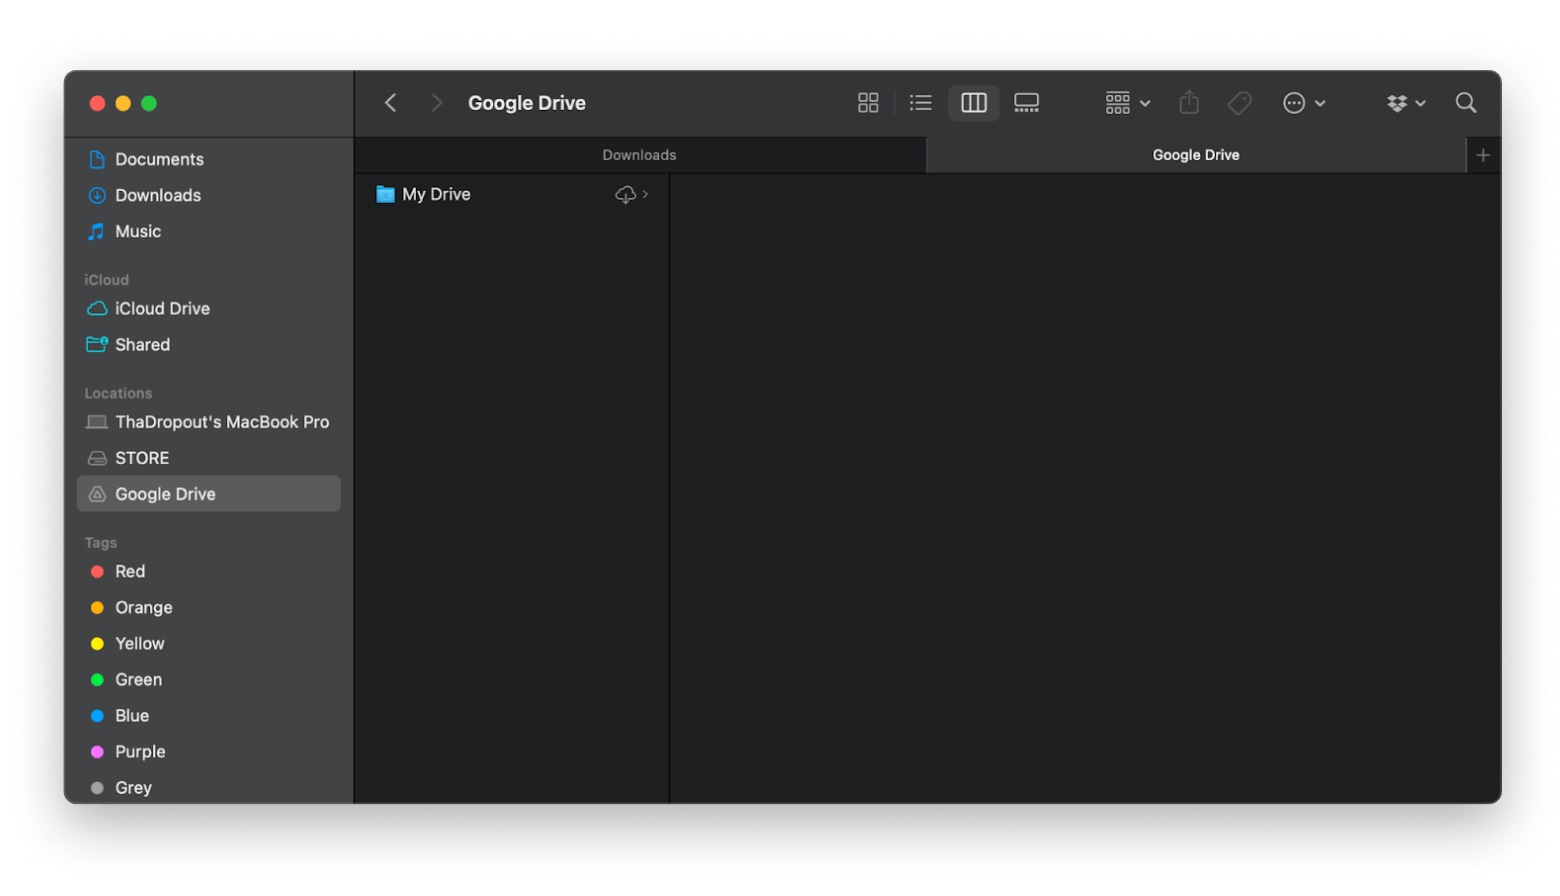
- Open Finder and click Google Drive from the left-hand menu.
- Drag and drop the files you want to transfer into this location.
- Log into the same Google Drive account on the receiving Mac, then open Finder.
- Choose Google Drive from the left-hand menu, and your files will be there.
Transfer files with AirDrop
AirDrop is one of the coolest and most convenient ways to transfer files between Mac devices. It’s fast, wireless, and so easy to use — perfect for those moments when you need to move files quickly.
To transfer files using AirDrop:
- Go to Control Center in the menu bar > Click AirDrop > Turn it on.
- Choose Contacts Only or Everyone.
- Open Finder and click AirDrop from the left-hand menu on both Macs.
- Drag and drop the files you want to transfer onto the icon of the receiving Mac.
- Click Accept on the file transfer prompt that appears on the receiving Mac. Once they finish transferring, you can access them in the Downloads location.
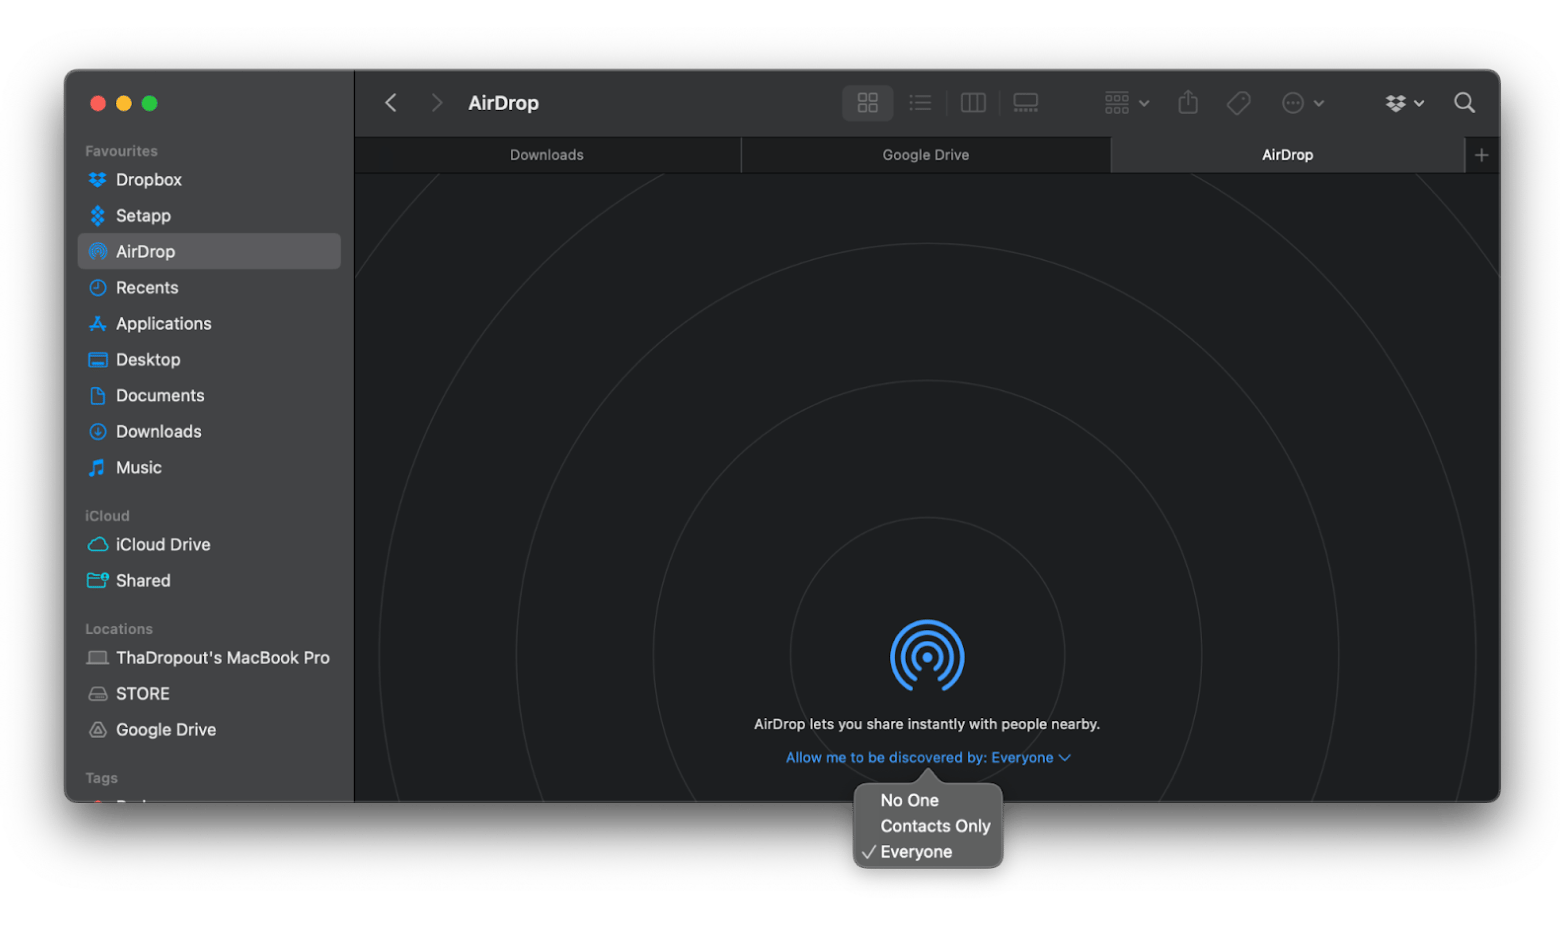
Remember, AirDrop works only between Apple devices, so it’s not compatible with Windows or Android. Your Macs must be no more than 10 meters apart for AirDrop to work, and larger files may take longer to transfer or even fail.
Use File Sharing
Macs come with many hidden gems, like the Sharing feature that can move media, files, content, and an entire screen to another Mac. Amazing, right?! Here’s how to maximize the File Sharing option:
- Click the Apple menu > System Settings.
- Click General > Sharing > Turn on File Sharing.
- Click the information “i” icon on the right to open the configuration window.
- Click the add “+” button under Shared Folders and choose the folders to share.
- Click the add “+” button under Users and choose who to share with (the receiving Mac).
- Click the drop-down menu button on the right of each name in the Users list to choose the permissions they’ll have.
- Open Finder on the receiving Mac and choose Shared from the left-hand menu. You'll find your shared files and folders in this location.
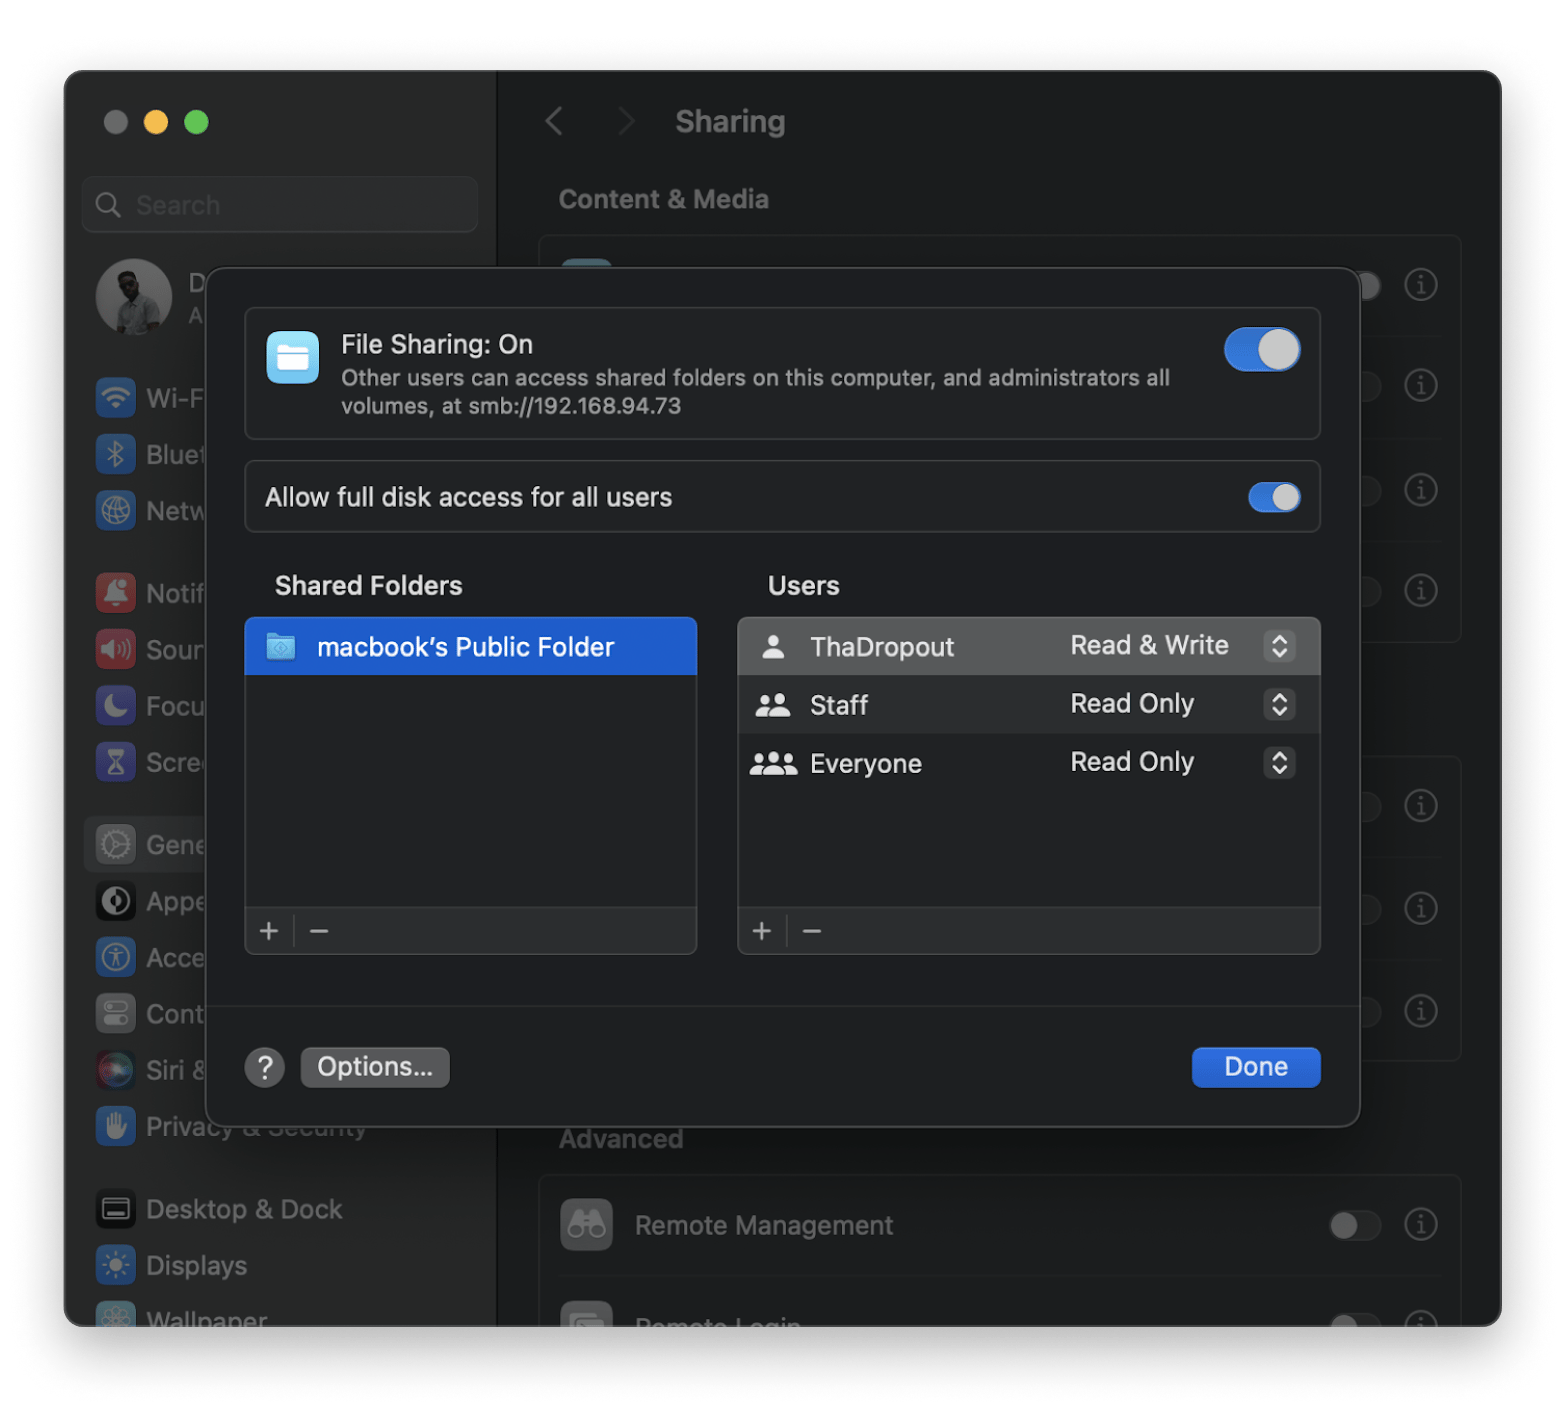
Mac's native File Sharing feature doesn't require additional apps but may be slower and offer fewer configuration options.
Sync folders between Macs
Sometimes, you have specific folders whose contents keep changing. Instead of transferring files after each change, you can configure both Macs to reflect each change instantly using an app like ChronoSync Express.
To sync folders with ChronoSync Express:
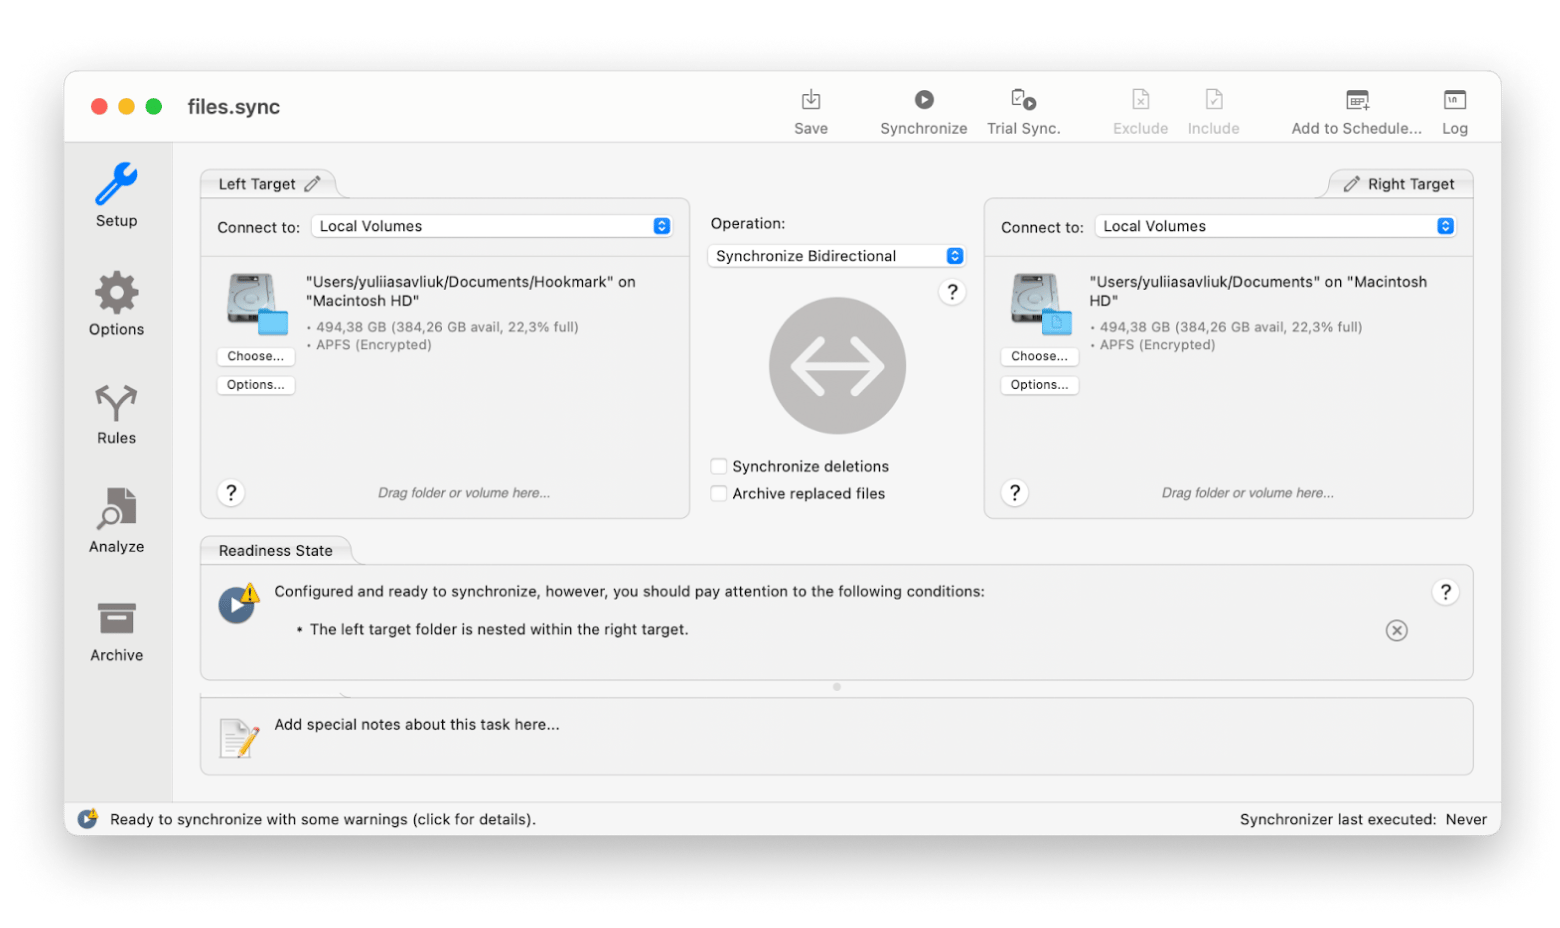
- Install and open ChornoSync Express on both Macs.
- Click Create a new synchronizer task.
- In the Source Target box, click Choose folder to sync.
- In the Operation drop-down menu, select Synchronize Bidirectional.
- In the Right Target box, choose a destination folder.
- Then, under Operations, click the start button (double arrow) to start synchronization.
If you want to keep your music in sync across multiple devices, check out this detailed guide on syncing your Apple Music library.
How to move your content to a new Mac
Starting with a new Mac but want it to feel just like your old one? No worries! Migration Assistant is here to help. The cool thing is that it doesn’t delete information on your old Mac, in case you need to keep it. Here’s how you can easily transfer your info and settings so your new Mac feels like home:
Connect both Macs using Wi-Fi or a cable (Thunderbolt or USB-C).
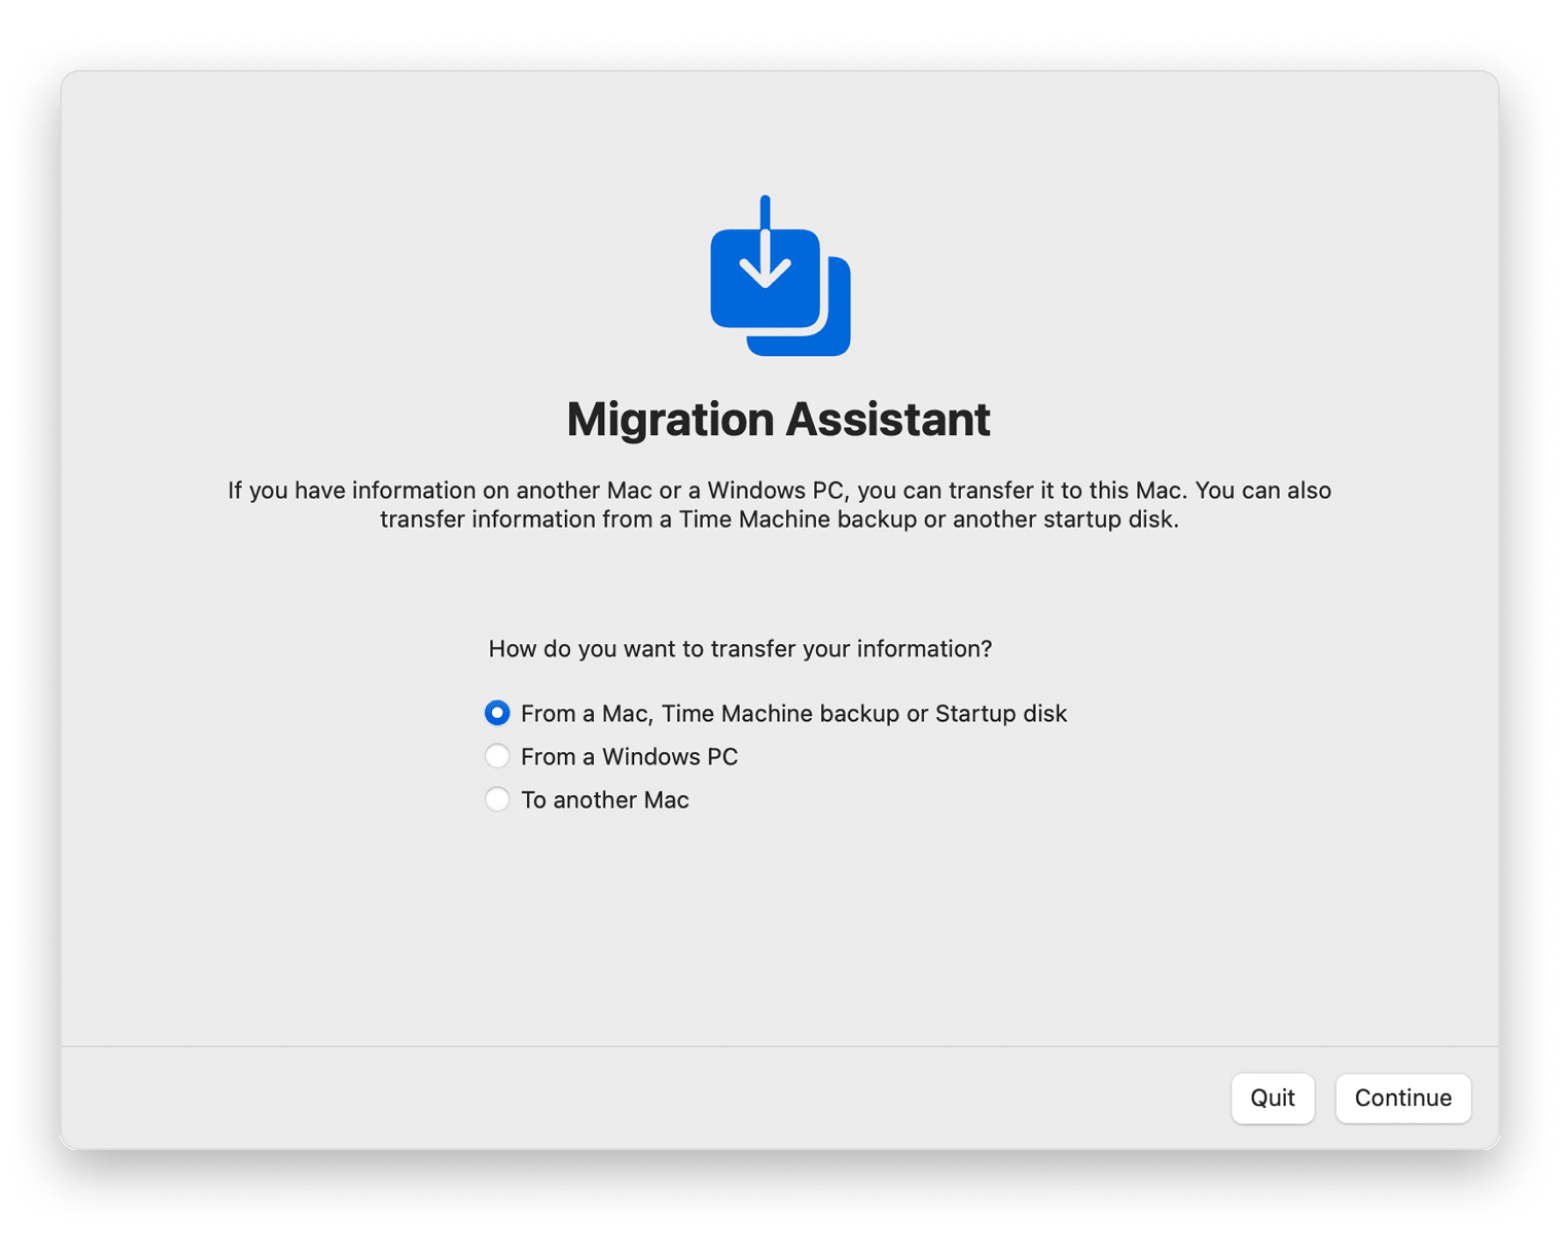
Go to Finder > Application > Utilities. Open Migration Assistant on both Macs.
On your new Mac, select From a Mac, Time Machine backup, or Startup disk.
On your old Mac, click Continue > Select To another Mac.
Source: support.apple.com
3. After that, go back to a new Mac and click the icon of your old Mac.
4. Check if the security code is the same on both Macs.
5. On your new Mac, select folders and apps to migrate.
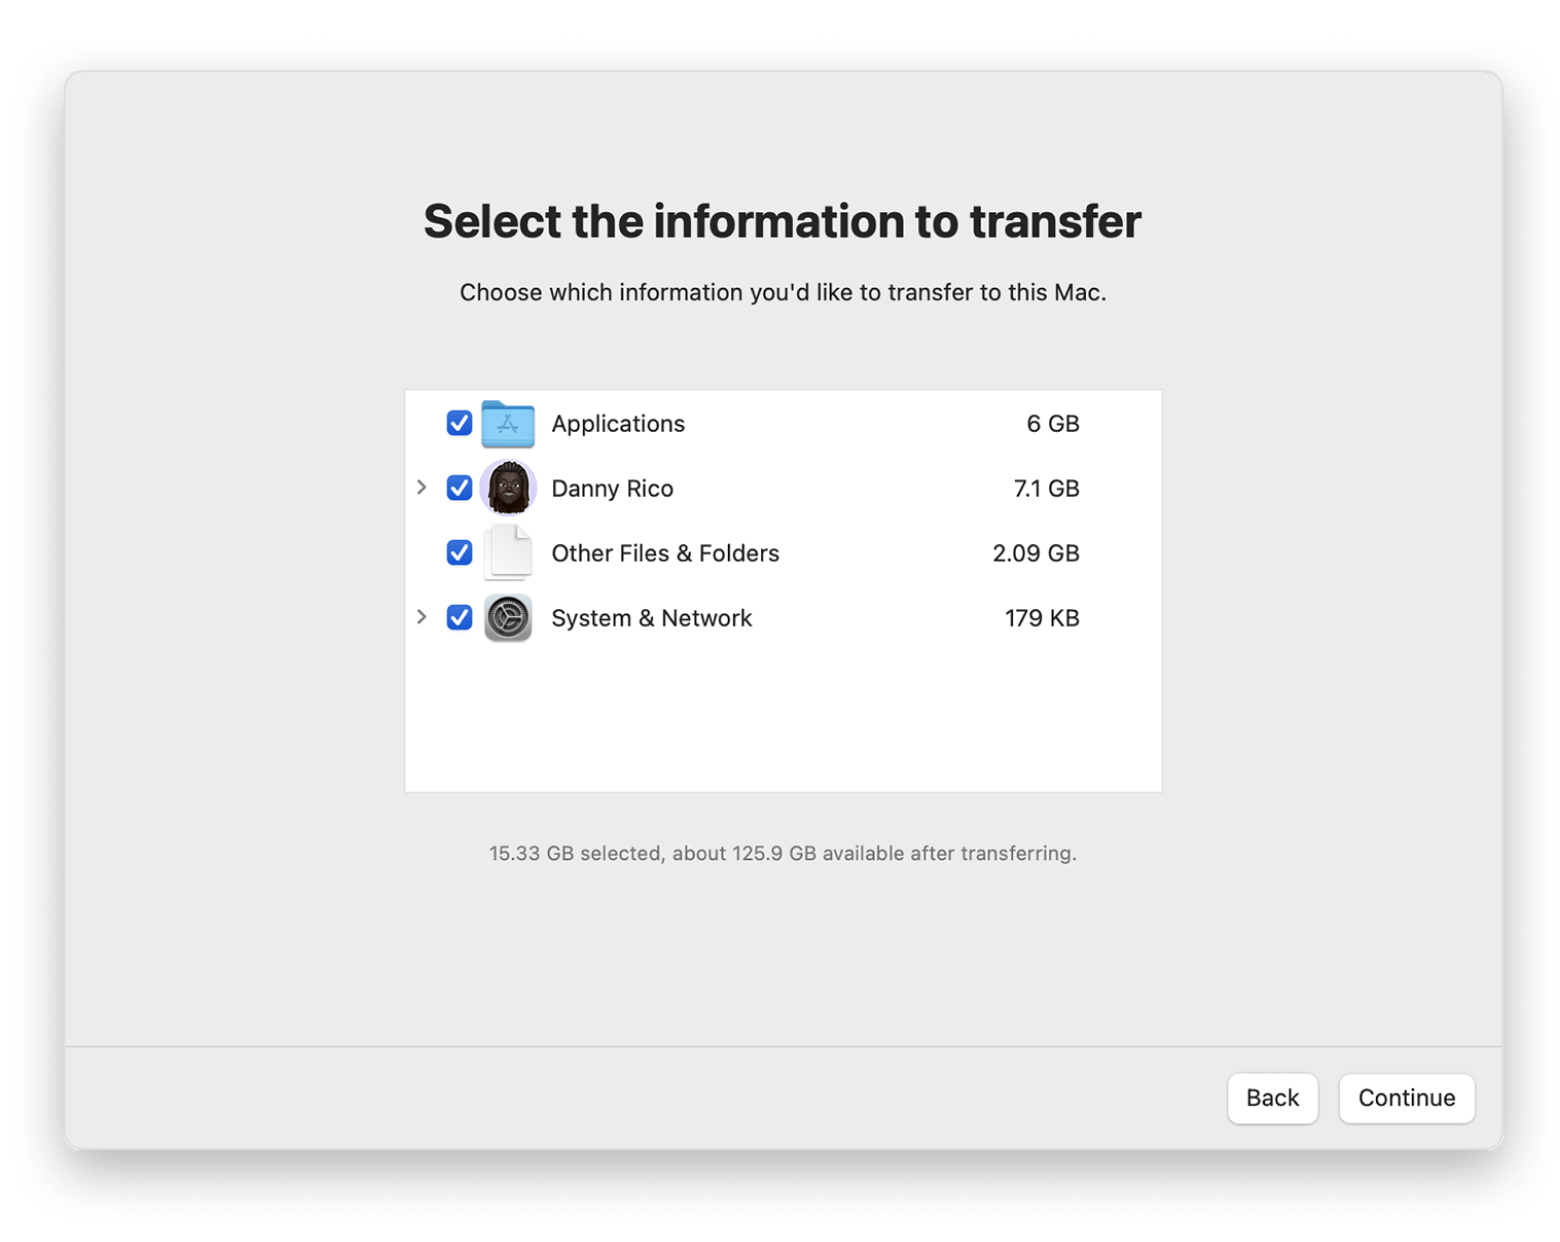
Source: support.apple.com
6. Create a password to safely transfer files > Continue.
This method is ideal for setting up a new Mac but not the best for continuously synchronizing two Macs.
Use external drives to transfer files
USB drives, SSDs, and HDDs make it super simple to move all kinds of files from one Mac to another, no matter where they’re stored.
To use this method:
Connect an external drive to the Mac that has the files you want to transfer.
Copy the files to the external drive.
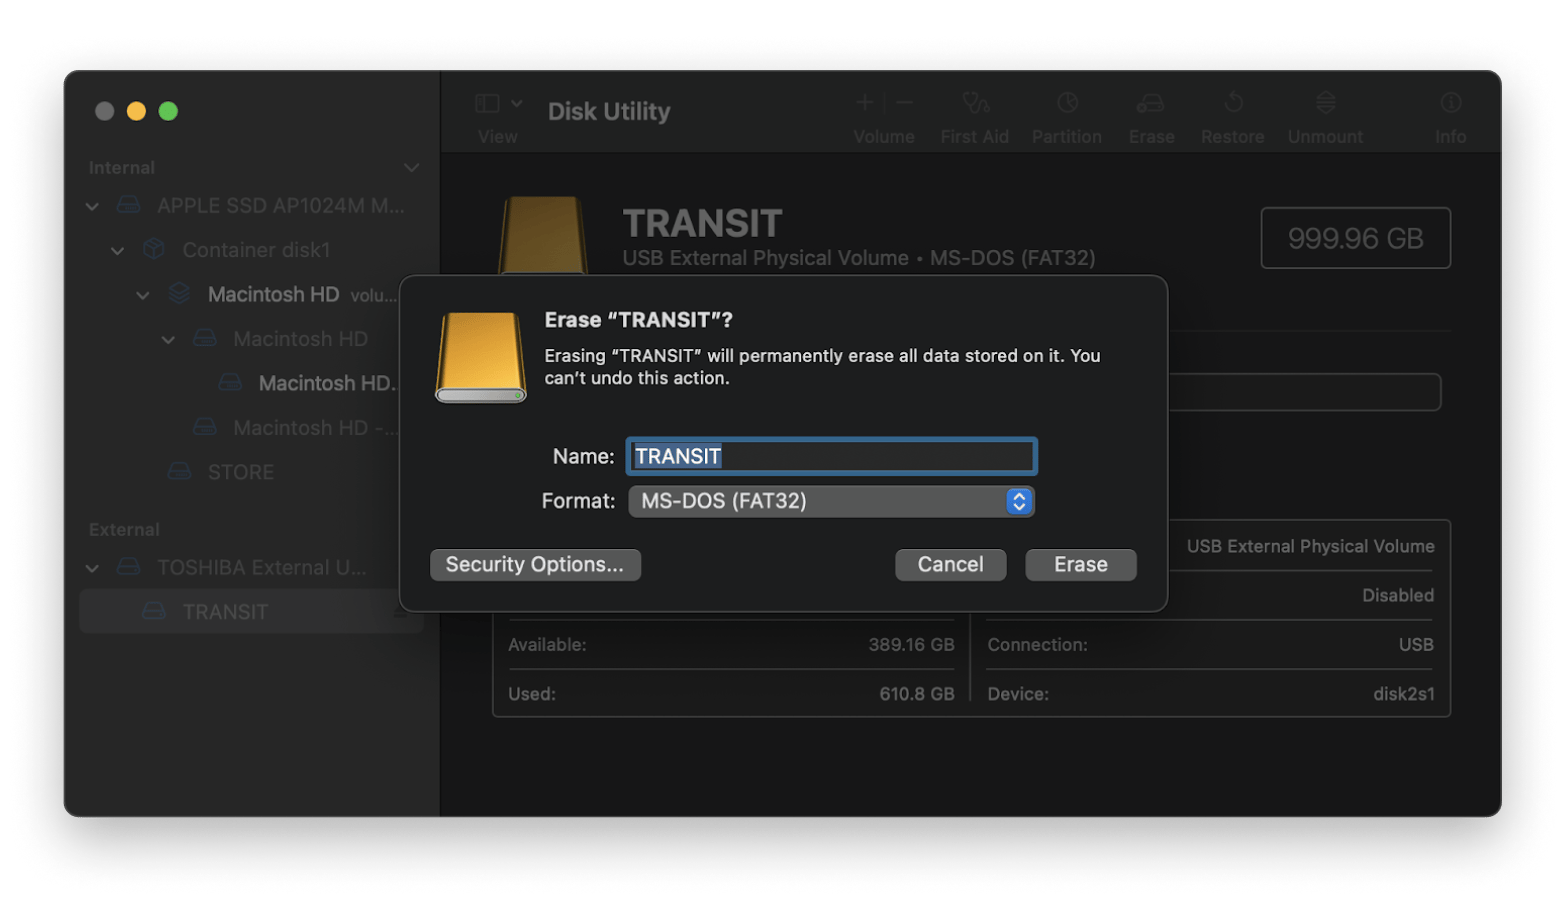
If the drive isn’t readable, you may need to format it first, but be sure to back up any existing data. To format:
Open Finder > Applications > Utilities > Disk Utility.
Select the external drive from the left-hand menu and click Erase in the top right corner.
Choose a compatible format, such as exFAT (which works with both macOS and Windows), then erase the drive.
4. Once formatted, copy your files to the drive.
5. Eject the drive and connect it to the receiving Mac.
6. Open Finder, open the external drive and copy the files to your preferred location.
Transfer files from Mac to Mac: Solved
There are different ways to share files between Macs, but some methods need more effort than others. Wouldn’t you like to set things up once and rest assured that your files are always on all your Macs whenever you need them?
With Setapp, you can find brilliant apps ChronoSync Express, Dropshare, and AnyTrans for iOS to keep your Macs synchronized without many repetitive steps. You could also try solutions like Forklift and Pathfinder, which give you more control in organizing and transferring your files and folders. Yes! The kind of moves you can't make with native Mac apps.
Setapp gives you access to over 250 macOS and iOS apps, all with one subscription. It can easily find the right apps for whatever you need, and you can manage everything through a clean, simple interface. The best part? You can give all the apps a spin with a 7-day free trial. So, what are you waiting for?
FAQs
How to sync desktops across Macs?
To sync desktops across Macs:
- Go to the Apple menu > System Settings > iCloud.
- Click Drive > Turn on Sync this Mac and Desktop & Documents Folders.
How do I move files from iCloud to my Mac?
To move files from iCloud to your Mac:
- Go to Finder and open the iCloud Drive folder on the left pane.
- Choose files to transfer and drag and drop them to the desired Mac folder.
Can I transfer files directly between Macs?
You can transfer files directly between Macs using:
- iCloud Drive
- Dropbox
- Google Drive
- ChronoSync Express
- AirDrop
- File Sharing
- Migration Assistant
How do I transfer data between Macs wirelessly?
To transfer data between Macs wirelessly, use ChronoSync Express:
- Install and open the app on both Macs.
- Choose data to synchronize from one Mac to another.
- Click the synchronization button (double arrow).


