Fix iCloud notes not syncing between Mac and iPhone
I am an avid note-taker and rely on the Apple Notes app for almost everything, including things I probably shouldn’t: finances, business plans, and passwords. This became a huge problem for me one day when I jotted down some notes from my cofounder for an important pitch. I did this in Notes on my Mac. Then I left my computer at home, trusting that the notes would be on my phone and I could quickly reference them in the meeting. You can imagine my horror when the issue of the shared notes not syncing appeared. I pulled down the screen multiple times to refresh, but nothing came up. When I returned home, I decided to solve this problem once and for all. Here are my findings.
Why are my notes not syncing?
When it comes to notes, there are three possible sources of the problem of shared notes not updating or syncing: Apple, yourself, or your collaborators. I can't solve the collaborators' part, but if you pass this article on, they can try to fix the issue on their end.
Apple includes bugs, system glitches, server updates and glitches, and hacks or unexpected events. The issues related to "you" are a longer list.
Your Notes may not sync because:
- You don't know how to use the collaboration feature.
- You've accidentally locked a note.
- Your notes aren't enabled.
- Your Wi-Fi is weak.
- You use the wrong Apple ID.
- You don't have any space left on iCloud.
- Your date and time settings don't match your location.
While we're going over this, don't beat yourself up if you realize it's on you. And keep in mind that you might need more than what iCloud provides. There's an app for that, you know?
How to collaborate Notes saved in iCloud
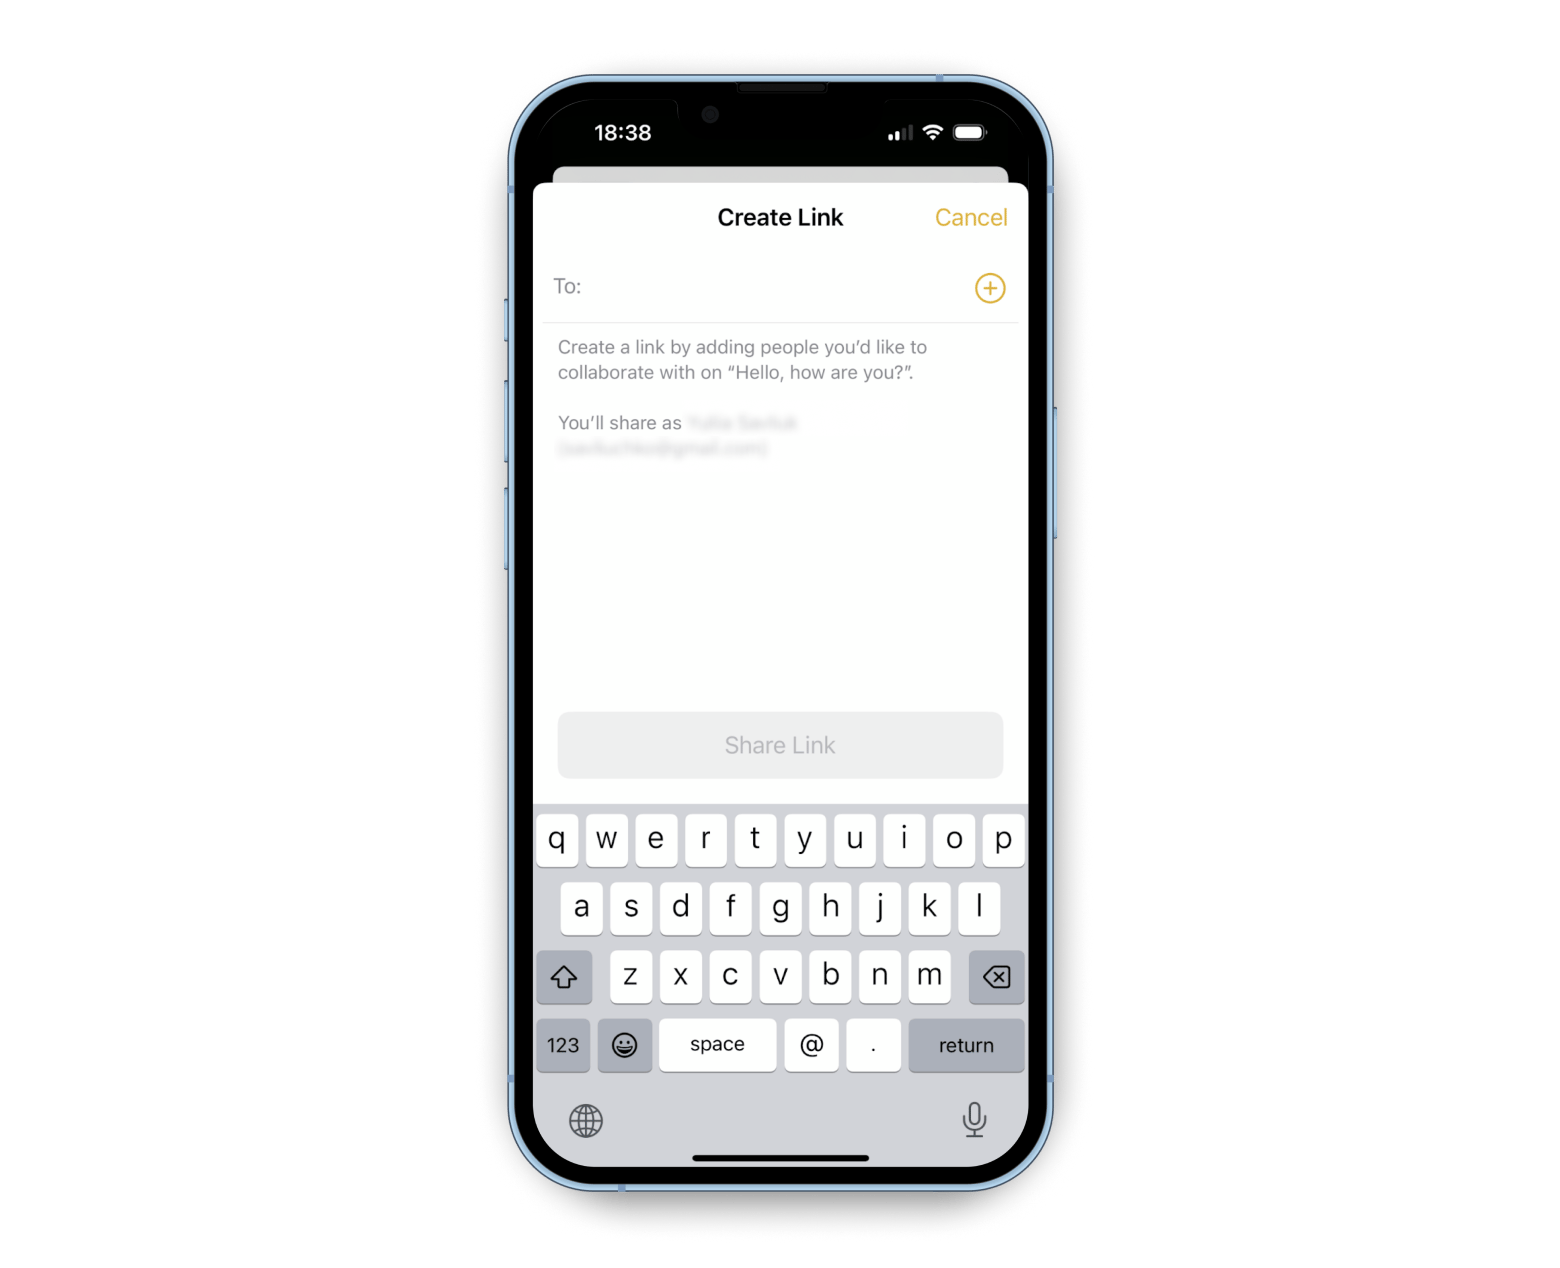
Sharing notes is easy, but it’s also not something you’re born knowing. So, let’s review the iPhone notes collaboration not working and how to fix this.
Say I have an idea for my business that I want to share with my co-founder. I want them to be able to edit and add their ideas to it. I open Notes, click the new note icon, and start typing. Then, when it’s time to share, I follow these steps:
On your iPhone:
- Open the Notes app and go to your note.
- Click on the share icon at the top right.
- Choose Collaborate from the drop-down menu.
- Choose Only invited people can edit.
- Tap the contact or app you want to share with and follow the prompts.
On your Mac:
- Open the note.
- Click on the share icon.
- Click on the app you’d like to use to share notes.
- Choose People you invite can make changes.
- Select or deselect Anyone can add more people depending on your preference.
- Click Share.
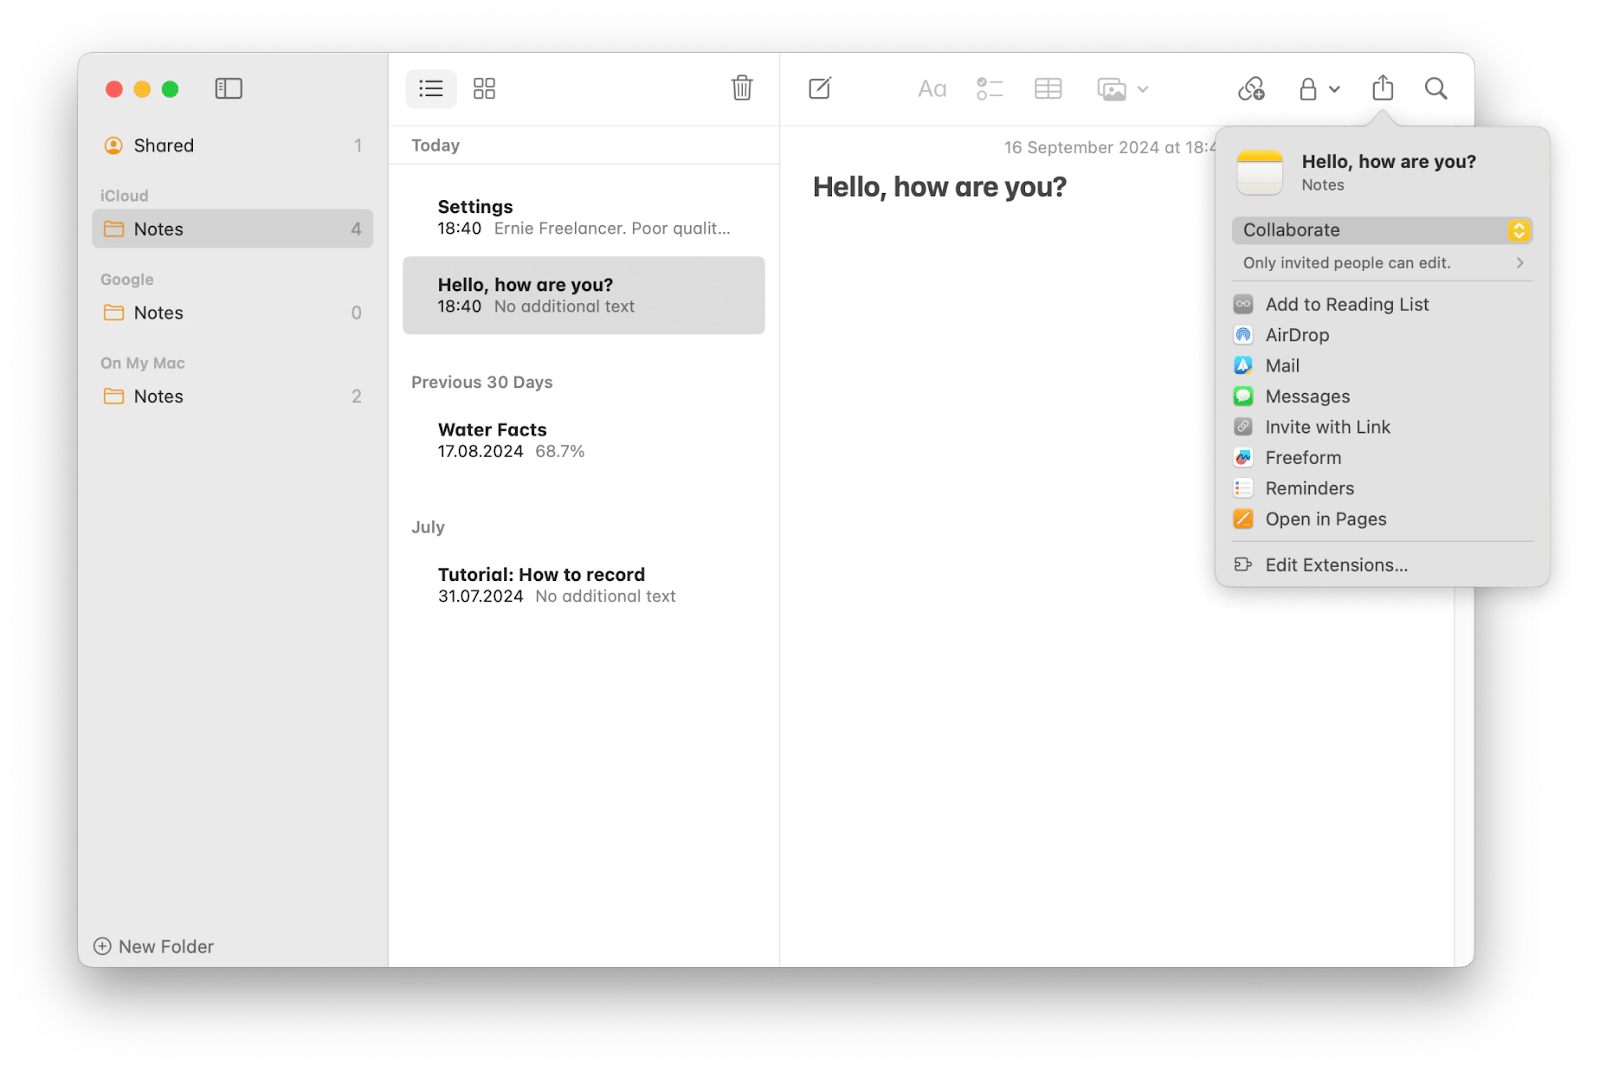
Problem solved. With these settings in place, I’d be inviting my co-founder to collaborate, and I’d set up that they’d only have access because I had invited them. Note that only people with iPhones can use or collaborate on Notes.
How to get a shared note to update?
Assuming your problem may not be solved yet, then let’s get into heavier-hitting fixes. We’ll start with Apple.
Check System Status
If you're having trouble updating a shared note, start with the Apple System Status page and check if there are known iCloud server issues.
Here's how:
- Go to the Apple System Status page.
- Look for iCloud in the list and check if there are any reported issues.
- If iCloud is working properly, you can proceed with other troubleshooting steps.
In my experience, checking the system status page first can save a lot of time. I once spent ages troubleshooting an issue, only to find that it was a temporary server problem on Apple's end.
Check if the note is locked
A locking feature in the Notes app is great if you want to protect your app from anyone without a password or a replica of your face. But if I want to share edits easily with my cofounder, who I trust, I don’t don’t want to lock them out of the note.
Here’s how to disable it:
- On your iPhone, open the note and look for a lock icon.
- If there is a lock, tap the three dots at the top right.
- Tap Remove.
- Tap back into the note.
If there’s no lock icon, the note is not locked, and this is not your problem. If you want to lock it, follow the same steps but click Lock instead of Remove.
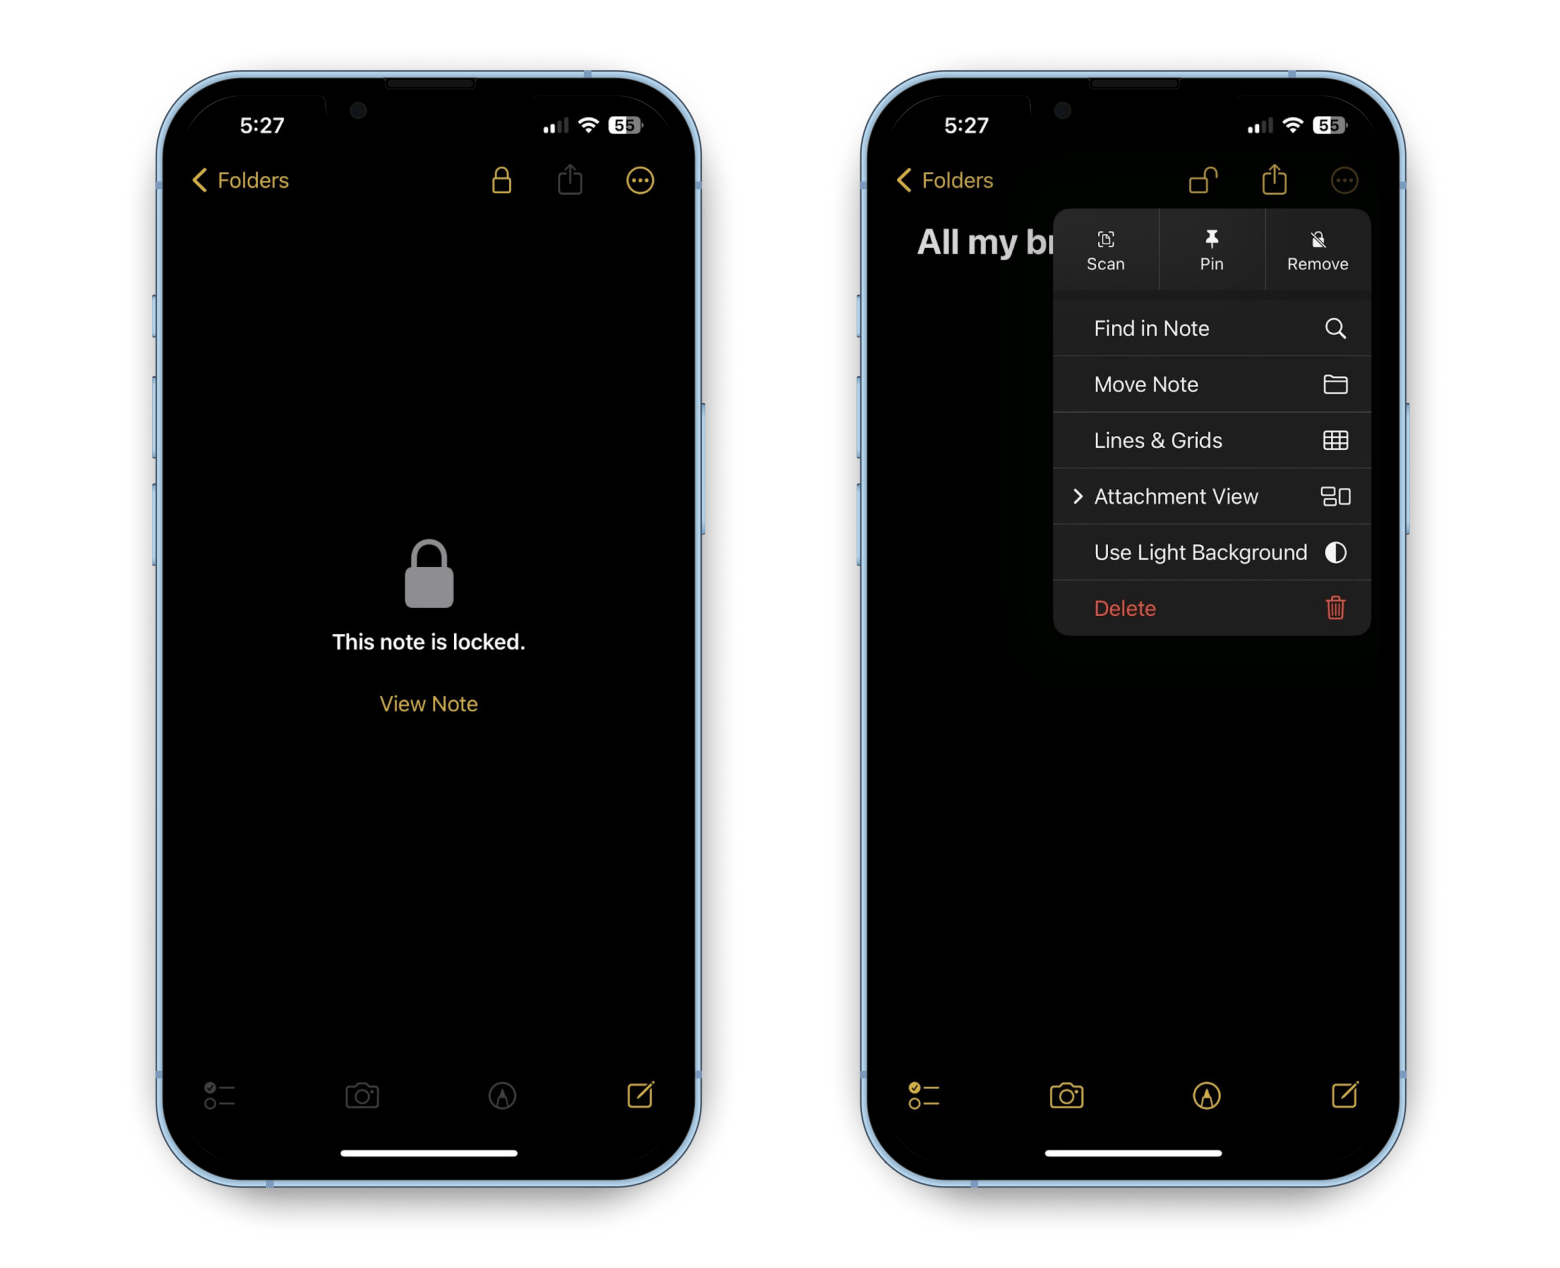
On your Mac, the lock icon will always be at the top of your note. Click the dropdown arrow next to the lock icon > Click Remove Lock if that option is available. If the menu says Lock Note instead, the lock was not enabled, and this is not your problem.
Also, make sure that the Notes app is linked to iCloud. Remember that iCloud is the transmitting method. Otherwise, it’s just on your device.
Fix your Wi-Fi connection
Syncing requires a functioning internet connection. First, check that you’re connected to a strong network and not accidentally hooked up to the one from the random business across the street. If you are using your phone’s data plan, check your bars.
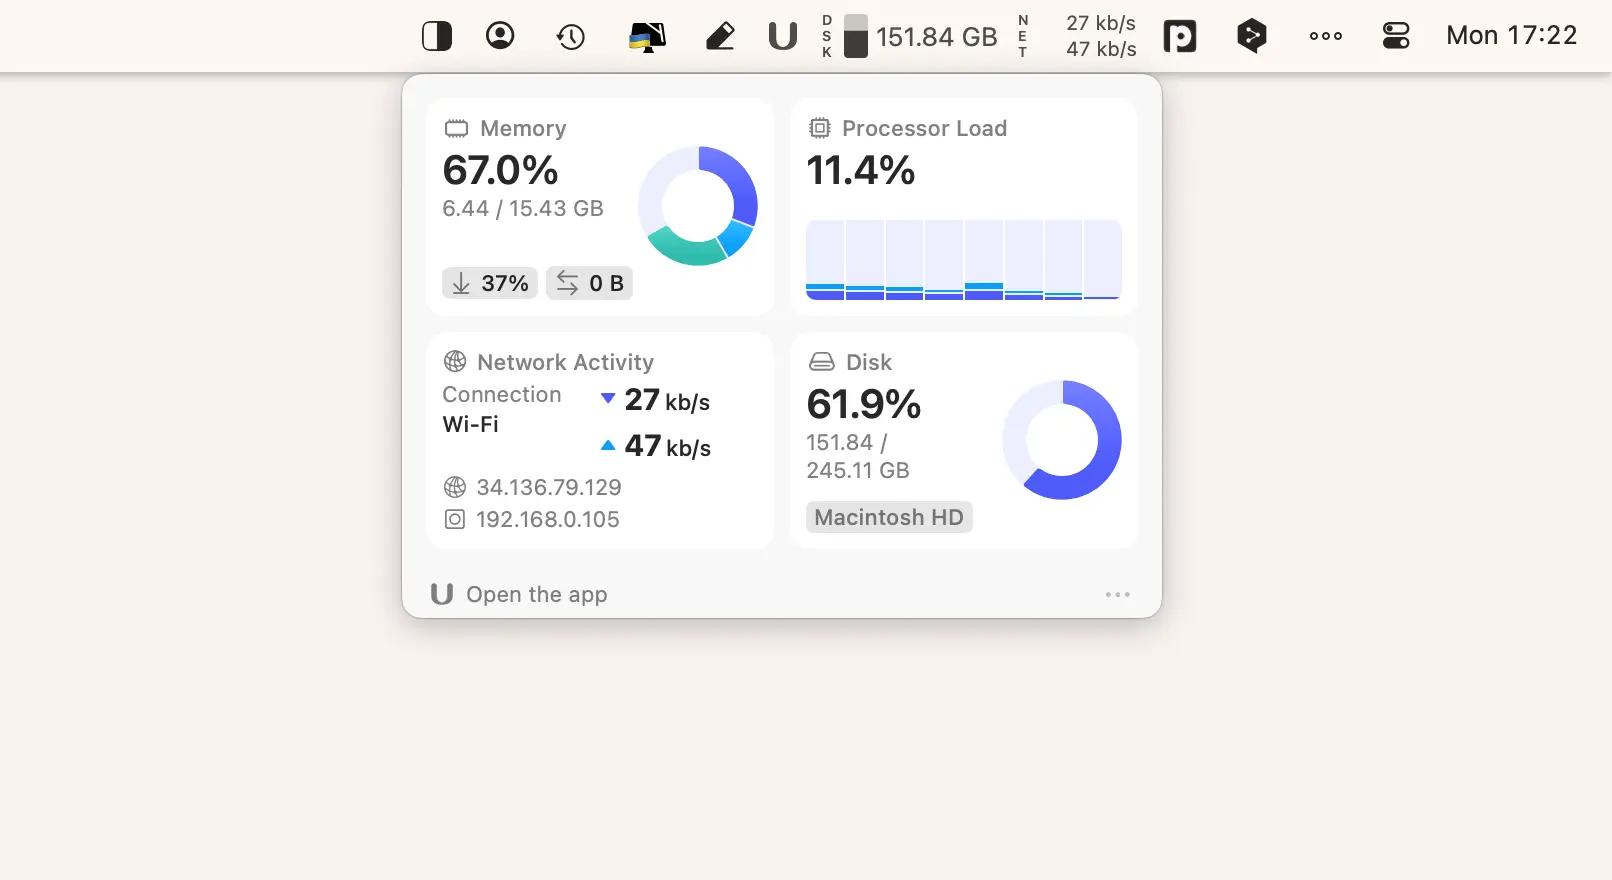
Then, check your network activity with the Usage app. The app monitors connection and performance well on Mac and iOS devices. You can also check processor load, memory use, and battery health at the same time and be sure your device functions as usual.
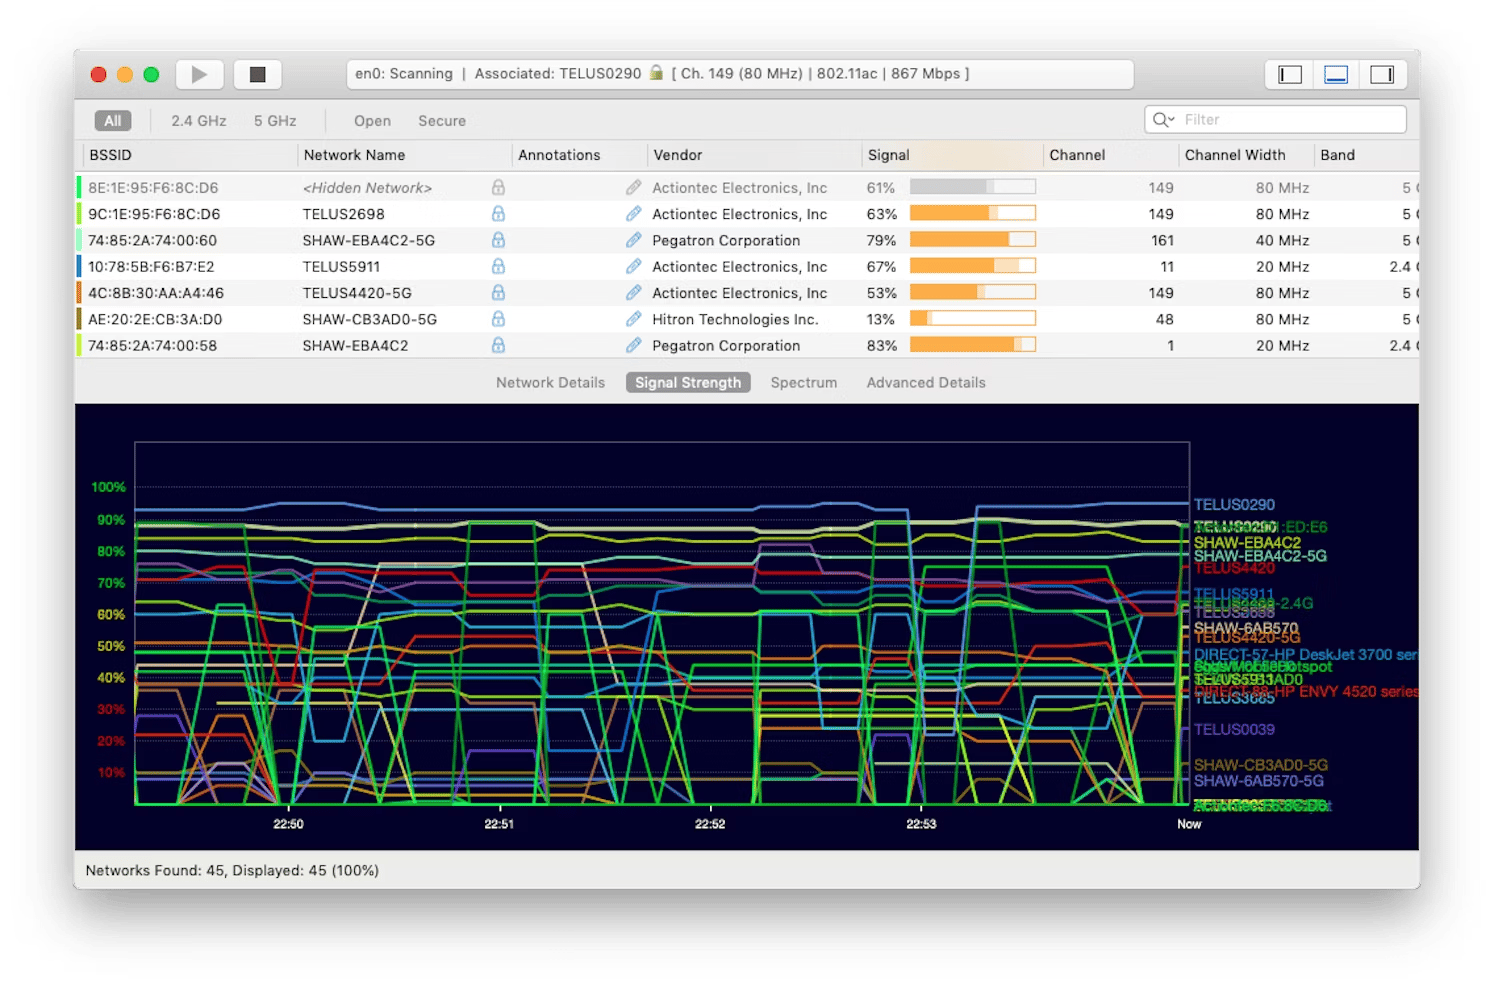
For more advanced users, I recommend using Wi-Fi Explorer. The app allows you to troubleshoot connection problems on your Mac with a Wi-Fi scanner and uses a signal-to-noise ratio monitor when signal strength might be insufficient to make proper conclusions.
Here, you can see how it has identified the health of the network you’re on and others. You can then make adjustments and take more advanced actions.
Ensure you are using the right Apple ID
If you’re like me, who has multiple accounts on most services, check that you’re signed in to iCloud with the right Apple ID.
Here’s how to check and change your Apple ID:
- Go to Settings > Apple ID.
- Look at the email address and make sure it’s the right one.
- If not, scroll down and tap Sign Out.
- Sign back in with the same account as your Mac.
It’s very unlikely you’re using the wrong Apple ID on your Mac, but you can fix that the same way as on iPhone in System Settings > Apple ID.
If you have multiple iCloud accounts, try AnyTrans for iOS. The app can handle all your iCloud accounts without a hitch. It makes it easy to transfer data between accounts, access backups, and batch-save files from iCloud to your Mac. Plus, it offers a simple way to move content from your iTunes library to your Apple devices.
To add multiple clouds in AnyTrans for iOS:
- Instal and open the app.
- Go to iCloud Manager.
- Sign in with the Apple ID.
- Click the drop-down icon next to your name and choose Add iCloud Account.
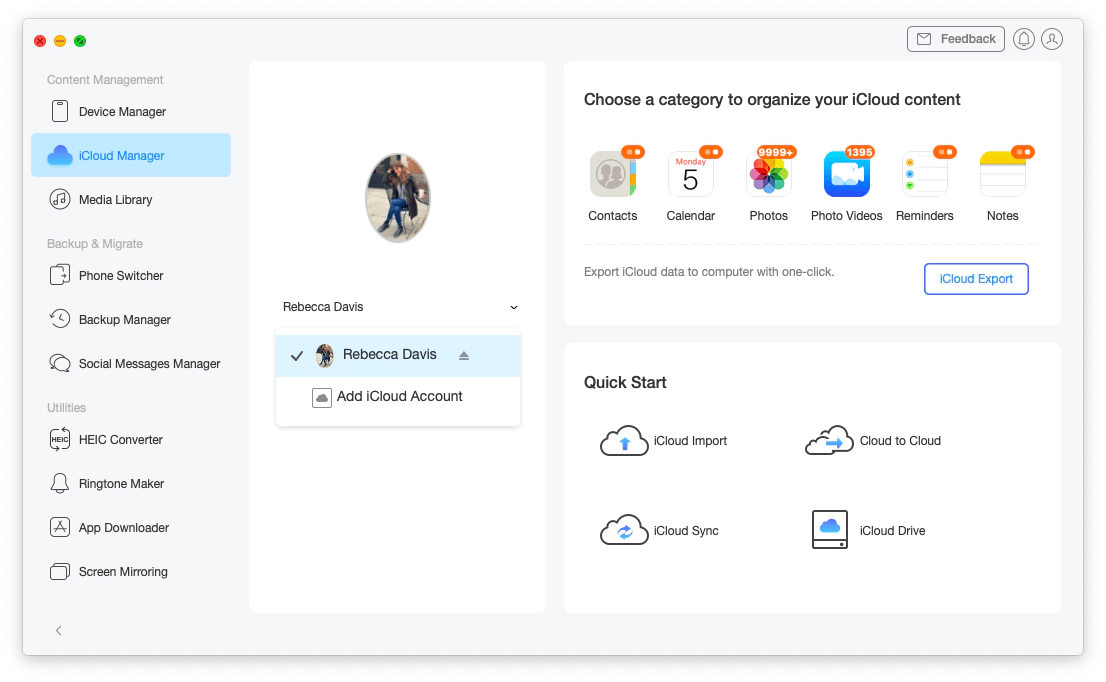
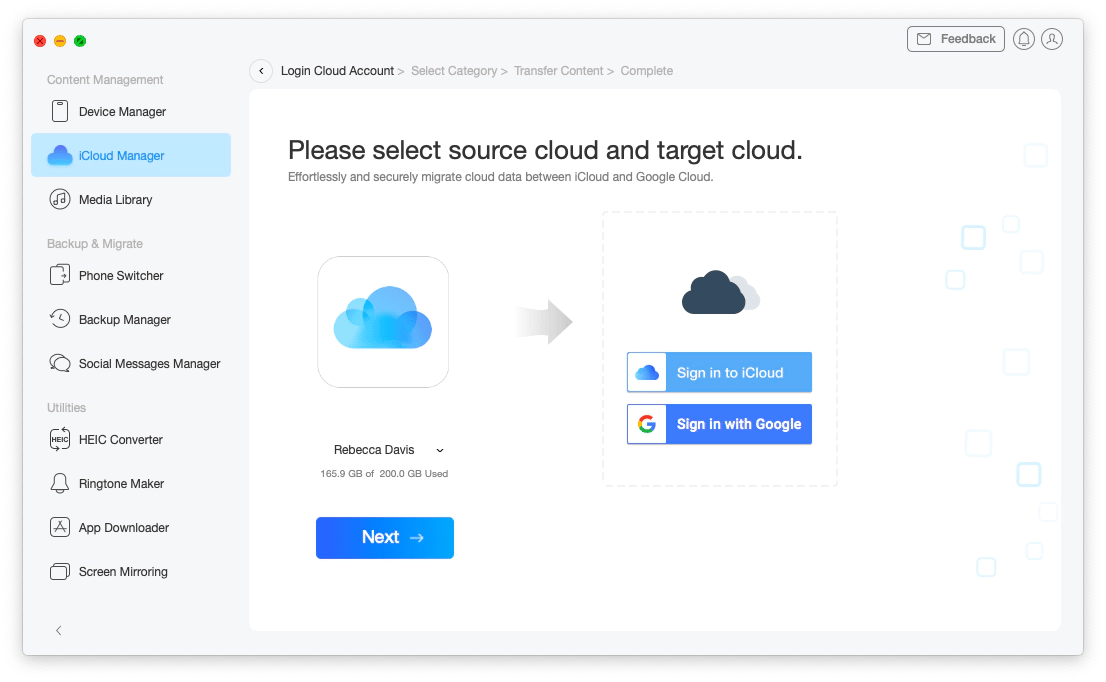
Alternatively, you can click Cloud to Cloud under the Quick Start menu:
Free up space on iCloud
This makes me anxious even to say, but it often has to be done. Your sync might not work because there’s no room for all your feelings, shared recipes, or apps on the cloud. However, make sure you really need to delete photoshoots with your dog before you do it
First, you can resolve simple storage issues just by readjusting your iCloud sync settings. On your iPhone, go to Settings > iCloud, and deselect the apps, features, and backups you don’t need to be synced.
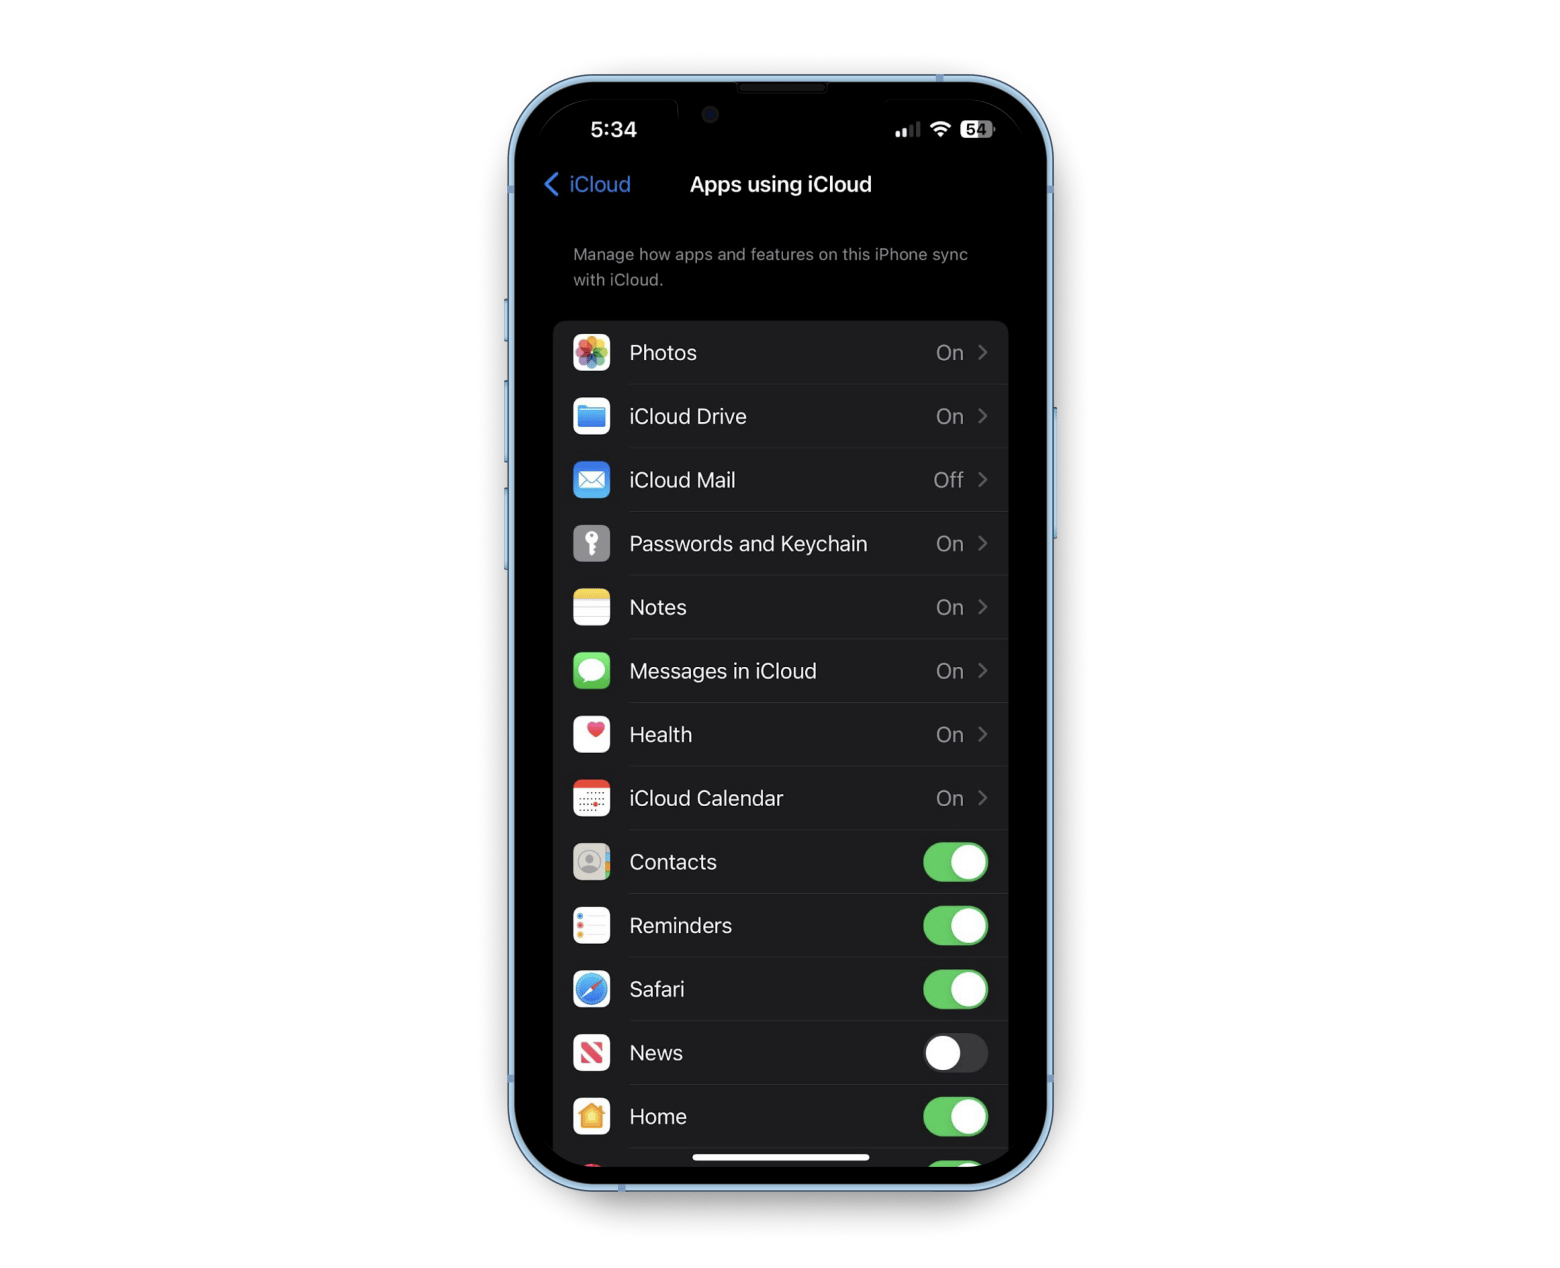
For example, disable sync for Messages in the Cloud and remove them from your Mac. This will free up space, especially if elf costumes were being traded for cat shenanigans in the family group chat. You might not want to do this if you do want to use iMessage, though. In that case, consider upgrading your iCloud plan to iCloud+ and pick a realistic tier.
How to free up space on your iPhone or iPad
Another option, especially if you’re a photo/video person, is to use CleanMy®Phone. The app helps you find duplicates, like three of the same pic of your dog in his elf costume, unneeded screen records and screenshots, blurry photos, saved TikToks, and other items on your iPhone you probably don’t need anymore. It also allows you to check your network connection. I was able to get rid of 41.93 GB within minutes, which included numerous random screen records!
Here’s how it works:
- Install and open CleanMy®Phone.
- Go to Declutter and tap Scan.
- Tap Clean, or tap on a section.
- If you’ve tapped a section, deselect what you’d like to keep and tap Clean.
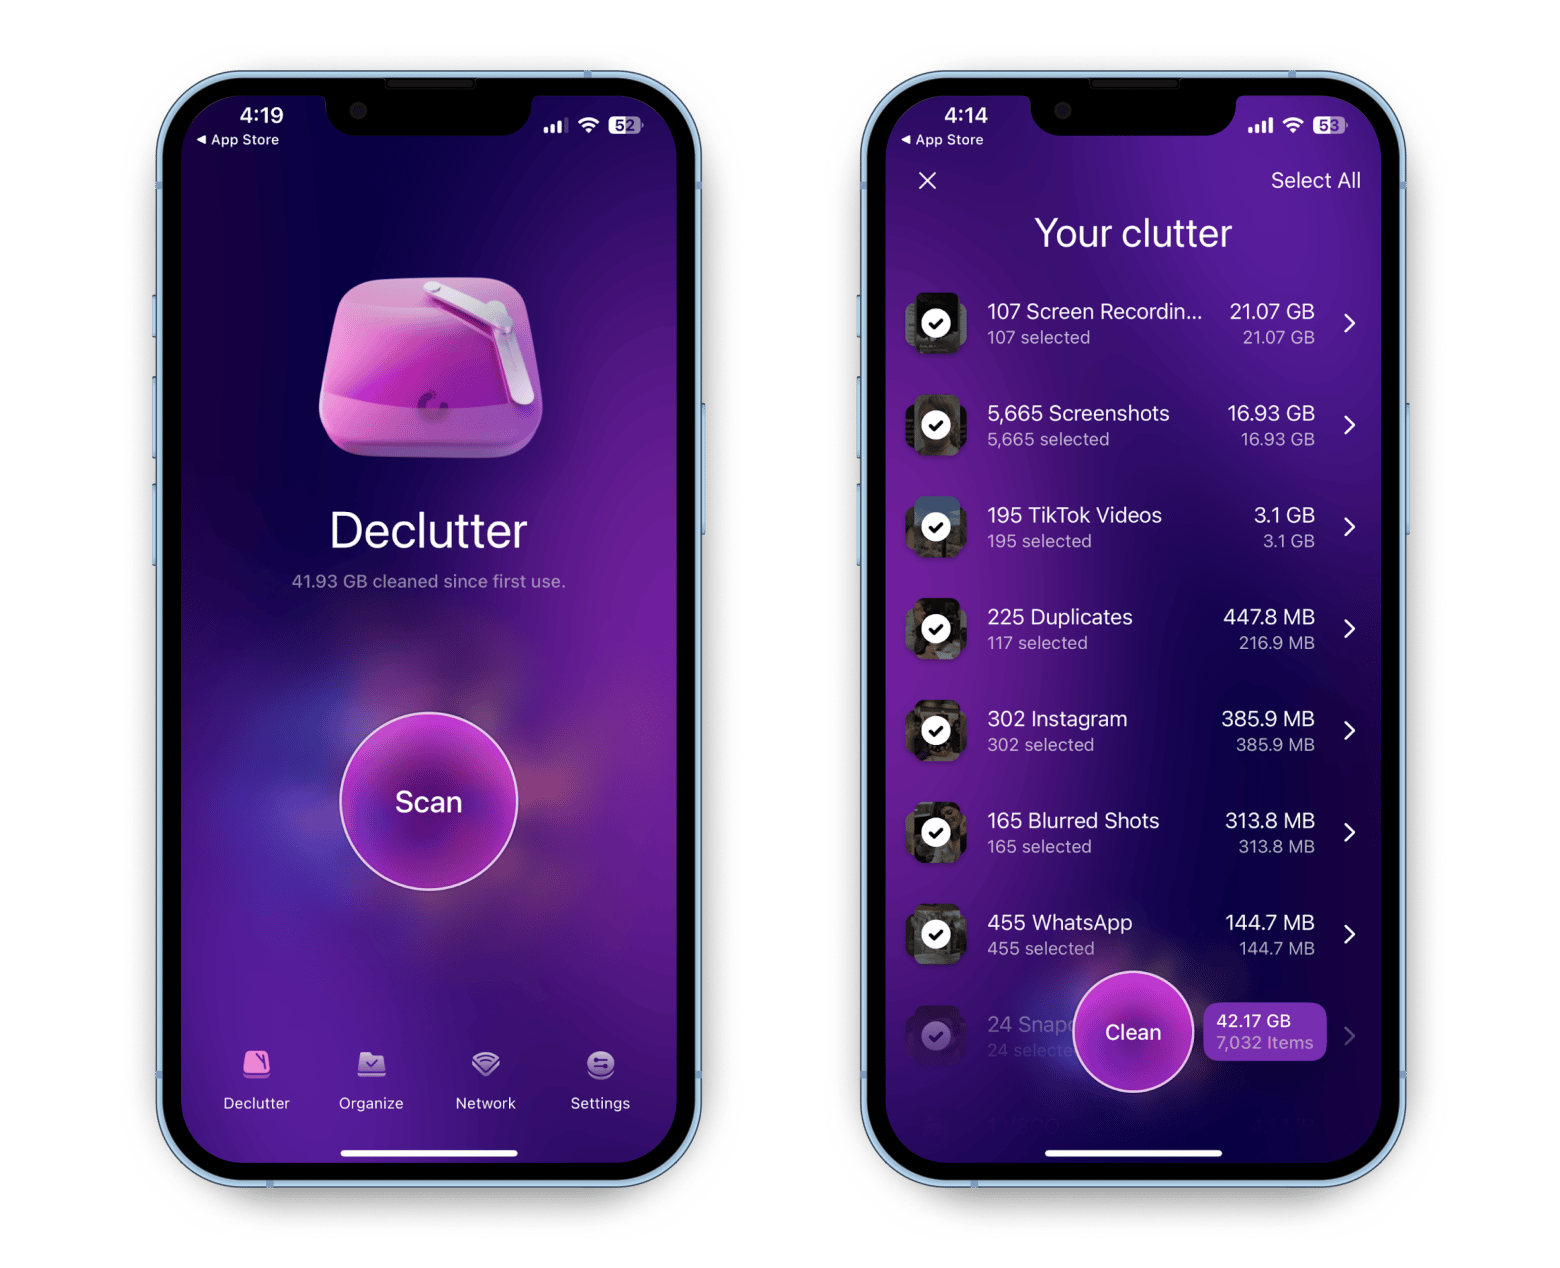
Note that anything you clean out is kept in your recently deleted folder for 30 days.
How to free up space on your Mac
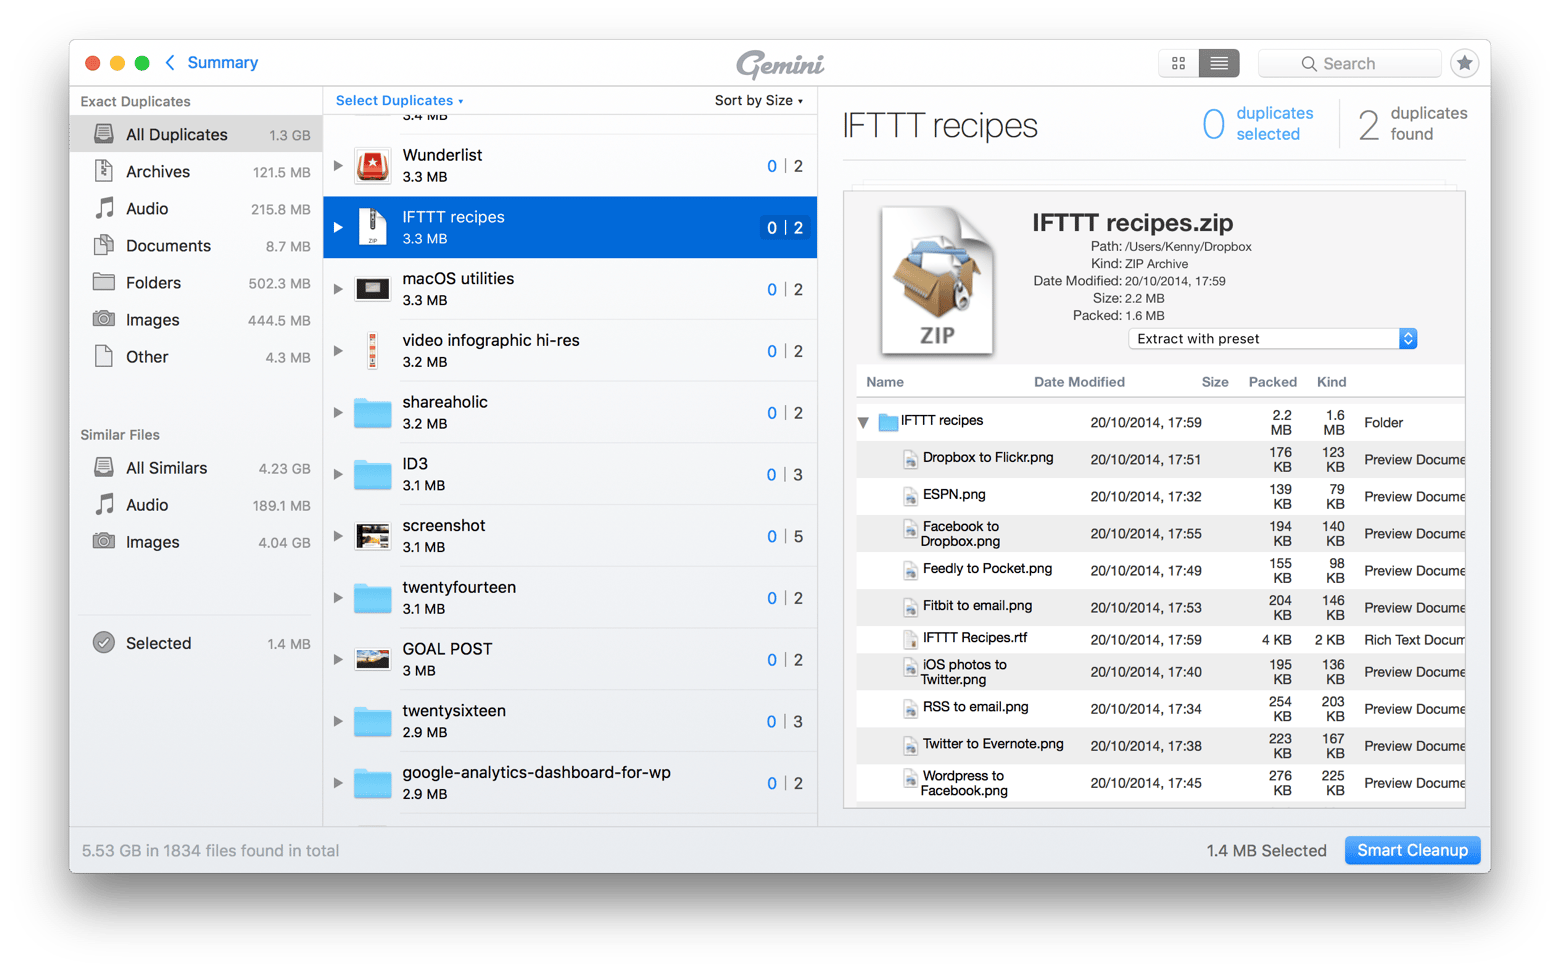
If you want to free up space quickly on your Mac, you have a great third-party app that will help you declutter it quickly and efficiently — Gemini. The app has a feature called Duplicate File Finder, and it can also identify items that are similar in nature, even if not exact duplicates. It can also scan Photos and Music with its built-in AI and notify you right from the menu bar each time it detects any kind of duplicates.
To find duplicates:
- Install and open Gemini.
- Drag and drop a folder onto the screen, or click “+” plus and pick a location.
- Click Scan for Duplicates > Review Duplicates.
- Review and select items and click Remove.
Clearing out storage with any of these options might make devices faster overall — not just when syncing Notes.
Match your time and date settings with your current location
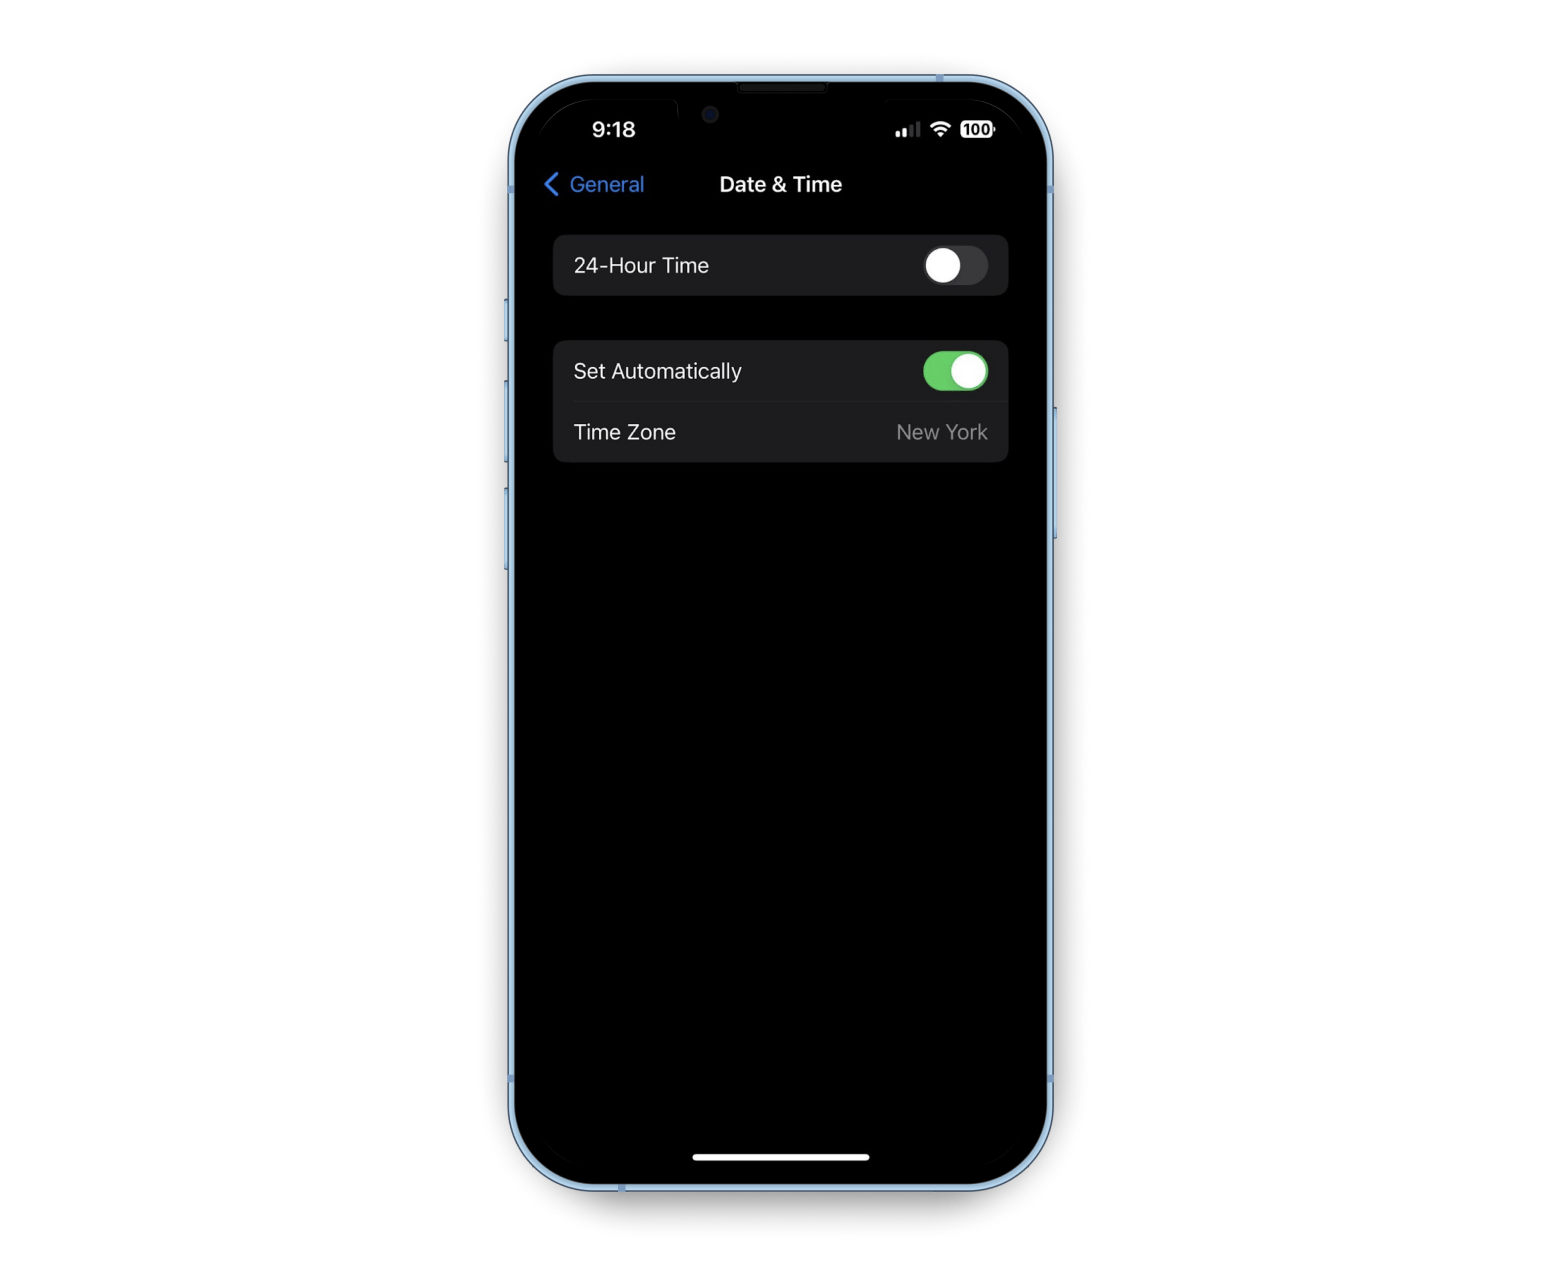
If your present location doesn’t match your time zone, iCloud might pause sync. For example, it may pause if you keep your phone in EST while visiting London. This is especially true if your Mac knows it’s in GMT.
This is easily sorted by going to Settings > General > Date & Time and toggling to Set Automatically. After that, you may want to restart your phone.
Restart to clear system glitches
Finally, Apple might be responsible for a system glitch. This is solved by turning your device on and off again, and then signing out of iCloud and signing back in.
If none of these solutions worked, report the issue to Apple. In the meantime, use AnyTrans for iOS to do any immediate transfers.
Final notes on how to sync notes from iPhone to Mac
Alright folks that’s all I’ve found for the iCloud notes not syncing issue. Remember that it’s not just you vs. Apple and there are various possible reasons. Good news is you have the workaround and troubleshooting apps I mentioned.
To review:
- Usage: monitors your Wi-Fi connection and device usage.
- Wi-Fi Explorer: allows you to troubleshoot Wi-Fi network problems.
- AnyTrans for iOS: transfers content across iCloud accounts and iOS devices.
- CleanMy®Phone: removes duplicate photos from your phone.
- Gemini: finds duplicates and similar files on your Mac.
You can get all these apps in a seven-day trial with Setapp. It’s a platform that features hundreds of apps to improve usability and enhance the experience of your Apple devices. A monthly subscription to Setapp is a fantastic way to make the investment last longer, with more apps and tools that you can discover with the platform.


