How to make flashcards on a Mac: I mastered all the best methods + tips
I remember using flashcards a lot when I was in further education. It was a great way to get information to “stick” quickly and retain facts.
Flashcards are typically formatted with a question on one side and an answer on the other. They assist students with recalling and memorizing facts in a wide variety of subject areas, from language skills to more complex ideas in the Sciences.
My guide will show you great ways to use your Mac to make your own flashcards for study or in the classroom with students.
What are the benefits of using flashcards?
Flashcards are beneficial for learning in various settings and a great aid for many different learners. Let’s stroll through some of the reasons they’re particularly good:
- Promote memory recall so students and teachers can test accurately on information retention.
- Students will have a deeper engagement with the material.
- They’re customizable to fit specific subjects and needs.
- They’re cost-effective to design and can be re-used time and again.
Now, I will show you the best ways I tested to create your own flashcards on a Mac.
Create your own flashcards with Marginnote
MarginNote is a brilliant little app that can help you assimilate a lot of information and create valuable flashcards for your studies. The app “screams” productive — you can create notes, turn them into flashcards, and customize them with images, texts, and even audio comments.
- Install and open MarginNote.
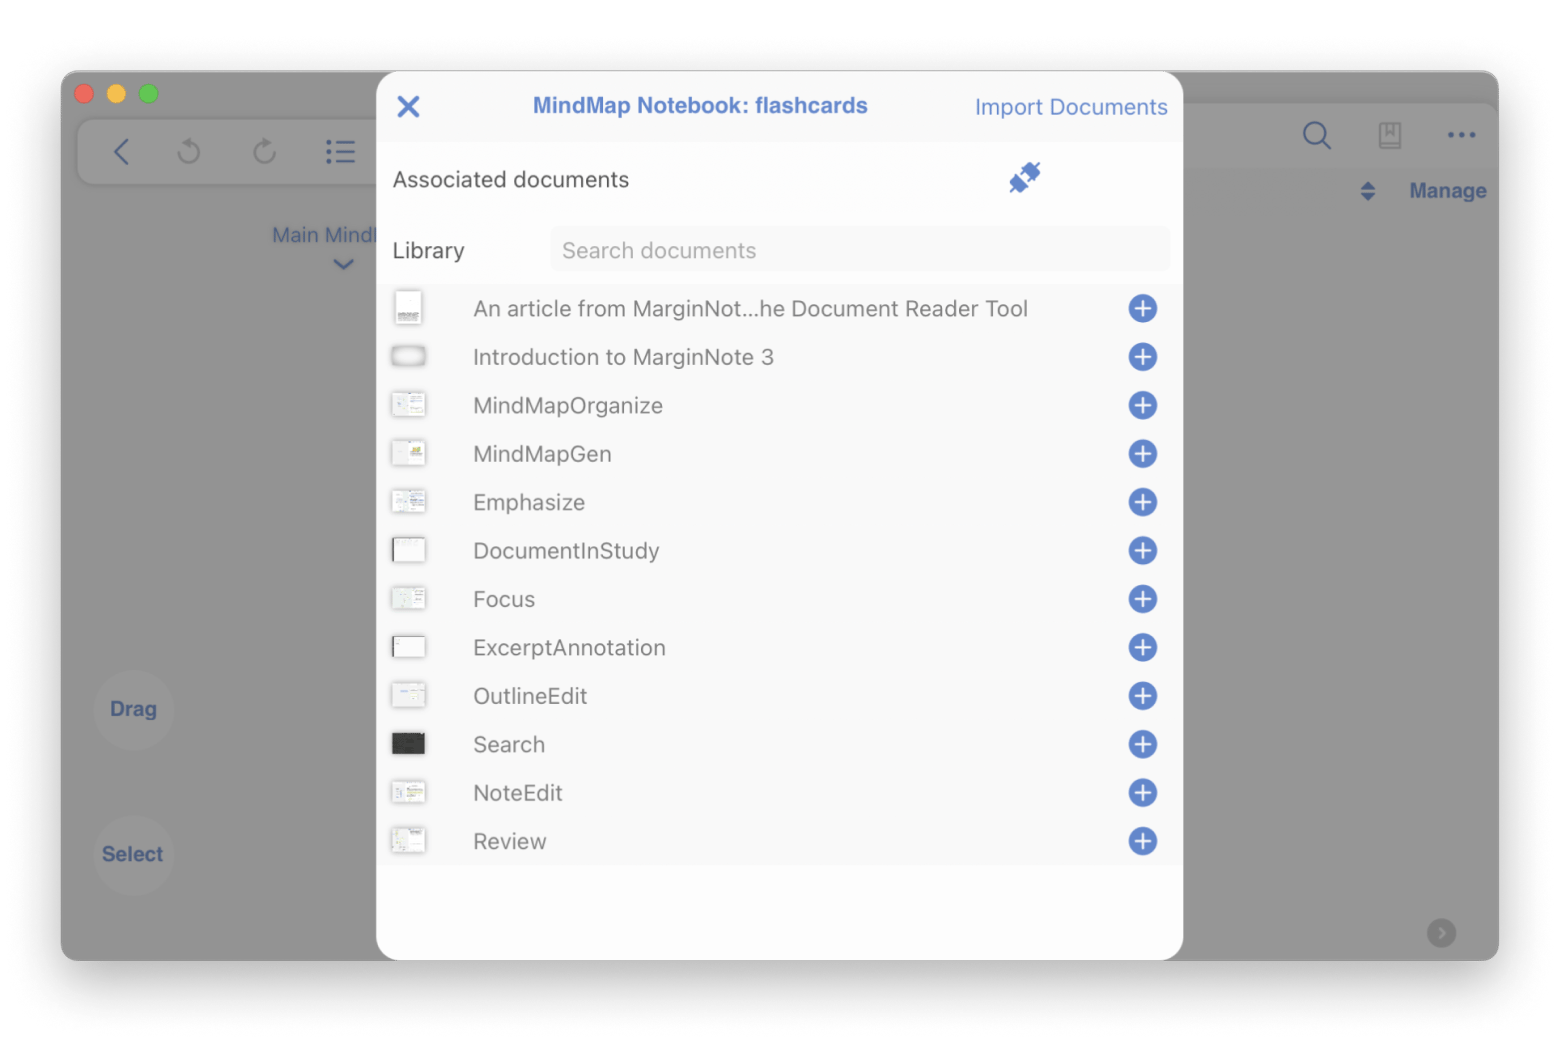
- In the Study tab, click New > Give a name to your project.
- Click Import Documents > Choose a file from which you need to create flashcards.

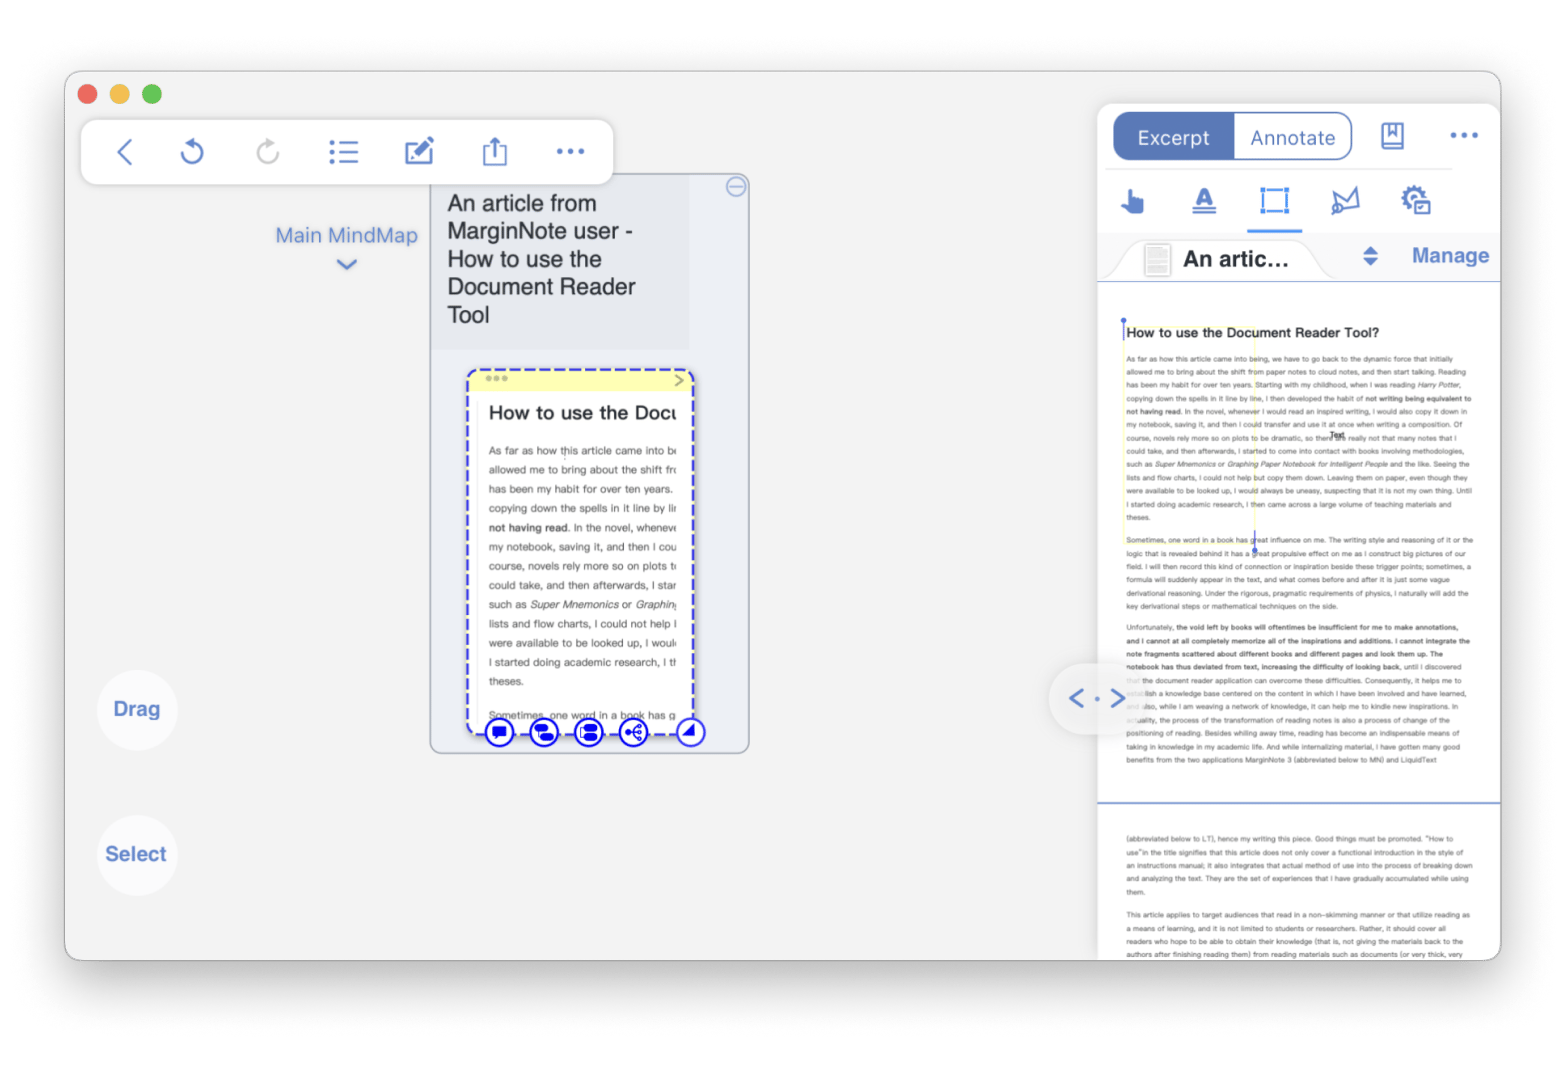
- On the right pane, you’ll see a list of tools to use and work with your document, such as Excerpt and Annotate.
- If you want to edit a flashcard, just click on it and see the editing toolbar.

Make cards a lot more memorable
Using visuals — images, photos, and bright colors alongside the text — can help students absorb the information much more effectively.
To make flashcards memorable:
- Add pictures that match the concept (e.g., an image of a tree for the word "oak").
- Summarize complex topics with visuals like timelines or diagrams.
- Highlight important info with colors to organize or emphasize (e.g., blue for science).
Concentration is a must when creating qualitative flashcards. That’s why I recommend you check the tools for the best background noise for focus, concentration, and creativity.
Create mental connections
Another great technique when using flashcards for learning is mental connections and grouping. Here’s how it works:
- Categorize by subject: Group related cards together based on the subject they cover. For example, if you're studying English, you might create separate categories for different areas, such as language and literature. It allows for focused study and makes it easier to review specific topics.
- Create subsets: Use different criteria, such as difficulty level, textbook chapters, or specific study goals. Subsets can categorize cards based on specific topics and concepts. It allows for more flexibility and lets you focus on specific subsets during study sessions.
- Use labels: These give an extra layer of organization. Assign labels for each card, and you can search and filter cards based on criteria. Labeling allows for quick identification and retrieval of cards based on specific attributes, streamlining your study process.
For instance, images associated with the questions and answers will aid memory recall and improve the process. For instance, if you were creating geography flashcards to help students learn facts about a country, they could be made in the colors of the country’s flags!
Break complex concepts into multiple questions
Flashcards are a great way to break down complex ideas into easy questions and answers. They help students memorize things quickly and remember what they've learned. For instance, if you're diving into the Presidents of the USA:
- You might have one side of the flashcard with an image of a particular President
- When you turn it over, there are three salient facts: date of birth, when inaugurated, and the year they passed away.
Use the structure to present one idea and answer, preferably with a visual aid.
How to make flashcards in Word
Many people love to use Word as a great tool to help them create effective flashcards. Here are some simple steps for how to make flashcards in Word:
- Open a new document in the Word app.
- In the page layout settings, change to landscape.
- Create a table with two columns.
- In the first column, type a question, and in the second one — answer.
- Then, customize your table. I recommend experimenting with fonts and colors to make each card distinguishable and more memorable.
- Then, print your table and cut for physical cards.
If the Word app crashes, check the troubleshooting guide on how to recover unsaved Word documents on a Mac.
What about online flashcard makers?
Are there places where you can learn how to make digital flashcards? Some good online sites offer the option to make them for free. Well-known online sites such as Canva are a great option to try, and they offer both free and paid plans. But what are the pros and cons of using online flashcard makers? Let’s compare.
Pros of online flashcards:
- You can study on the go from any device.
- They can be shared easily with other students for collaborative learning.
- You can add audio clips and images.
- With Cloud storage, flashcards can be backed up to avoid losing data.
- You can use game-like elements to make studying fun.
Cons of online flashcards:
- They require an internet connection at all times.
- Sometimes, getting distracted with other activities is easy if you’re online.
- May discourage active learning if used solely as a passive study tool.
- Subscription costs are a consideration for some online flashcard sites.
My final thoughts on how to create flashcards
Creating flashcards on a Mac can really help make complicated stuff a lot easier to grasp. When you use them regularly in class, they can boost learning and make it simpler to take in all that information.
Plus, you can try super apps like MarginNote, perfect for precising info into manageable chunks for flashcards, and Studies for creating lots of cards quickly and effectively!
If my ideas and app suggestions have piqued your interest, why not try them on Setapp? This platform is awesome, and I think anyone studying should totally check it out. It’s got over 250 really handy Mac and iOS apps all in one subscription. With Setapp, you can get a free 7-day trial to learn about all the apps.
FAQ
Can you make flashcards on Apple Notes?
You can’t make flashcards in the Notes app, but it can be a handy tool for noting ideas, such as flashcard questions and answers. Instead, you can use Studies or MarginNote to create flashcards with visuals.
How to make flash cards on Word Mac?
To make flashcards on Word Mac:
- Open a new document in the Word app.
- In the page layout settings, change to landscape.
- Create a table with two columns.
- In the first column, type a question, and in the second one — answer.
- Then, customize your table. I recommend experimenting with fonts and colors to make each card distinguishable and more memorable.
- Then, print your table and cut for physical cards.


