How to make Dark Mode on Mac: A complete guide
Most people switch to Dark Mode because it's easier on the eyes, especially when working in a dimly lit room. (Although some people just like the dark design). Today, we'll look at how to make Dark Mode on a Mac in a few different ways. You'll learn how to do it manually, how to automate the switch, and how to add an icon to switch directly from the menu bar.
How to make Mac in a Dark Mode with one click
The standard way to turn on Dark Mode requires a multi-click journey (which we will cover below). The easiest way to turn on Dark Mode with one click is to use the One Switch app.
- Download and open One Switch.
- Head on to the One Switch icon in the menu bar.
- Click the toggle button next to Dark Mode, and voila!
To turn off Dark Mode on MacBook, simply uncheck this box, and your laptop will revert back to light mode.
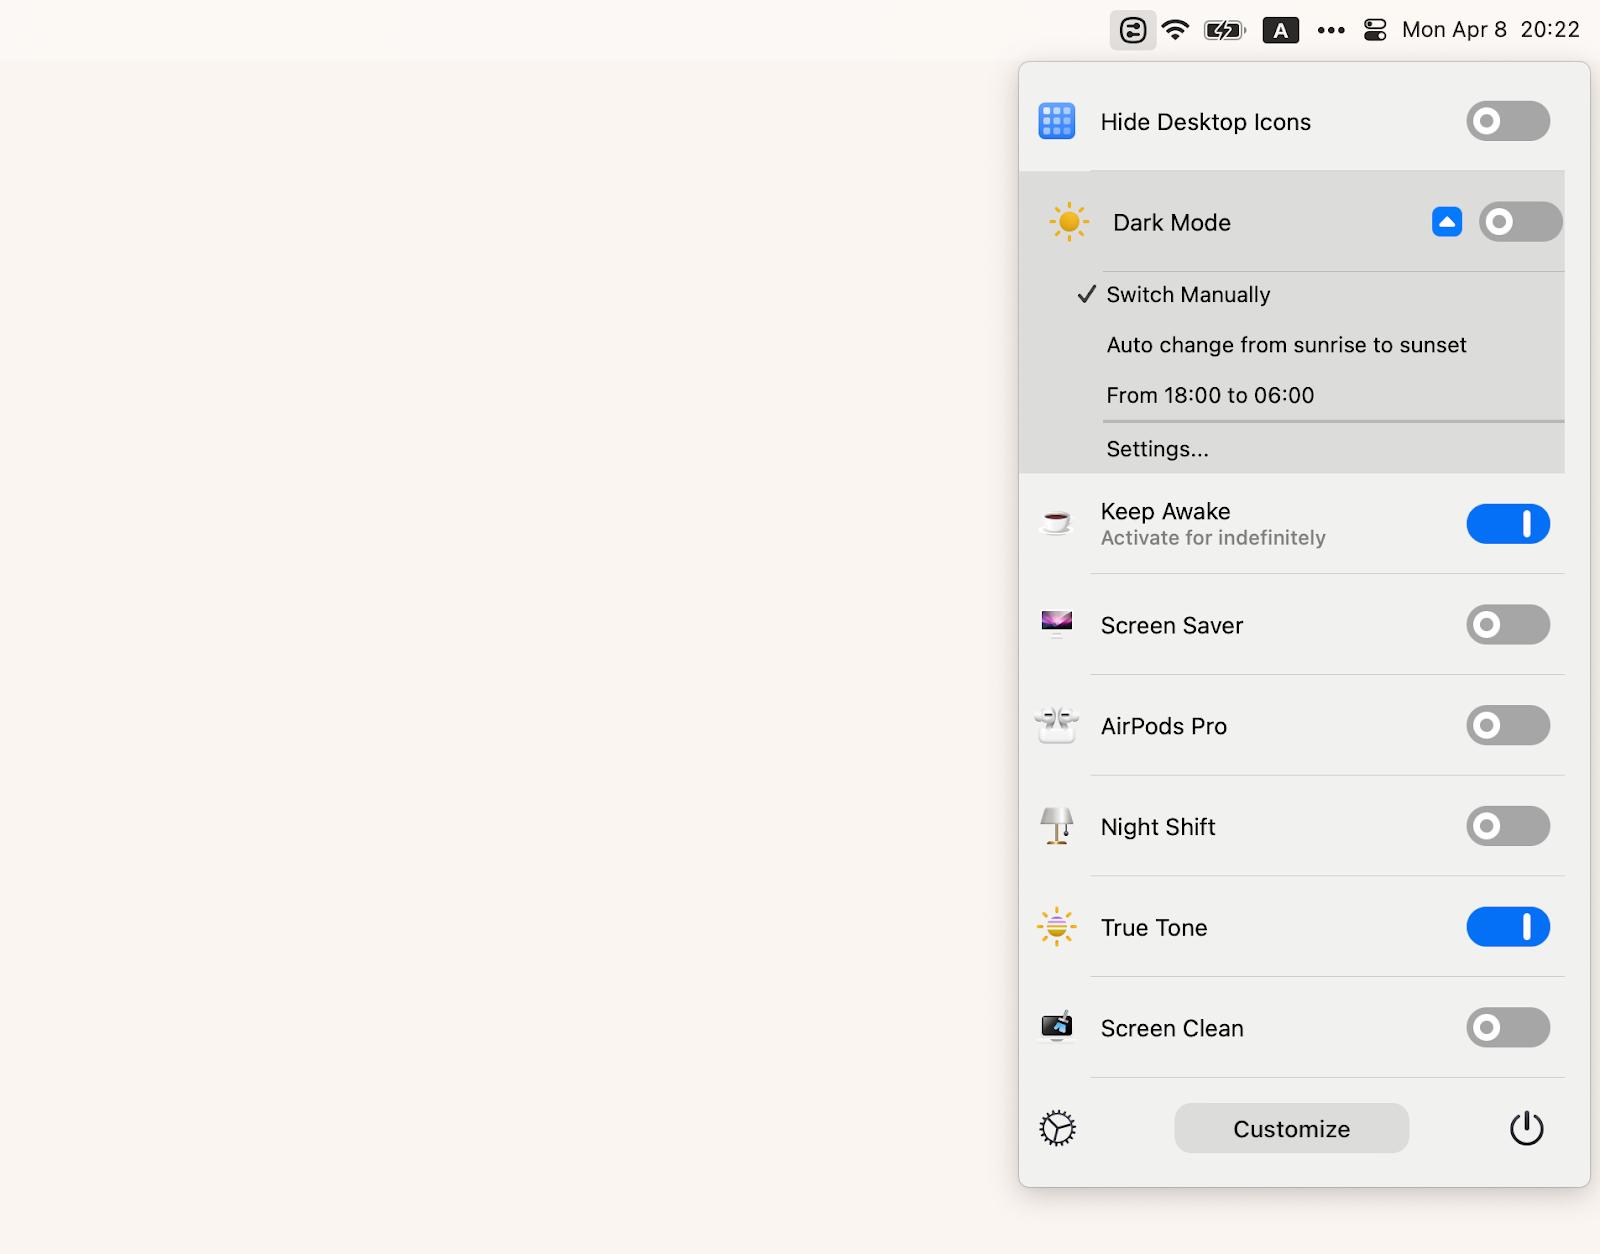
Right here, you can also set a schedule to switch your laptop to Dark Mode so you don't have to do it manually every day.
How to manually enable Dark Mode on Mac
Of course, you can also use the Mac's built-in features. Here’s how to enable Dark Mode on macOS manually:
- Go to the Apple menu in the upper left-hand corner of your screen.
- Press System Settings and click on Appearance.
- Check for Light, Dark, and Auto options. Then, click Dark.
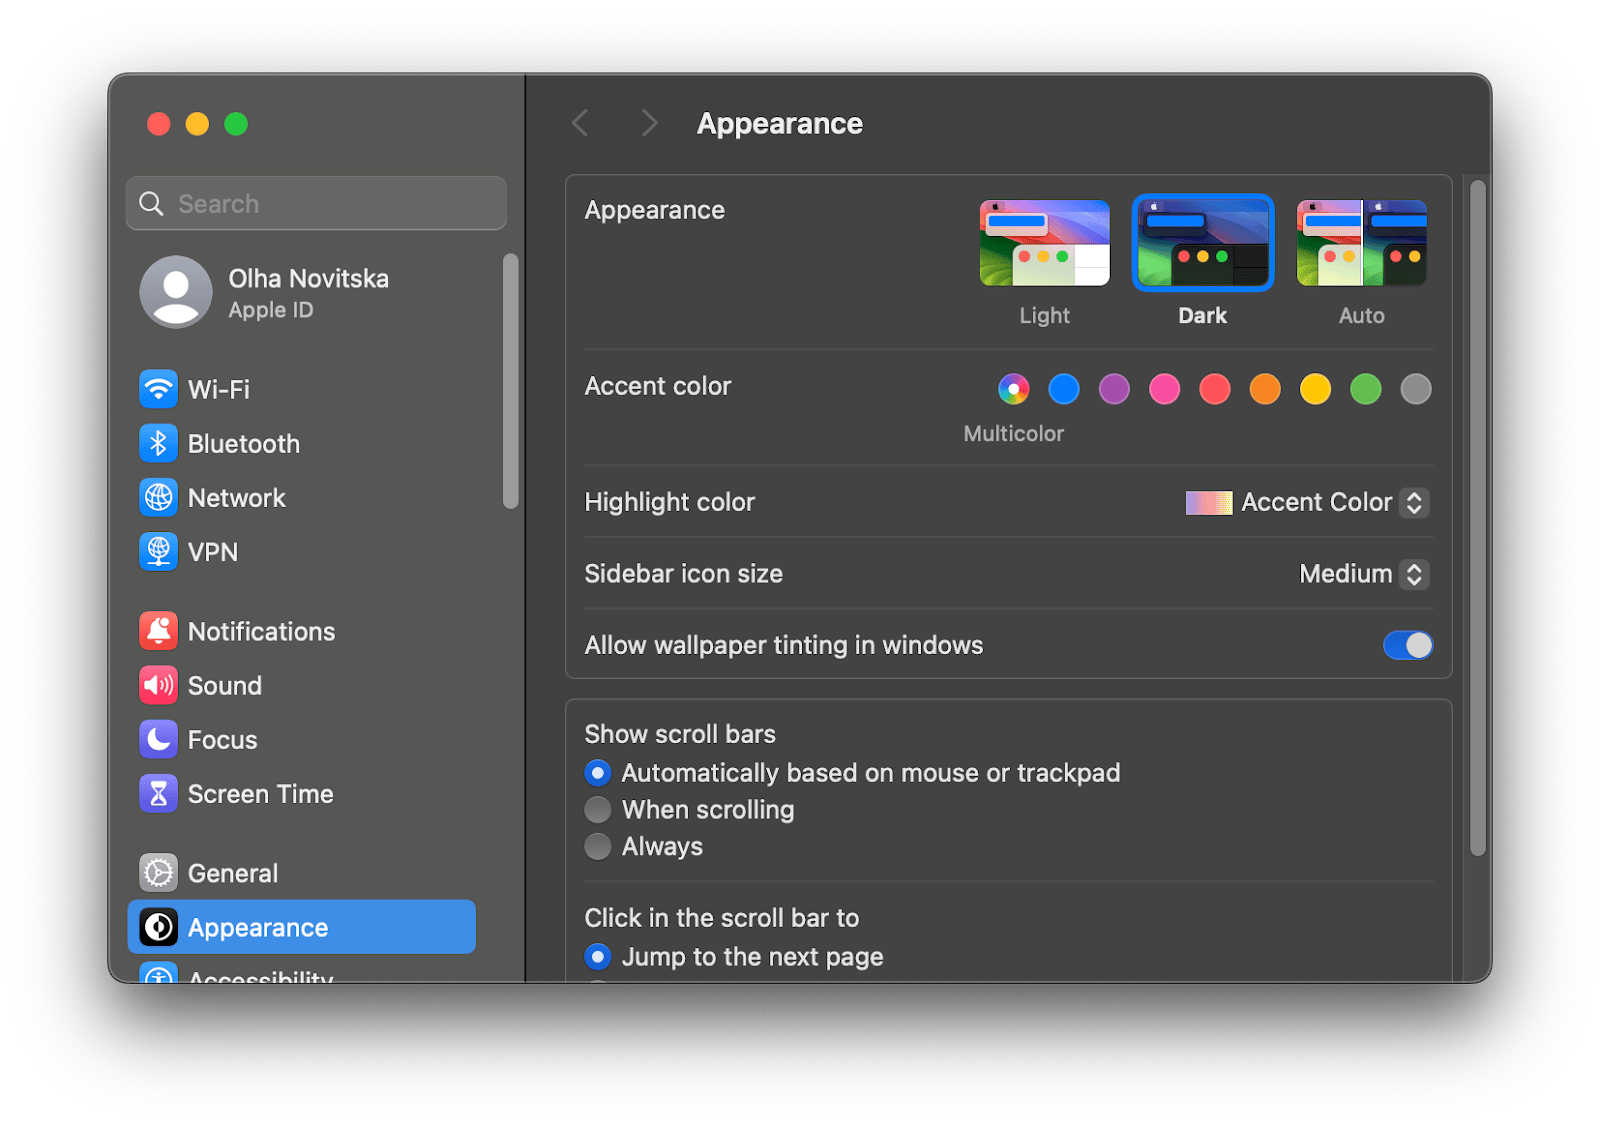
Unlike One Switch, the built-in settings do not allow you to set a schedule for switching to Light or Dark Mode independently. This schedule is always tied to your Night Shift mode (System Settings > Displays > Night Shift). This is another eye-friendly mode that gives the screen softer colors.
How to add a Dark Mode toggle to the menu bar
The faster way to activate Dark Mode on OSX is through the Control Center.
- Click on the Control Center icon in the menu bar. This icon looks like a toggle bar.
- Tap the Display feature.
- Tap the icon right above Dark Mode.
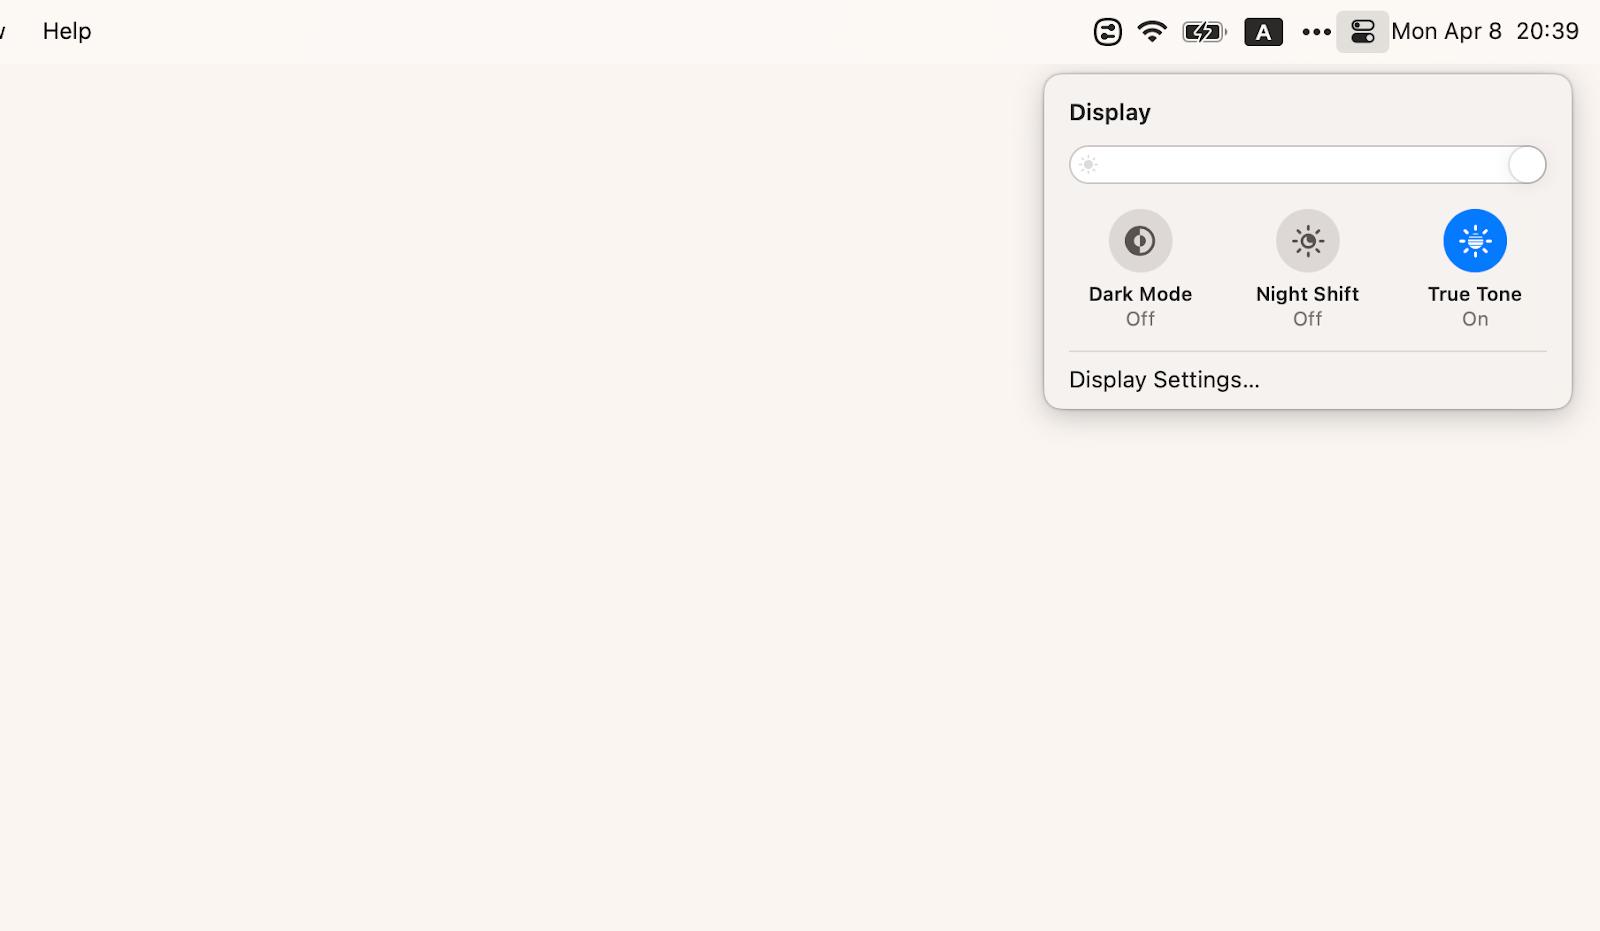
The Dark Mode icon is hidden deeply in the settings, and it is impossible to move it directly to the bar menu – you will always have to access it as described in the instructions.
The easiest way to have the toggle between Light and Dark Mode at your fingertips directly in the bar menu is to install One Switch.
How to turn on Mac Dark Mode in apps
Mac Dark Mode applies to your system interface and (usually) Apple's own apps. To set up Mac Dark Mode in third-party apps, you'll need to go into the settings of each individual app. In the list of settings, look for something like Themes, Appearance, and so on.
For example, here’s how to make dark theme on a Mac for Chrome:
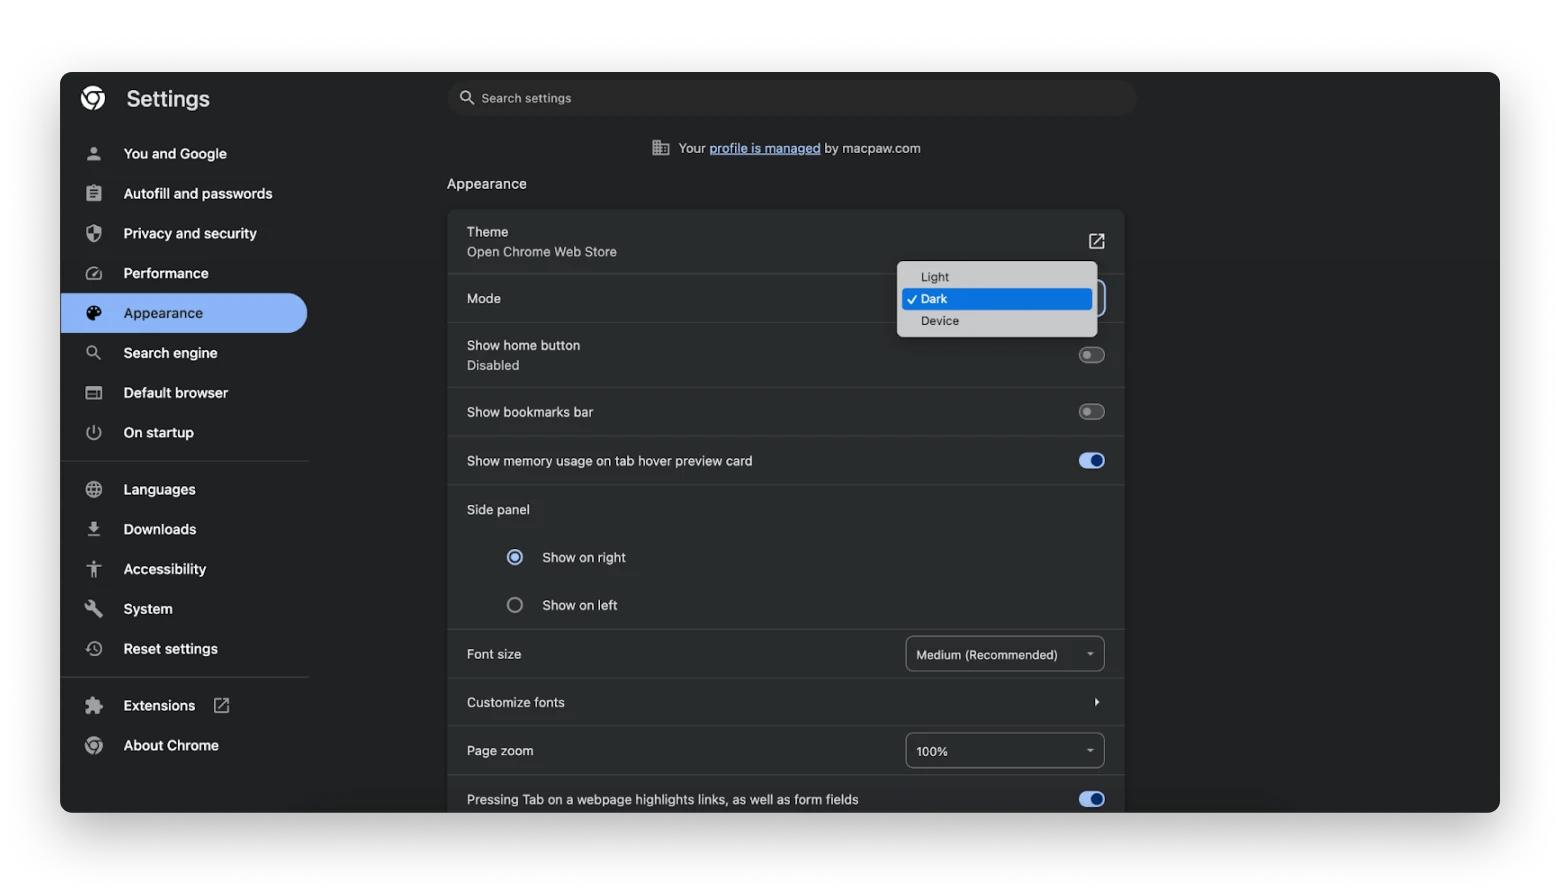
- Open Chrome and go to Chrome > Settings.
- Click on Appearance.
- Choose Dark in the Mode drop-down menu.
How to make your Mac more darker
Depending on where you are, making your Mac screen even darker than usual can prove to be advantageous. Here’s how to change Dark Mode on Mac to even darker:
Click on the Apple logo in the left-hand corner of your screen.
Tap on System Settings > Displays.
Adjust the nozzle next to Brightness to make your screen even darker.
Or look for a key with a sun on it on your keyboard (it could be F1).
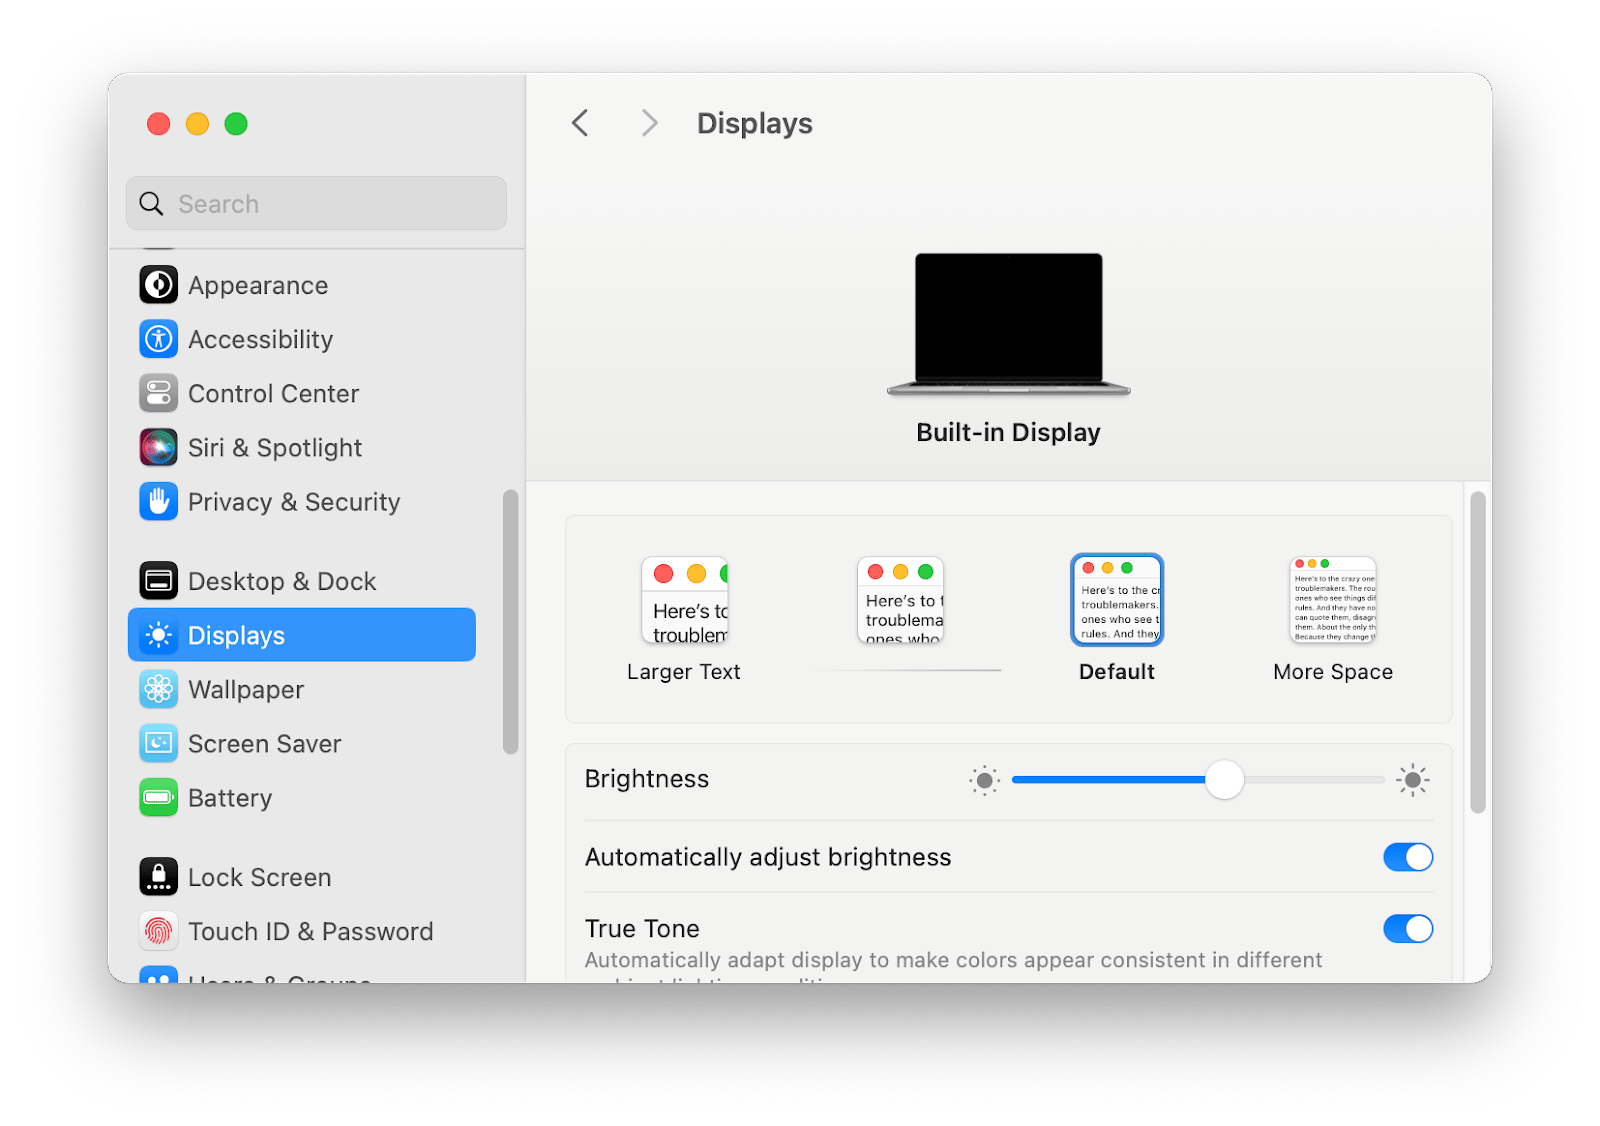
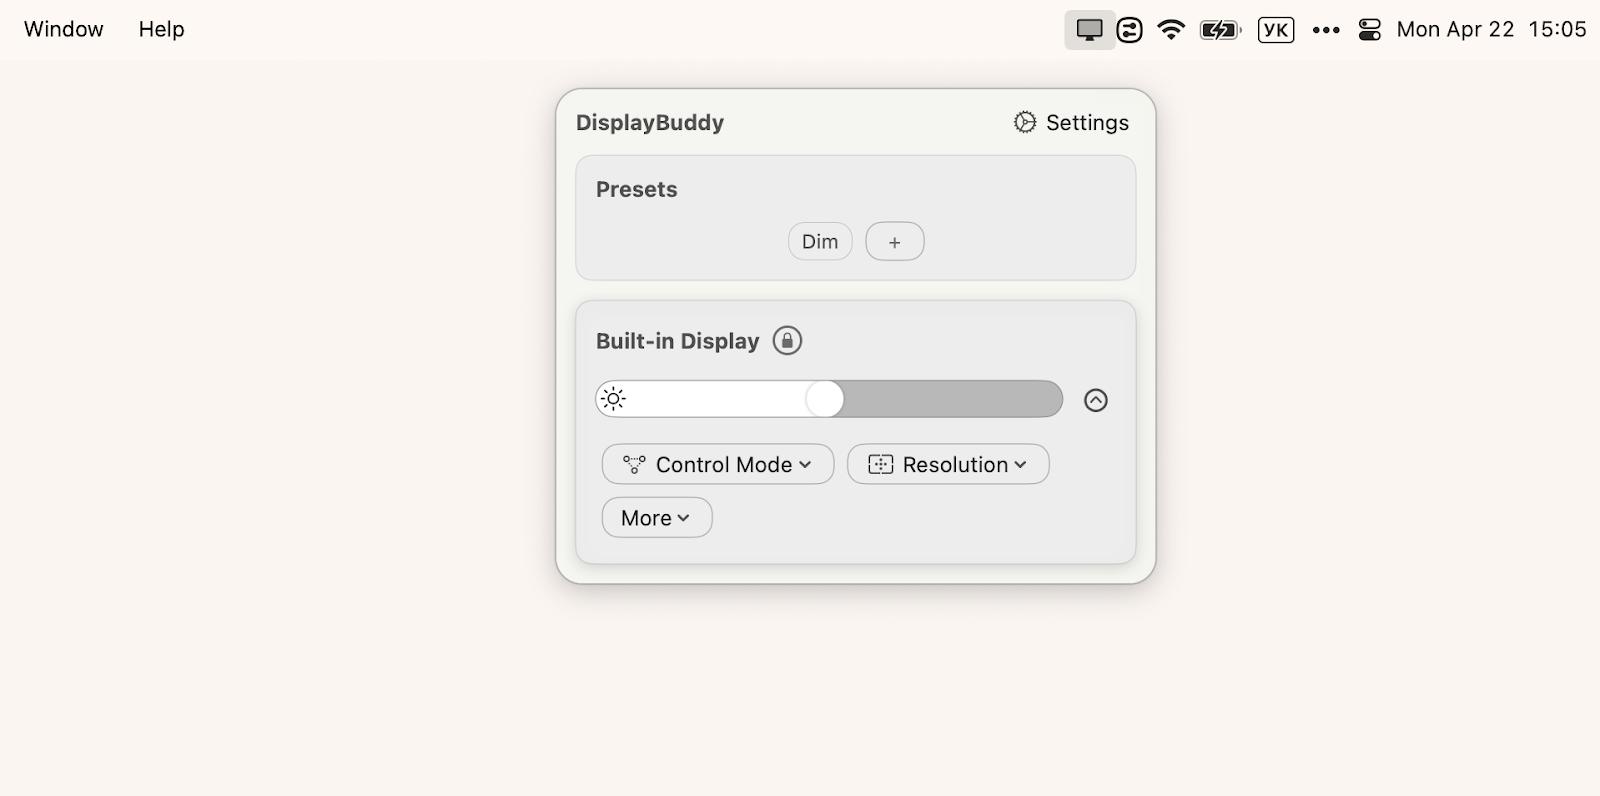
What if you use an external display? In this case, its settings will match the display settings on your Mac. If you need to change them, try DisplayBuddy. It will help you adjust the brightness, contrast, or volume on your other displays. Plus, you can create presets to set your display to the mode you want with a single click.
How to turn off Dark Mode on Mac
Understanding how to turn off Dark Mode on a MacBook is just as important as comprehending how to switch it on.
The good news is this: both tasks are fairly simple. In a nutshell, you’ll be following the reverse steps of enabling Dark Mode on your computer. Here’s what you can expect:
- Click on the Apple icon in your screen’s upper left-hand corner.
- Go over to System Settings and click Appearance.
- Click on either Light or Auto. Either one will promptly turn off Dark Mode on your Mac.
OneSwitch can also be used for the same purpose. With the simple press of a button, this app lets you easily turn off Dark Mode on macOS.
How to switch between light and Dark Modes
You can switch between Dark and Light mode manually or automatically.
- Go to the Control Center.
- Click on Display.
- See Light, Dark, and Auto modes. Click on either one to either activate or turn off Dark Mode on your computer.
To set up automatic switching, select Auto mode. Your Mac will switch to Dark Mode according to your Night Shift schedule (System Settings > Displays > Night Shift).
If you need to turn on Dark Mode separately from Night Shift, use the One Switch app. There, you can set each mode transition schedule independently of other settings.
But what if you want to do the opposite - make the screen even brighter than your Mac allows? Use Vivid. It unlocks the brightness built into your M1 MacBook Pro and Pro Display XDR, enabling you to make your display up to twice as bright.
Get started with Dark Mode on macOS today
At a time when more and more of us are relying on our laptops to work, communicate, and thrive, knowing how to set your Mac to Dark Mode can be an asset.
While your laptop comes with built-in features to streamline these processes, apps like DisplayBuddy, OneSwitch, and Vivid can help you customize your Mac's display more precisely.
These tools are available on Setapp - a platform with dozens of apps for macOS and iOS available under a single subscription. Sign up for a 7-day trial period with Setapp.
FAQ
Why has my Mac gone into Dark Mode?
In the event that your MacBook is on Auto (instead of Light or Dark), the brightness level of your screen automatically adjusts, depending on your Night Shift settings. To avoid having your Mac enter into Dark Mode, you’ll want to manually switch it to Light, rather than Auto.
What is the shortcut for Dark Mode on Mac?
The shortcut for Dark Mode on Mac is fairly simple. Here’s how:
- Go to System Preferences.
- Click on Keyboard.
- Click on the Shortcuts tab.
- Click on Services and press the General button.
- Look for Toggle Dark Mode and select Add Shortcut.
This may not work for macOS Sonoma.
How do I turn off Dark Mode on Mac?
To turn off Dark Mode, go to System Settings > Appearance and select Light Mode.
e power or battery. If you don't like it going to sleep, change the settings. The second is that your Mac is low on power. Plug it back in.


