How to recover deleted files from an SD card on a Mac: 4 easy ways
When files disappear from a memory card, there are only two ways to recover them. The first is to restore them from a backup – if you've made one beforehand, of course. The second is to use a program to recover deleted, damaged, or lost files. In this article, we'll cover both ways to recover an SD card on a Mac, using built-in and third-party tools.
What happened | What caused it | How to fix it |
Don’t have old SD card files | Files were accidentally deleted or not backed up | Install Get Backup Pro to back up selected files and recover them to any computer. |
Can’t locate SD card files to recover on Mac | SD card files saved to iCloud | Go to Finder > iCloud Drive and find the file from there. Install CludMounter to mount popular cloud storage services. |
Can’t locate deleted SD card files with Terminal | SD card isn’t connected | Empty Trash > Connect SD card > Open Trash > Righ-click on the file > Put Back. |
SD card recovery tips on Mac
Let's start with a few tricks to help you recover lost files more efficiently.
First, stop using the SD card as soon as you realize you need to recover a certain file. The reason is that the recovery process is easier until new files replace the old ones.
Next, don't install any file recovery software on the card. Use a Mac you trust and a reliable app.
If your SD card contains personal information, you may want to disconnect from the internet (or at least not connect the card to your Mac while you're online).
Finally, make sure the location where you'll restore your files is secure and has enough free space.
Way 1: Recover deleted files from an SD card on a Mac with Time Machine
If you regularly back up your SD card using Time Machine, you'll probably be able to recover files from almost any date. The important thing is to know the date when the file was definitely on your card.
Here's how to recover Mac SD card using Time Machine.
- Connect the SD card and open the folder where the lost file was stored.
- Connect the disk your SD card was backed up to.
- Open Time Machine.
- Scroll to the date your file existed on the SD card.
- Select the file you need and click Restore.
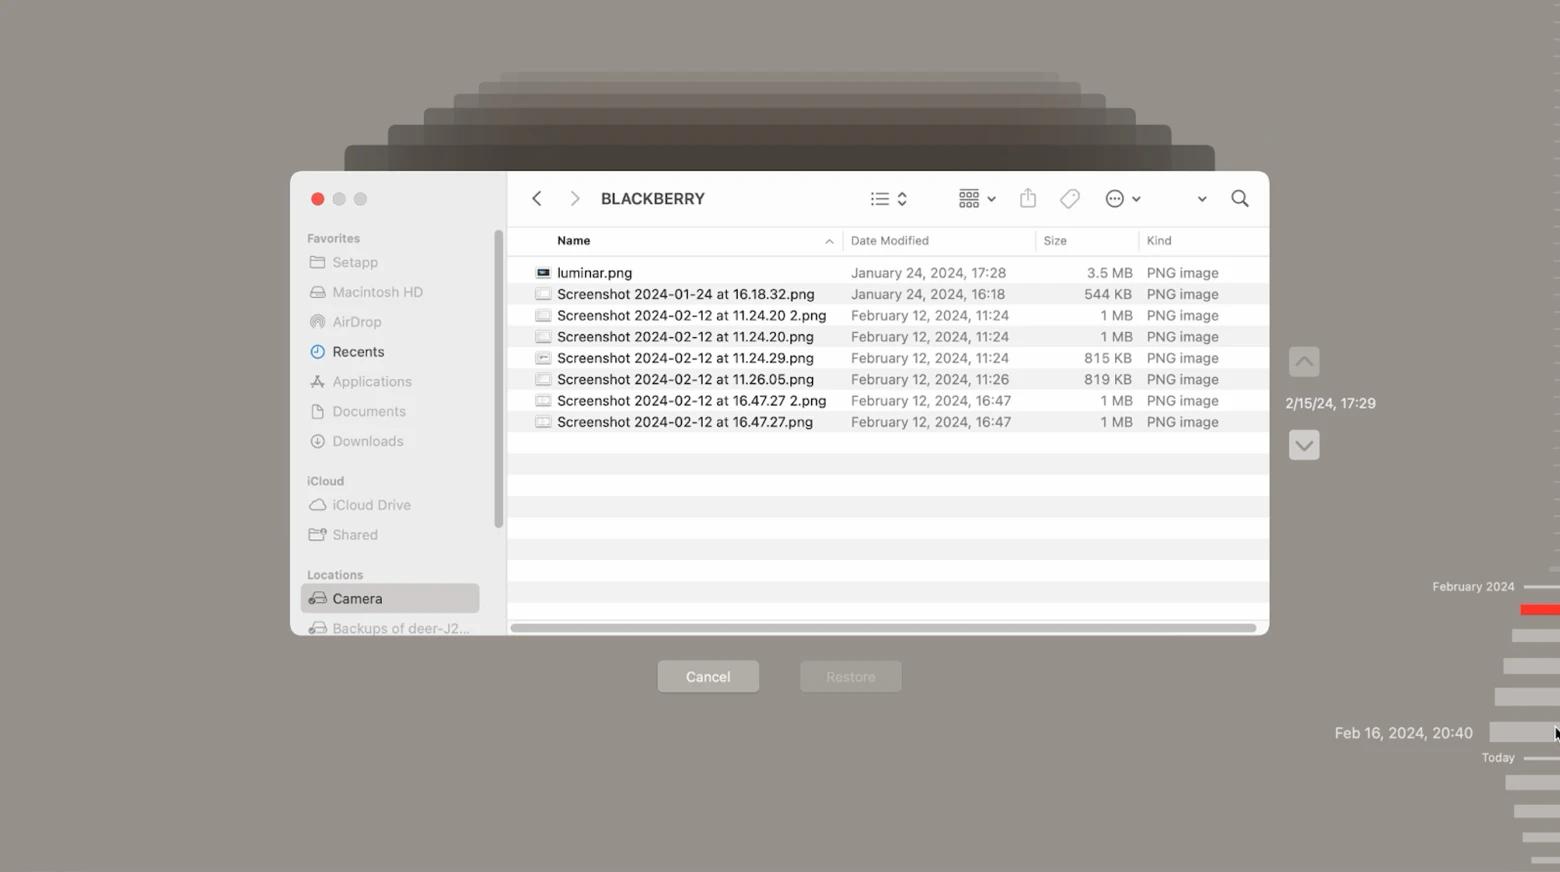
The restored file will appear in the same place it was before.
By default, Time Machine backs up your entire Mac. If you want to back up individual folders, you'll have to change the settings over and over again. Not that it's a big deal, but it does require constant attention.
To simplify these processes, try Get Backup Pro. It allows you to back up only selected items. Plus, compressed backups take up to 60% less space than the original files. And you can restore them to any computer even without installing Get Backup Pro.
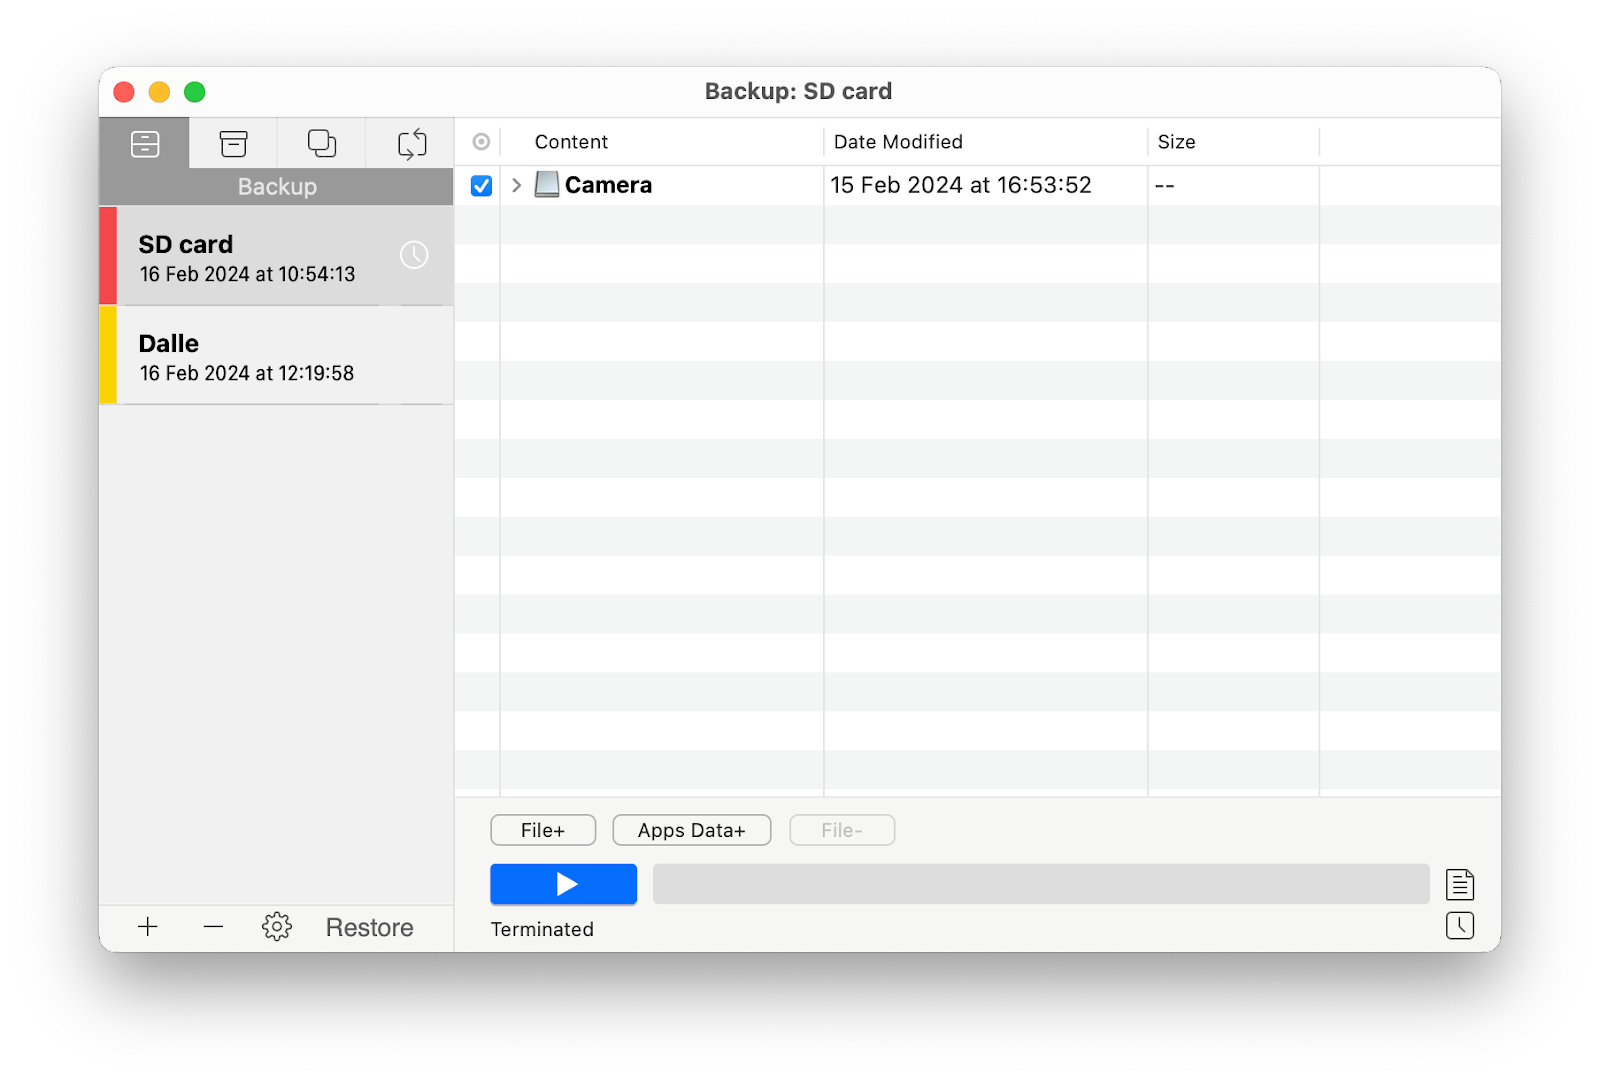
Here's how to create a backup with Get Backup Pro. The instructions may seem long, but in reality, all the steps take less than 30 seconds.
- Download and install Get Backup Pro.
- Select the Backup section from the top left menu.
- Click the + in the lower left corner and name a new project.
- Choose a destination for your backup (your Mac or an external drive), set a backup schedule, and click OK.
- Click File+ in the bottom center and add the items you want to back up.
- Click the start button at the bottom to begin the backup and enter your admin password.
SD card recovery on Mac with Get Backup Pro looks like this.
- Launch Get Backup Pro.
- Select the desired backup in the list and click Restore on the bottom left.
- Locate the file you need.
- Choose a location to save the file.
- Click Restore.
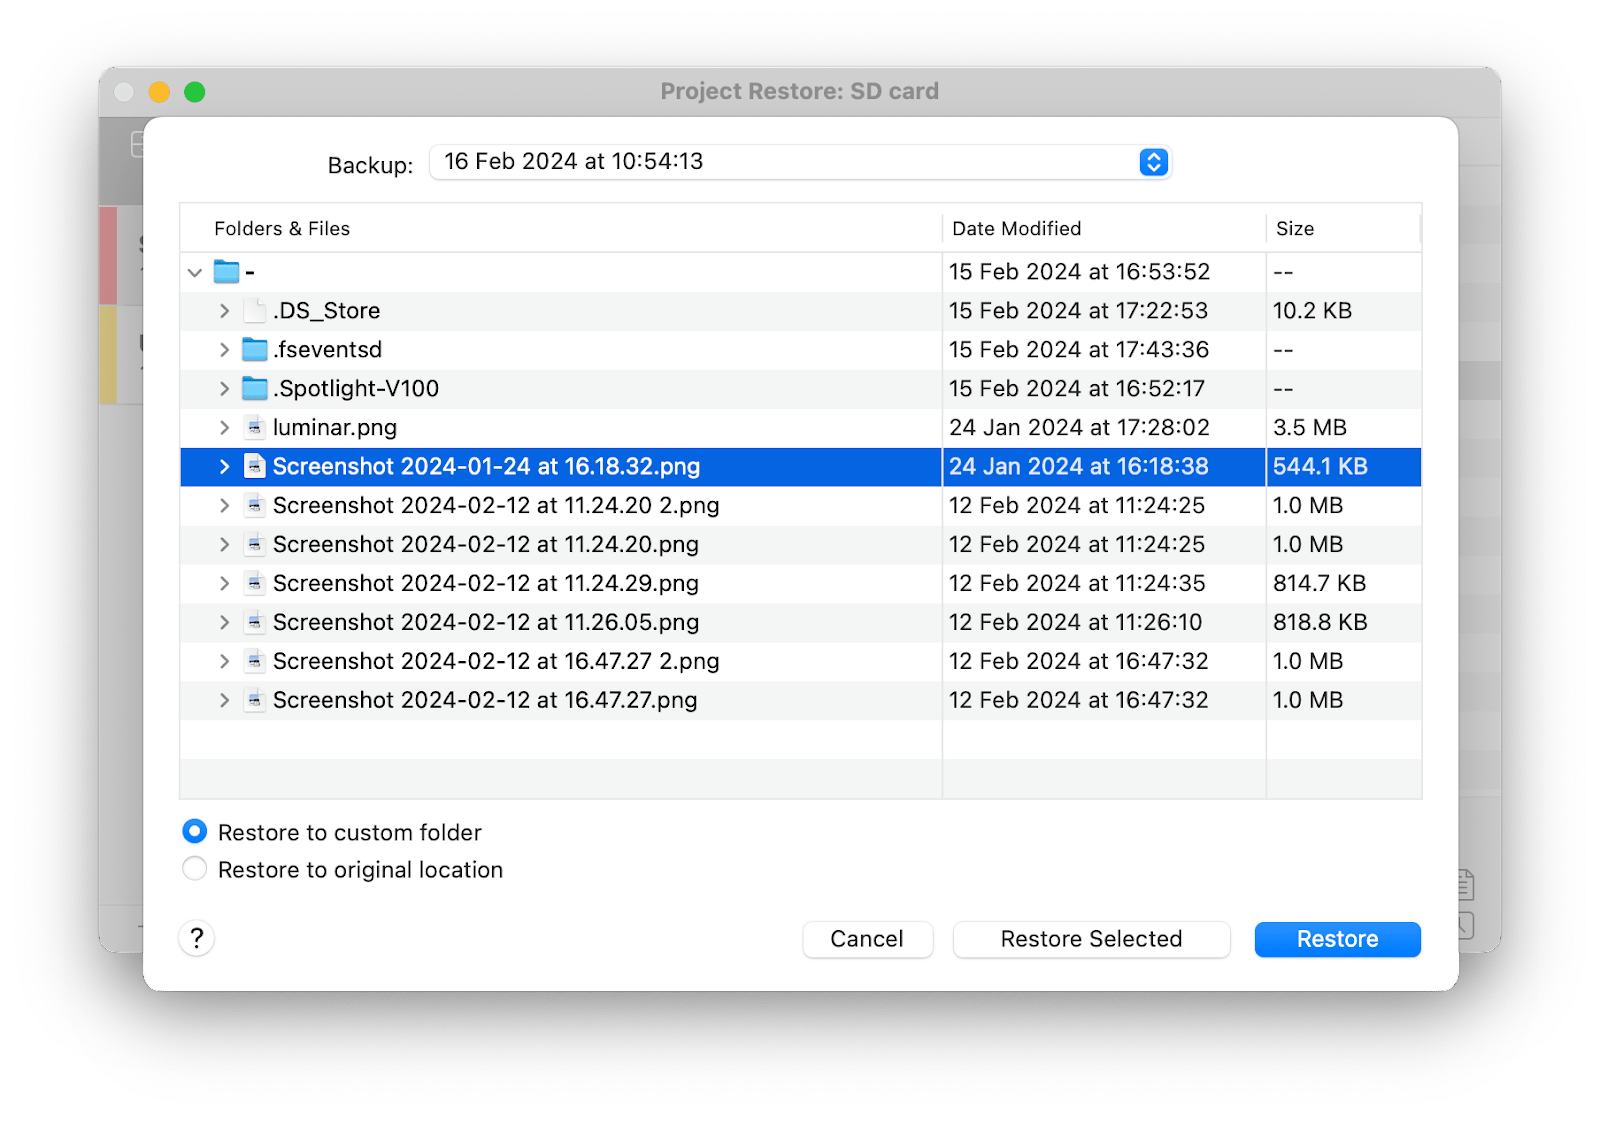
The final thing to note is that these backups save your files and space on your Mac or storage device. Isn't that the perfect combo?
Way 2: Recover files from SD card on Mac with iCloud backup
If you've previously saved files from your SD card to iCloud, restoring them is a few simple steps.
- Sign in to your Apple account at icloud.com.
- Go to iCloud Drive and find the file you need.
- Click the three dots to the right of it, then choose Download a Copy.
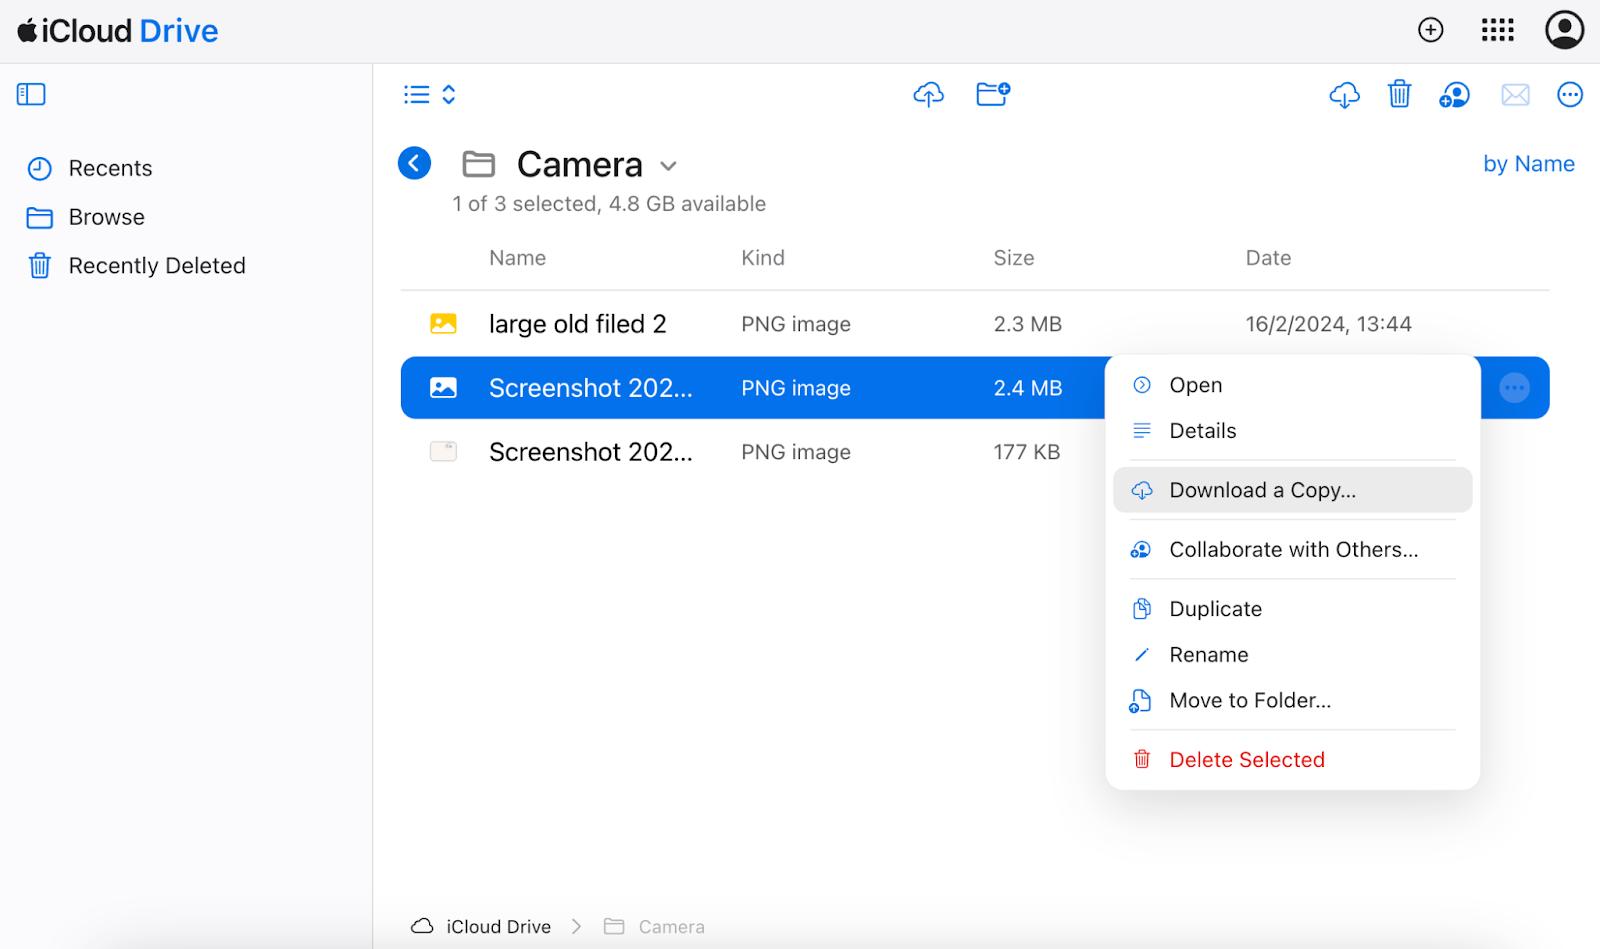
Or just go to Finder > iCloud Drive and find the file.
If you've never uploaded files from an SD card to a cloud storage before, you should know a few things. First, it's not exactly a backup; it's a full-fledged copy of the files from the SD card to the cloud. Second, a cloud storage in the browser may not warn you if the files you are trying to upload already exist in the current folder. So, you could upload the same photo multiple times, cluttering up your storage. But this problem doesn't exist if you use the Finder to move files to a cloud drive. Then your Mac will warn you about possible duplicates.
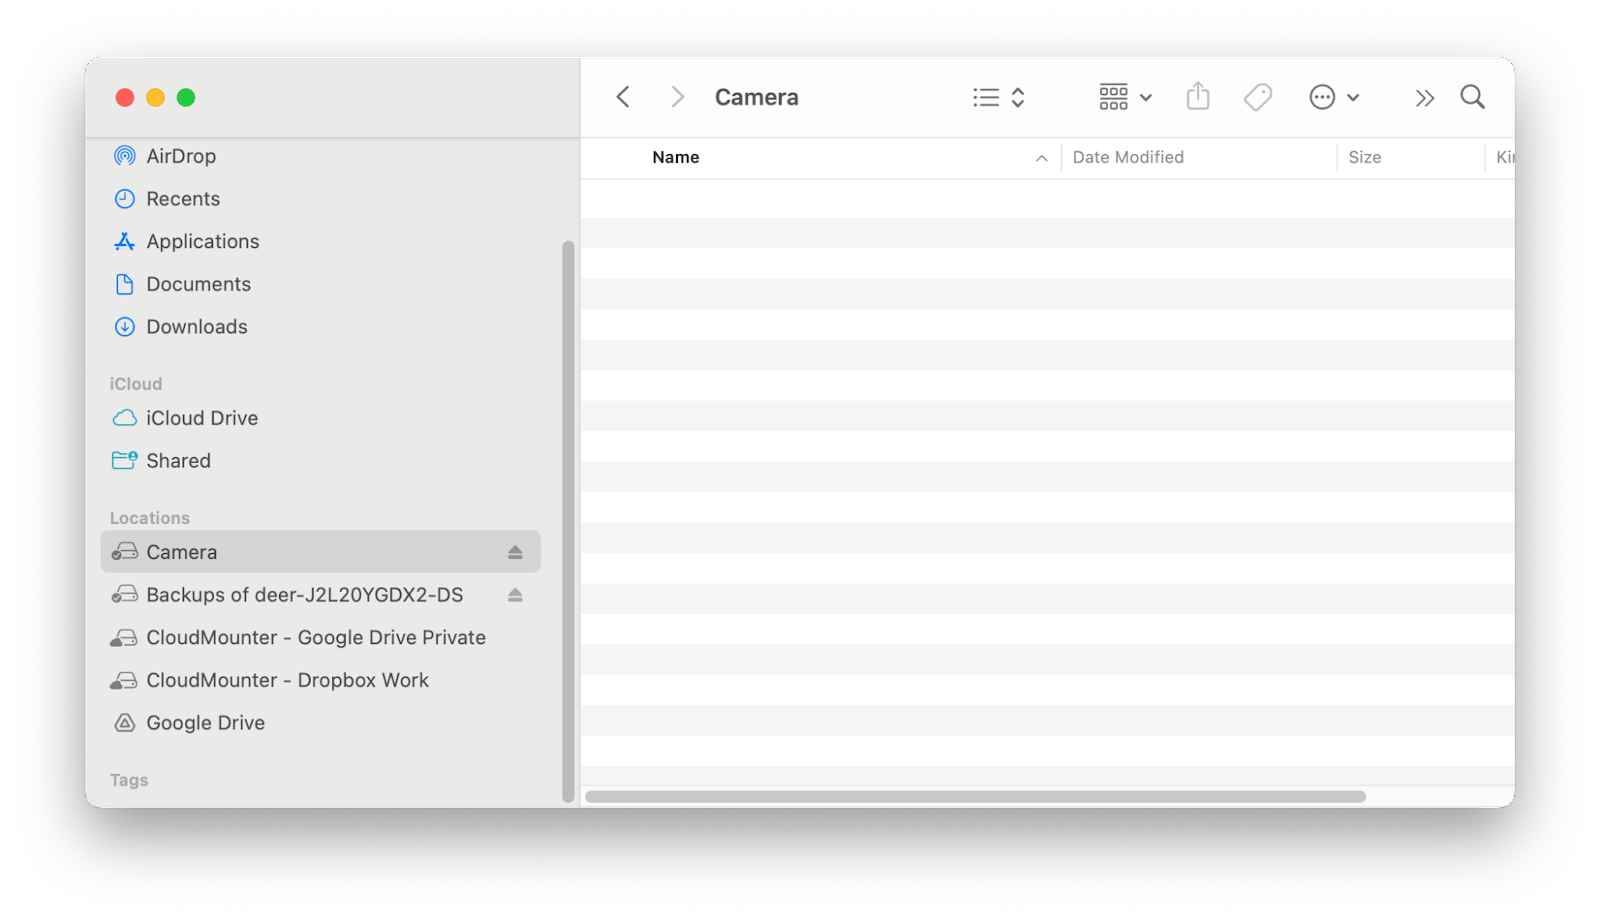
In fact, accessing cloud storage directly from your computer instead of a browser is handy. You can quickly move files not only between your Mac and the cloud but also between different clouds. If you find this option useful, try CloudMounter. It mounts cloud storage as if they were local drives on your computer. The app works with Dropbox, Google Drive, Microsoft OneDrive, and more. Here's how it will look in your Finder.
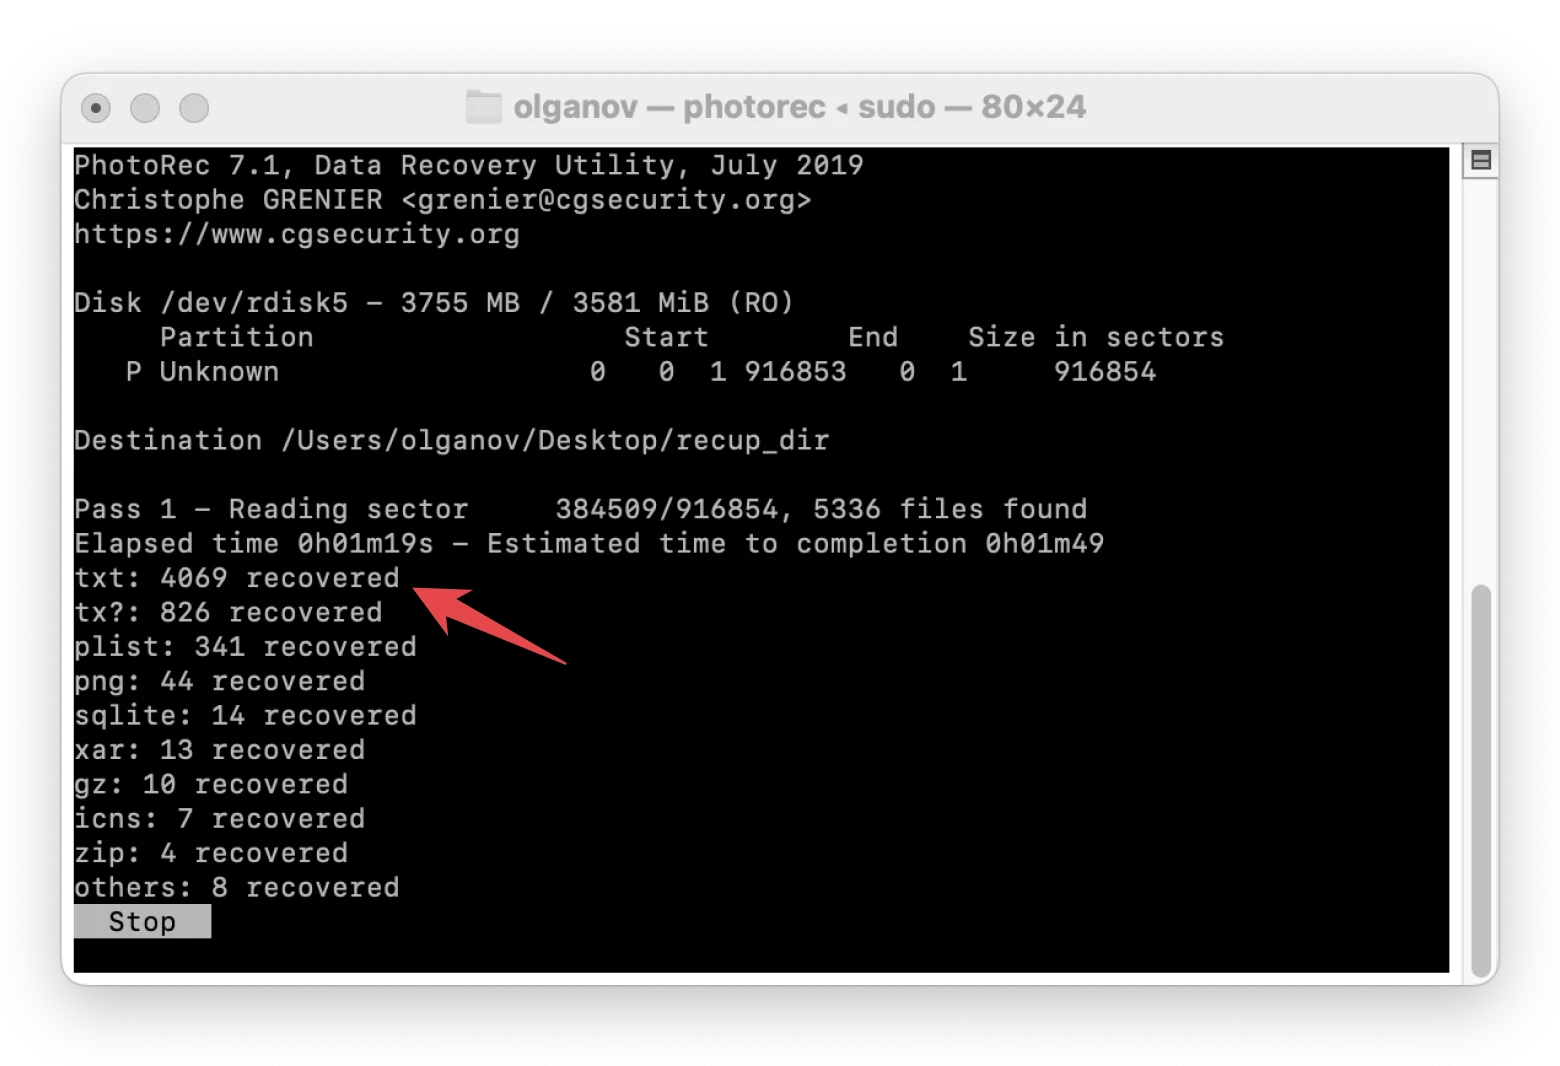
If you're looking for a free tool to recover lost files and you're comfortable with a terminal, try PhotoRec. You can download it here or install it via homebrew. We will describe the second option because, after direct download, the app may not open on your Mac for security reasons.
Here's your guide to SD card recovery on Mac using PhotoRec.
Connect the SD card to your Mac.
Launch Terminal and type the commands one by one. Type the admin password when necessary:
/bin/bash -c "$(curl -fsSL https://raw.githubusercontent.com/Homebrew/install/master/install.sh)" > Enter
brew install testdisk > Enter
sudo photorec > Enter
With arrows, select your SD card and the partition you want to recover files from and press Enter.
Select the file system type on the card where the lost file was stored and press Enter.
Specify the location where you want to save the recovered files and press C.
The program will start working, and folders with recovered files will appear on your Mac. Yes, with all possible files that PhotoRec can find in the specified location on your SD card. You may have to deal with dozens or hundreds of files, but there's a chance that the one you need will be recovered.
Way 4: Recover SD card data from the Trash on the Mac
Apps, Time Machine, Terminal... Wait, have you checked your Trash? Deleted files from an SD card go into the Trash and are only visible when the card is connected to your Mac. If you emptied the Trash when the card was disconnected, there's a chance your files were saved.
So, let's find your lost files. For convenience, it's best to empty the Trash first. Then (and only then!) connect the SD card, open the Trash on your Mac, find the file, right-click it, and choose Put Back. The file will be moved back to your SD card.
What are the symptoms of memory card corruption?
Sometimes, you may need to fix the media before recovering lost files. What are the signs that something is wrong with your SD card? Here are the most common symptoms: inability to detect the SD card, read/write problems, connection problems, slow performance, presence of unknown files, or, of course, the absence of the necessary ones.
You can read about ways to fix these errors here and then proceed to recover files using one of our suggested methods.
Recover deleted photos from SD card on Mac with zero problems
So, if you're in the habit of backing up your SD card, recovering files shouldn't be a problem. You can use Time Machine, iCloud, or another source, depending on where you backed up your card.
Note: Some of the apps I've mentioned in this article are available on Setapp, a platform with dozens of Mac apps. They are all available for 7 days with no restrictions. Subscribe and try it now.
FAQs
How can I recover deleted files from a microSD card on a Mac?
If you've created a backup (via Time Machine, iCloud, etc.), use it. If you don't have one, use Disk Drill to recover your files. It can recover files regardless of the cause of the loss: data corruption, disk utility errors, formatting, accidental deletion, etc.
Is there a way to recover trashed items on a Mac?
Yes, if you haven't deleted the file from the Trash. Connect the SD card where your file was stored. Then, open the Trash folder, locate the item you want to recover, right-click it, and select Put Back. This action restores the item to its original location.
How to recover photos from a corrupted SD card on a Mac?
The Mac does not have built-in tools to recover files from a damaged SD card. To recover photos from a damaged SD card, use Disk Drill or PhotoRec. Disk Drill allows you to preview files before recovering them. PhotoRec recovers everything it can find in the location you need in one go.
Why is my USB controller not working on Mac?
There are several reasons why a USB controller might not work with a Mac, including hardware problems with the USB port itself, compatibility issues between the USB device and your Mac, outdated or corrupt drivers, and conflicts with the operating system or other software. To troubleshoot, you can try connecting to different USB ports, checking for system updates, resetting SMC and NVRAM settings, and ensuring the device is compatible with your version of Mac.


