How To Secure WiFi Network From Any Threats
It used to be that attacks on home WiFi networks were rare — office WiFis presented a much better reward for the effort put in. But, now, when work-from-home policies are on the rise across so many companies and industries, hacker attacks on home-based networks are getting more and more widespread, since there’s a lot more valuable and confidential information to capture while WiFi home security often leaves much to be desired.
So if you own a business with remote employees or run your company from home, or simply want to make sure your home network security is as good as it can be, you need to take a few steps to secure networks you might be using.
What Are WiFi Security Threats At Home?
You might’ve heard stories of hackers snooping on people in public spaces, where common WiFi is freely accessible without any password. In that case, hackers are able to intercept a lot of your data and not only read your emails but also see your credit card information and login credentials.
There’s a widespread notion that your wireless security at home is somehow different and better protected. But it’s really not. Unless you’ve taken some precise steps to improve your WiFi protection strategy, your WiFi router guard is just as much of an open invitation for intruders as your local coffee shop.
Home wireless network security is an issue because most people never take the time to change the default settings, come up with complex passwords, check for encryption, filter random devices, and use a virtual private network (VPN). Good news is it’s not that difficult to set up wireless networks correctly. Here’s a quick guide to show you how.
Reset your router to factory settings
Since your home router is what connects your devices to the internet, it makes sense to start your wireless security inspection there. A good first step is to wipe out any custom preferences from your router to get it back to factory settings. It could be that your router still carries some outdated WiFi security types, keeps some random network ports accessible, and uses default login credentials. This is especially important if your router was bought from someone else — you don’t want to rely on someone else’s settings for your security.
While the exact procedure for resetting routers might differ (refer to your router manual for specifics), the general principle is to hold down the reset button (might be different from the on/off button) for around 30 seconds and then wait for 30 seconds more before powering it back on.
Create a unique username and password
By default, nine out of 10 routers ship with the same “admin” username, which is what hackers will easily guess when trying to access your WiFi router guard. Don’t make their work easy — changing your default username is not hard at all:
Look at the sticker on your router. It’ll usually list the URL you need to visit for settings, your username, and password.
Log in to your account and go to settings to change the default username. Make sure to write it down somewhere safe (e.g. your password manager) and cross it out from the sticker on the router to remember the change.
The next step in getting to a true WiFi Protect Access network (WPA network) is to come up with a strong WPA password. While it might be tempting to use a password you can remember and easily share with guests, you can be sure it’d be easy for potential hackers to crack too. Instead, you should use a random password generator (most password managers have that option built in) to come up with something that’s long and complex, making use of letters, digits, and special characters alike. Then you can be certain that no password-hacking tool will be able to get into your system.
To change your password, log in to your WiFi router settings and look for the appropriate option.
Enable a secure WiFi network for guests
If you have lots of people sharing the same WiFi at home or have lots of guests coming over, or even if you just handle sensitive work files from your home WiFi, it makes sense to create a separate guest WiFi network to not stress about “who is on my network” all the time. After all, you never know, and some of your friends’ phones could be affected by viruses or other malware that might make their way into your system. A guest WiFi network takes care of all that.
Luckily, you don’t need to buy an extra WPA network device anymore. Your router should be able to handle two or more networks at the same time. To create a guest network:
Visit your router settings
In the Wireless tab, find the option for guest or virtual access points
Enable a new channel and give it a name
Make sure to create a secure WPA password
Use the latest WPA network encryption
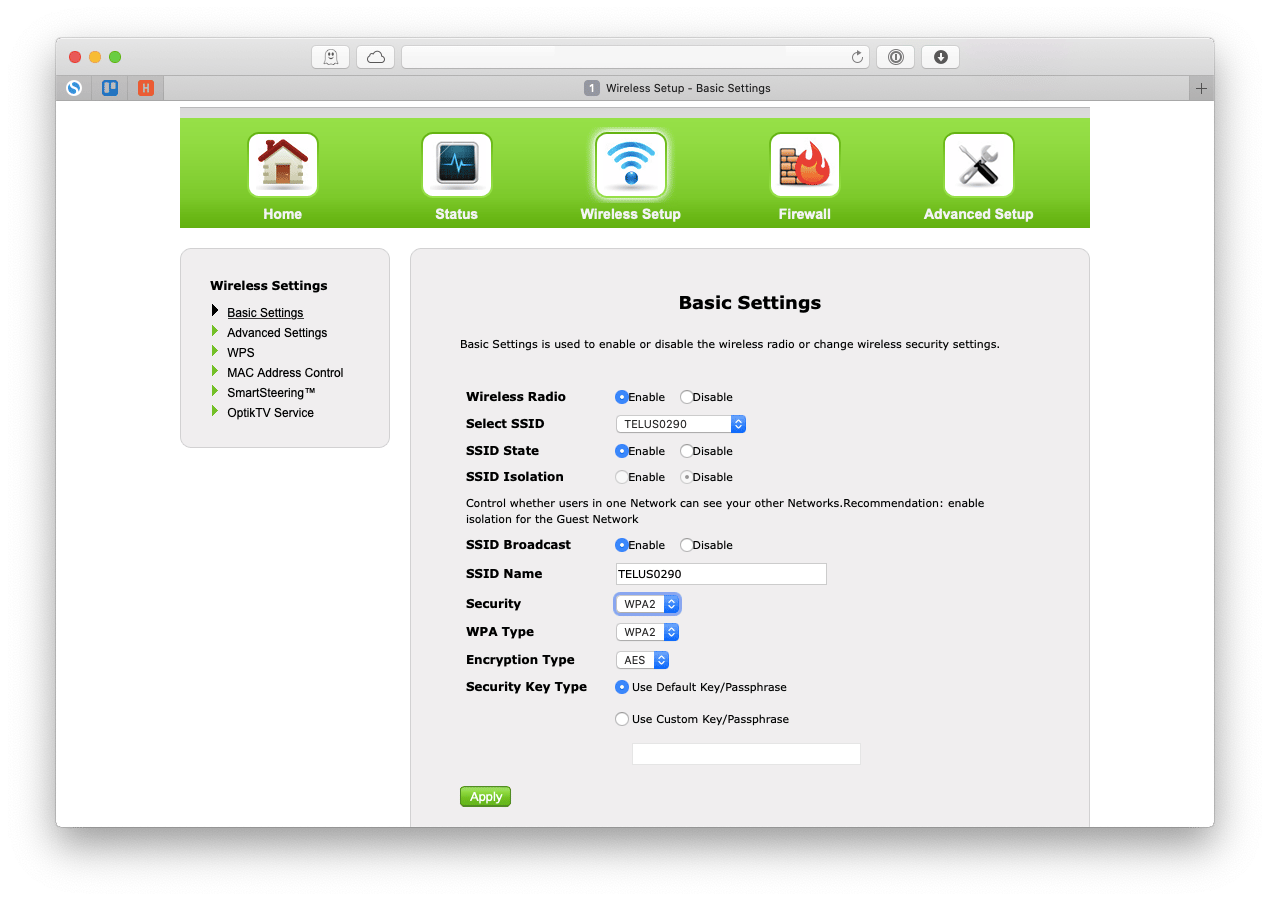
There are a few WiFi security types you can generally use for your home WiFi, and you should use the most up-to-date version supported. If your router only works with Wired Equivalent Privacy (WEP) protection, you might want to buy a new one, since it means it’s probably outdated in other ways as well. WPA is ok; WPA2 is likely the latest version most routers today can use, and it’s good; WPA3 is the latest version currently available, and not all routers can work with it, but surely make the switch if possible.
You can switch the WiFi encryption in your router preferences, on the same page you used to change your password.
Hide your WiFi network
It’s considered to be normal for all the secure networks in the area to be visible to anyone. After all, they are password-protected. But why tempt hackers and make their lives easier?
You could simply hide your Service Set Identified (SSID) from the list of WPA networks and only give it out to people directly. This will improve your security, since anyone who wants to connect to your WiFi will need to know both your password and SSID.
Hiding your SSID is pretty much a one-click task: simply tick the appropriate checkbox in your router settings.
Filter unknown Mac addresses
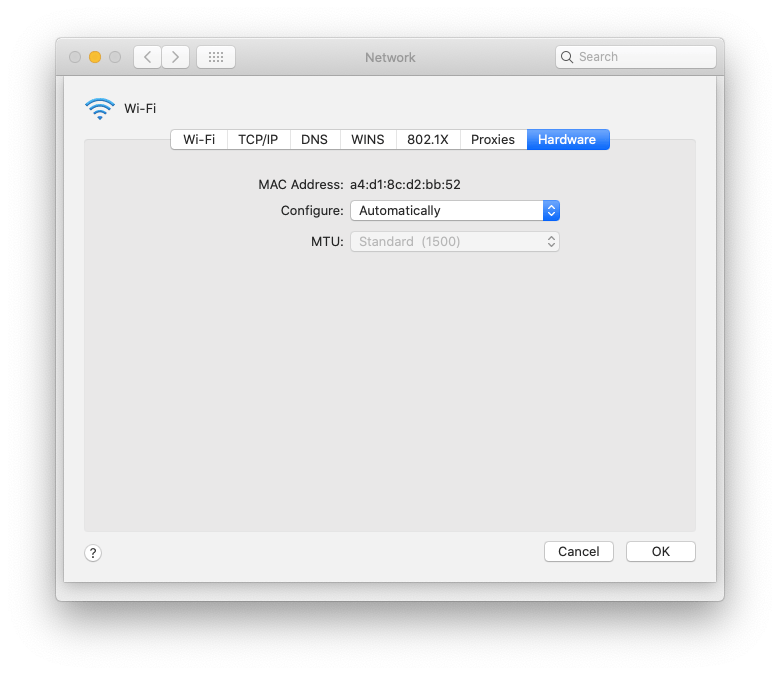
Another tip for top home network security is to specifically allow WiFi access only to the devices you own. Since every device has a unique MAC address, you can list all the laptops, phones, and anything else you use in your router settings, and all other devices will be turned away.
To find your MAC address on Mac:
Open System Preferences ➙ Network
Click Advanced
Navigate to the Hardware tab
Copy your MAC address
Limit wireless devices by IP
In case you know you’re using the same number of devices to access your secure WiFi every day, you can set the amount of allowed devices on the network to that specific number by limiting the IP addresses being issued. This can be done by changing the DHCP pool number in your router settings.
Note: It’s important to understand that if you limit the number of IPs given to the number of devices currently connected, your friends wouldn’t be able to join your WPA network unless you change the setting once again.
Use a virtual private network (VPN)
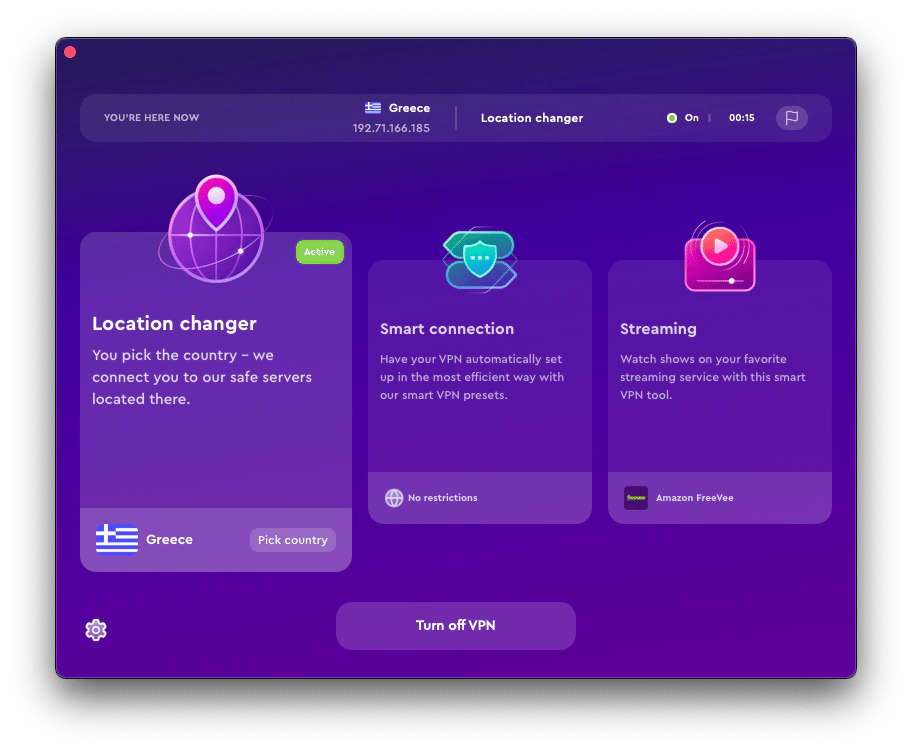
As a rule of thumb, using a VPN when you’re on public WiFi is a must — it encrypts your connection and prevents anyone from seeing the data you’re sending to the router. But using a VPN at home could be valuable too, since you get anonymous and secure web browsing without even thinking about it.
ClearVPN is the most flexible VPN client for your home WiFi encryption. It works smoothly and connects you to exactly the servers you need. You can connect through a specific country, find the country with the fewest web restrictions, choose the fastest servers, or get the best protection. There is even an option to access geo-restricted streaming services. In other words, ClearVPN is not only about security but also about convenience. We highly recommend that you give it a try.
Improve your WiFi connection
At last, when all possible changes for getting your wireless network security up to the standard are in place, you can think about how you can improve the quality of the WiFi connection itself. After all, there’s always room for more internet speed.
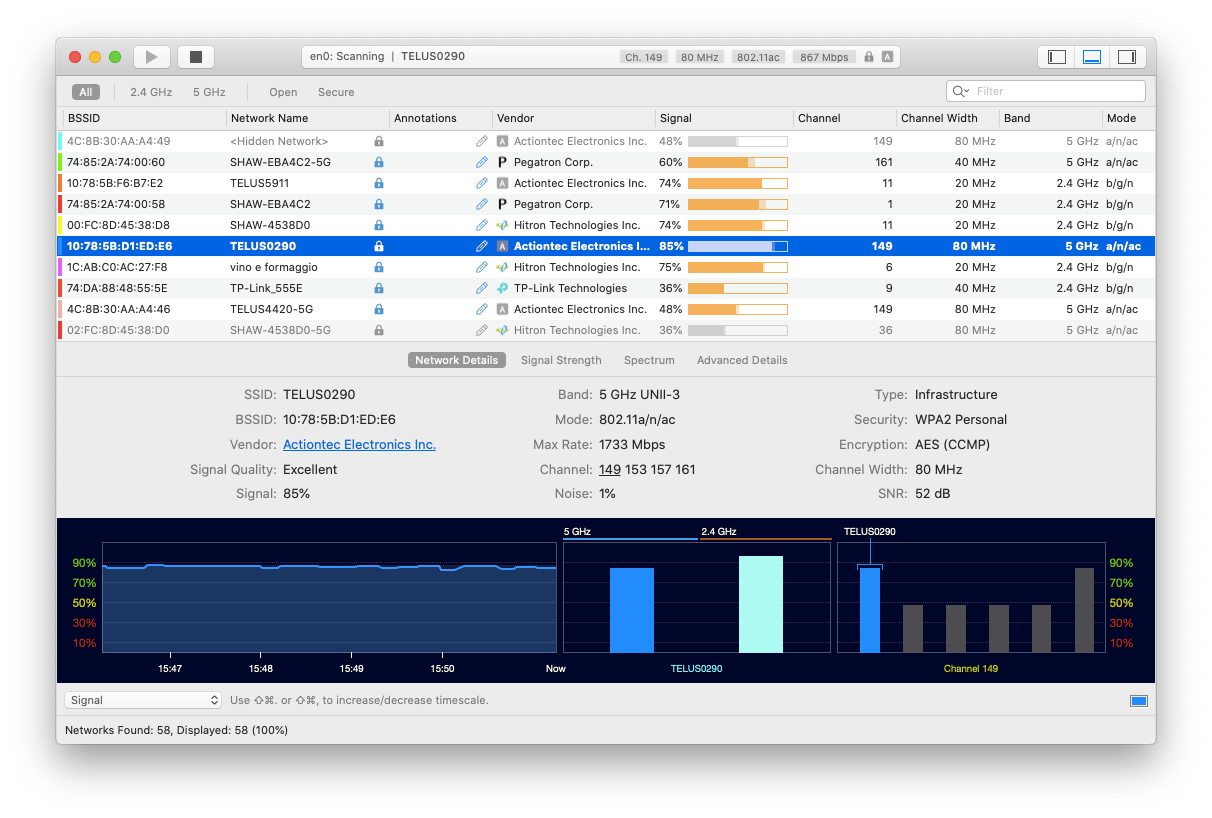
WiFi Explorer should be your go-to app for monitoring the quality of your network connection in real-time. This analyzer instantly shows the strength of your WiFi signal, the band you’re using, the WiFi security types available, and much more. You can also customize the view to only show what’s important for you and get troubleshooting tips tailored to your specific situation.
NetSpot is another essential WiFi analyzer app that makes fixing faulty WiFi home security networks a breeze. While NetSpot has a powerful monitoring tool to scan and give specifics about any nearby network, it's true strengths are in surveying the penetration of your own WiFi network through your space. You can upload the actual plan of your home (or draw one), then specify the scale, and walk around, recording the WiFi signal strength to identify any gaps and adjust the positioning of your router accordingly.
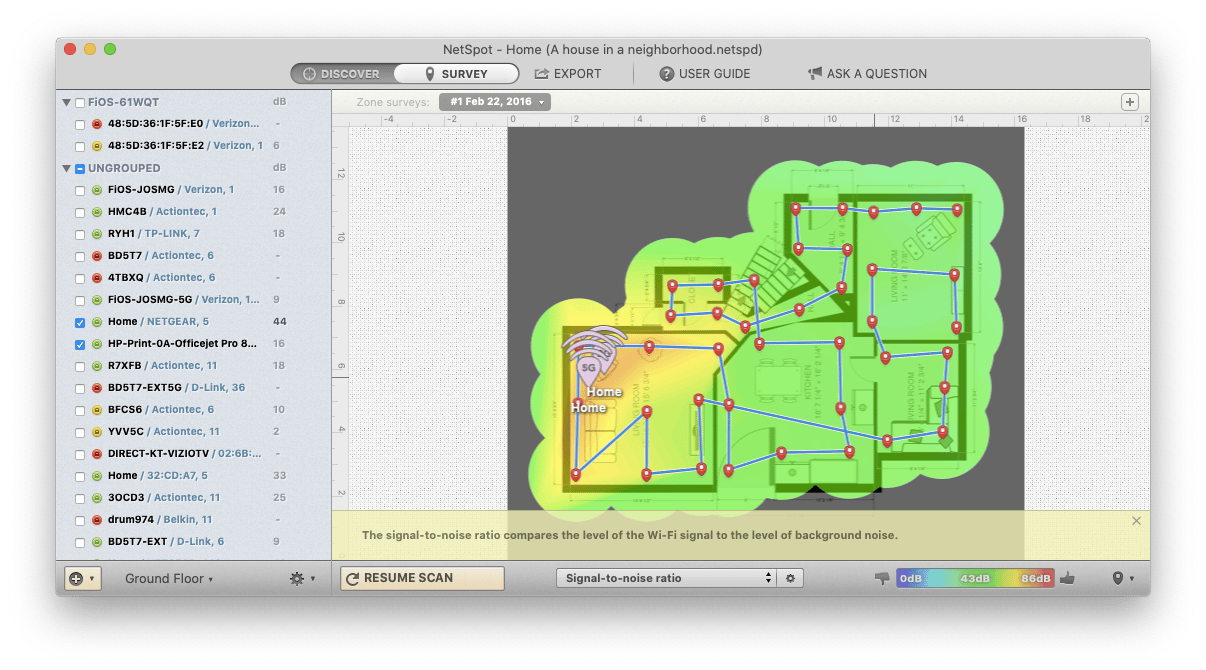
As you can see, learning how to secure WiFi and make it faster is not difficult. In fact, the whole process described above might only take you around an hour or so to go through. Especially if you enable ClearVPN right away, scan your network with WiFi Explorer, and survey your WiFi reception with NetSpot.
Best of all, ClearVPN, WiFi Explorer, and NetSpot are available to you absolutely free via Setapp, a platform with more than 200 top-rated Mac apps to make nearly any task you need to do easy. Now that you have a military-grade internet connection, you can try them all at no cost and see for yourself!


