How to set up iMessages on your Mac: Step-by-step guide
If you can set up messaging on Mac, conversations sync simultaneously as you communicate through your Apple device, whether an iPhone, iPad, or Mac. I loved sending iMessages on my iPhone, but using it on my Mac was a bit of a hassle. After I send it, I'd often just get caught up in doom scrolling, and I couldn't shake off the worry about whether my messages were actually secure.
So, I decided to figure things out and went through the settings on my Mac to set up iMessage. It was super easy, and I found out that my messages were all protected with solid encryption.
To save others from the same headaches, I put together a quick guide on how to set up iMessage on a Mac, plus some awesome apps that help keep your messages synced across all your devices. Let's check it out!
How to set up iMessage on Mac
Setting up iMessage on your Mac is incredibly easy. Just a few simple steps are required as long as you have an Apple ID.
Here's how to install iMessage on Mac:
- Go to Finder > Application > Messages.
- Sign in to your account with your email or phone number.
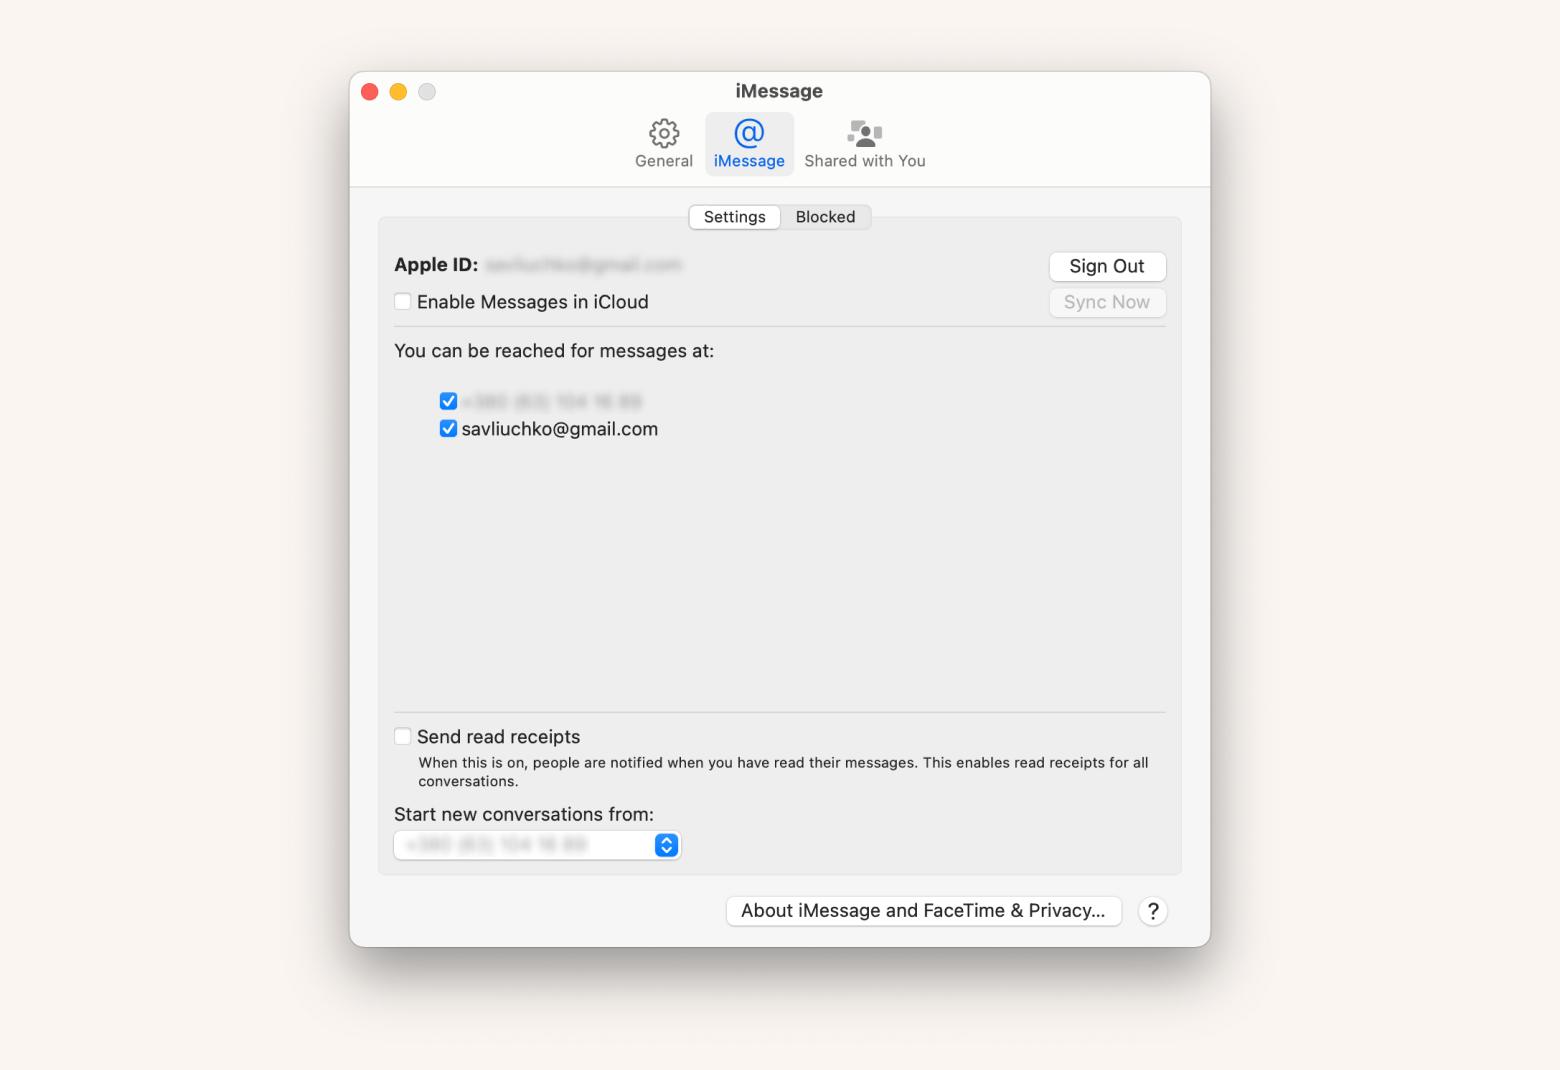
- Then, click Messages in the menu bar > Settings > iMessage.
- Select Enable Messages in iCloud.
- Select the preferred method of contact.

Sit back and relax as your iPhone and Mac sync their messages. You will receive a notification on your iPhone notifying you of the process. The sync shouldn't take longer than a few minutes, and you’ll be ready to start messaging immediately.
How to set up Messages in iCloud in macOS
When your Mac or other Apple device is logged into iCloud, you can access this information without the hassle of a backup or restore process. Knowing how to sync iMessage to Mac in iCloud also means instantly receiving and sending messages, and whichever message or contact you wish to delete also syncs between devices.
Here’s how to enable iMessage on Mac in iCloud:
- Make sure iCloud is enabled with the same Apple ID and active on your iPhone and Mac.
- On your Mac, go to Finder > Application > Messages.
- Click Messages in the menu bar > Settings > iMessage.
- Select Enable Messages in iCloud.
On your iPhone:
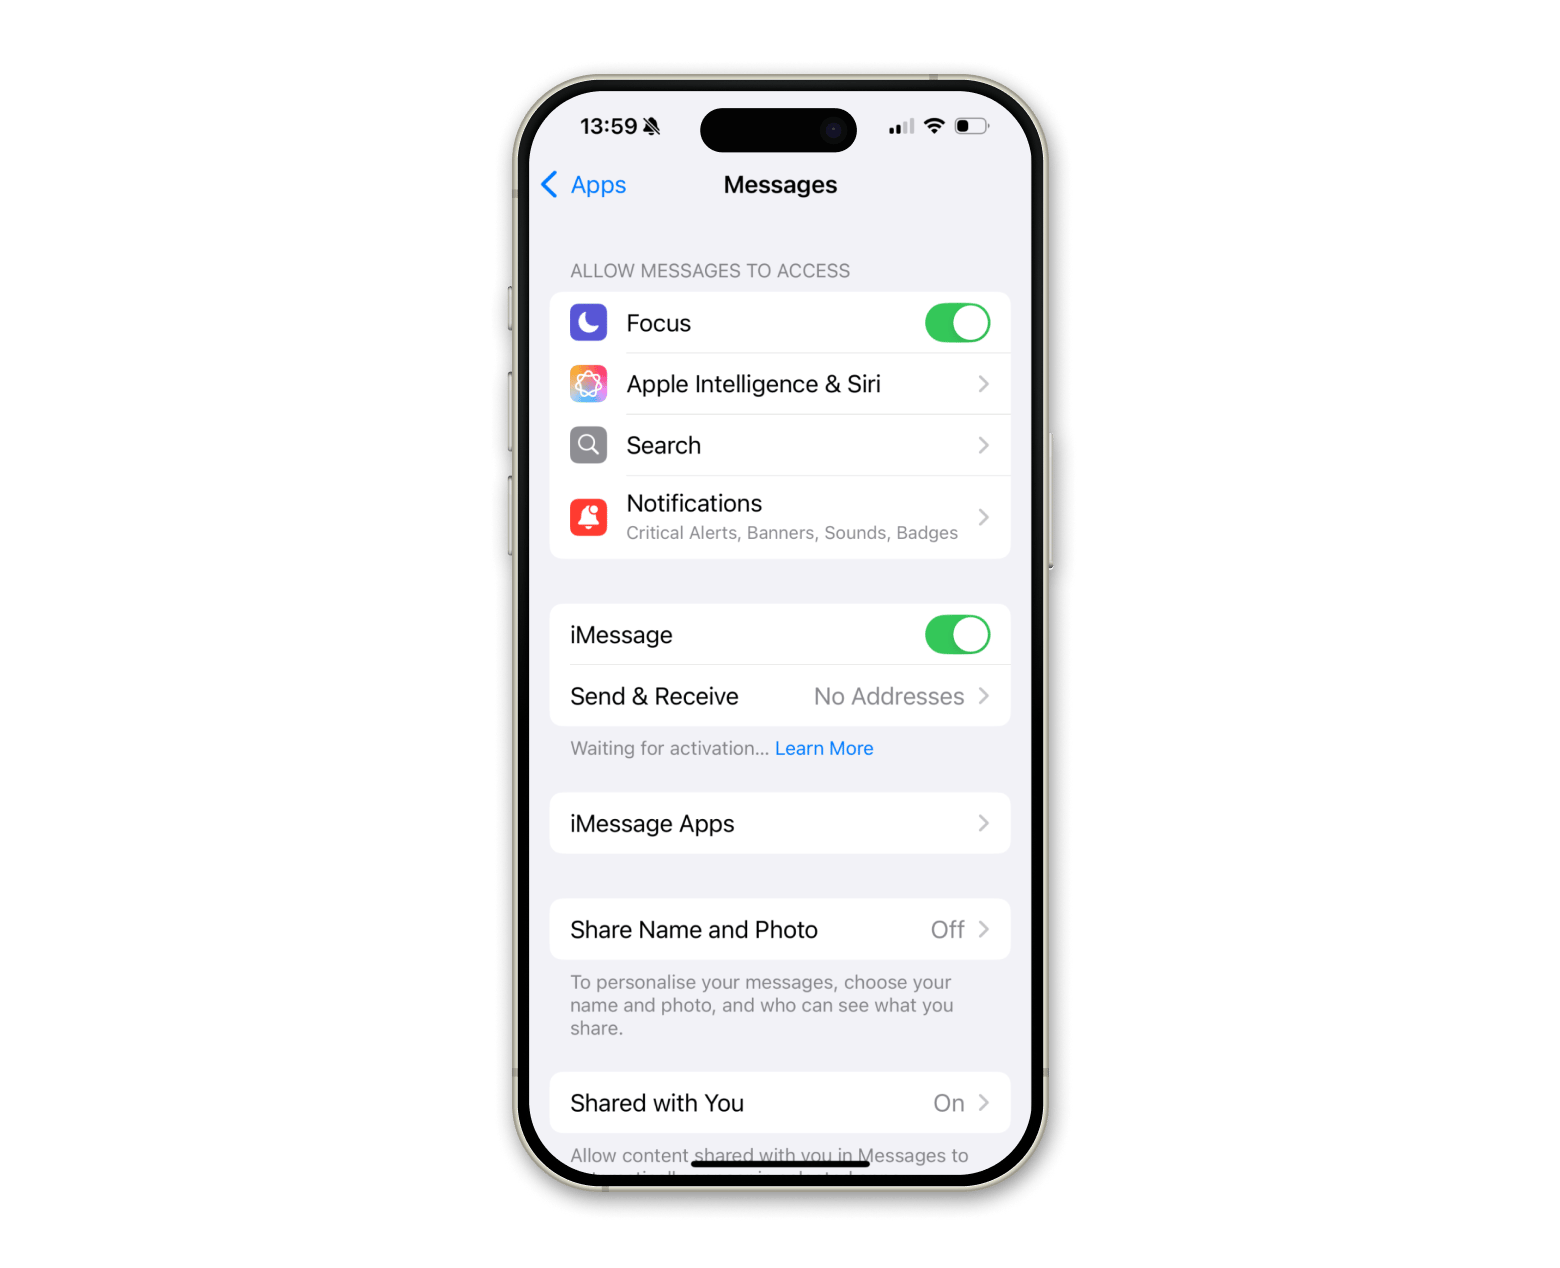
- Go to Settings > Messages.
- Turn on iMessage.

This is how to get messages on Mac and iPhone simultaneously.
Troubleshooting iMessages on Mac
Do you have issues with iMessage on Mac? Don’t worry — it happens, and multiple ways exist to fix it.
Often, poor internet connection is the main culprit. If your iCloud isn’t functioning properly, syncing messages between devices can be unreliable or fail entirely.
Here are some solutions for iMessage common issues:
- Sign out of iMessage and sign back in via Messages > Settings > iMessage.
- Ensure your internet connection is stable.
- Verify that the same Apple ID is used across all devices.
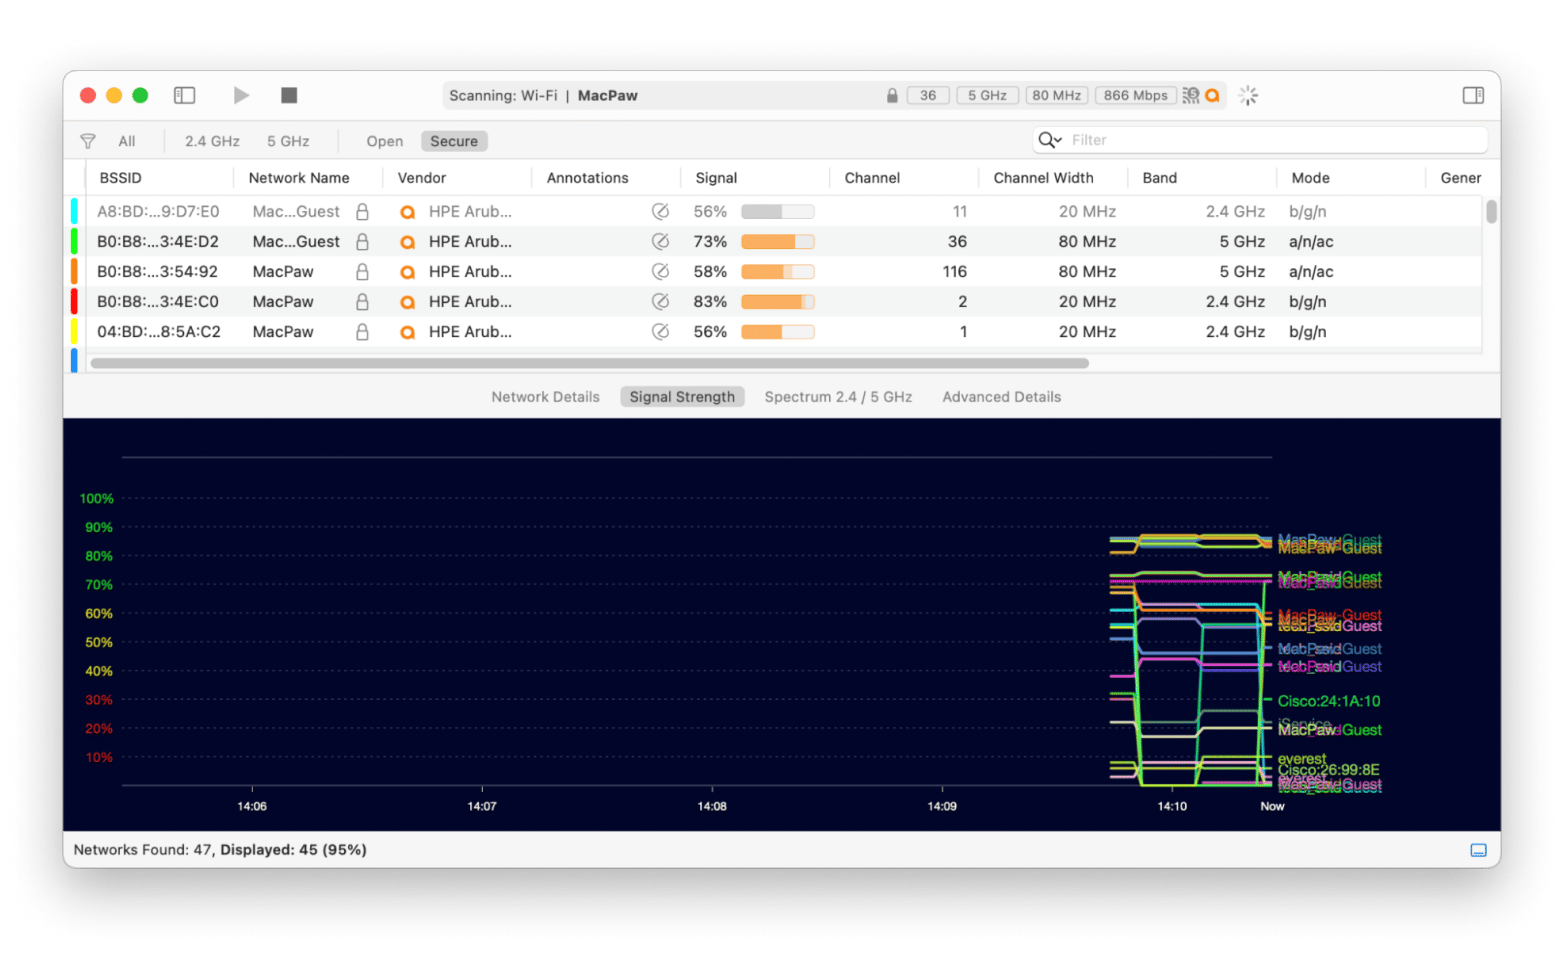
Unstable networks are the most common reason for the need for an app like WiFi Explorer.It helps monitor your network connection and detect issues that you can troubleshoot immediately. By having this data firsthand, you can see if it’s your internet connection that’s causing the issues or something else.

How to connect iMessage to Mac: Resolved
See, it’s easy to set up messaging on Mac, and now, staying on top of conversations is simple. Through iCloud sync, you can pick up chats on your Mac exactly where you left off on your iPhone or iPad.
You can level up your WhatsApp experience with ChatMate for WhatsApp, filled with features to improve appearance and functionality. To stay always connected, use WiFi Explorer to monitor your network and troubleshoot quickly.
Get started with these fantastic apps and way more with a 7-day trial Setapp subscription. On Setapp, you can get apps for any task to boost your Mac performance to the max. Try today!
FAQs
Why isn't my Mac getting my iMessages?
If you have set up messaging on your Mac but are not receiving messages, restart your Mac and check that each device is running the latest software.
If the issue isn't resolved, it may be due to a poor network connection. Try restarting your WiFi or using an app like WiFi Explorer to check your network stability.
How do I sync my iMessages to my Mac?
To sync your iMessages from your iPhone or iPad to your Mac, make sure iCloud sync is enabled for all your devices. Double-check that you're logged in with the same Apple ID on each device and that you've turned on Messages in iCloud.
How do I enable iMessage?
To sync messages on your Mac, go to Messages > Settings > iMessage and sign in with your Apple ID. Enable Messages in iCloud, and your Mac should start receiving messages right away. On your iPhone, go to Settings > Messages and turn on iMessage.


