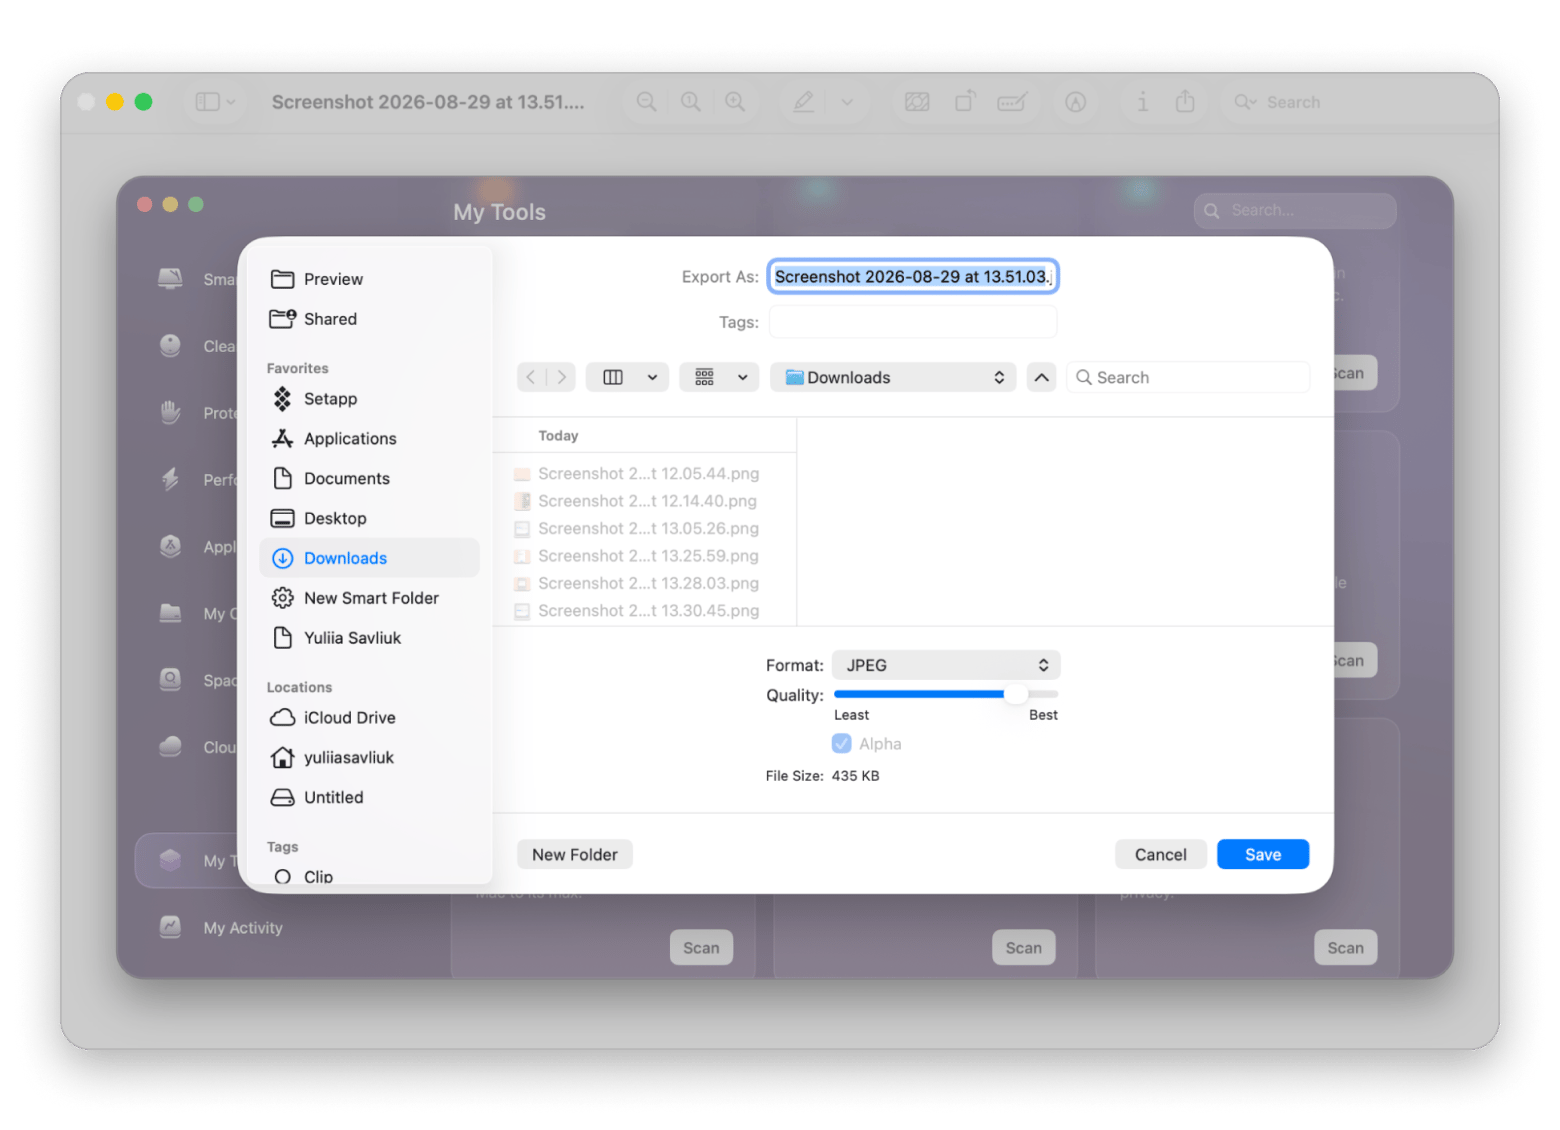
Use Preview for single-image conversion. Open the PNG in Preview, go to File > Export, choose JPEG, adjust the quality slider, and save. No extra software needed.
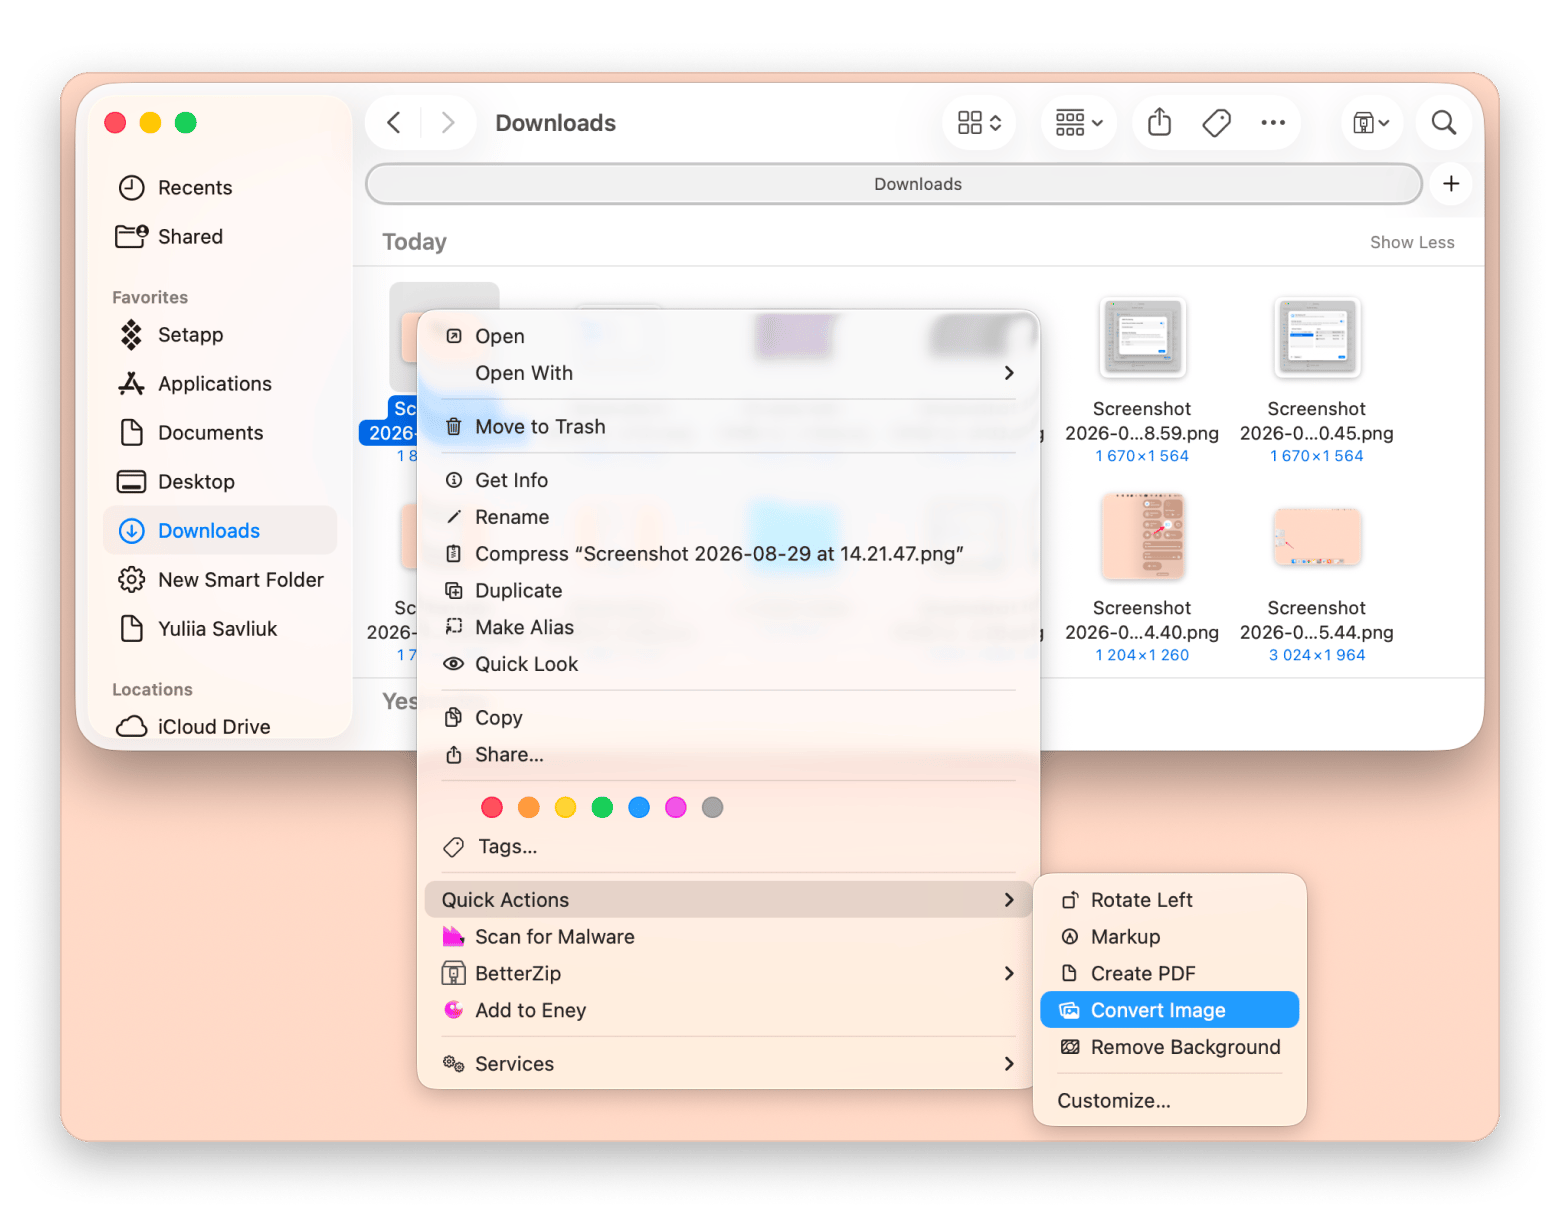
Use Finder Quick Actions for multiple files at once. Select your PNGs in Finder, right-click, and choose Quick Actions > Convert Image. Available on macOS Monterey and later.
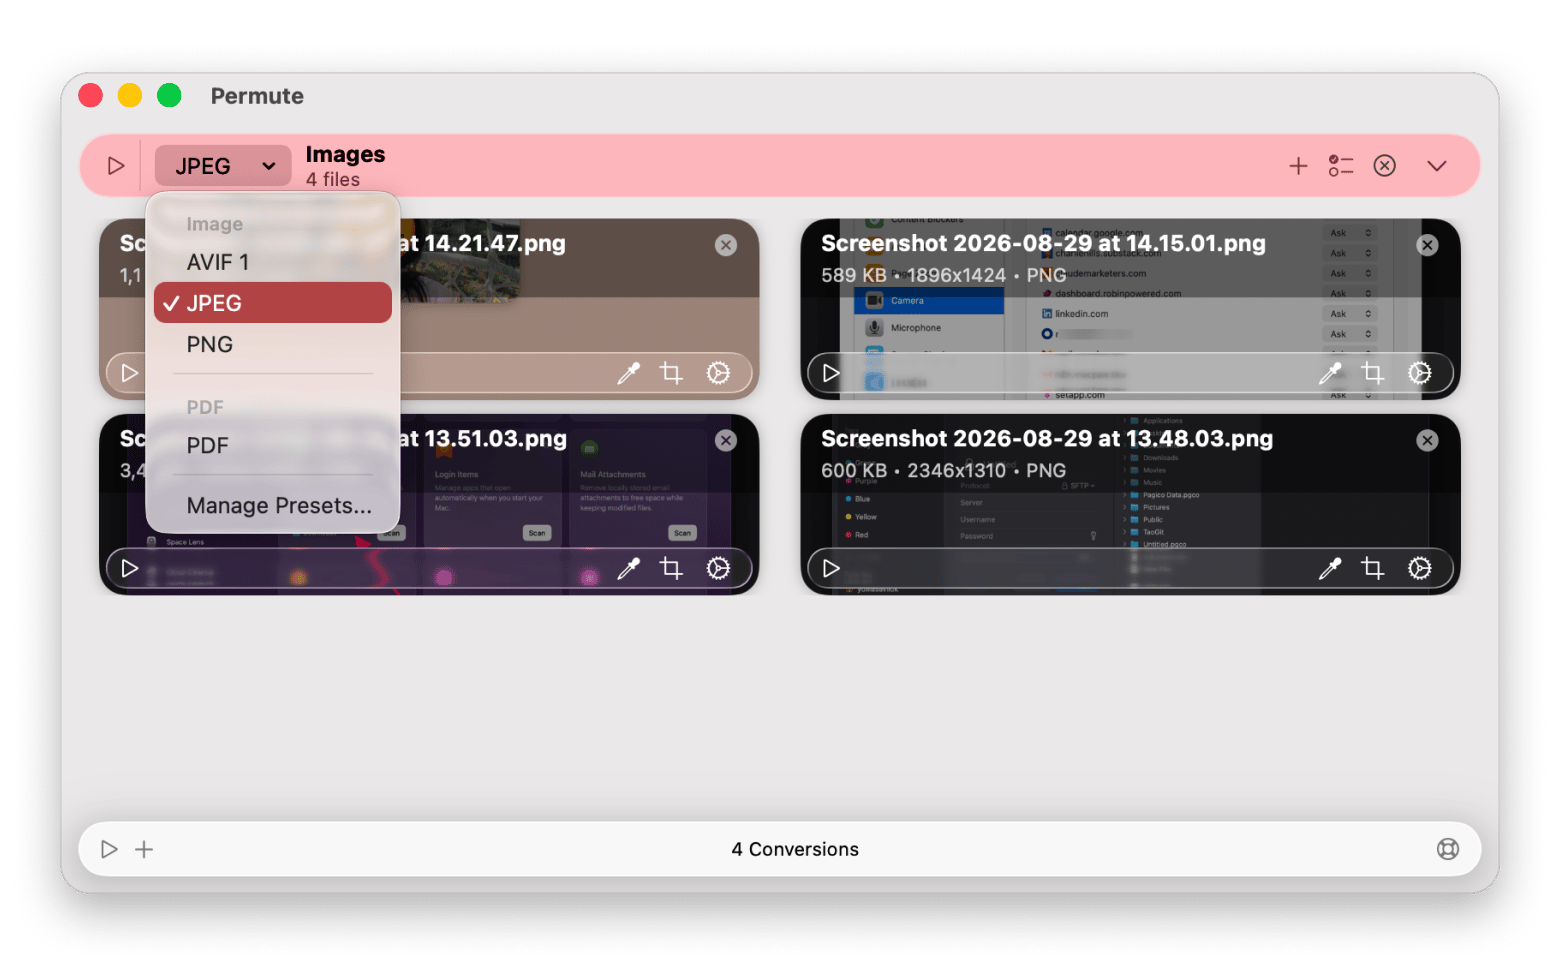
Batch convert hundreds of images withPermute. Drag and drop any number of files, pick the output format, and convert everything in seconds — supports images, audio, and video.
JPEG loses transparency; PNG keeps it. Any transparent areas in a PNG become a solid white background after conversion to JPEG. If you need transparency, stay with PNG.
Adjust compression for the right balance. Set the quality slider to around 75% for web use (small file, no visible loss) or 90%+ for print and portfolios. Permute and Preview both offer quality controls — try Permute and Compresto free for 7 days with a Setapp membership.
Quick answer: To convert PNG to JPG on Mac, open the PNG file in Preview, click File > Export, choose JPEG from the Format dropdown, and click Save.
Need to convert PNG to JPG on Mac? Whether it's for a form upload, email attachment, or web publishing, here's how.
JPEG (or JPG) and PNG are two of the most popular image formats. How do you know which one to use and when? And how to convert PNG to JPG on Mac when required by a form you’re filling out, for example?
I'll walk you through the key differences and show you the methods I use to convert PNG to JPG on Mac, whether it's for a form submission or any other need.
Here's a quick overview of the conversion methods I'll cover in detail below:
When you see a JPG and a PNG image side by side, it’s hard to tell the difference. So what’s the reason behind two different formats:
JPEG (also written as JPG) works primarily for digital photos. According to W3C specifications, it achieves high compression with minimal quality loss. This makes JPEG the most widely used image format globally.
PNG (Portable Network Graphics) supports lossless compression and was created to replace GIF. Its key feature is transparency support through alpha channels. However, PNG doesn't support CMYK color mode for professional printing. File sizes tend to be larger than JPEG equivalents.
My advice: If the image is a photo, use JPEG. If it has text, sharp edges, or transparency (like a logo or screenshot), use PNG.
Convert PNG to JPG (and vice versa) on Mac
To convert PNG to JPG on Mac, open the image in Preview, go to File > Export, select JPEG from the Format menu, adjust the Quality slider, and save.
If you need to change an image's format on your Mac, I've found it's actually quite straightforward. Here's the step-by-step for each method.
How do I convert PNG to JPG on Mac for free?
For single-image conversion, you don't need any special apps. Preview handles the job perfectly:
Open any PNG image in Preview.
Go to File > Export.
Select JPEG in the Format drop-down, then drag the Quality slider — moving left shrinks file size, moving right preserves more detail.
Save.
The quality slider in Preview is easy to overlook, but it makes a real difference.
The reverse conversion is just as easy — open the JPEG image in Preview and export it as PNG.
Convert straight from Finder (macOS Monterey or later)
Since macOS Monterey, Apple added an even faster method that I use constantly:
Select one or more PNGs in Finder.
Right-click and choose Quick Actions > Convert Image.
Set JPEG as the format, pick the size you need, and click Convert.
If you need to transform dozens or hundreds of images, it will take you a while to do so one by one. A better solution would be to use a professional image converter, such as Permute.
Permute is a lightning-fast converter for images, audio, and video. It can read and output files in practically any format you can imagine. Plus, it supports batch formatting, so you can drag and drop any number of images, and the app will transform them all at once.
Here’s how to convert to JPEG on Mac with Permute:
Install and open Permute.
Drag and drop your PNG images onto the app.
Select JPEG in the dropdown.
Click the play icon.
Compress images without losing quality
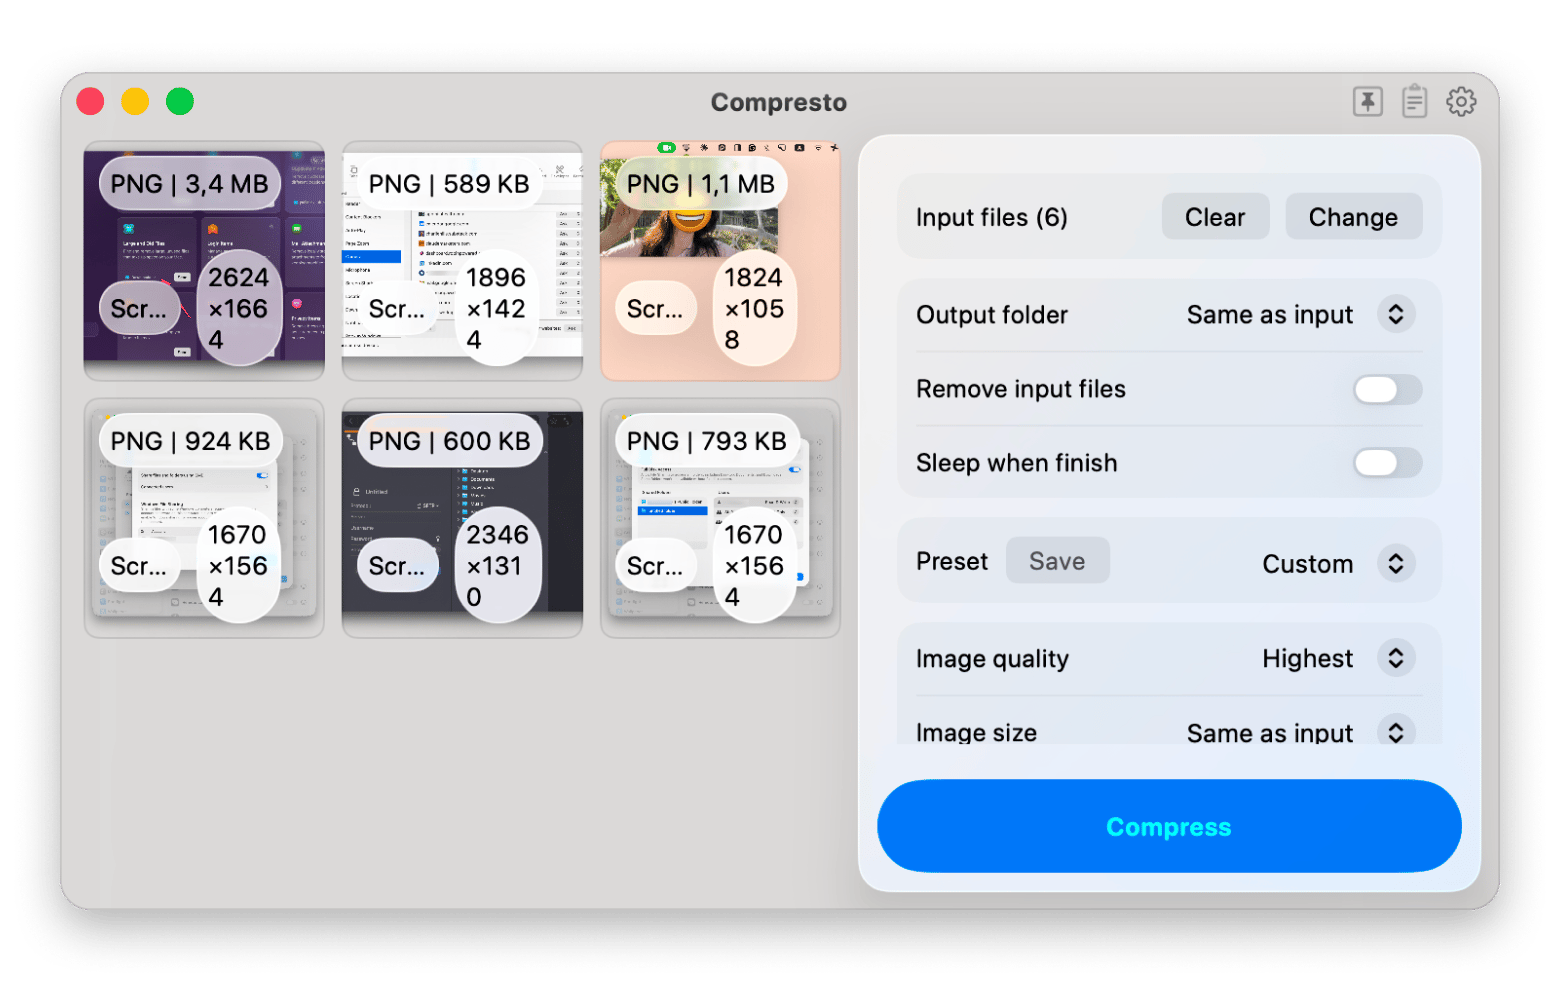
Once you have all the images in the right format, you might wonder if it’s possible to compress them all without losing quality? Or batch-process them in another way (e.g. watermarking)?
Drag and drop or import as many images as you want.
Select all adjustments you want to apply.
Click Compress and export images.
Compresto works entirely offline, so your files stay private on your Mac.
How do I make a GIF from PNG or JPG images on Mac?
When you’re working with batches of similar images, sometimes it’s a great idea to output them all as a GIF, or an animated image format.
While there are online options available, I prefer using dedicated Mac apps like Gifox for more control and better integration with my workflow.
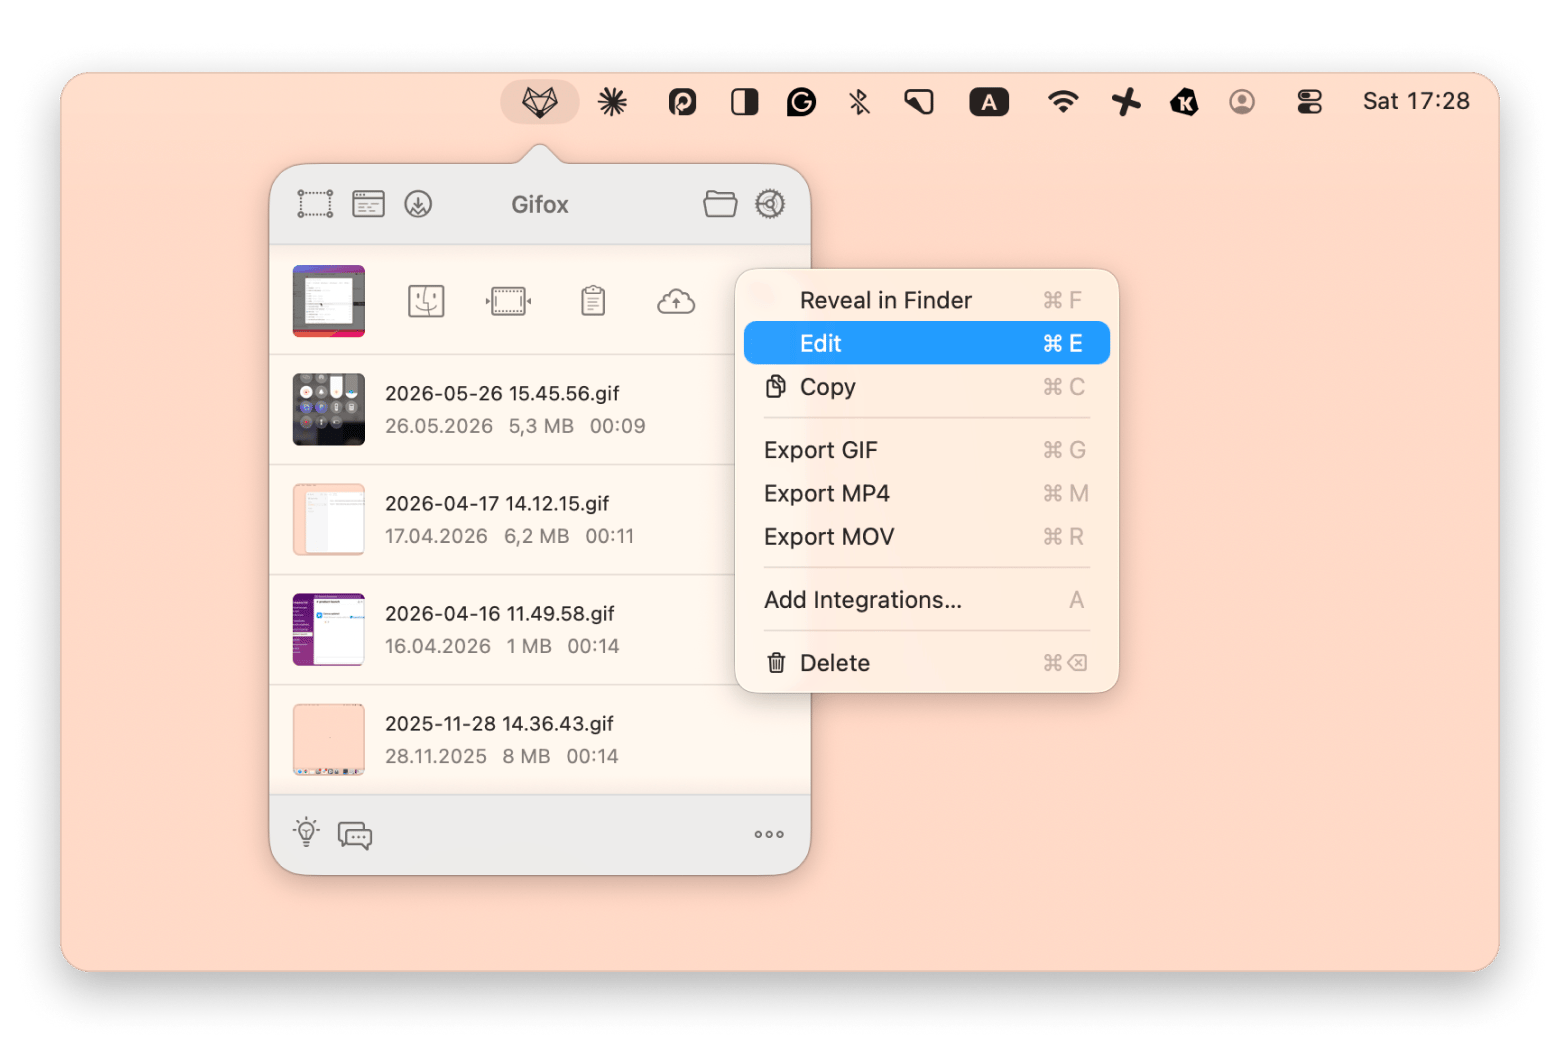
Gifox is a great GIF-screenshotting app. When recording and sending a video of your screen might be difficult, Gifox quickly records a sequence of actions on your Mac. It outputs them as lightweight GIFs instead.
Here's how to create GIFs on Mac:
Make sure Gifox is turned on in your menu bar.
Drag to define the recording area.
Press Record and go through the actions.
Click Stop when done.
The GIF saves to your Downloads folder automatically. You can also adjust it in the app.
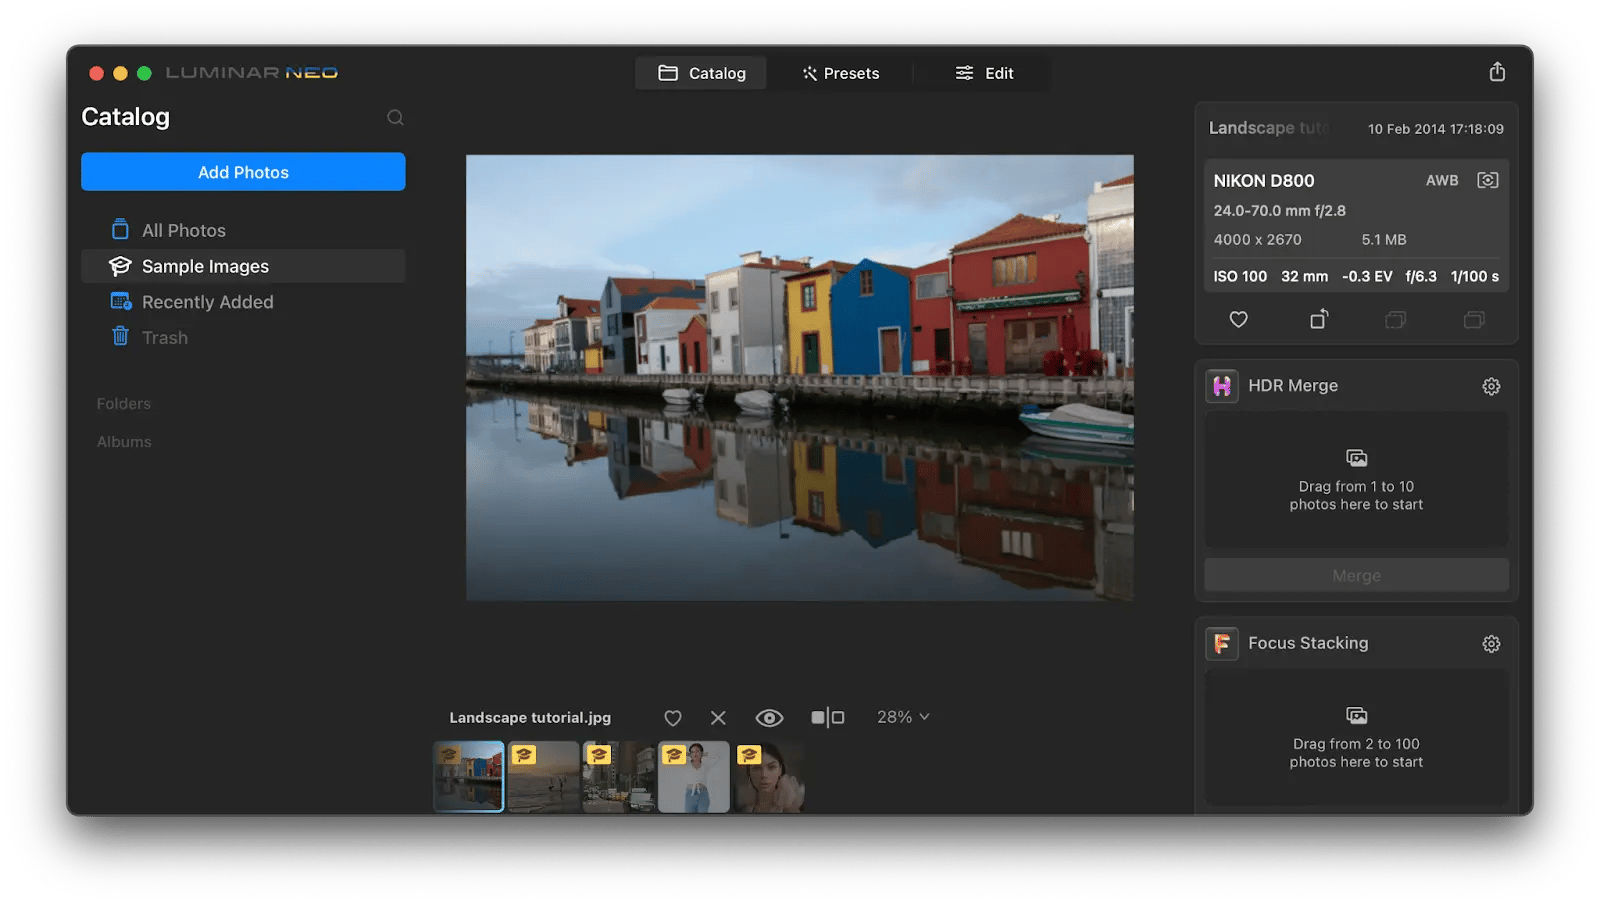
There are lots of apps that can help you adjust images, but if you’re looking for beautiful and quick edits enhanced by AI, I recommend Luminar Neo.
Luminar Neo is an image-editing app that helps you turn your photos from average to stunning in no time. Powered by industry-leading AI, Luminar Neo can do everything from color changes to enhanced lighting to object removal, and more. Plus, a curated selection of presets allows you to elevate your photos in just a few clicks.
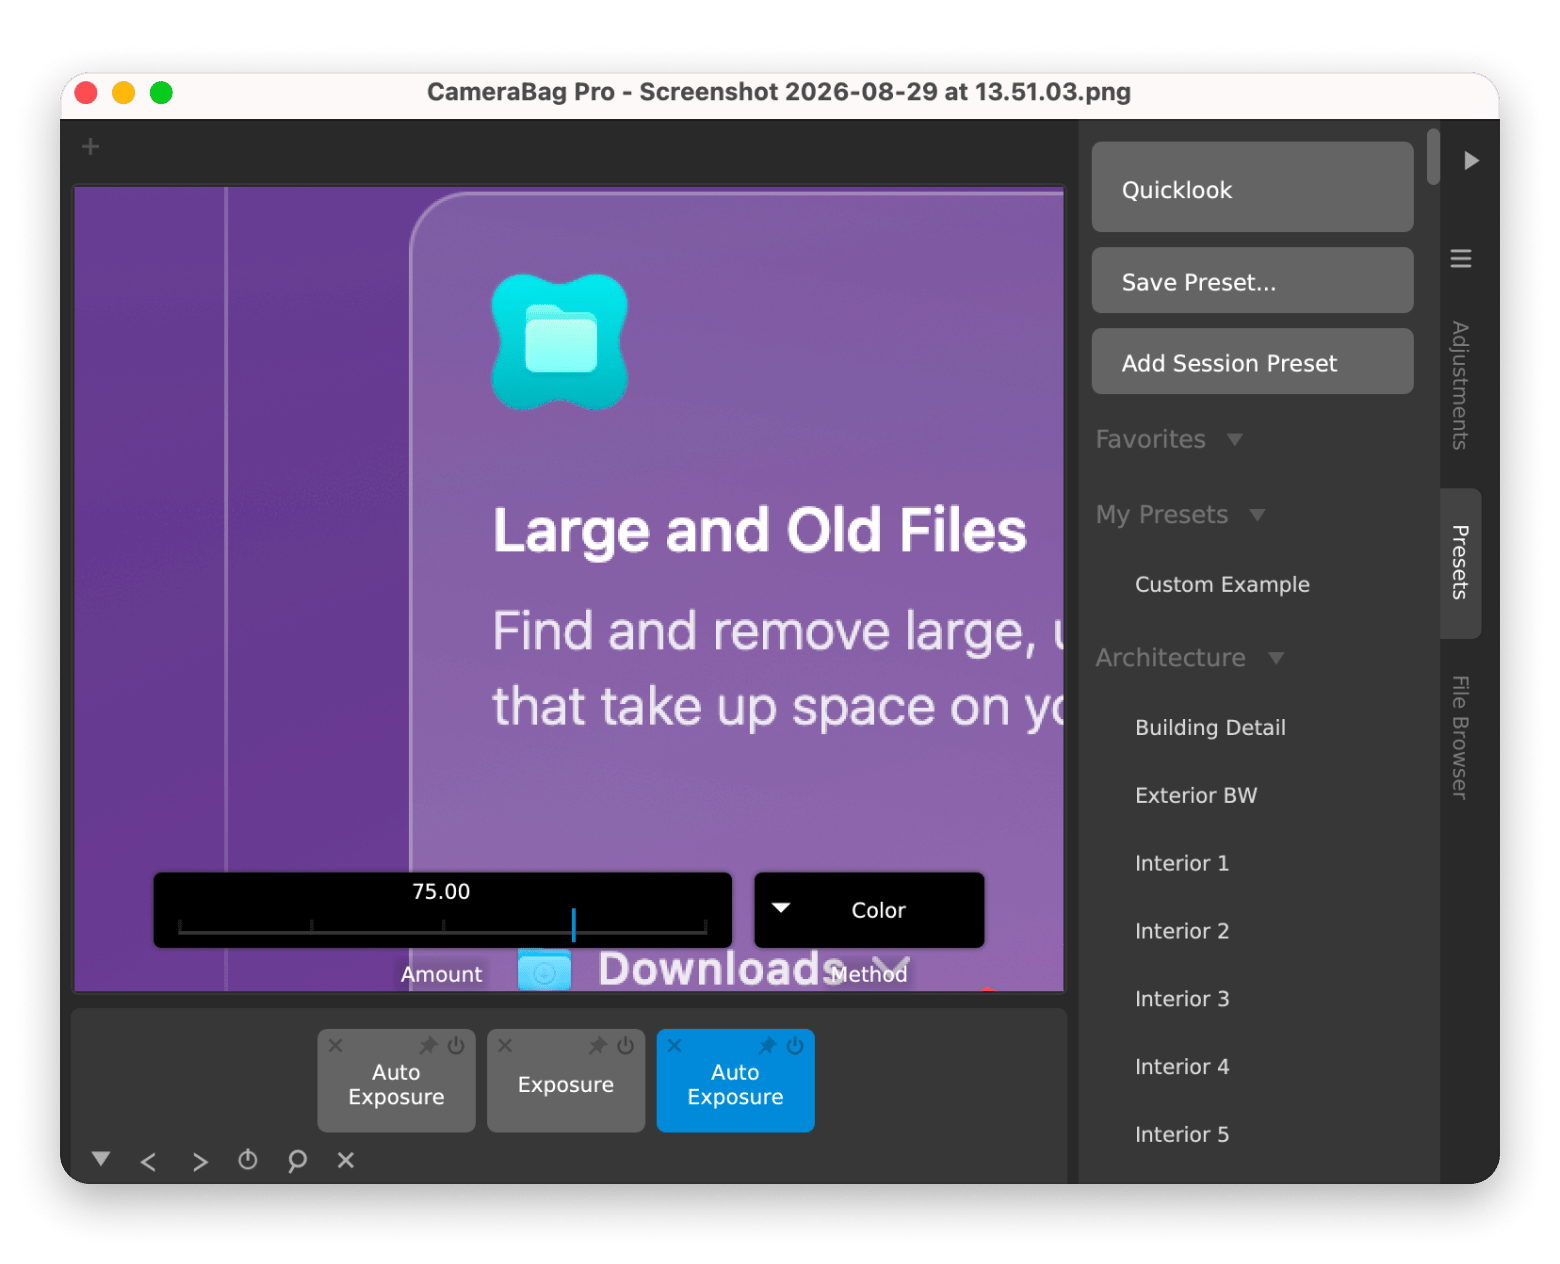
Alternatively, if you want to dive deep on every photo and have full control of every retouching aspect, try CameraBag Pro:
Master image conversion on your Mac
As you can see, the answer to “how do I change a photo to JPEG on a Mac?” is pretty straightforward. Preview lets you change practically any file format, even PDF to PNG Mac can read would work.
At the same time, you can convert multiple images at once with Permute and compress them with Compresto. Gifox lets you create GIFs on Mac in just a click, and apps like Luminar Neo and CameraBag Pro help edit any aspect of images with precision and control.
You've learned how to convert images. Now get the tools that handle everything else. Permute, Compresto, Gifox, Luminar Neo, and 270+ other Mac and iOS apps — all in one Setapp membership. Cancel before Day 7 — $0 charged. Start Your 7-Day Trial.
FAQ
Can I convert PNG to JPG in the Photos app on my Mac?
Yes. Select the image in Photos, choose File > Export > Export 1 Photo, pick JPEG from the Photo Kind menu, then click Export. Choose where to save the new file, and you're done.
Will converting PNG to JPG lower the file size?
Usually, yes. JPG uses lossy compression, so the same picture saved as a JPG is often much smaller than its PNG version — handy for faster sharing and uploads. According to Adobe's documentation, JPEG compression can reduce file sizes by 50-90% depending on quality settings.
What happens to transparency when I change PNG to JPG?
JPEG doesn't support transparency. Any clear areas in a PNG turn into a solid color — macOS sets them to white — after you convert the file. If you need to preserve transparency, stick with PNG format.
Get a universal media converter
Permute quickly converts files in a required format.






 Best solution
 Best solution