How to format a USB on Mac: The easy way to fix compatibility issues
Ever plugged in a USB drive only to realize it doesn’t work on anything but your own device? That’s what happened to me when I tried to share a video project with a colleague who was using a Windows PC.
Don't judge me, but I had saved the file to a USB drive formatted in Mac’s default format (APFS) and completely forgot that Windows doesn’t support it. Well, this is me.
Want to know how to format a USB on a Mac? I created the guide that will walk you through the steps and help you avoid compatibility issues.
But before we get technical, here’s a quick reference guide:
| You're trying to… | Here's how to handle it |
|---|---|
| Format a USB drive on Mac | Open Disk Utility > Select drive > Click Erase > Choose format > Click Erase > Done. |
| Choose the right format | Use APFS for Mac-only use, exFAT for cross-platform, and FAT32 for small files. |
| Ensure Windows compatibility | Format in exFAT or FAT32. You can also use iBoysoft NTFS for Mac to convert NTFS. |
| Back up USB data before formatting | Use Get Backup Pro to clone the disk or archive files. |
| Write to NTFS drives | Use iBoysoft NTFS for Mac. |
How to format a USB flash drive on a Mac
Formatting a USB drive on a Mac is quick and easy if you know where to look. The built-in Disk Utility tool lets you carry out the procedure in a few seconds, and there's no need for any Terminal commands.
You should know that if you format your USB, your files are completely gone. So, back up any information you don’t want to lose (more on that later). If you’ve already formatted it, check out the quick guide on how to recover lost USB files.
With that said, here’s how to format a USB flash drive using Disk Utility:
- Plug in your USB flash drive.
- Open Disk Utility (Go to Finder > Applications > Utilities > Disk Utility).
- Click on your USB drive.
- Click Erase in the toolbar.
- Choose the desired format.
- Click Erase > Done.
The process only takes a few seconds.
Back up a USB drive before reformatting
Don't hurry to click Erase. It's always wise to double-check if there are still files you might regret losing. Because once they're gone, you can't restore them.
Most people format USB drives the old-school way. They choose the files they need, then copy them to their Mac. The trick here is that double-checking every single file wastes a lot of time when you have many files, and you can easily forget important ones.
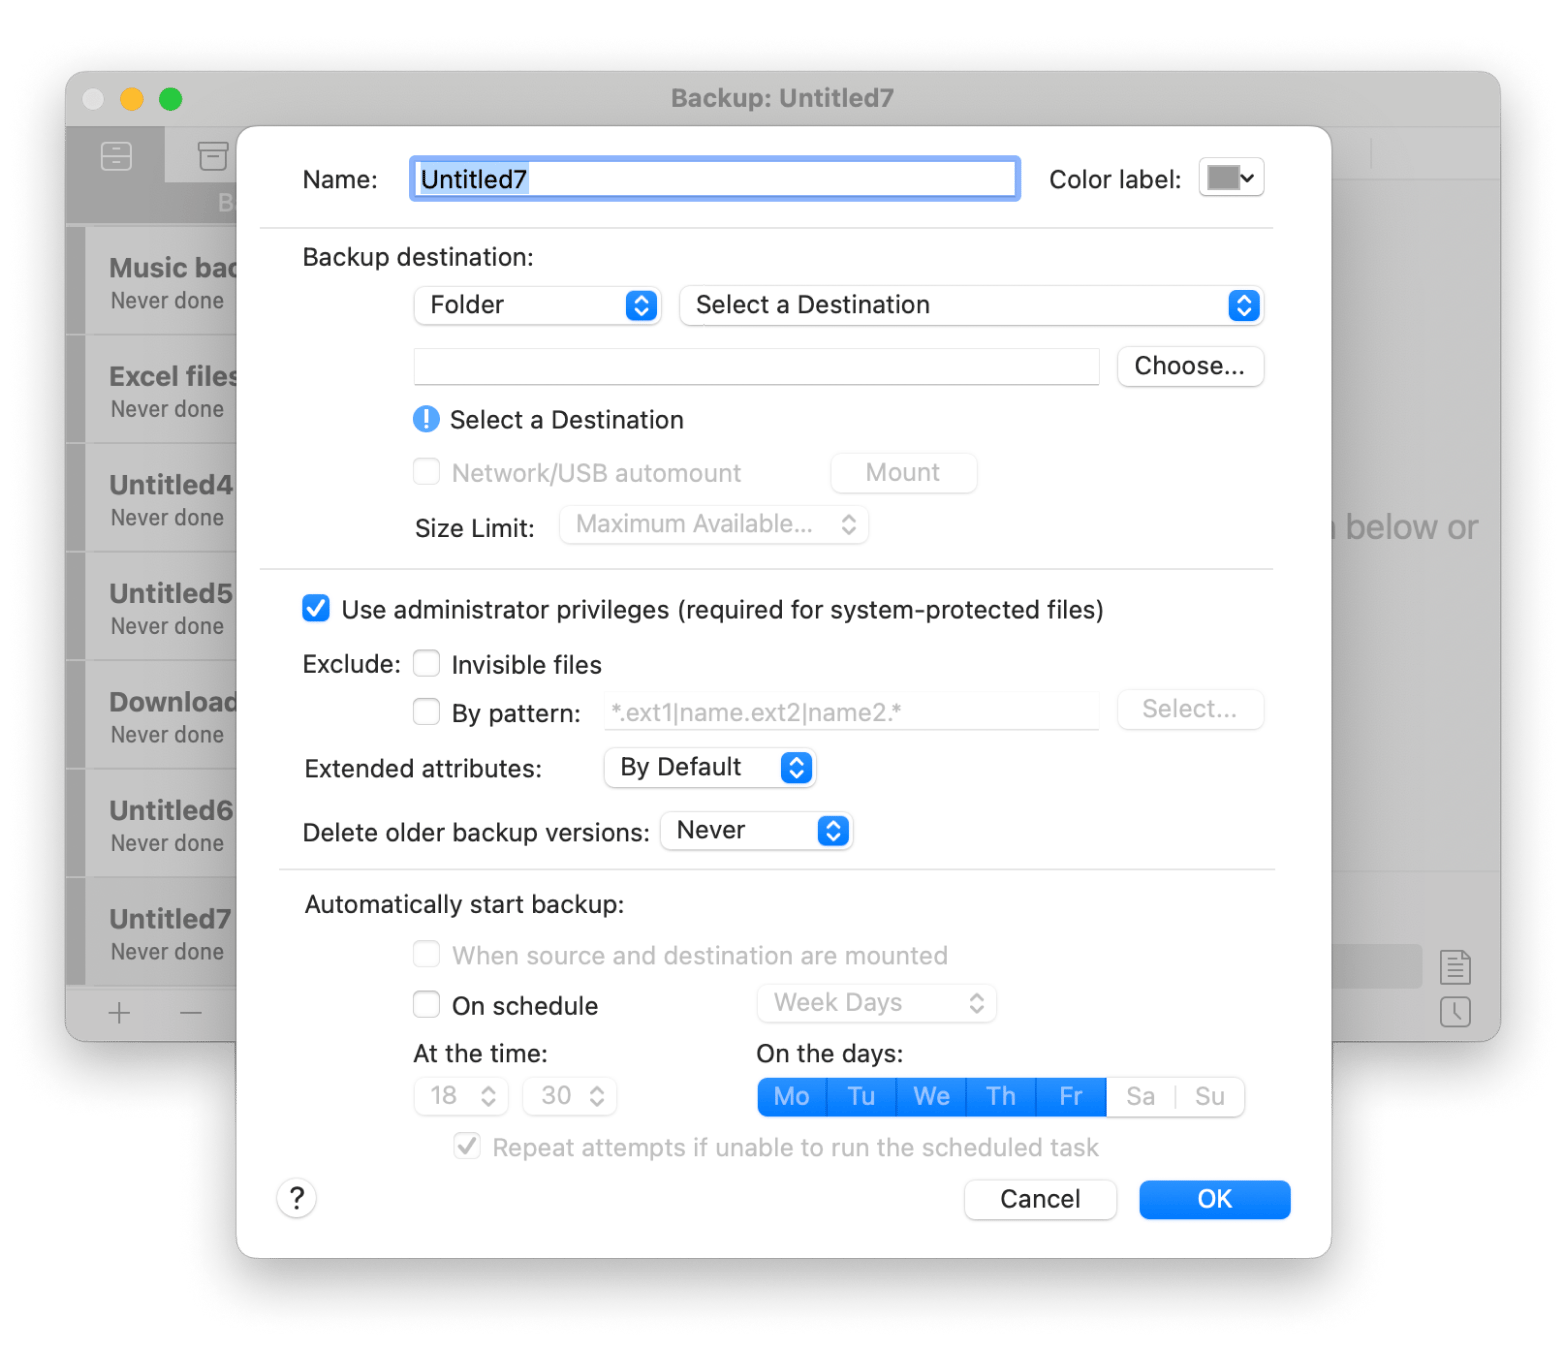
Personally, I prefer using Get Backup Pro to make my backups simple and automated, whether it’s the main disk or a USB drive. I find the utility tool quite powerful, and it can even clone your entire disk or archive everything on the drive. Best of all, it reduces the storage space that’s used by up to 60%.
To back up your USB:
- Connect your USB to your Mac.
- Install and open Get Backup Pro.
- Click “+” to create a new backup.
- Set up the name and backup destination > OK.

- Then, click File+ and choose your USB drive. Select files to back up.
- Click the play button to run the backup.

Once your files are safe, you can then format your USB drive with peace of mind.
Can you format a USB to FAT32 or NTFS on a Mac?
The short answer is yes, you can reformat a USB on a Mac to FAT32 or NTFS, but there are a few conditions.
Using the FAT32 format (shown as MS-DOS (FAT)) doesn’t have complications, as Mac and Disk Utility fully support it. However, you’ll need to keep in mind the 4GB maximum file size limit, and you should only use it for USB drives that are 32GB or less in size.
Here's how to format a USB to FAT32 on a Mac:
- Open Disk Utility (Go to Finder > Applications > Utilities).
- Click on your USB drive.
- Click Erase.
- Choose MS-DOS (FAT) as the format.
- Choose Master Boot Record as the scheme for better cross-platform compatibility.
- Click Erase, then Done.
That’s it! Your drive will now work on almost every system.
How to Format a USB to NTFS on Mac
Now, when it comes to how to format a USB to NTFS on a Mac, things get a little tricky. While it’s the main file system on Windows, it’s not fully supported on macOS. The operating system can read NTFS drives but can’t write to them natively. This means you won’t be able to format NTFS disks unless you use a third-party app.
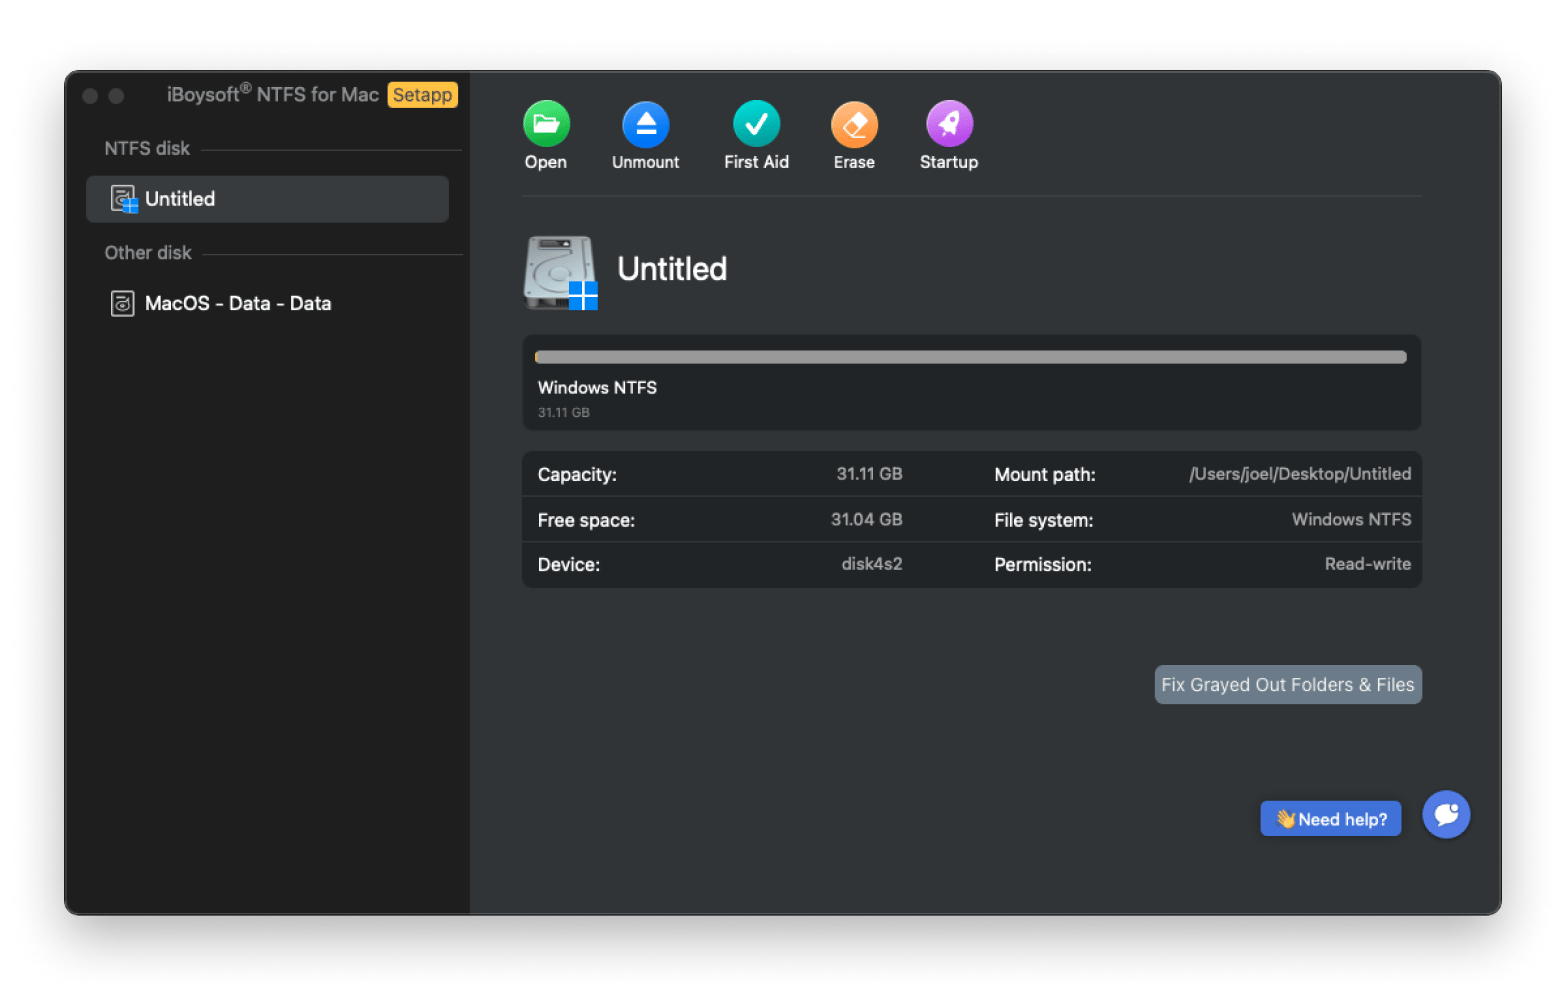
The best of the class is iBoysoft NTFS for Mac, a simple but powerful utility app that makes it possible for Mac to write and format NTFS disks. All you need to do is connect your NTFS disk and open the app, and it will allow you to manipulate the disk any way you want. If the drive is not already in NTFS format, the app will give you an option to format it in NTFS.
Here’s how to format a USB to NTFS on a Mac using the app:
- Install and open iBoysoft NTFS for Mac.
- Plug in your USB drive.
- Select your drive.
- Click Format as NTFS and confirm.

Your disk will now be fully compatible with Windows systems. In case it’s a problematic drive, you can check out how to recover data from a failed hard drive.
Setting format preferences
After you click Erase in Disk Utility, you need to choose a Format and Scheme. Not sure what to pick?
These are the format options:
- APFS (Apple File System): Apple’s modern file system. It’s fast, efficient, and secure but only works on Macs running macOS High Sierra and later. It’s not compatible with Windows.
- Mac OS Extended (Journaled): This one was used by Apple before APFS was introduced. It keeps a log of file changes to help with data recovery, but APFS is gradually replacing it. And like APFS, it’s not compatible with Windows.
- MS-DOS (FAT32): This one works everywhere. It has a 4GB file-size limit, so it’s not your best bet if you often work with huge files. Also, it doesn’t work on devices larger than 32 GB.
- exFAT: This is essentially FAT32’s smarter sibling. It has no annoying size limits, and it works well with macOS, Windows, and some Linux systems. It’s perfect for external hard drives and larger USB drives.
Just below the Format options, you’ll see several Scheme options. Most people ignore this part, but it actually matters in some cases.
- GUID Partition Map: You’ll find it as the default option, and it’s the recommended option for most Mac users. If the drive will be used on other Macs, leave it as the selection.
- Master Boot Record (MBR): It’s an older partition scheme, but it’s compatible with macOS, Windows, and some Linux systems. It works well if you’re formatting a USB drive to FAT32 or exFAT, but it has a 2TB drive size limit.
- Apple Partition Map (APM): Only choose this one if you want to share data with a vintage Mac from the early 2000s.
How to format a USB on Mac: Final thoughts
If you’ve ever struggled with compatibility when using macOS and Windows, knowing how to format a USB on a Mac will save you a lot of time and trouble. Understand the various file format options, and you can then use Disk Utility to format the drive.
If you want to format the drive to NTFS for better compatibility with Windows, you’ll need a third-party tool like iBoysoft NTFS for Mac. It makes Mac fully compatible with the format. Before you hit erase, remember to back up your files with Get Backup Pro.
All these apps are part of Setapp, a subscription service that gives you access to 260+ Mac and iOS apps in one place. Feel free to check them out with Setapp's 7-day trial.
FAQs
What USB format is best for Mac?
The best USB format for Mac is APFS, which is used on macOS High Sierra and later. But if you want to copy your data to a Windows computer, the best format in this case is exFAT as it’s compatible with both platforms. It also supports large files, unlike FAT32.
Why is my USB drive read-only?
A USB drive can be read-only due to compatibility issues. In most cases, this will happen if the drive is formatted in NTFS and used on a Mac. The OS can read it but can’t write to it without help from third-party software. If you don’t want to reformat the drive, use iBoysoft NTFS for Mac to write on NTFS-formatted disks.
How to format a read-only USB drive on a Mac?
To format a read-only USB drive on a Mac, use Disk Utility to change it to a writable format.
- Open Disk Utility (Finder > Applications > Utilities).
- Choose your USB drive > Erase.
- Then, choose exFAT as your format.
- Click Erase > Done.
In case it’s an SD Card, you should also check the drive to ensure write-protect isn’t switched on.
Does Apple recognize exFAT?
Yes, Apple fully supports exFAT. It’s a great choice if you also want to use the drive on a Windows computer.
Can a Mac read EXT4?
Natively, macOS isn’t able to read or write on drives using the EXT4 format (for Linux). You'll need third-party software if you want to use the drive on a Mac without formatting it. Some free options are macFUSE and ext4fuse.


