iStat Menus
Track CPU, GPU, sensors, etc.
Mac
Version 7.30
macOS 11.0 or later
67.9 MB
32 languages
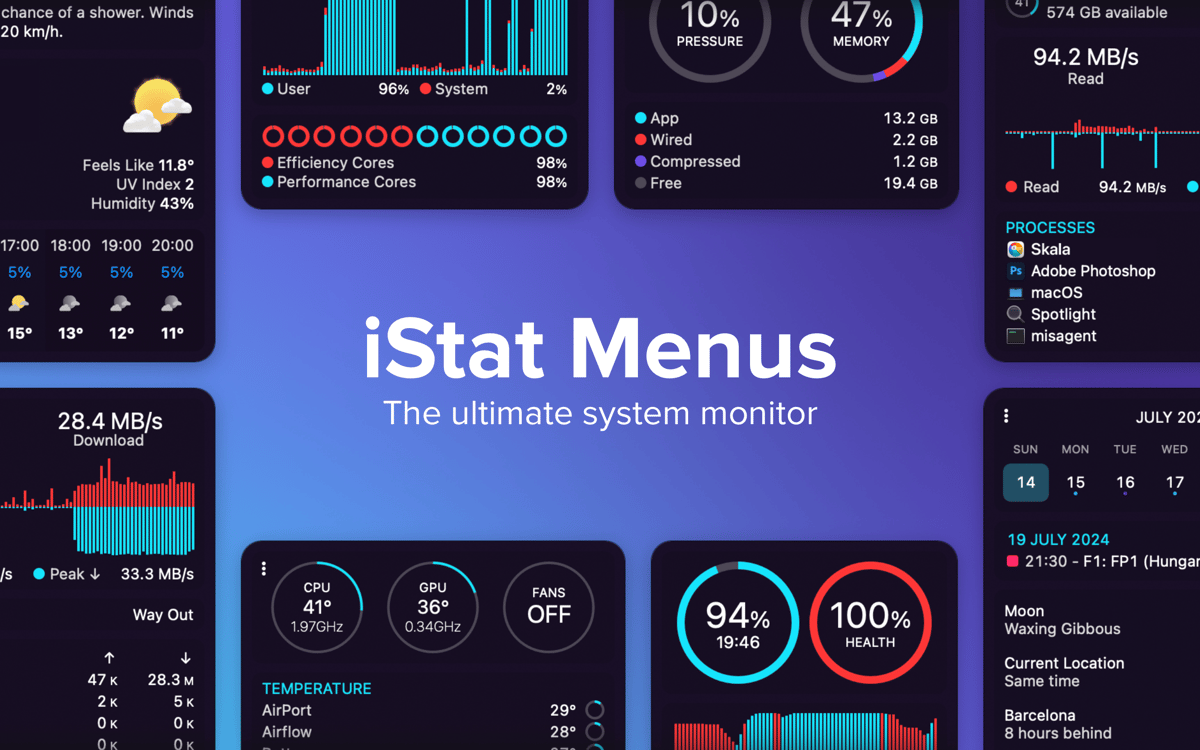
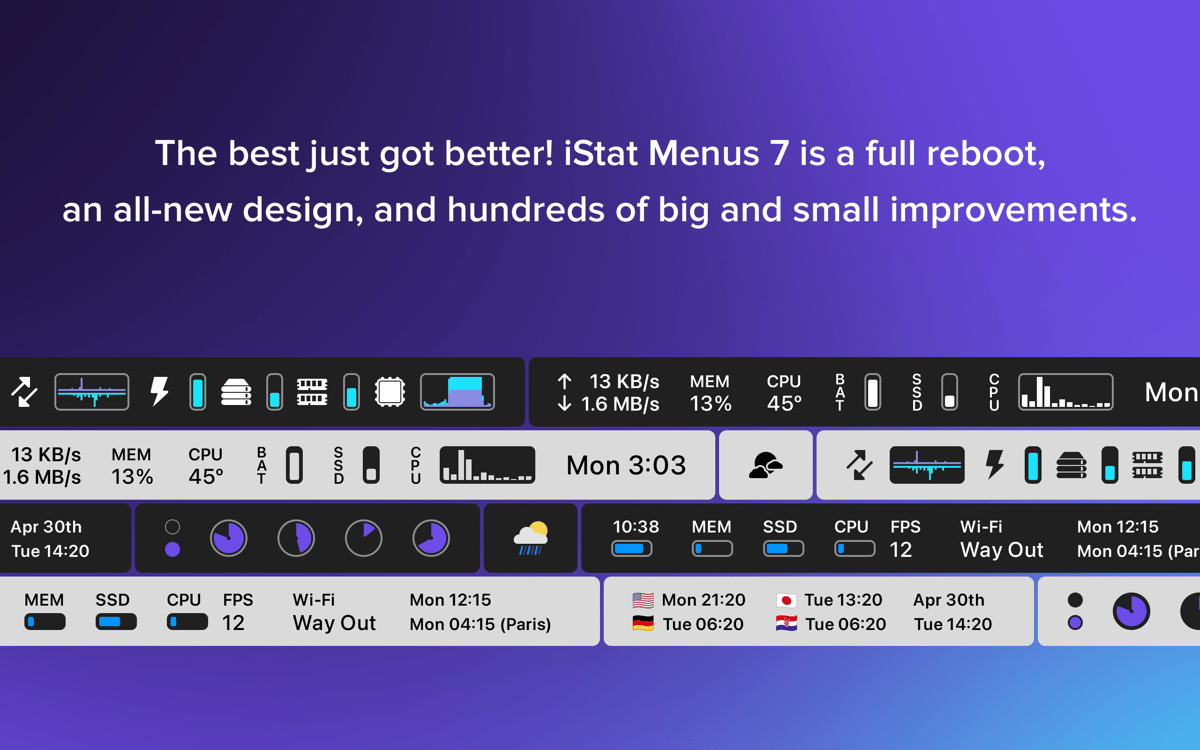
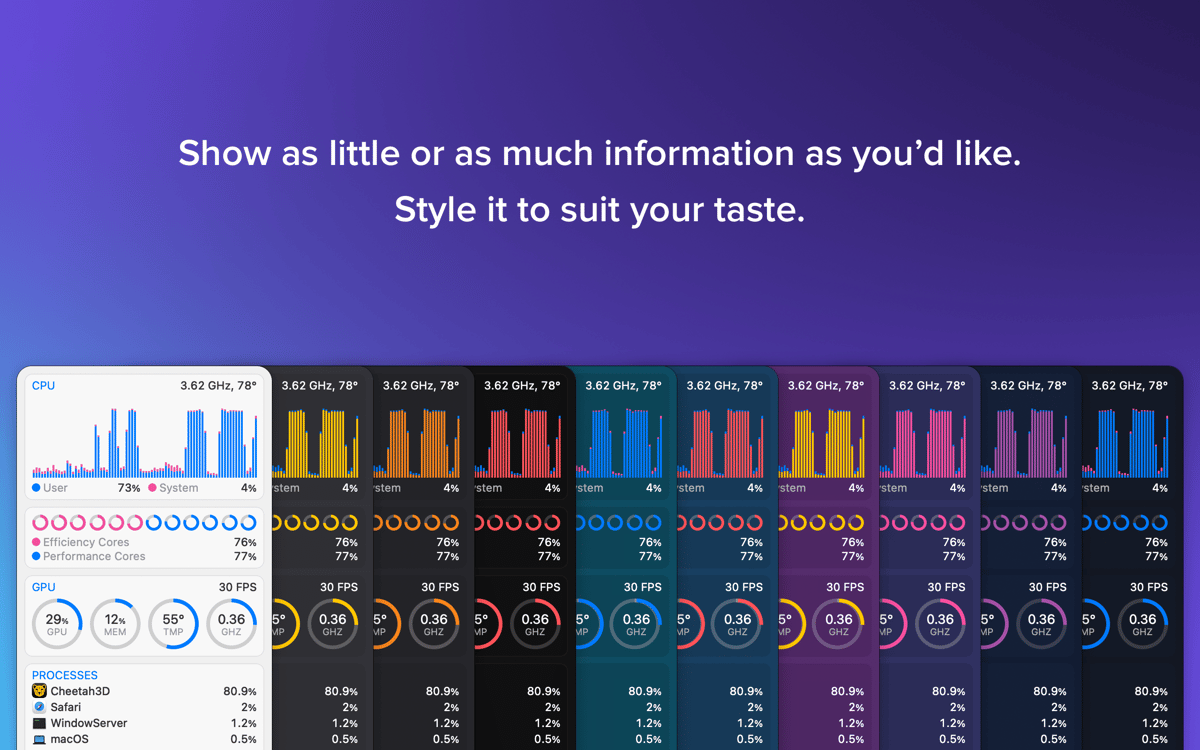
The most comprehensive Mac monitor to date. iStat Menus is a fully-equipped system data collector that lives in your menu bar and provides vital info about the key indicators. You get the stats on CPU load, memory load, disk usage/space, disk activity, temperature monitor, fan sensors, battery life and cycles, weather, and so much more. And, there’s a Dark Mode support. Of course, there is.
Fix loud fan noise problem
Spot the biggest CPU hogs
Track and optimize disk usage
Reduce excessive memory use
iStat Menus features
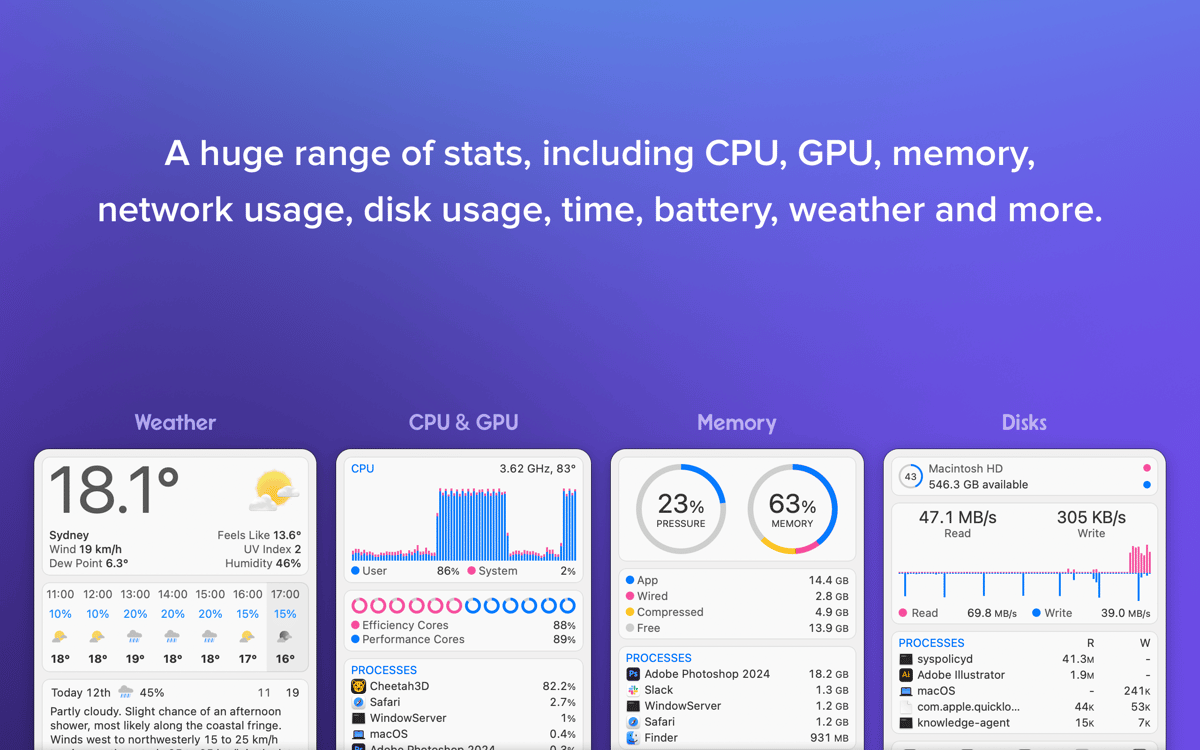
CPU & GPU
All you need to know to be sure everything’s alright: Mac CPU usage and overall activity. Quickly check on it without opening the app — the menu bar icon will show you the info. It’s real-time and you can view your Mac’s process monitor by individual cores or by all cores combined.
Memory
You can view memory stats in any form you prefer — as a pie chart or bar graph. Plus, you get a list of apps using the most memory, so you know which to quit when it gets tight.
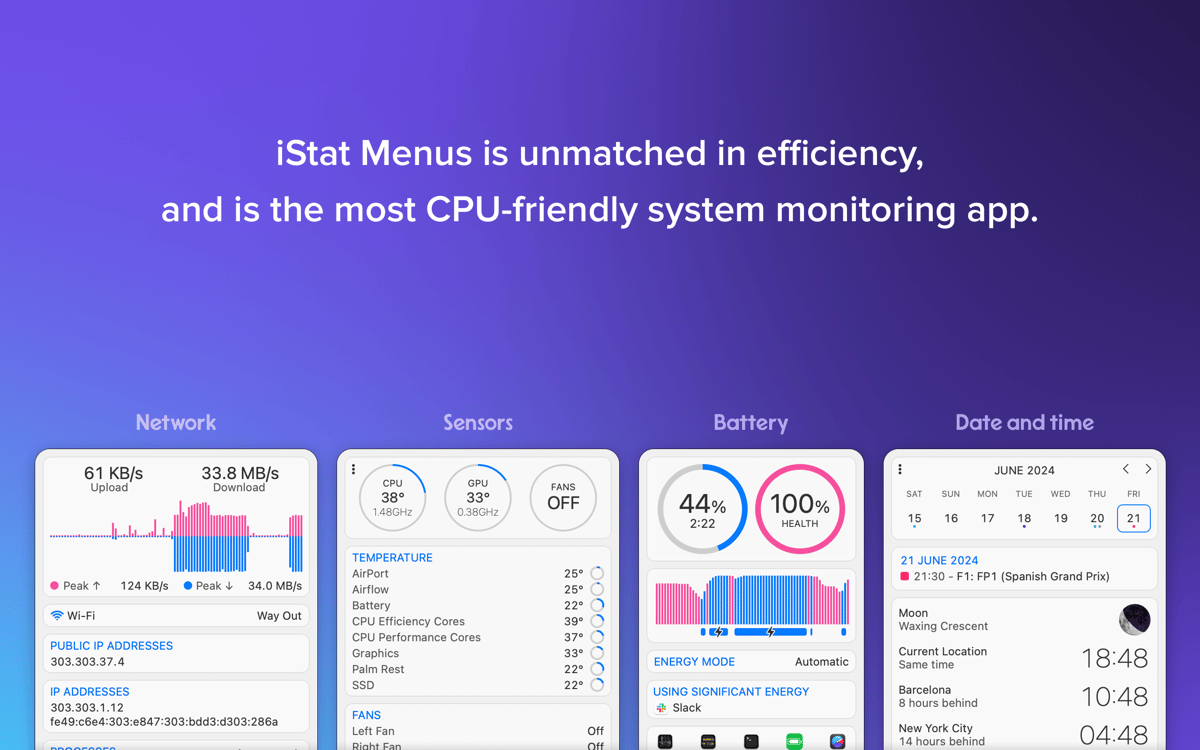
Network
A realtime graph to keep on top of what’s being sent and received for all network connections, including a bandwidth breakdown for the top 5 apps.
Disk usage & activity
One of the main Mac performance monitors is naturally disk usage and general disk activity. Apart from general info on both HD and network drives, iStats gives you a variety of read and write indicators and S.M.A.R.T status monitoring.
Sensors
A realtime view of temperatures, hard drive temperatures (where supported), fans, voltages, current and power. Fan speeds can be controlled, with different rules when on battery power, if you’d like.
Date & time
Most of daily needed info in super detailed form: date, time, and an extensive weather for Macs module with temperature calendar, moon phases, wind speeds, dew points, and more. iStat Menus also has a world clock to show you not just the time, but sunset and sunrise times all across the globe.
Ratings and reviews
iStat Menus
•
5430 ratings
LuisGMM
Jul 10, 2026
App version: 7.30
me encanta tengo monitoreado solo con esta app
Mario Serrano Bula
Jul 9, 2026
App version: 7.30
Muy buena applicacion para el monitoreo de condiciones del PC realmente esta es una de las aplicaciones que paga sola la membresia.
Sara
Jun 14, 2026
App version: 7.30
works great. very helpful
Get hundreds of apps with Membership
Become Setapp member and use hundreds of stellar apps with one subscription.
Try 7 days free, then pay one simple fee.
Install Setapp on Mac
Explore apps for Mac, iOS, and web. Find easy ways to solve daily tasks.

Get the app you came for
That one shiny app is waiting inside Setapp. Install with a click.


iStat Menus
Choose your subscription
One app or more with a Setapp membership. Get apps the way you want.

Get hundreds of apps with Membership
Become Setapp member and use hundreds of stellar apps with one subscription.
Try 7 days free, then pay one simple fee.
1
Install Setapp on Mac
Explore apps for Mac, iOS, and web. Find easy ways to solve daily tasks.
2
Get the app you came for
That one shiny app is waiting inside Setapp. Install with a click.
iStat Menus
3
Choose your subscription
One app or more with a Setapp membership. Get apps the way you want.
Home to the top apps
From planning and routine tasks to creative pursuits and coding, tackle tasks with apps on Setapp.


iStat Menus
Track CPU, GPU, sensors, etc.