How to delete screenshots on a Mac
Are screenshots taking over your Mac's desktop? It's a common problem among Mac users. In this article, we'll give you step-by-step directions on how to get screenshots off a Mac desktop and how to deal with them neatly and compactly.
Where are screenshots saved on a Mac?
By default, the screenshots you take using the built-in tools are saved to the desktop. The name is most likely ScreenShot, followed by the date and time the screen capture was taken. For instance, a screenshot that was taken on the 5th of March, 2022, at 3:30 PM would be seen as Screenshot 2022-03-05 at 15.30.00.
If your screenshots don't end up on the desktop, you (or a previous user) may have changed the default settings. Here's how to check where the screenshots are stored.
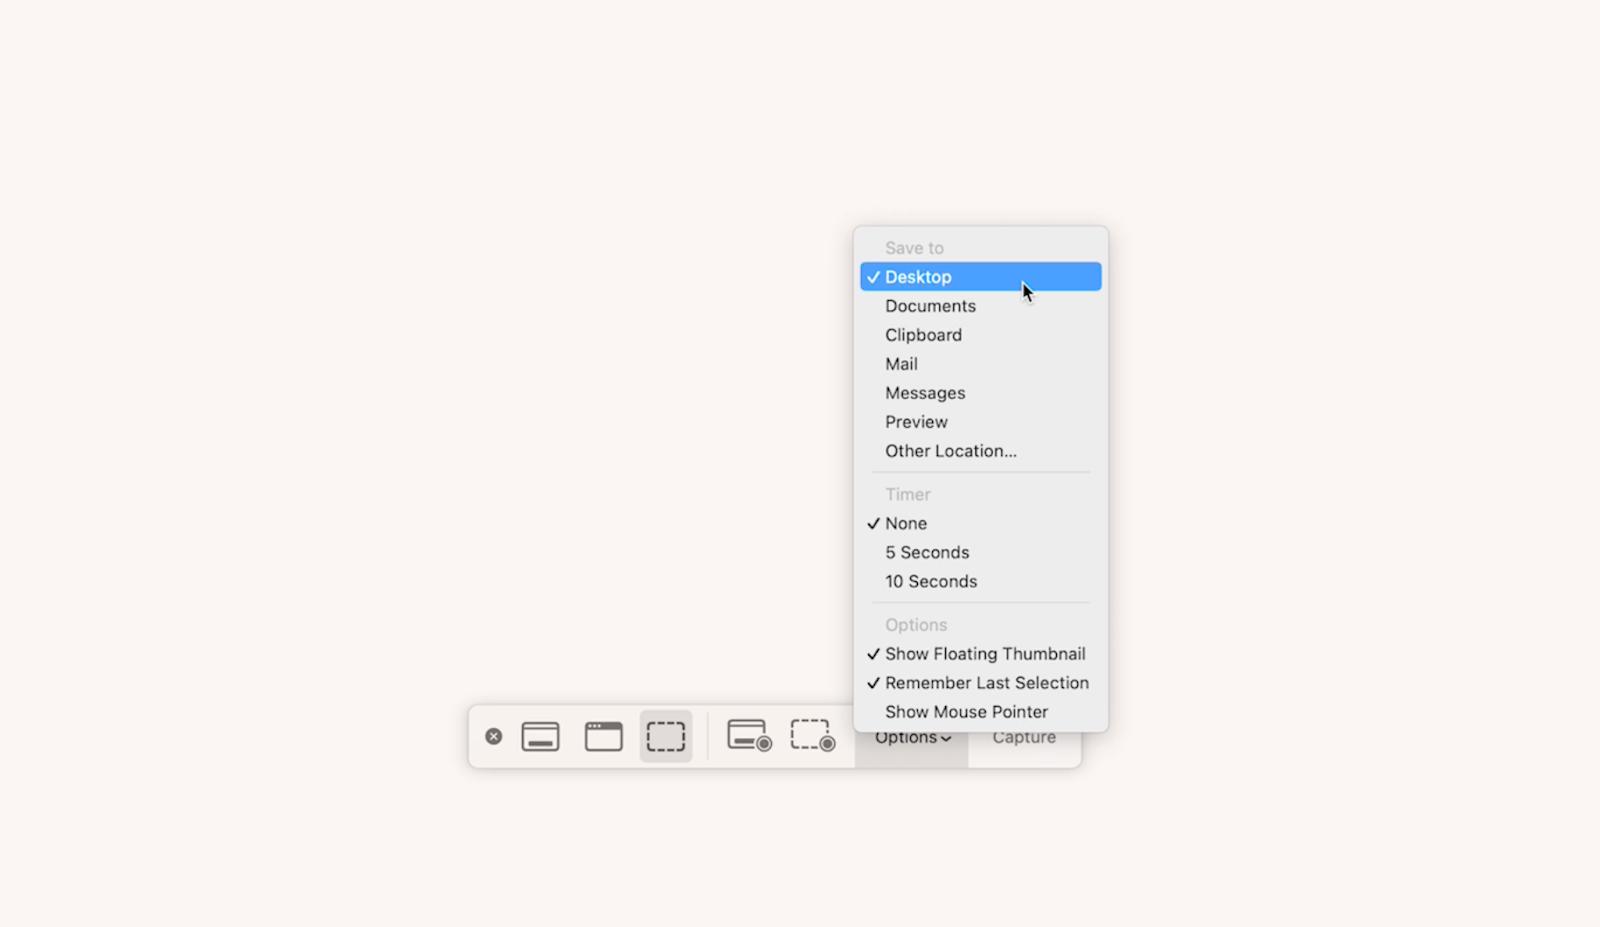
- For macOS Mojave or later, open the Screenshot app by pressing Command + Shift + 5.
- Click on Options.
- Check the Save to block to see where your screenshots go.
How to manually delete a screenshot on your Mac
Now that you've located those clutter-causing screenshots, the question is, how do you delete a screenshot on a Mac?
There are three ways to delete a screenshot on your Mac manually:
- Select the screenshot you want to delete, then hit the Command + Delete buttons.
- Drag the screenshot file to the Trash icon on your dock.
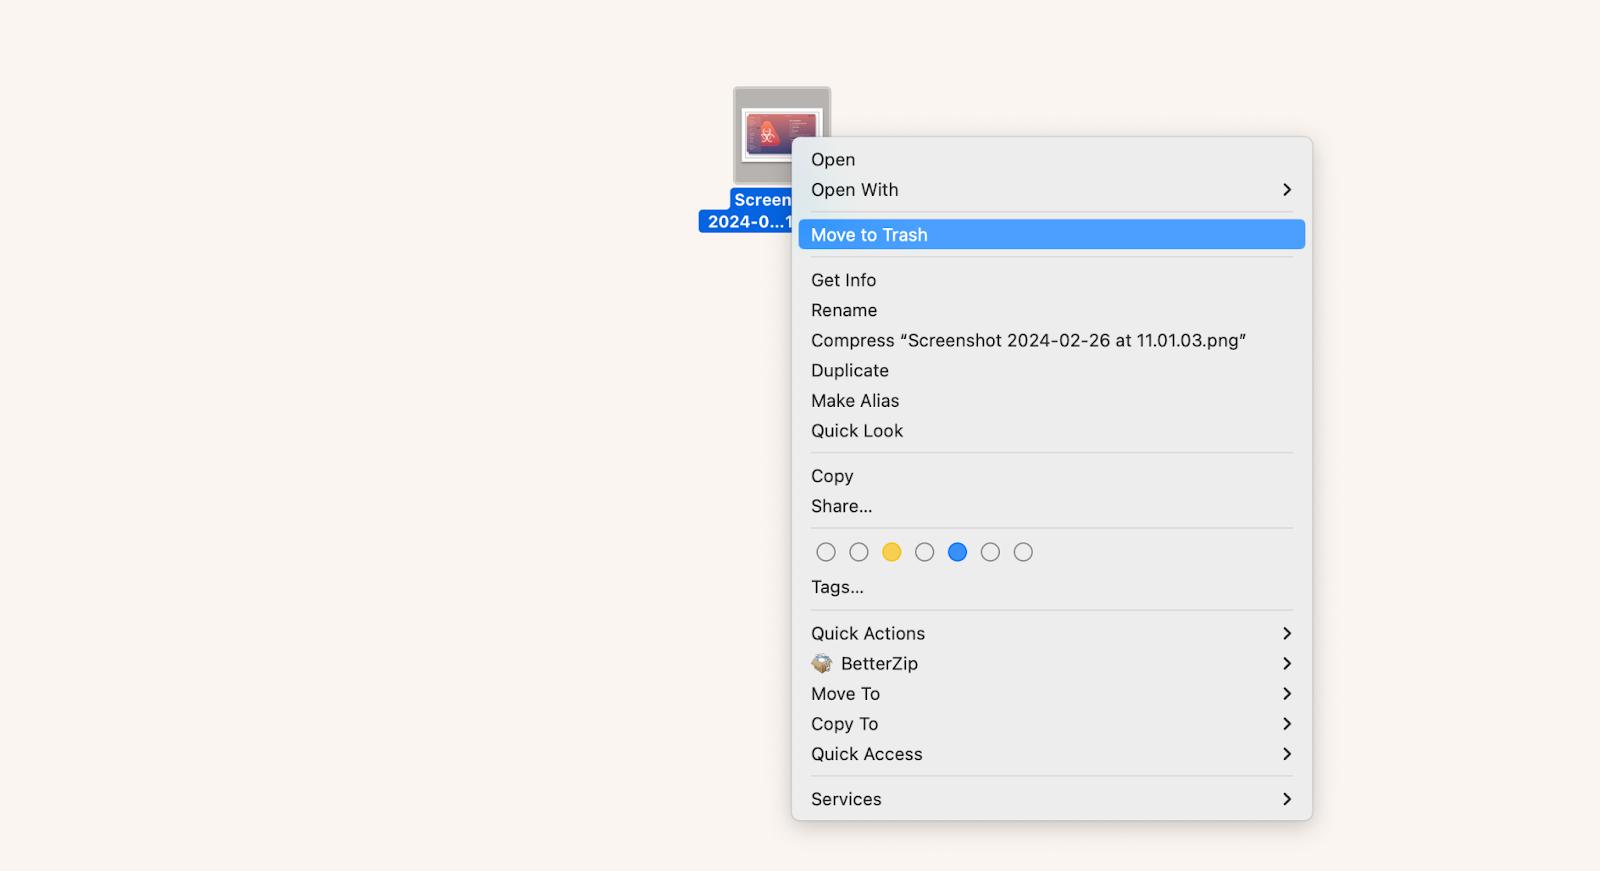
- Right-click on the screenshot on your desktop, then choose Move to Trash from the drop-down menu.
If you need to take screenshots all the time but want to keep your desktop (or any other folder) neat, you'll enjoy CleanShot X.
CleanShot X gives you the choice of saving screenshots to your Mac or to the cloud. If you choose the cloud, you'll get a link that's easy to share. The image is stored in your personal folder in the cloud, which you can access at any time. Moreover, with CleanShot X, you have lots of additional capturing features. For example, you can take a scrolling capture or hide desktop icons while taking a snapshot.

Delete multiple screenshots at once
Now, let's see how to delete screen captures at once, saving you time and effort.
- To choose many screenshots that are beside each other: Click the first screenshot, hold the Shift key, and click on the last screenshot. This will select all the screenshots, including the first and the last ones.
- To choose the screenshots that are not adjacent: Press the Command (⌘) key as you click each screenshot you want to select.
Once you have selected all the screenshots that you want to delete, press and hold the Command (⌘) + Delete keys to move the screenshots to the Trash.
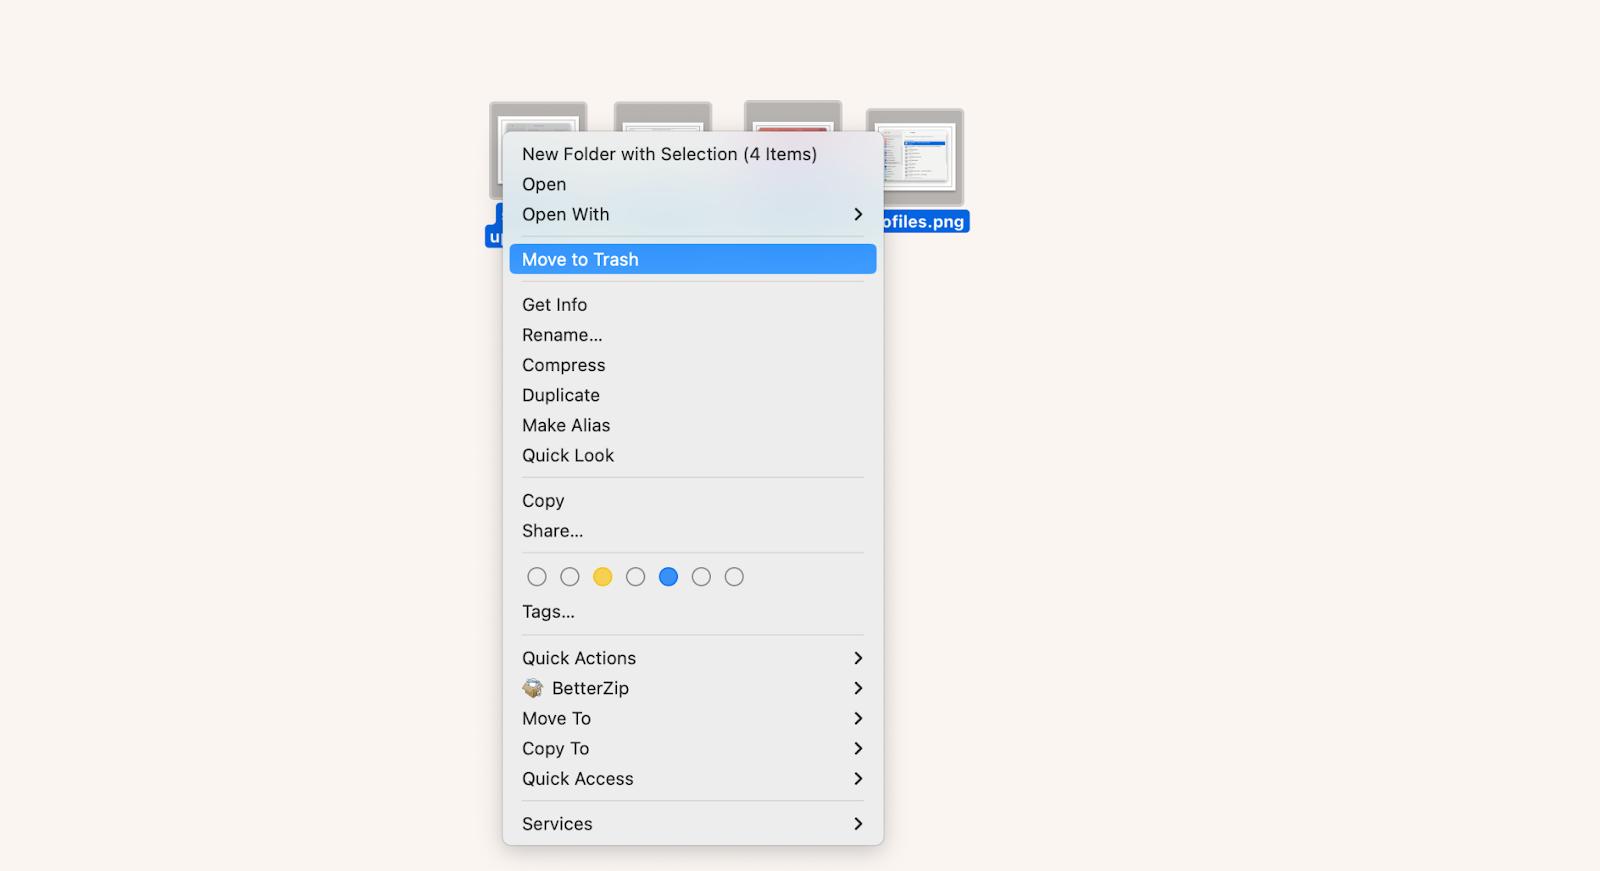
You can also right-click any highlighted screenshots and then choose Move to Trash from the context menu. Or you can just drag the screenshots to the Trash.
After you've moved the screenshots to the Trash, you'll need to empty it to permanently delete them from your Mac's disk and make more space for new files. To do this, right-click on the Trash icon, hit on the Empty Trash, and confirm.
How to automatically delete screenshots on Mac
As we discussed earlier, manually deleting screenshots is possible but definitely tedious. One of the best ways to optimize storage and keep the system organized is to clear them all out at the same time. For this, try CleanMyMac X. It slides you through the process of cleaning, optimizing, and securing your Mac with no effort.
Here's how to use CleanMyMac X to remove files that take up space.
- Download and open CleanMyMac X.
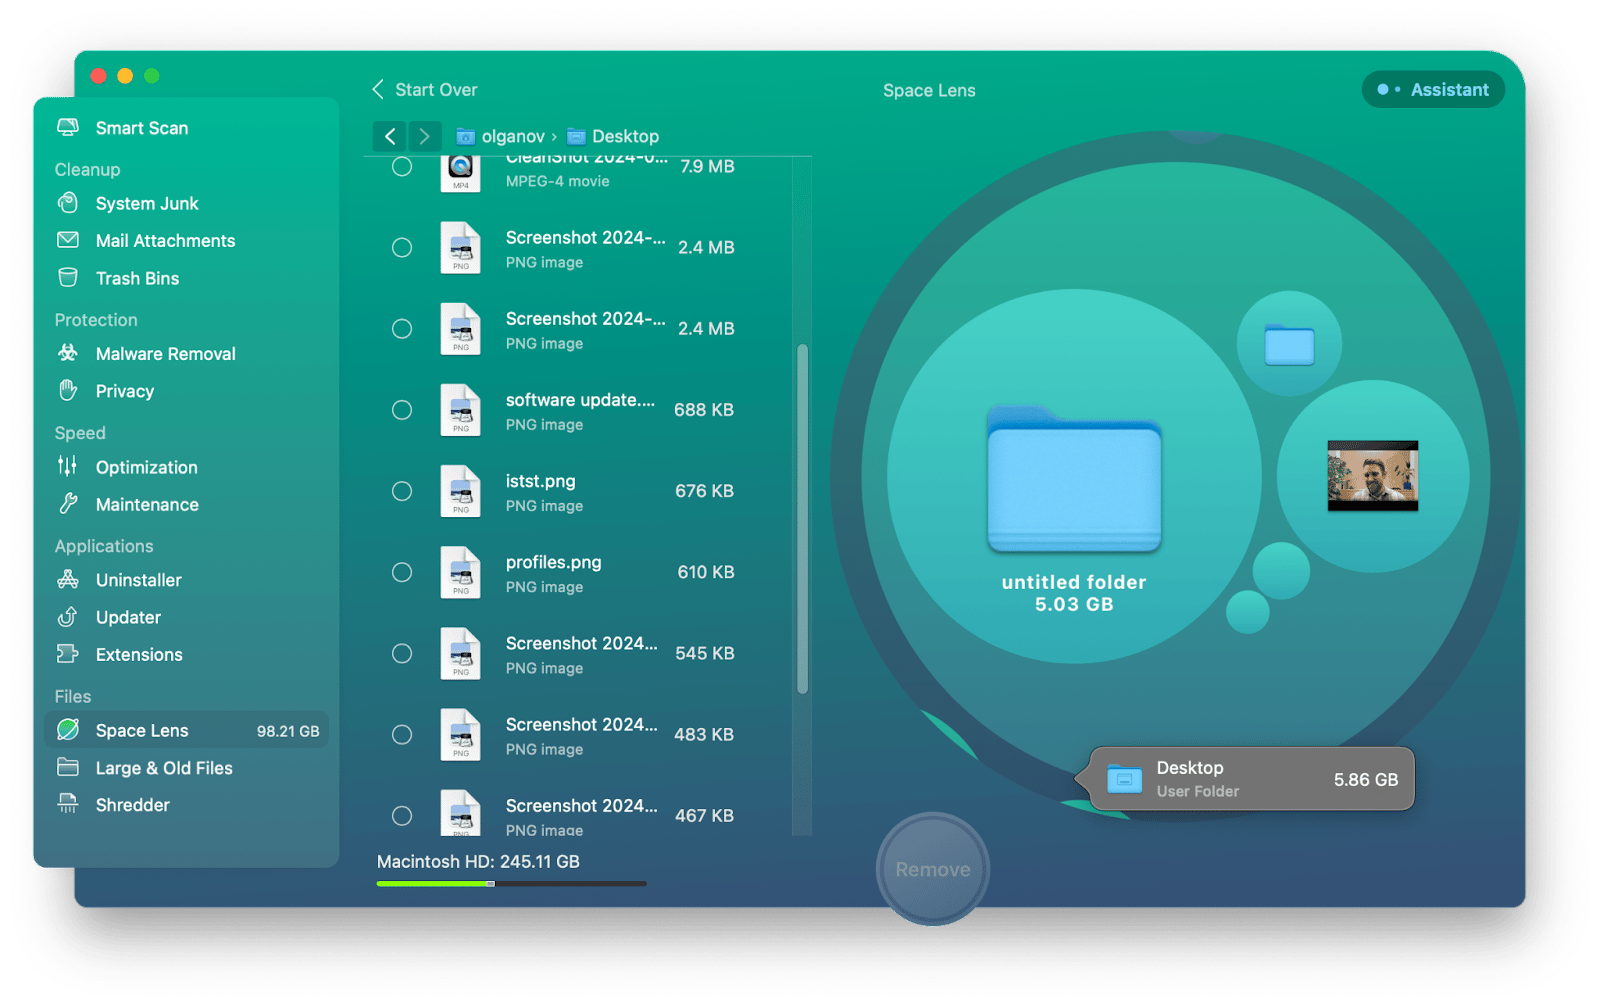
- In the left sidebar of CleanMyMac X, select the Space Lens feature.
- Click on the Scan button. This will analyze your Mac's storage and identify areas where space can be reclaimed.
- Once the scan is complete, double-click on the Users folder > your user folder > Desktop.
- Check the box next to each screenshot that you want to delete and hit Remove. You can preview the screenshots to ensure you're selecting the right ones.
To search for large and old files, use the button of the same name in the left panel. We also recommend running Smart Scan – it will clean your Mac from system junk (your computer could have accumulated gigabytes of it!).
How to find lost screenshots on Mac
Sometimes, you accidentally move or lose a screenshot. Here is a detailed tutorial on finding them on your Mac.
- Open Finder.
- In the File menu, click on Find or press Command + F to open a new search window.
- Make sure to select This Mac in your search scope so that it examines the whole system.
- In the search field, type kMDItemIsScreenCapture:1 and press Enter. Your screen captures will appear in the search results within the Finder window.
We also recommend you right-click anywhere in the window and choose View > as Icons to display thumbnails of your screenshots. This kind of representation enables to identify the required files.
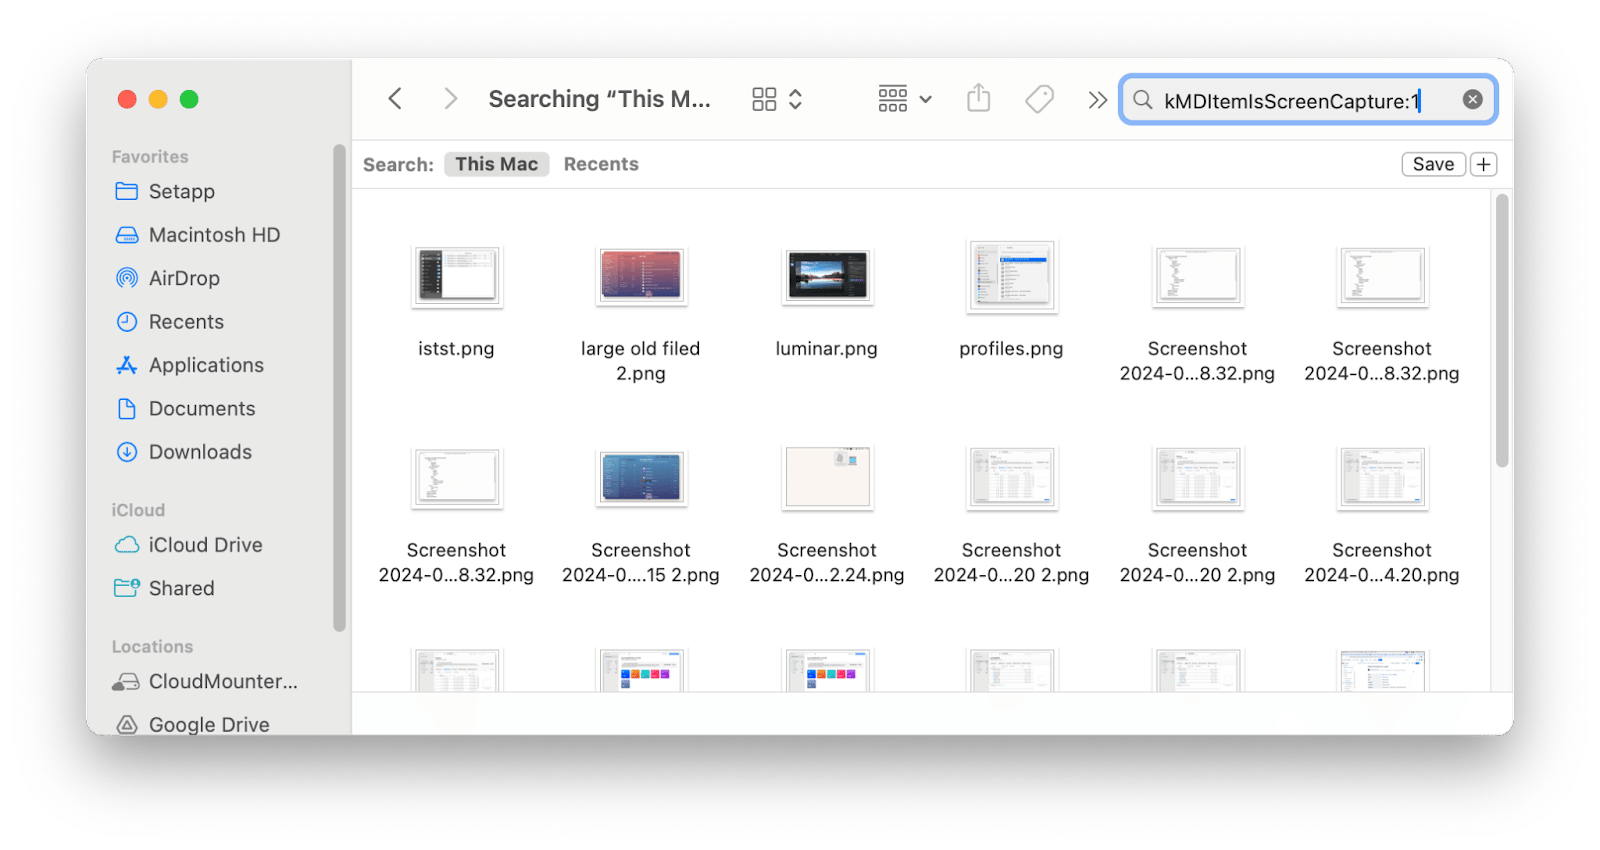
Note: If you know the exact name of the screenshot, you can type it in the search bar.
Finder may be powerful in terms of file management; however, there will be situations when it is necessary to possess more advanced qualities and customization options. This is where Path Finder steps in. Its dual pane view makes moving, copying, deleting, and synchronizing files between different locations easier and more convenient. Another special feature of this app is Drop Stack. It provides a quick temporary storage space for files, helping you to collect items before placing them in a more organized position elsewhere.
How to delete screenshots on a Mac: Fixed
So there you have it, a step-by-step guide on how to remove screenshots from a Mac desktop effectively.
To avoid cluttering your desktop with screenshots altogether, use CleanShot X. It stores images in the cloud, so they take up zero space on your local disk.
When you need to clean up your desktop, the most familiar way is to select screenshots and drag them to the Trash. A more automated way is to press Command + Delete. The most advanced method is to use CleanMyMac X, which will clean your computer of various junk in one go.
These and other apps mentioned in the article are available on Setapp, a platform with dozens of Mac apps for work and life. If you want to understand them better, sign up for 7-day free trial period. You'll have full access to all apps with no restrictions or ads.


