Where do screenshots go on Mac?
- Screenshots are saved to the Desktop by default
To change the default screenshot location, press Shift + Command + 5 to open the Screenshot toolbar > click Options > choose a new location under Save to. You can also set a custom folder using the “Other Location” option. - Find screenshots easily with Finder search
Open Finder, press Command + F, and search using this exact string:kMDItemIsScreenCapture:1. This shows all screenshots on your Mac, no matter where they’re stored. - Automatically upload or organize screenshots with tools like CleanShot X or Dropshare
CleanShot X lets you hide desktop clutter and set custom save destinations, while Dropshare uploads screenshots directly to your preferred cloud storage. Both apps support shortcuts, editing, and automatic saving. - Manage and clean up screenshots with CleanMyMac
Use CleanMyMac to remove clutter regularly and detect duplicate or old screenshots. All the apps mentioned are available on Setapp for a free 7-day trial. Try 260+ Setapp apps now!
Knowing "Where do screenshots go on Mac?" is important for a couple of reasons. First, it helps you find them easily when you need to view or use them. Second, it allows you to keep your files organized.
In this tutorial, we'll help you find the Mac screenshot location and show you how to choose where they go in the future. Works for all Mac models, including MacBook Air and MacBook Pro.
Where are screenshots saved on a Mac?
If you use the Shift, Command, and number keys for taking screenshots on a Mac, it is automatically saved to the desktop (for macOS Mojave and later) as a PNG file. Mac users running macOS prior to Mojave should know that their screenshot app is called Grab. The Grab app's default save location is your Documents folder.
No matter your macOS, if you screenshot a lot, you might end up with a cluttered Mac. Not the best outcome, right? See what you can do about that.
How to change where Mac screenshots are saved?
To keep files on your computer organized, you can easily change where screenshots are saved Mac.
Fortunately, it's easy to do if you're running macOS Mojave and later.
Here's how you can change Mac screenshot location:
- Press Shift + Command + 5 to open Screenshot app.
- Then click Options.
- From the Save to section, select your preferred location.
- If you select Other Location, you can create a new folder or choose another one.
That's how you change screenshot location Mac. Easy!
Note that if you're running older macOS, anything prior to Mojave, it's not as simple to change screenshot location Mac. Yet it's still possible with the help of Terminal command.
Here's what you need to do:
- On your Mac, create a screenshot folder and give it a name you like (for example, Screenshots).
- Next, open Terminal. For this, you can use Spotlight (press Command + Space at the same time and type in the word Terminal in the search field. Then press Return. Alternatively, find Terminal in Applications > Utilities folder).
- Once you open Terminal, type the following command: defaults write com.apple.screencapture location
- Then, drag your folder (the one we named Screenshots) onto the Terminal window. You'll see its path, including the file name, displayed after the command.
- Press Enter and quit Terminal.
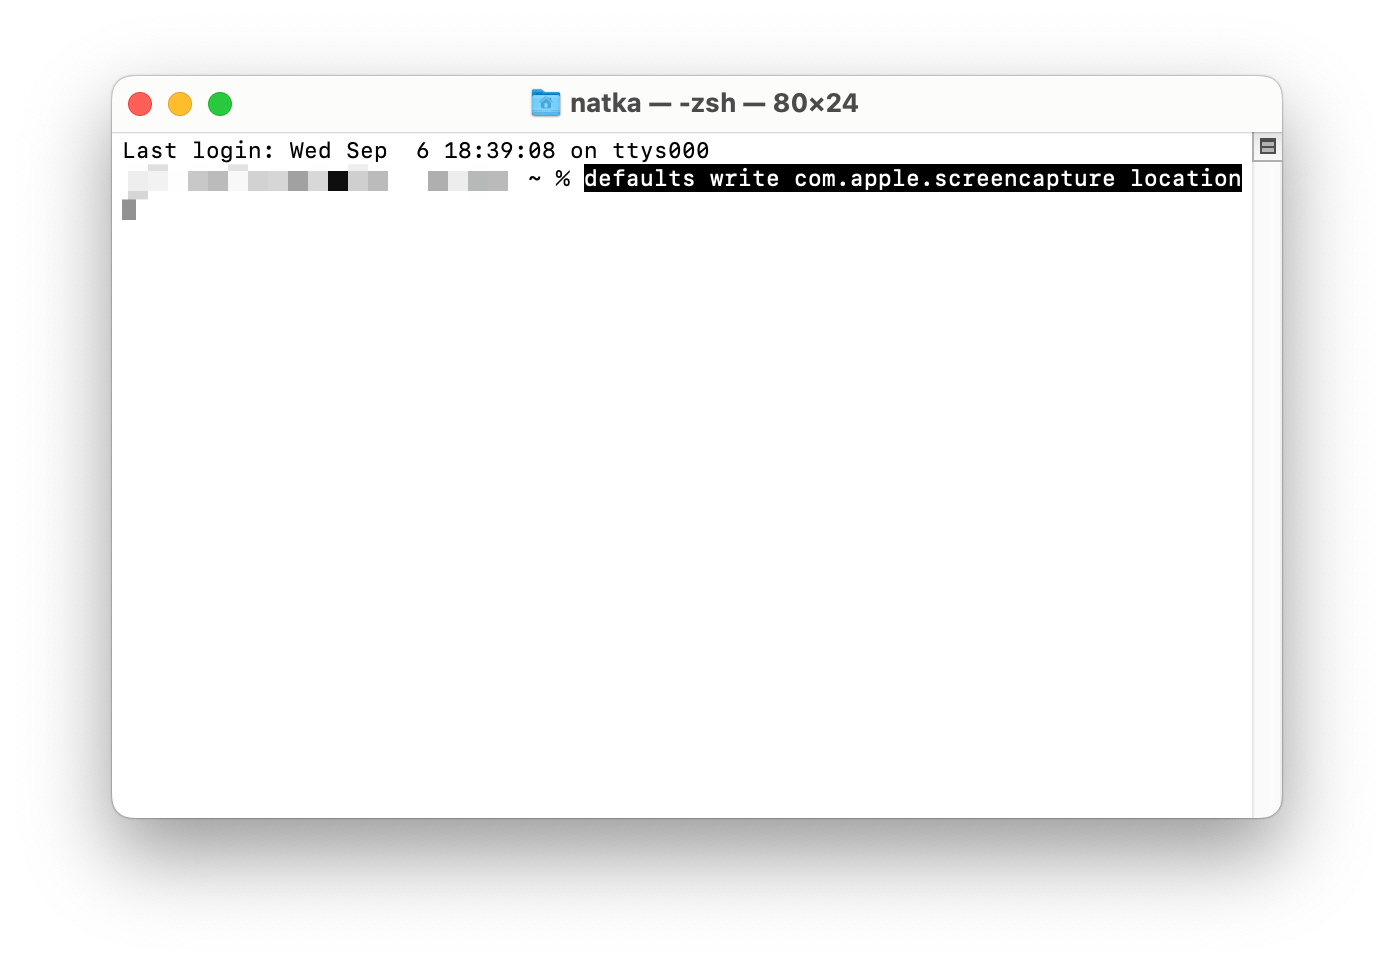
If you want your Mac save screenshots to folder other than the one you just specified, you'll have to go through the same process in Terminal but use your other folder.
TipIf you're looking to expand your screen capture and screen recording capabilities on your Mac, consider trying CleanShot X instead of relying solely on the built-in macOS screenshot tool. The app offers a number of useful features, such as advanced annotation and editing options, seamless sharing, and organization. The best part: CleanShot X hides desktop folders and icons so you can capture your Mac's screen on the fly without wasting time cleaning up! Also, check out a great guide on the best snipping tools on Mac. |
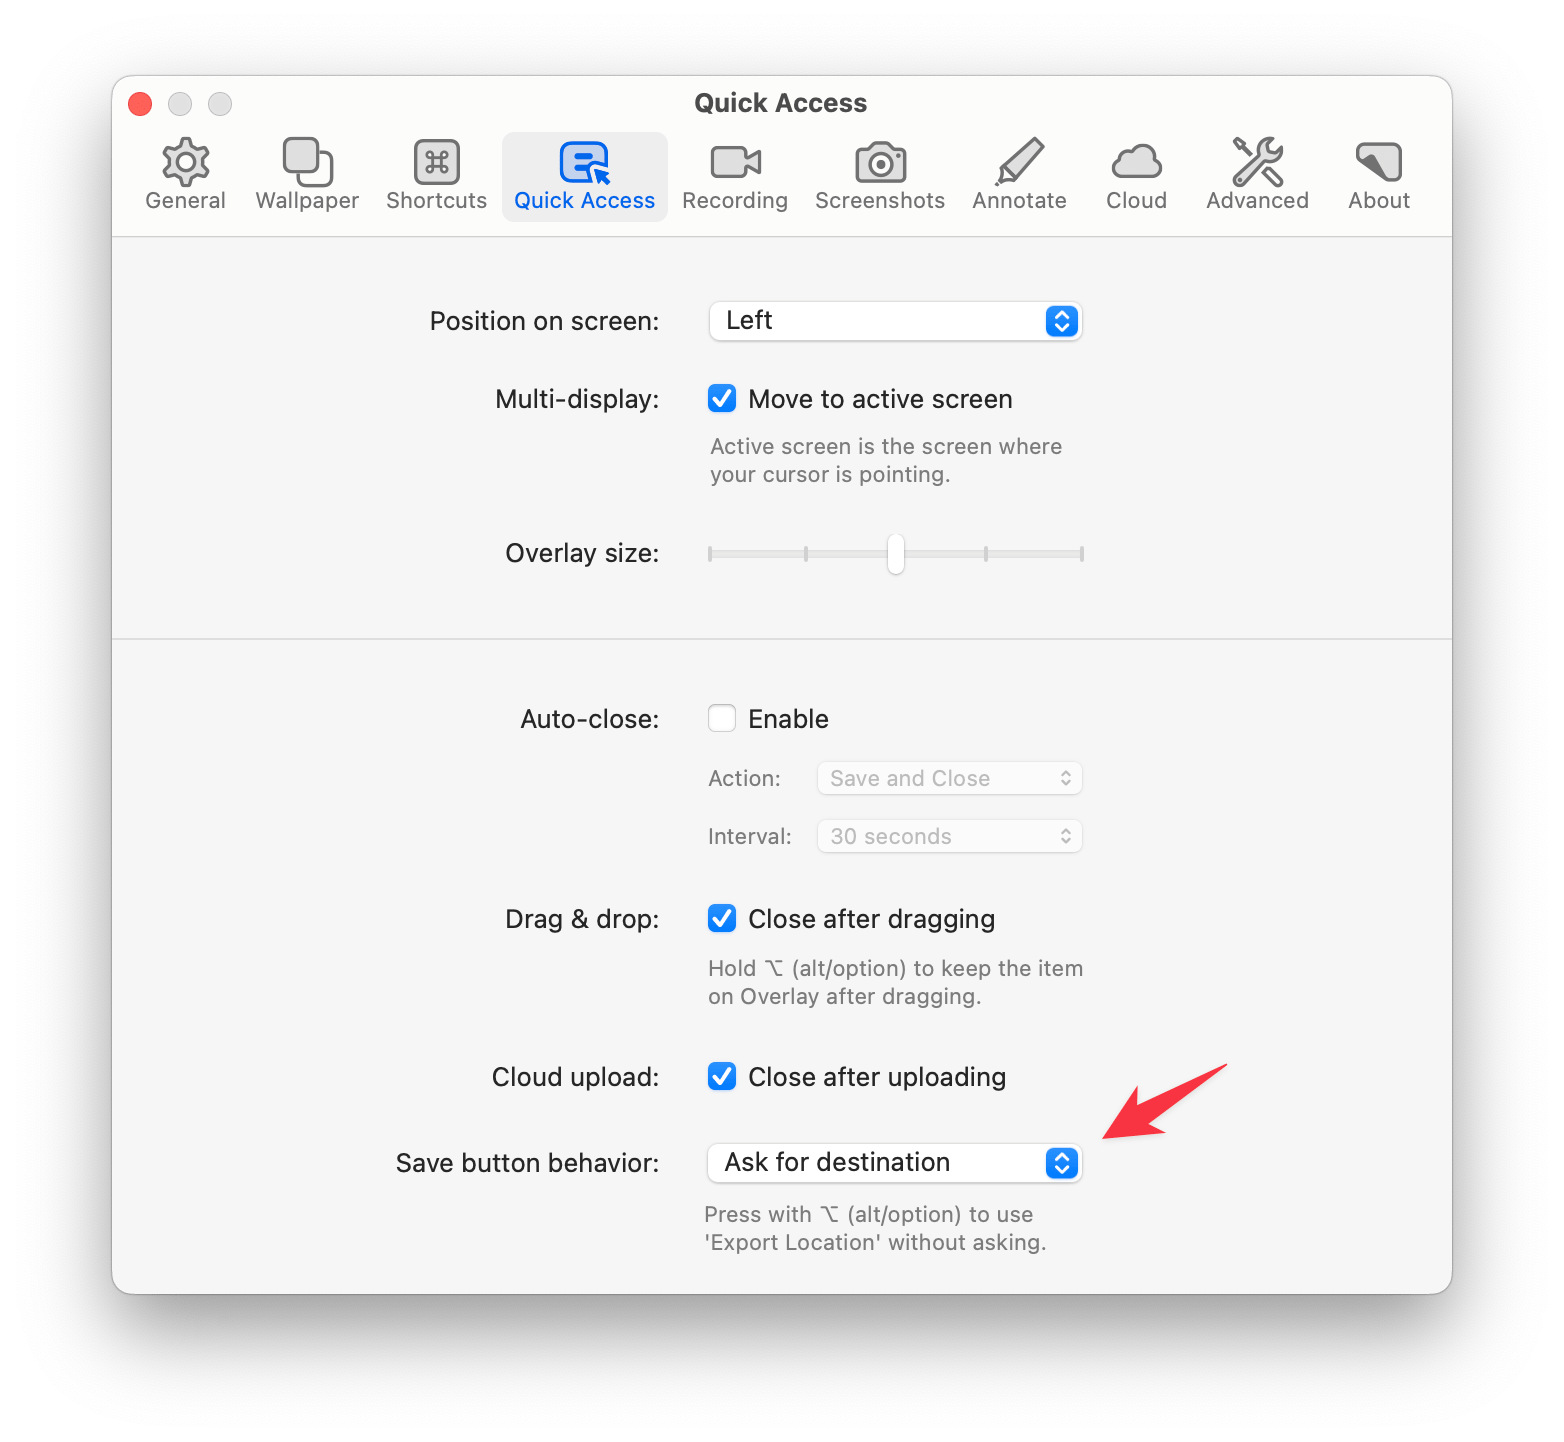
If you vary the location of where your screenshots are saved, open the app's Settings from the menu bar drop-down menu and go to Quick Access.
Find Save button behavior at the bottom of the window and set it to Ask for destination. This way, CleanShot X will give you a chance to pick your screenshot saving destination when you click the Save button on the screenshot miniature.
How to save screenshots to iCloud
Saving your screenshots to iCloud can be really helpful. First, it keeps your screenshots safe and backed up in case something happens to your Mac. Plus, you can easily access them from any of your iOS devices, like your iPhone or iPad.
To save screenshots to iCloud on your Mac, follow these steps:
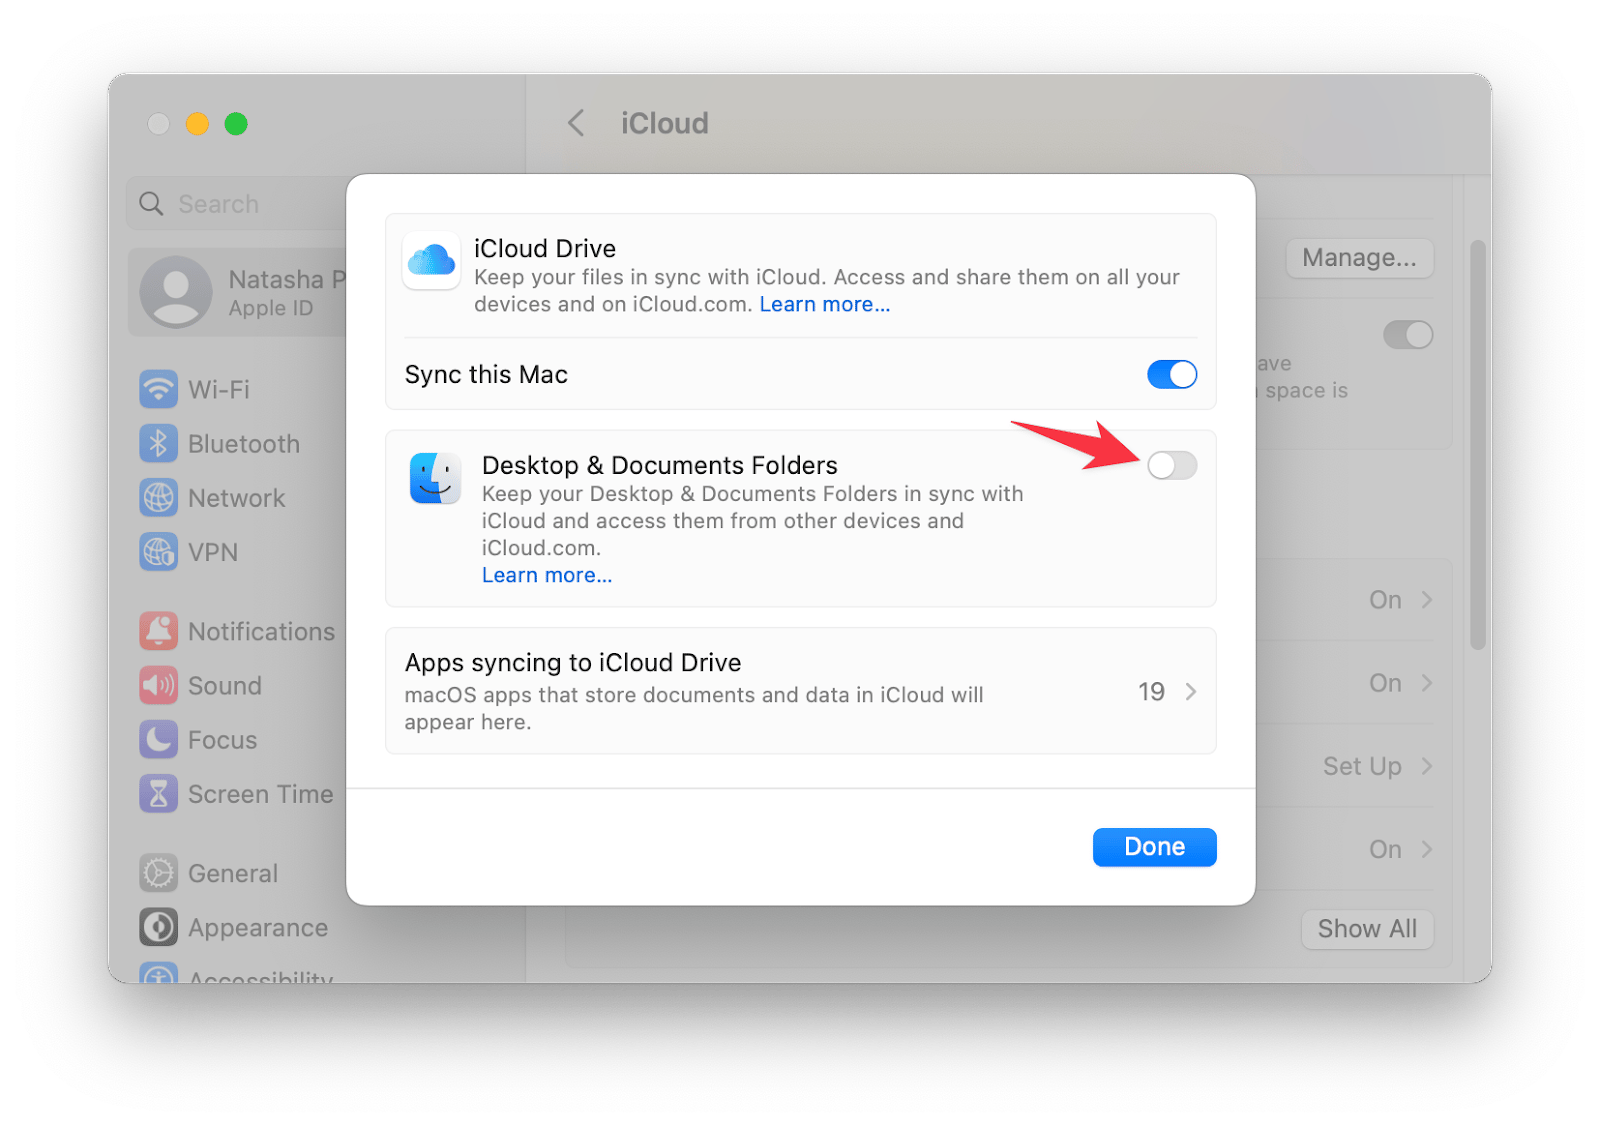
- Go to the Apple menu > System Settings
- Next, click on Apple Account (ex Apple ID) > iCloud > iCloud Drive
- Then make sure that Desktop & Documents Folders is turned on if you want to save screenshots to either of these folders. By enabling this option, anything saved to your desktop or documents folder, including screenshots, will automatically be saved to iCloud.
Tip: Learn what to do if syncing with iCloud paused.
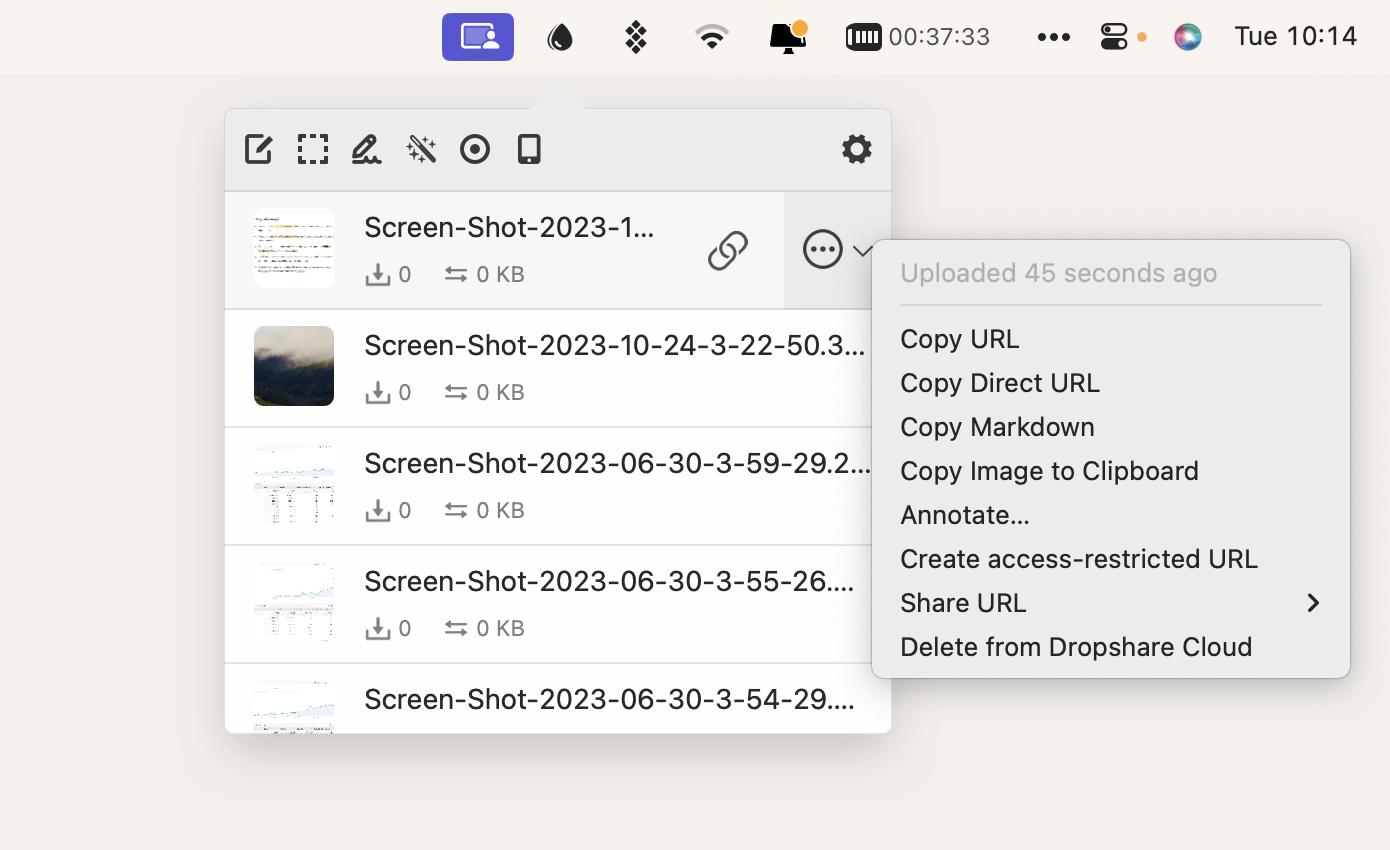
Most of us will simply snap screenshots, let them pile up on our desktop, then curate them later on. This is fine, but the workflow can get messy, and if you would rather save your screenshots to a cloud service provider that isn't iCloud, Dropshare makes it really easy. You can even record keyboard shortcuts for Dropshare to capture and send your screenshots to any cloud service provider you like.
Here's how:
- Install and open Dropshare.
- Type in your email address and password to create your account.
- Click on the Dropshare icon in the menu bar, choose the cog, and select Preferences
- Choose the Screenshots tab.
- Next to Capture & Upload Screen, choose Record Shortcut.
- Press the keys you want to use for the shortcut.
- Repeat step 6 for Capture & Upload Selection as well as Capture & Annotate, if you want to use those features.
- Optionally, change the default file format to JPG by choosing it from the menu next to Capture all screenshots in.
- Close the Preferences window.
If automation doesn't suit you, Dropshare doesn't require it. You can drag and drop screenshots onto the Dropshare icon in your Mac menu bar and select where they should be shared. A great option for those who use their Mac for business and personal purposes and have cloud storage lockers for each use case.
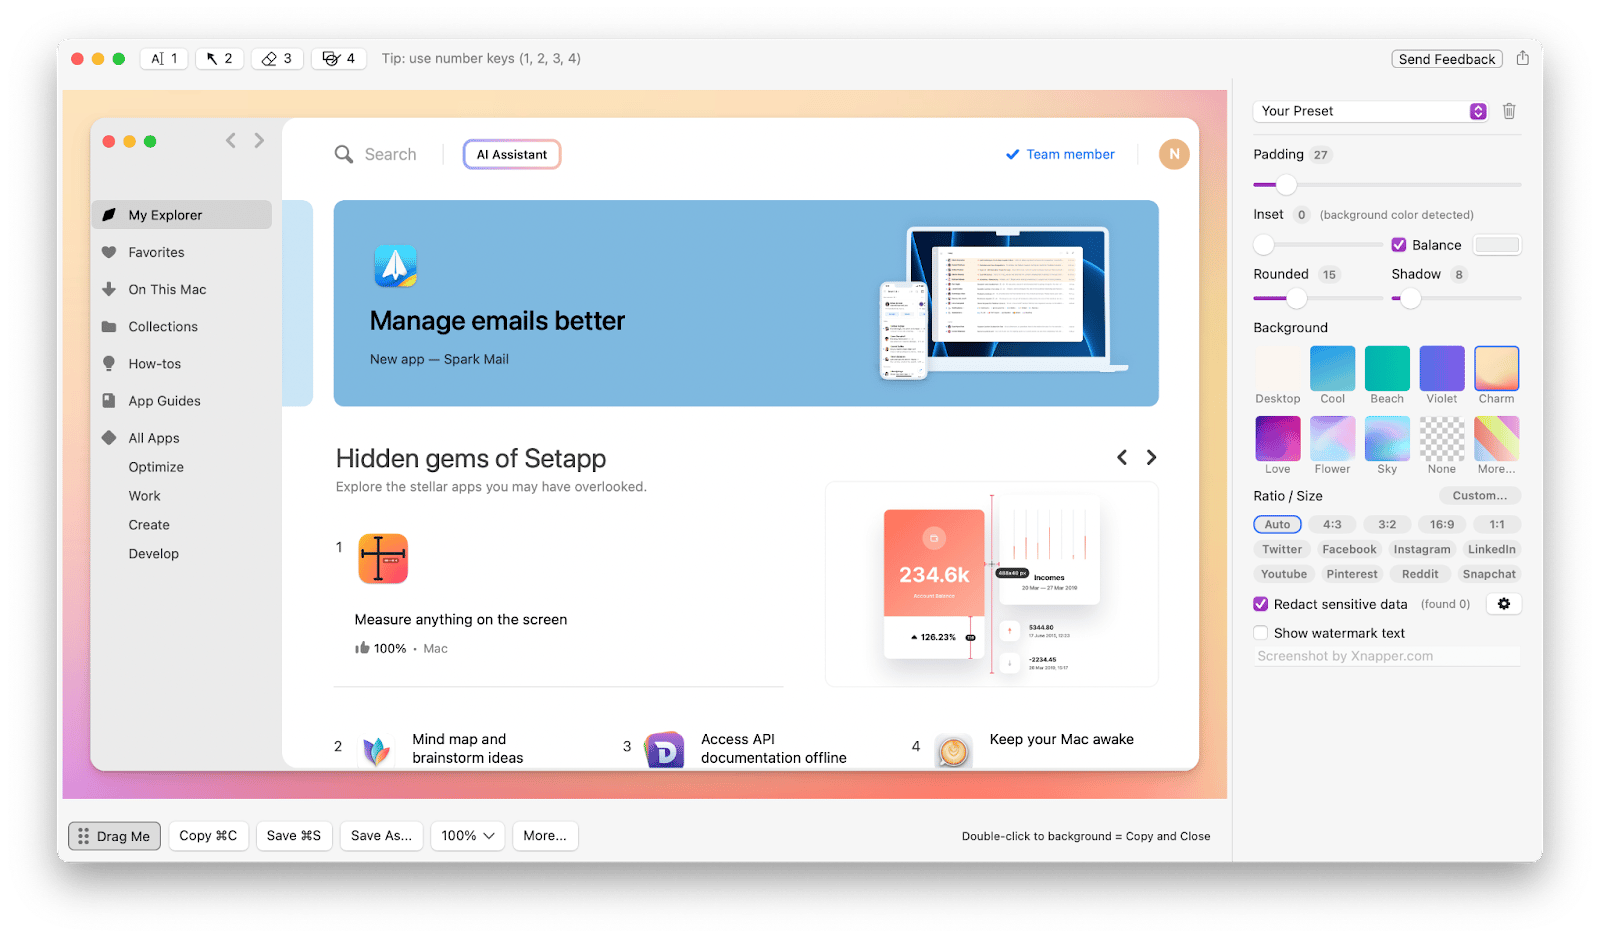
Tip: When it comes to sharing your screen captures, we all want them to look amazing, especially when it's for something like a presentation or showing off on Twitter. Try Xnapper, a screenshot app that helps you take beautiful screenshots in no time. It offers a number of quick and easy customization options for your screenshots, including a useful balance tool. Center your screenshot on a background with just one click. You can even change the padding, shadow, and border radius of your screenshot.
When editing your cropped screenshot in Xnapper, you have the option to place it on a blank canvas or use a background. It's also possible to easily customize the screenshot for different social media.
What if I can't find where are my screenshots saved?
As mentioned above, by default, screenshots you take on your Mac end up on the desktop (documents on older versions of Mac operating system). But you can easily set them to be saved to any custom folder, such as Downloads. In addition, you probably move some screenshots (such as those from specific apps) to your project folders. While this helps with organization, it makes finding all the screenshots stored on your Mac harder than it needs to be.
Fortunately, there are ways to find screenshots on Mac.
- Click the desktop, then choose File > Find from the Finder menu. Alternatively, press Command + F on your keyboard.
- After that, you'll see a Finder Search window.
- Click This Mac next to Search: under the window's toolbar. This will set your search scope to the entire boot drive.
- Type or copy and paste kMDItemIsScreenCapture:1 into the search field of the window. On MacOS 10.8 and later, all screenshot images are saved with the "kMDItemIsScreenCapture" flag, so you can easily search for them.
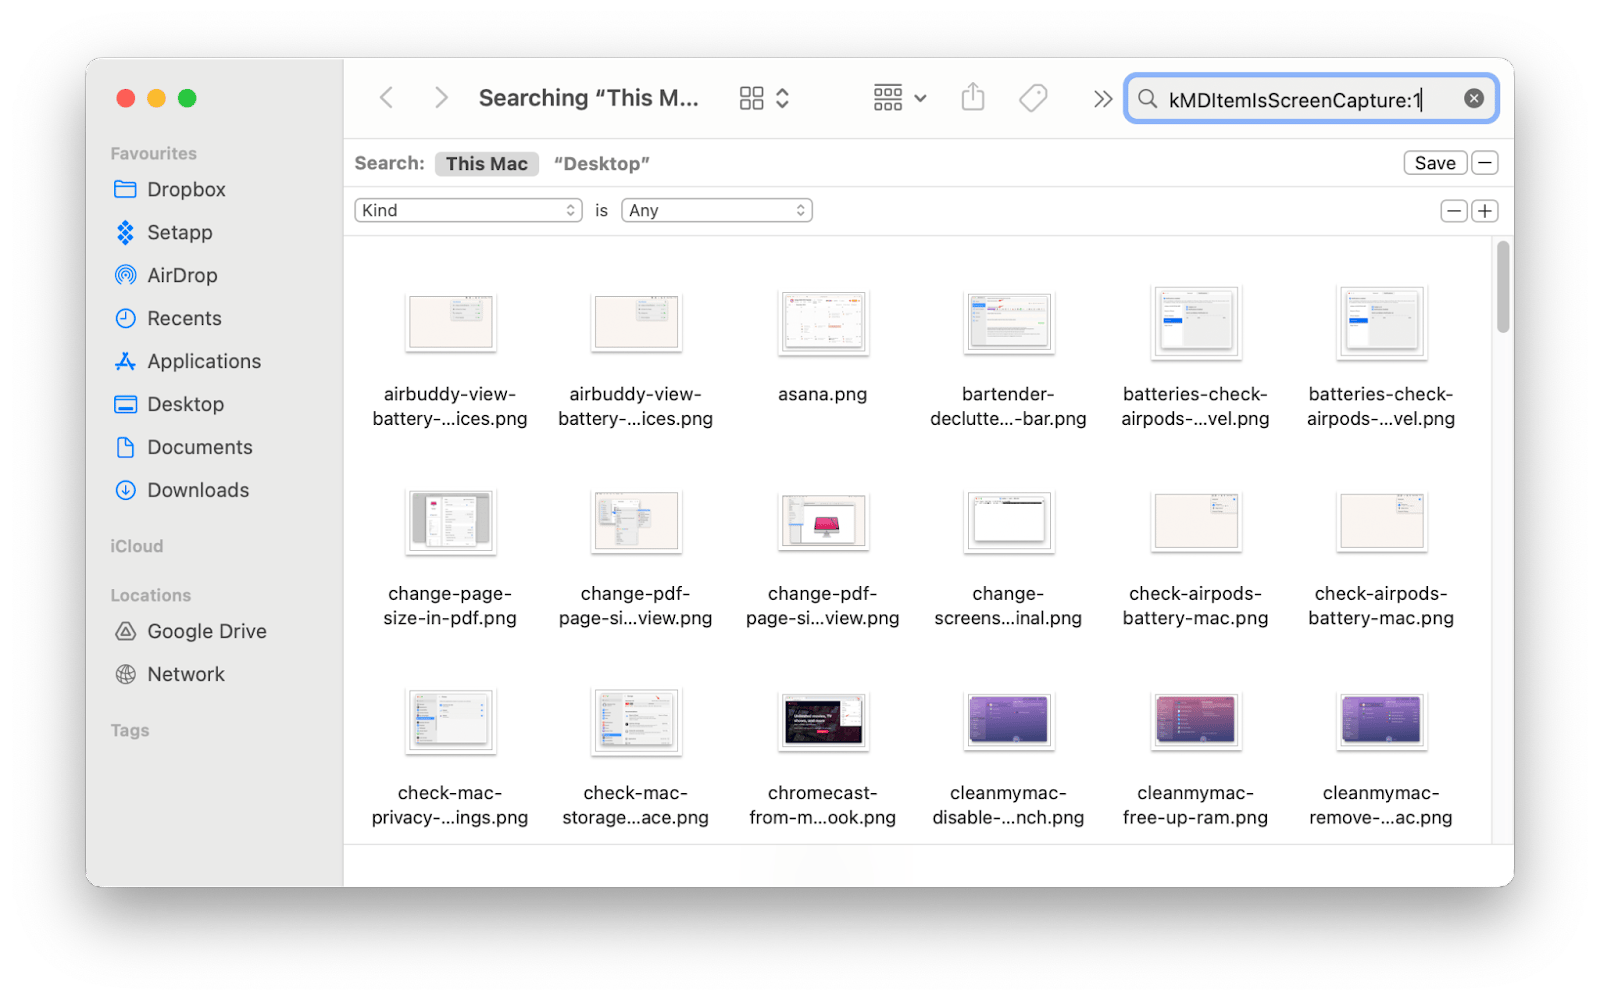
To visually browse your screenshots, switch to the Icons view in the toolbar.
You might also be interested in: What to do if a screenshot on Mac is not working.
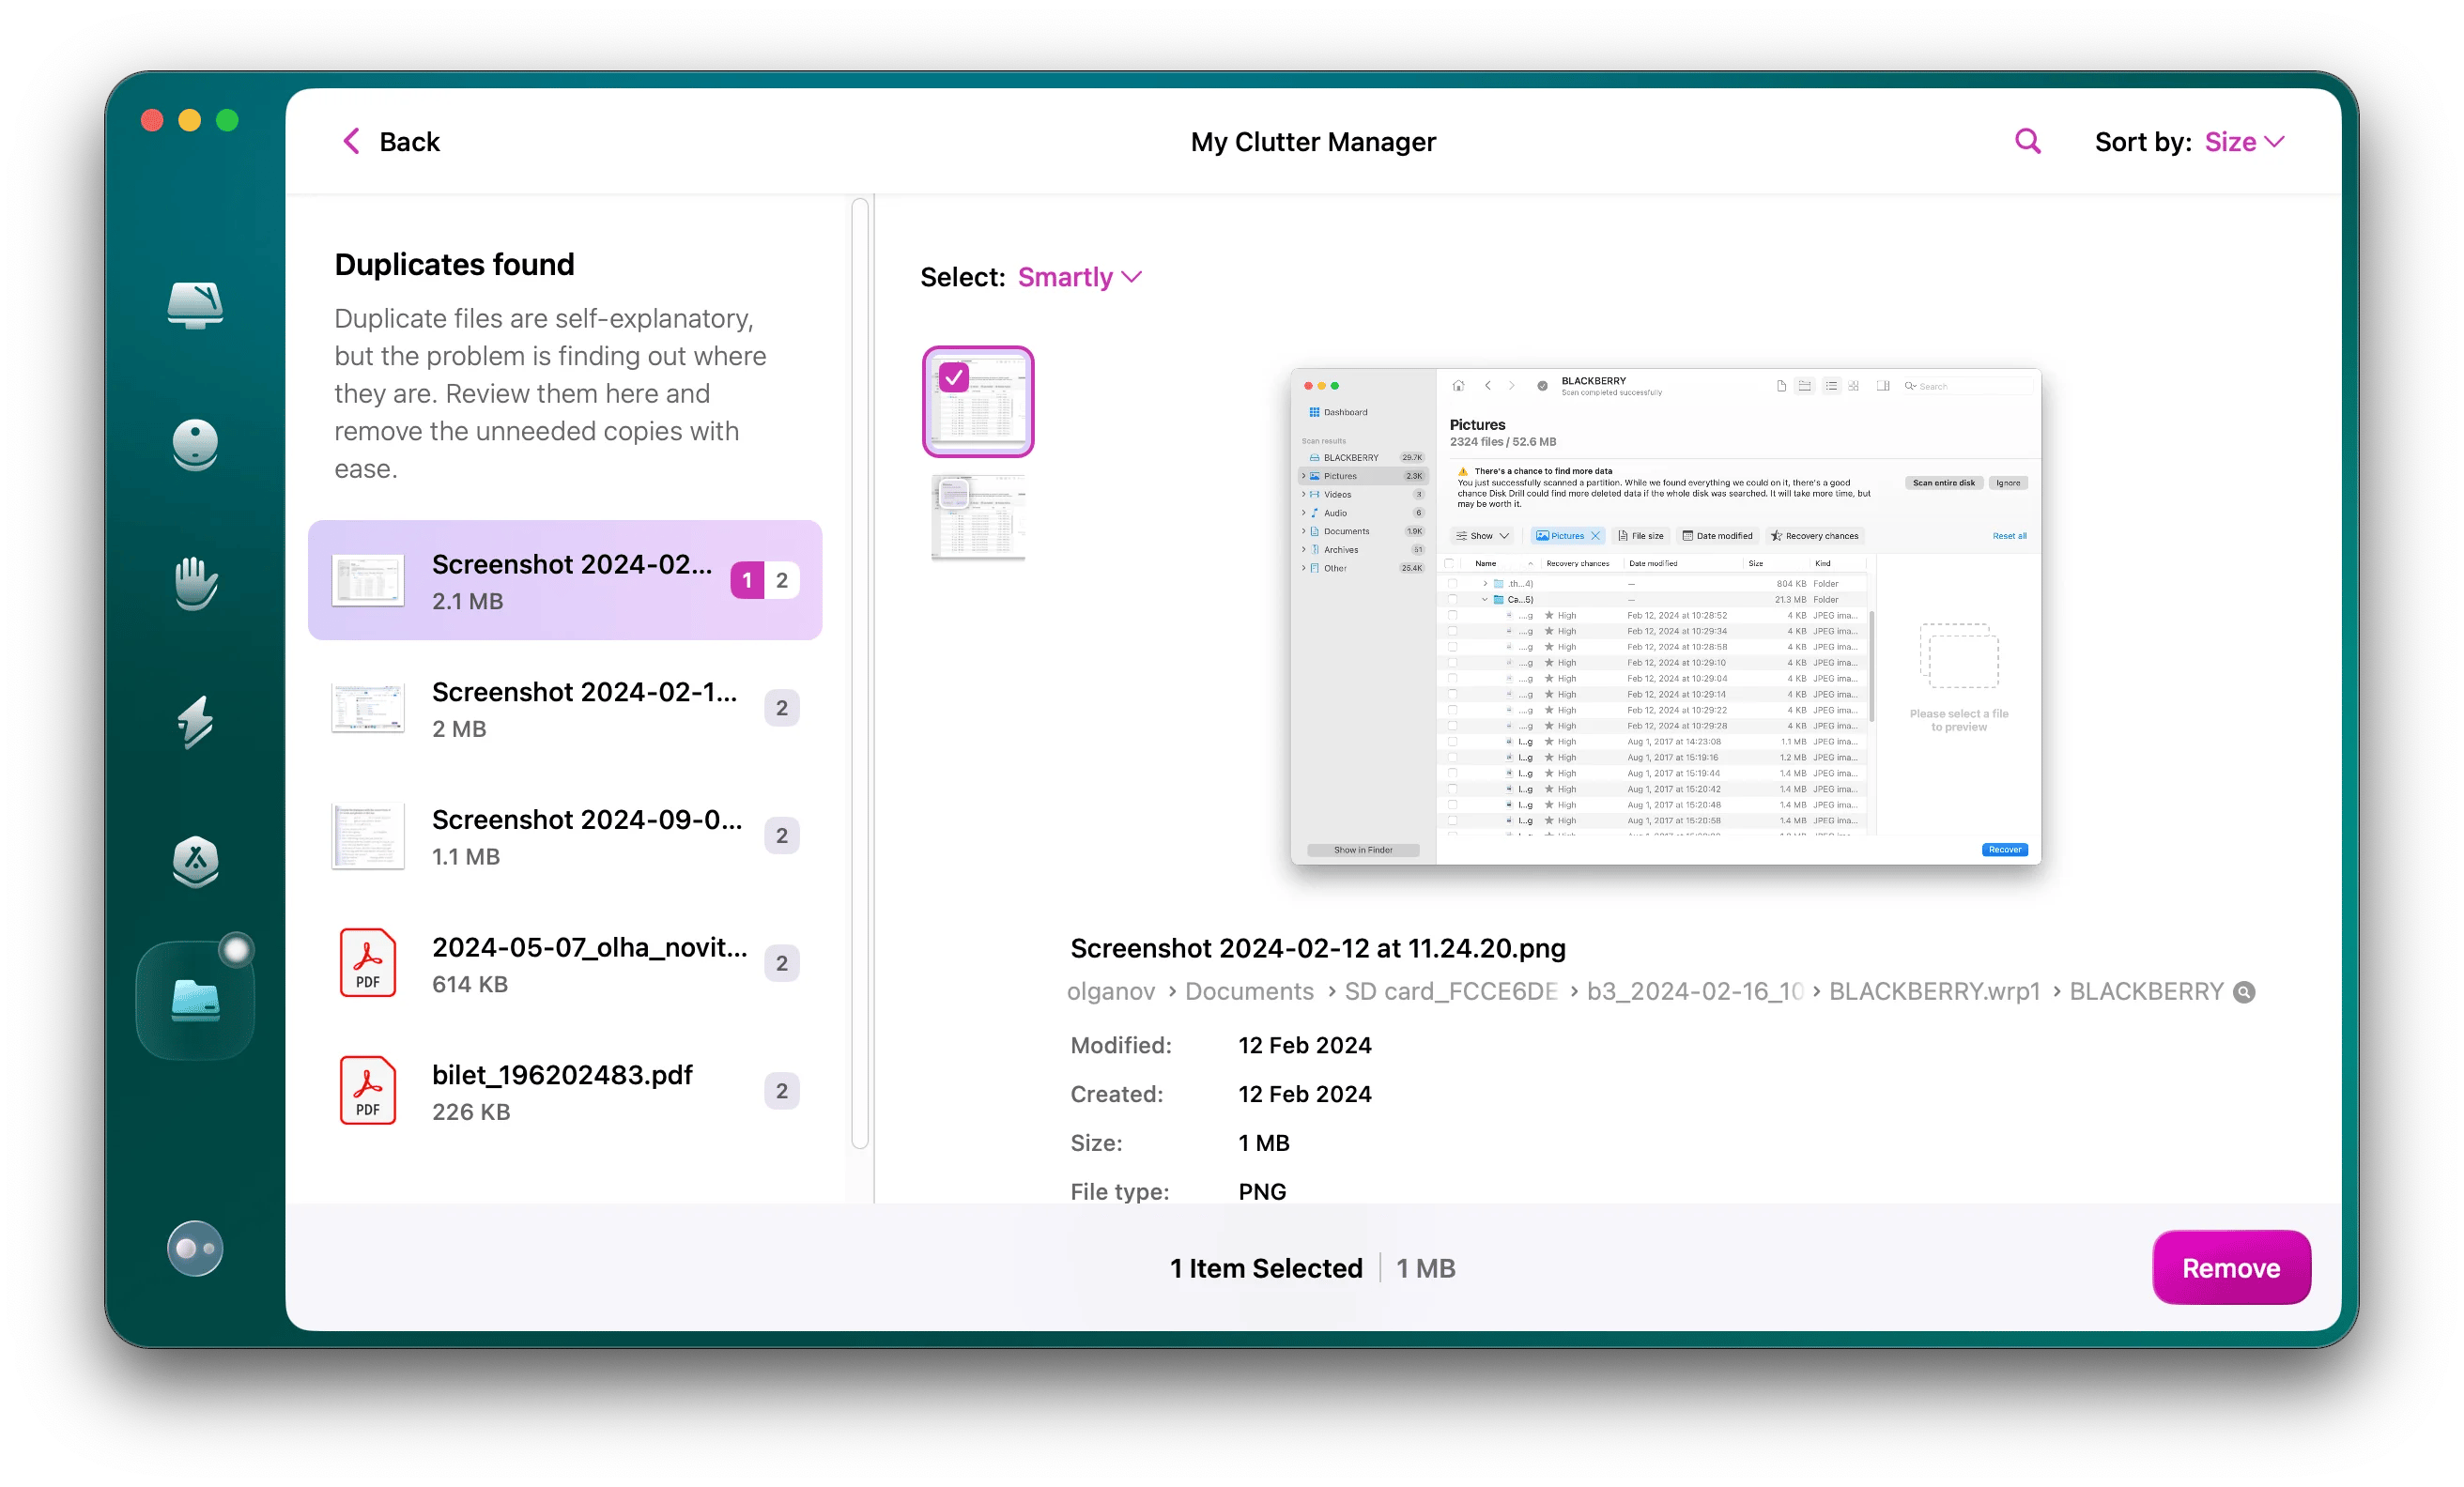
Tip: Screenshots can accumulate quickly and take up valuable space on your Mac. To optimize your computer's performance, it's important to regularly clean up screenshot files, along with other system clutter such as cache, temporary, and broken files. You can do this manually, but it can be time-consuming. That's why we recommend CleanMyMac, a Mac care app. With its Cleanup and My Clutter tools, the first helps you quickly remove all system junk with just a few clicks, and the second detects duplicates and similar images. Just run the scan, and in a few minutes, you’ll see all the junk.
Where are screenshots saved on Mac: Final thoughts
Now you know where screenshots go on a Mac and how to change Mac screenshot location.
As a rule, you'll find them on the desktop or in the Documents folder.
In this article, we also talked about how taking a screenshot on a Mac takes some getting used to. And if you want your screenshot to look amazing, you definitely need a few extra apps, such as CleanShot X and Xnapper. If you take a lot of screenshots, try CleanMyMac to clean up screenshot files, along with duplicates and other system clutter such as cache, temporary, and broken files.
Note that all apps mentioned in this article – CleanShot X, Xnapper, CleanMyMac, and Dropshare – are available for free as part of a seven-day trial of Setapp, a platform that hosts dozens of carefully curated apps for your Mac, iPhone, and iPad. During your week-long trial, you'll have access to all apps in Setapp's catalog, all free to test and try at your leisure.
FAQs:
Do screenshots disappear on Mac?
If you can't find your screenshots, it's probably because you or someone else changed the location they are saved to. By default, screenshots are saved to the desktop or the Documents folder on your Mac.
If you still can't find your screenshots, press Command + Space on your keyboard at the same time to open Spotlight search. Then, type the word screenshot in the search bar, and you'll see a list of matching screenshot files in the results below.
How do you copy a screenshot to the Сlipboard on a Mac?
Screenshots taken using keyboard shortcuts (Shift + Command + 3 to capture the entire screen, or Shift + Command + 4 to capture a portion of the screen using the crosshair) are usually saved to your desktop. However, when you hold down the Control key on one of these shortcuts, macOS copies the captured image to the Clipboard instead of saving it as a file on your desktop.
If you find it difficult to simultaneously press four keys, we recommend you use the CleanShot X app. It not only allows you to easily copy the screenshot to the Сlipboard but also has many advanced features compared to the native Screenshot app.
Why are my screenshots not saving?
If you ask, "Where are my screenshots going on Mac?", use the Command + Shift + 5 keyboard shortcut to take a screenshot. Sometimes, the keyboard settings are not correct, which can cause a screenshot to not work on your Mac. So, if Mac screenshots do not save to the desktop, you need to check your keyboard settings (Apple menu > System Settings > Keyboard > Keyboard Shortcuts > Screenshots). Check this guide for more fixes.
