Alright, let’s be real — I don’t have kids of my own. But as the designated "tech fixer" in my family, I was called in when my sister and brother-in-law needed help setting up parental controls on their daughter’s Mac. She had just turned 11 and needed a Mac for online classes. My mission? Make sure Emilia can use her Mac without accidentally stumbling into the Wild West of the internet.
So, after hours of clicking around, testing settings, and making notes on what actually works, here’s my comprehensive guide to setting up parental controls on Mac — updated for macOS Sequoia (because let’s keep it fresh). Plus, I’ll throw in personal experience tips you won’t find anywhere else online.
How to set up parental controls on Mac
When it comes to parental controls on Mac, there are two key places you need to know about:
Family Sharing: This is where you manage Apple Account settings for your kid, approve purchases, and share subscriptions like Apple Music.
Screen Time: The real MVP for setting limits on screen usage, blocking inappropriate content, and keeping tabs on how much time is spent on TikTok vs. Google Docs.
So, here’s a quick overview of how to set up parental controls on Mac:
I want to...
Do this!
See how much time my kid spends on apps
Click App & Website Activity in Screen Time
Block social media apps after homework time
Set App Limits for specific apps
Make sure my kid is not holding the Mac too close
Turn on Screen Distance alerts
Limit messages to family and trusted friends
Enable Communication Limits
Prevent accidental (or sneaky) purchases
Restrict purchases in Content & Privacy settings
Block explicit websites
Use Web & Games Restrictions under Content & Privacy
Disable Siri or restrict AI-generated content
Click Intelligence & Siri settings
Prevent in-app purchases from draining my wallet
Go to Store Restrictions and turn off in-app purchases
Hide certain apps completely
Use App & Feature Restrictions to disable specific apps
Lock changes to these settings
Use Preference Restrictions so only parents can adjust settings
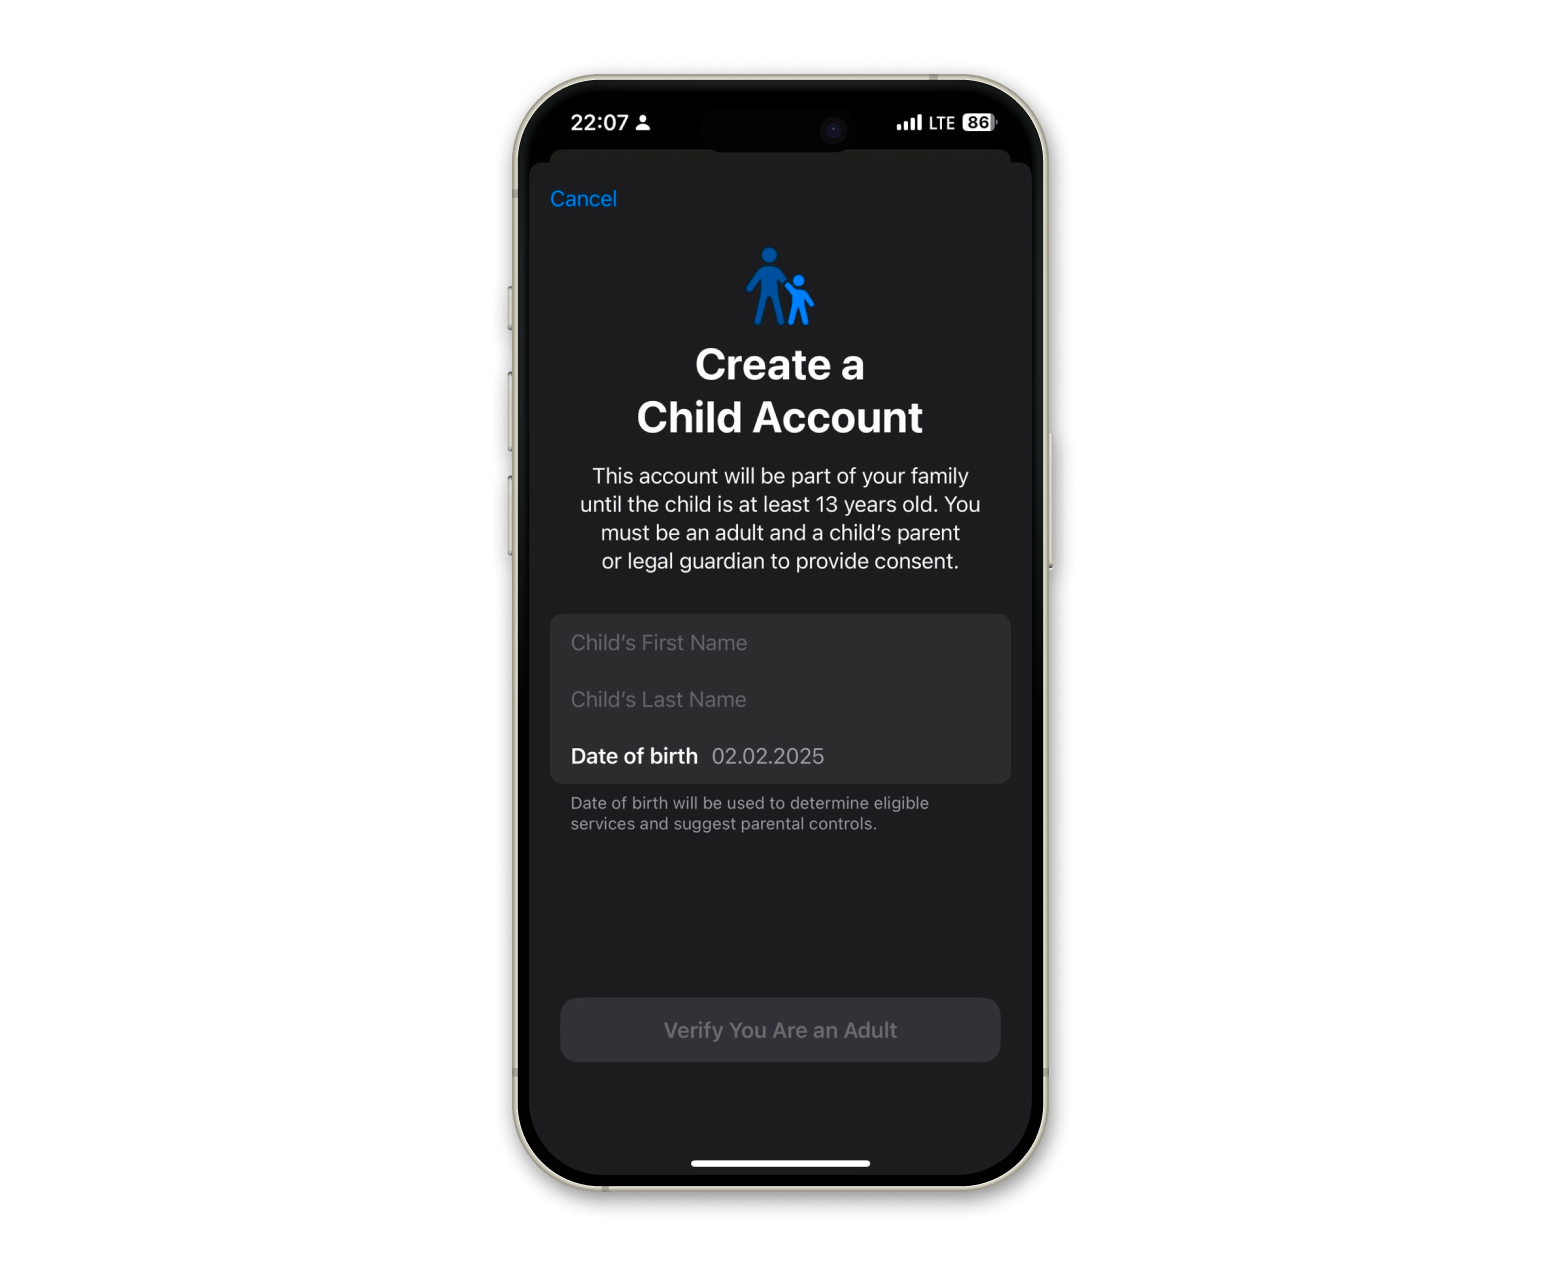
Create an Apple Account for your child
Before you can use all the parental control magic, you must create an Apple Account for your child and add them to your Family Sharing group. Kids under 13 (the age varies by region) can’t set up an Apple Account independently, so a parent or guardian must do it for them.
Here’s how I set it up on my sister’s iPhone, but you can also do it on a Mac.
On your iPhone or iPad:
Open Settings > Family.
Tap Add Member, then select Create Child Account and tap Continue.
Enter your child’s name and date of birth. (Double-check this! Apple is super strict about DOB changes later.)
Follow the on-screen steps to complete the setup.
Choose an email for their Apple Account — either their existing one, a suggested @icloud.com address, or even their Game Center nickname.
On your Mac:
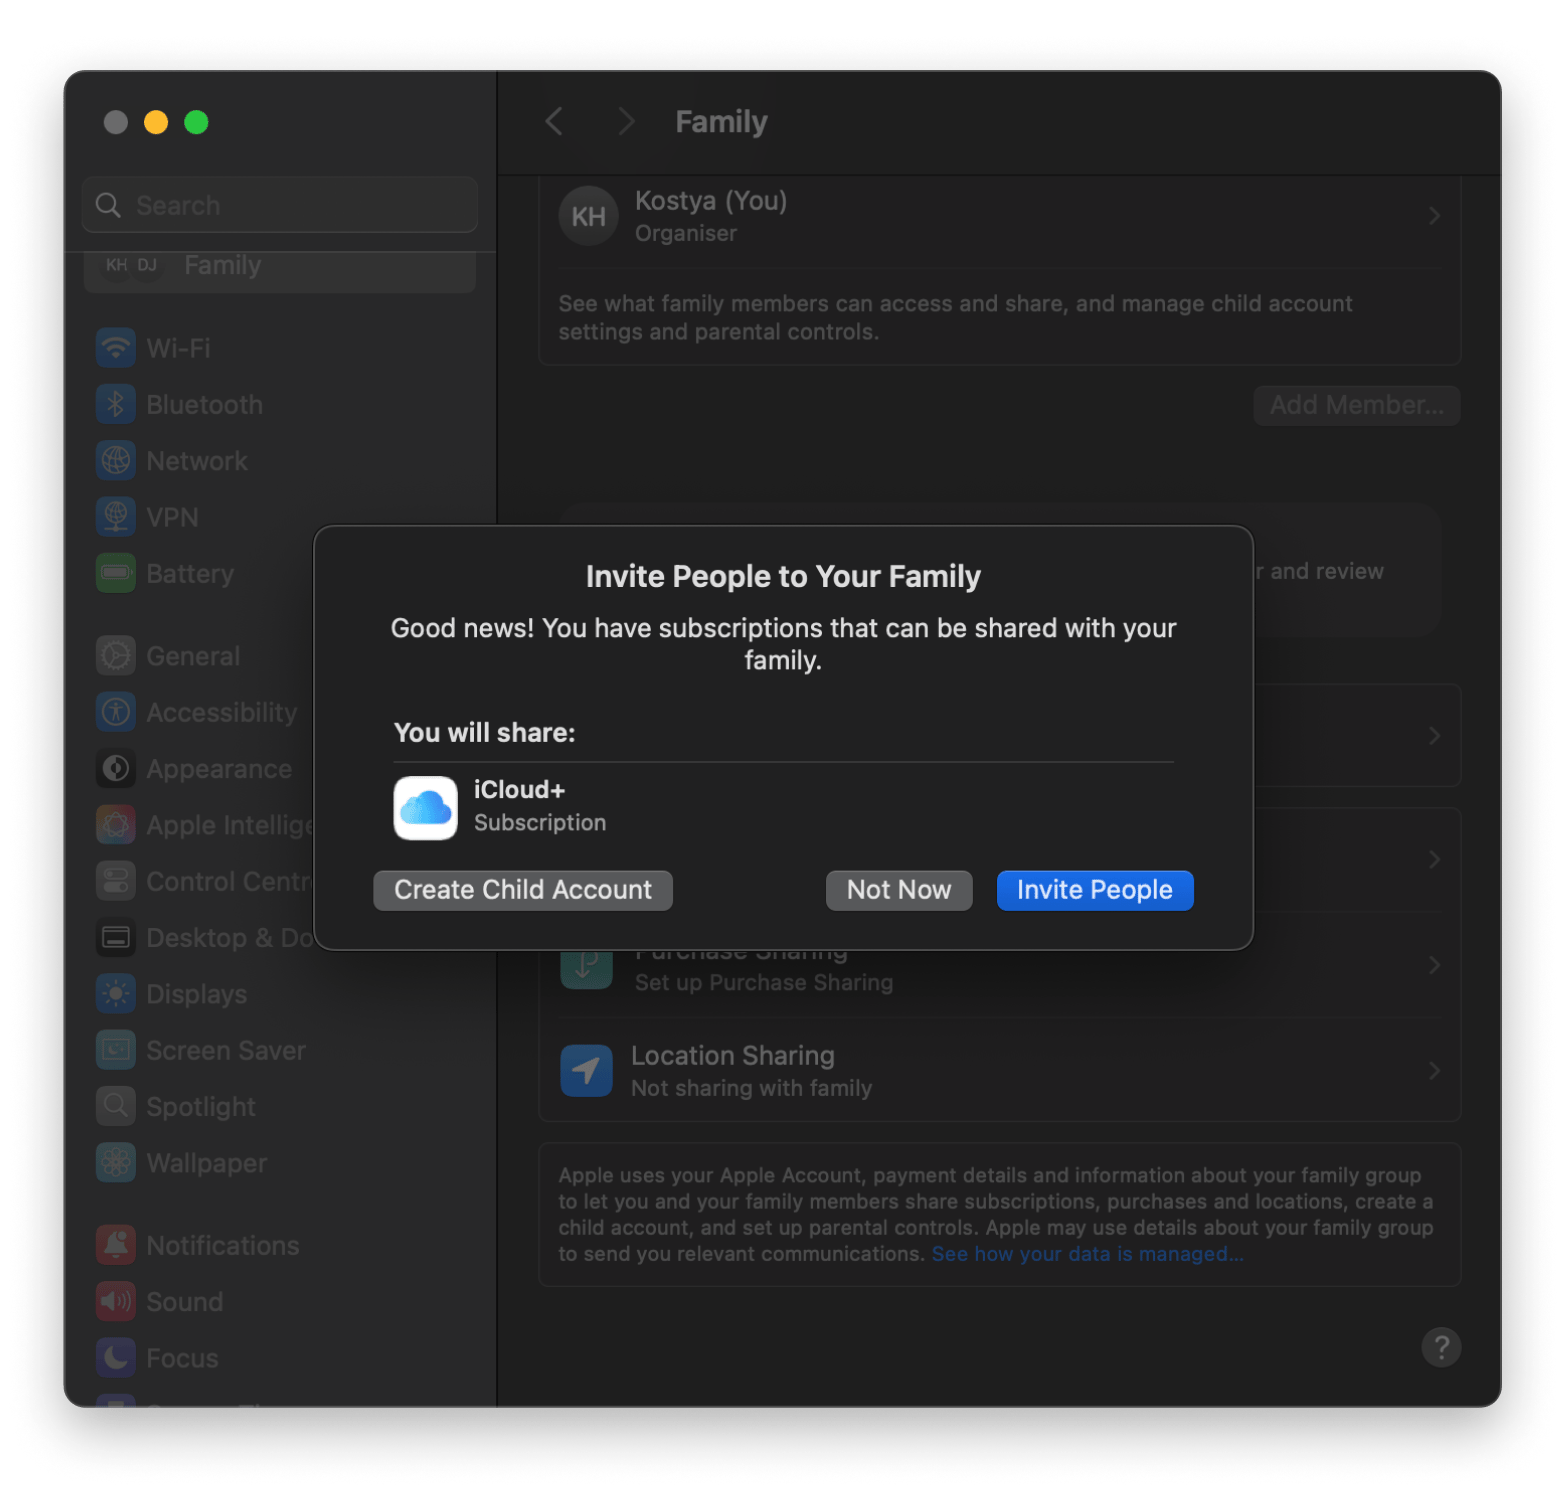
Open System Settings from the Apple menu and click Family.
Click Add Member, then Create Child Account.
Follow the on-screen steps to finish setting up the account.
If your child already has their own Apple Account, you don’t need to create a new one — you can simply add them to your Family Sharing group. This way, you can manage their parental controls, share purchases, and keep everything under one organized setup.
Once they accept the invitation, they’ll officially join the Family Sharing group, meaning you can now set Screen Time limits, app restrictions, and more. Now, let’s move on to actually locking things down.
The internet is great — until it’s not. And giving kids full, unrestricted access to the internet can get messy fast. Setting up parental controls is about helping them build healthy tech habits, not just restricting things for the sake of it.
Here’s why they matter:
Limits screen time so kids don’t spend hours scrolling TikTok instead of doing homework.
Blocks inappropriate content so they don’t stumble into the wrong corners of the internet.
Controls who they can message and call, preventing unwanted interactions.
Keeps app purchases in check so you don’t wake up to a surprise $100 charge from Roblox.
Encourages good screen habits with features like Screen Distance alerts.
For my niece, the goal was clear: let her use the Mac for school while keeping distractions to a minimum.
Risks of bypassing parental controls
No matter how good your parental controls are, kids are smart. If they really want to get around them, they’ll try.
Common workarounds kids use:
Borrowing another device. Using a parent’s phone or tablet with no restrictions.
Incognito mode. Bypassing web filters by using private browsing.
Creating a new Apple Account. Setting up a second account to avoid Family Sharing controls.
Factory reset. Wiping the device to remove all restrictions.
How to maintain control:
Set up an Admin account for yourself. Keep your child’s profile as Standard so they can’t change settings.
Use a Screen Time passcode. Without it, kids can just disable all the limits.
Regularly check Family Sharing settings. Make sure nothing has changed.
Talk to your kids about online safety. Instead of just blocking things, explain why limits exist.
When setting this up for Emilia, I walked her through everything and explained that it wasn’t about stopping her from using her Mac — it was about keeping her safe and focused.
Steps to set up parental controls on your Mac
When I was setting up parental controls, I realized Apple actually makes this process pretty intuitive — once you know where to look. If you're new to this, don’t worry — I’ve got you covered with a simple, step-by-step guide.
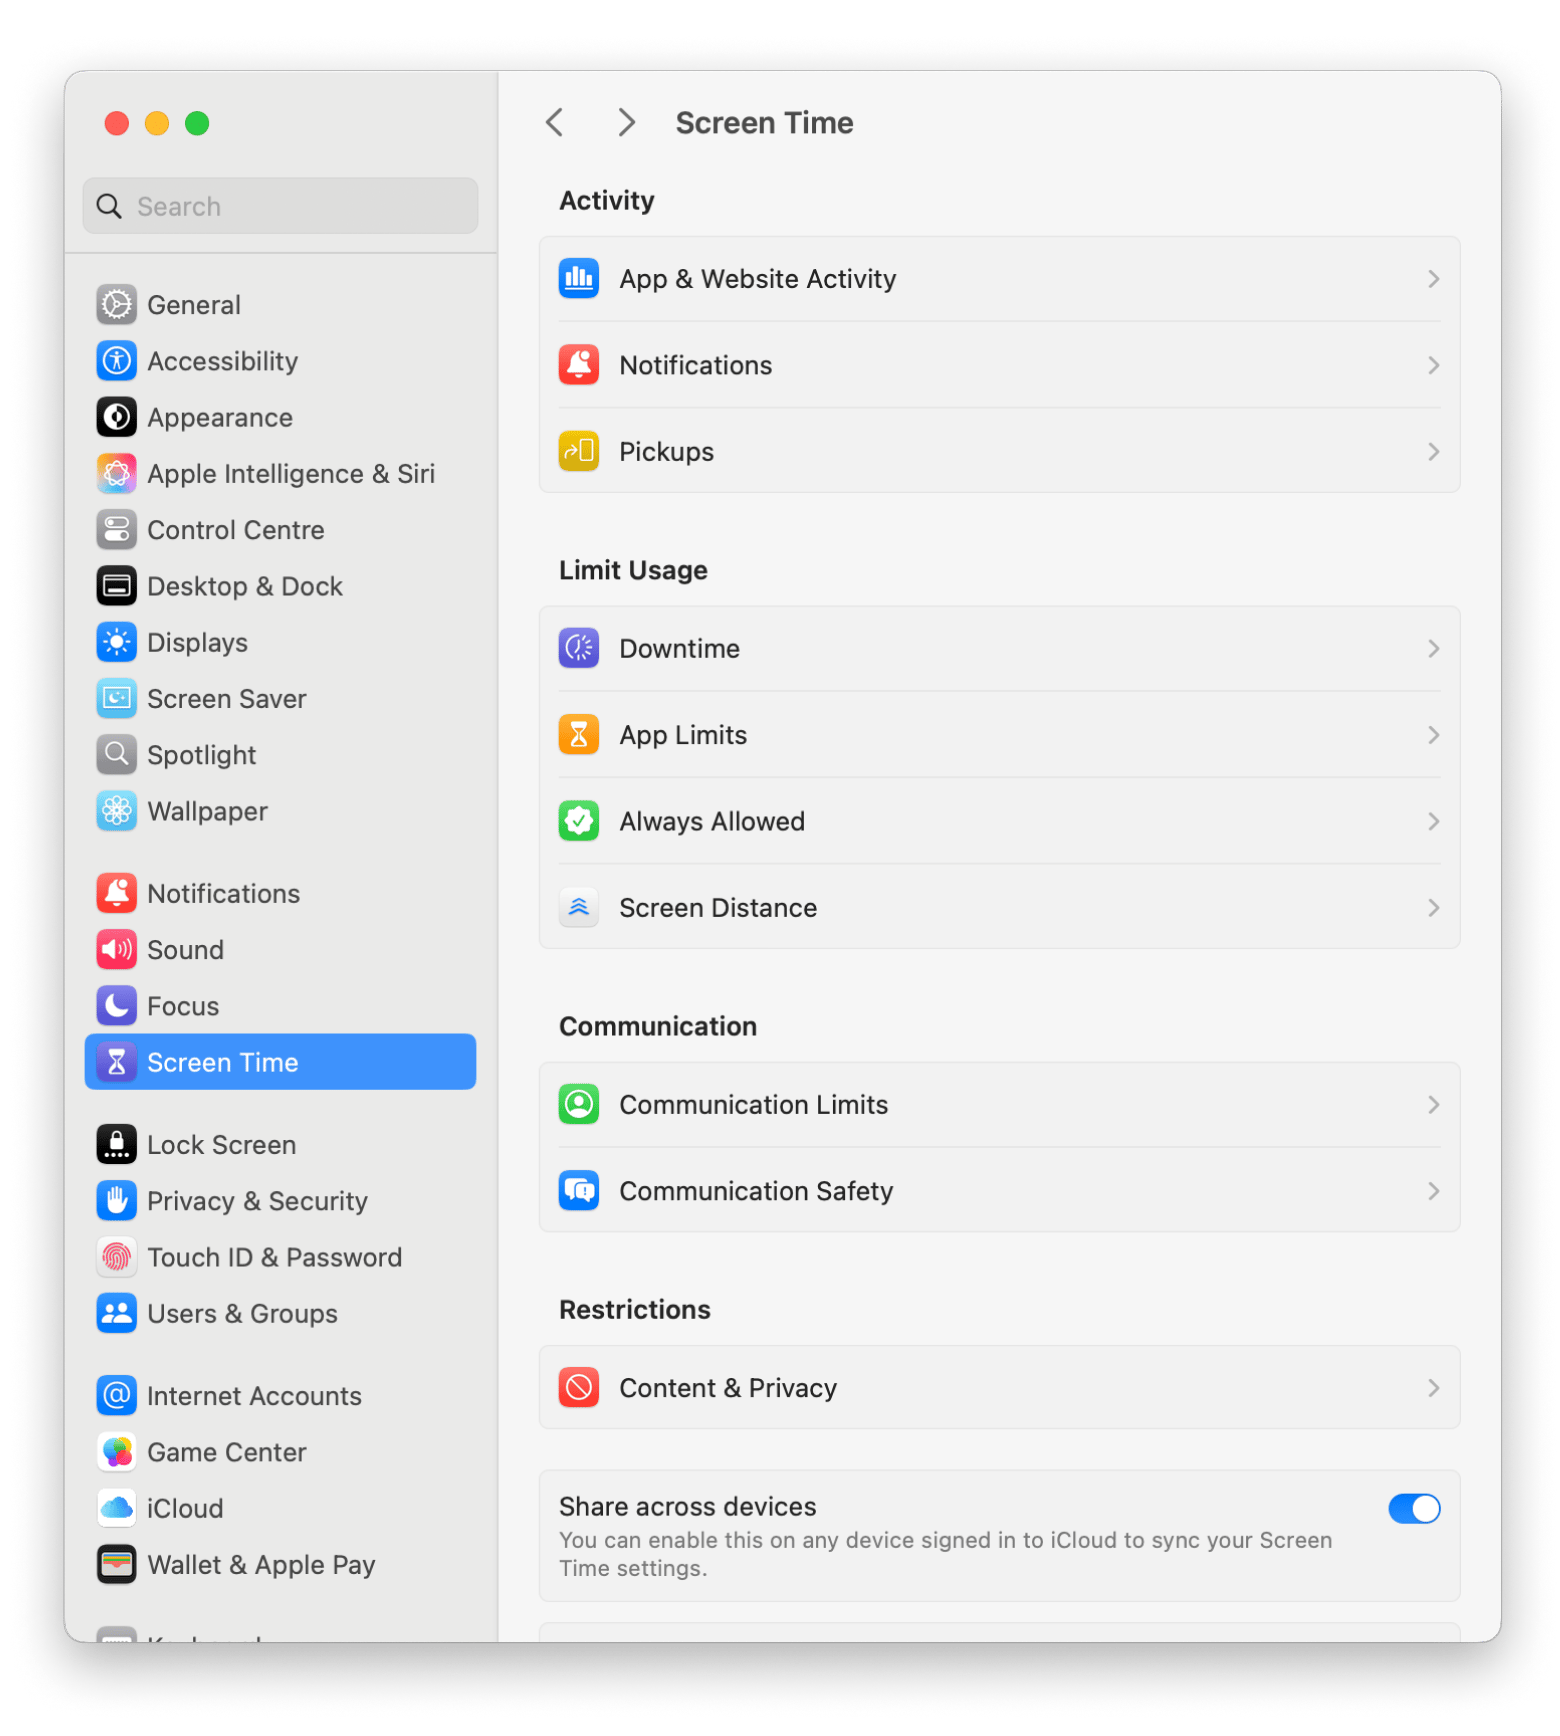
Step 1: Open Screen Time settings
On your Mac, go to the Apple menu > System Settings, scroll down, and click Screen Time in the sidebar.
Step 2: Choose the Child’s Profile
Click the Family Member pop-up menu and select your child’s account. If you don’t see this option, make sure:
You’re signed in to your Apple Account
You have Family Sharing enabled
Then, move to the next step.
Step 3: Turn on Screen Time
Click Set Up Screen Time For Your Child > Turn on Screen Time, then follow the onscreen instructions.
Turn on Screen Distance (a cool feature that warns when kids hold their devices too close)
Enable App & Website Activity (so you can monitor usage)
Schedule Downtime.
Set a four-digit Screen Time passcode (so your child can’t just turn everything off)
Step 4: Customize additional restrictions
Once Screen Time is enabled, scroll down in the settings and turn on the options that make the most sense for your family:
Include Website Data — see detailed reports of the websites your child visits.
Lock Screen Time Settings — require a passcode to prevent unauthorized changes.
If your child has an administrator account, you’ll be prompted to convert it to a standard account for better control.
Step 5: Fine-tune limits and permissions
Once everything is set up, your Mac does most of the work for you. You can tweak these settings as your child grows and their digital needs change. Want to adjust restrictions? Just pop back into Screen Time — no need to start over from scratch.
How to block apps
When my niece got her first Mac for school, my sister had one very specific concern: How do we stop her from downloading every random game in the App Store? (Because let’s be real — middle school online classes can quickly turn into a Minecraft marathon if left unchecked.)
Luckily, macOS makes it easy to block apps, restrict downloads, and make sure kids only use what they actually need — without turning into full-on helicopter parents.
Here’s how to block apps:
Go to Apple menu > System Settings > Screen Time (for your child’s account).
Scroll down to Content & Privacy and make sure it’s turned on.
Block Specific Apps. Click App & Feature Restrictions > Turn off any app you don’t want them to use (like Safari, Messages, or social media).
Restrict App Store Downloads. Apple menu > System Settings > Store Restrictions > Turn off Installing Apps.
Go to App Store, Media, Web & Games > Set the age restriction (like 12+, 9+, etc.).
Additional tools and customization options
I quickly realized that blocking apps wasn’t enough. Sure, limits help, but kids also need to learn how to manage their screen time in a way that feels natural—not like a punishment. That’s where extra tools come in.
Instead of saying, “No, you can’t use that,” these apps help guide you toward healthier screen habits — whether that means taking breaks, understanding where your time is going, or staying focused on work without distractions. And honestly? I ended up keeping some of these tools on my own Mac, too.
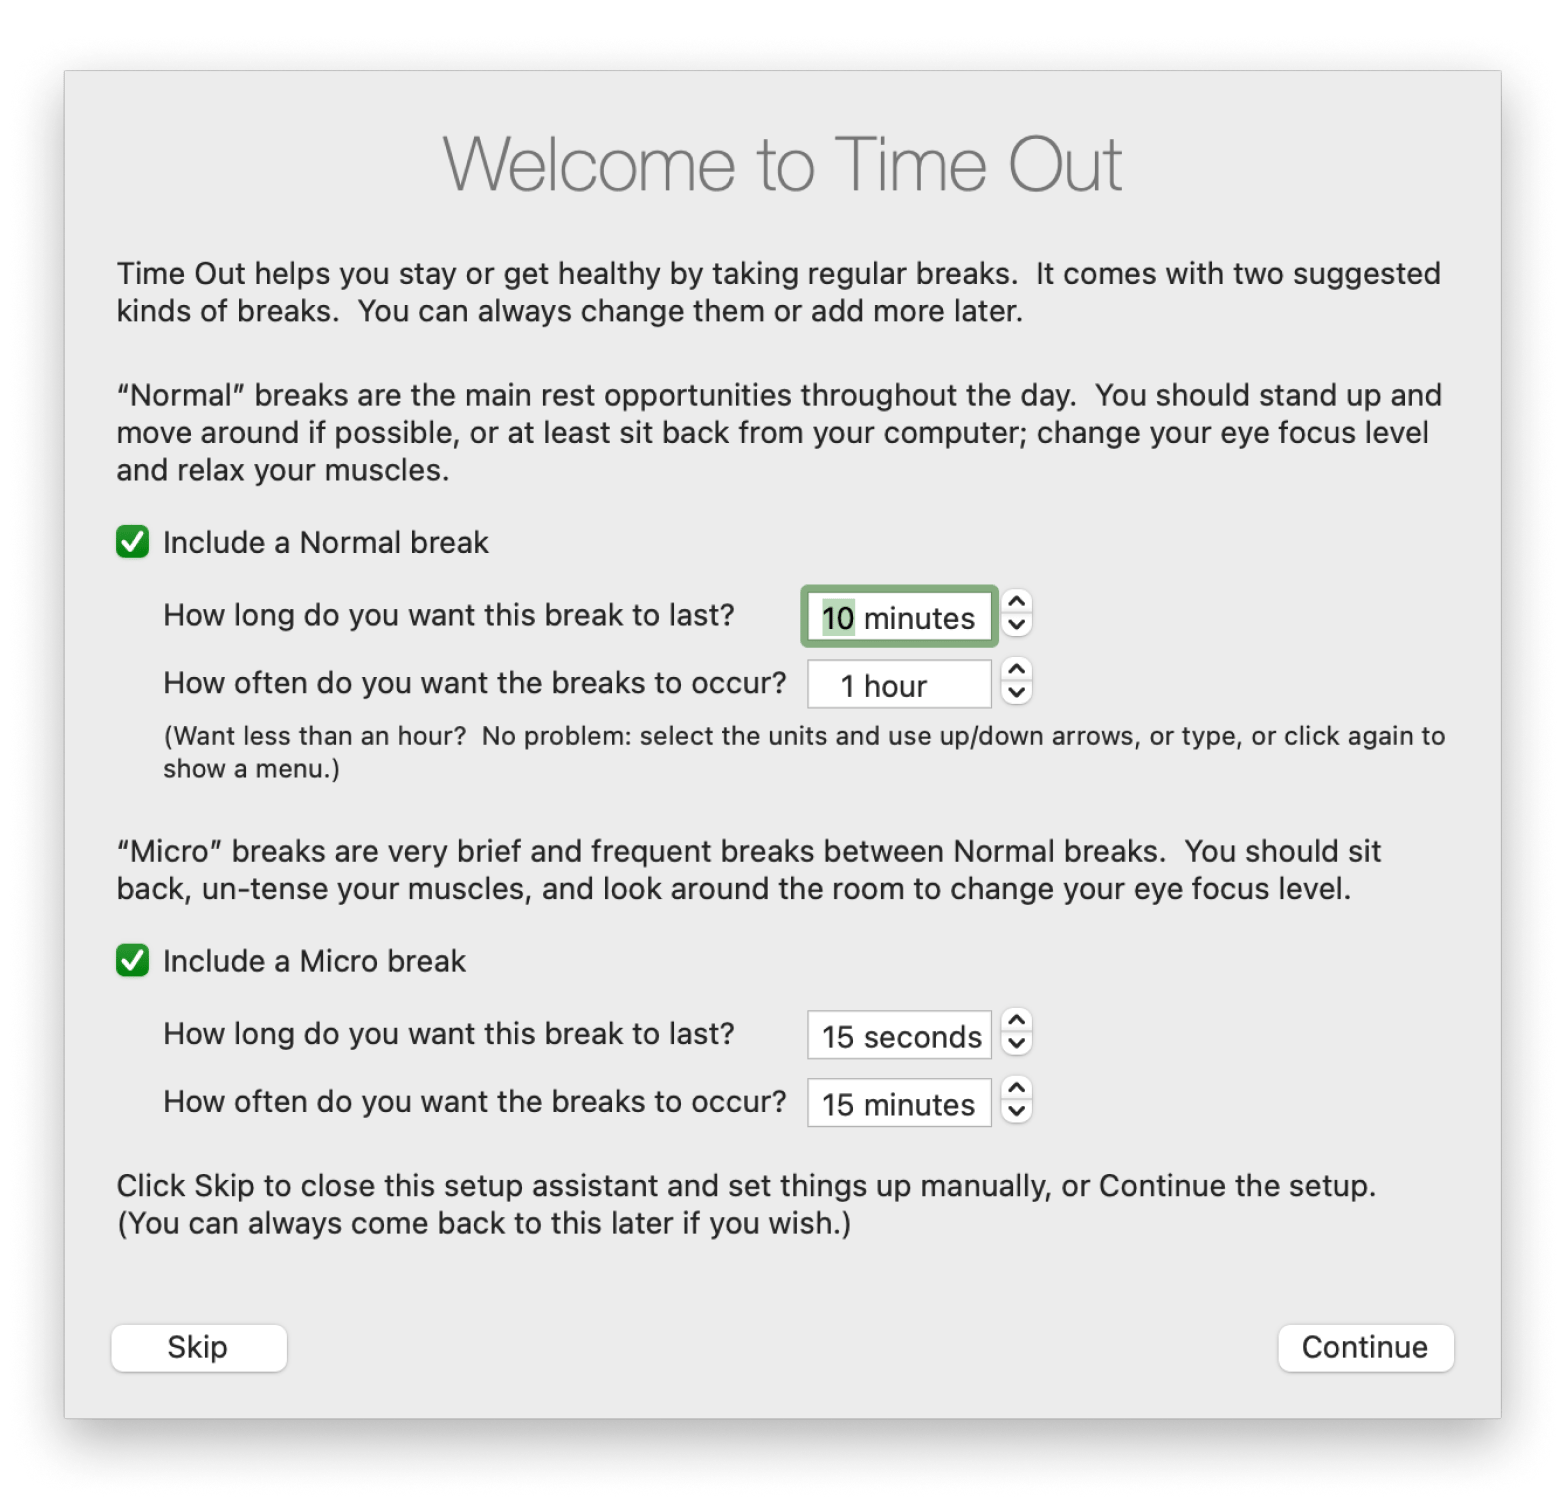
Time Out — for building healthy screen time habits
So, instead of just limiting access, I tested Time Out, a break reminder app, to see if it could help balance the screen habits.
It turns out that Time Out is the perfect tool for enforcing breaks without feeling restrictive. Instead of completely blocking access, I learned to take natural breaks, which made me way less resistant to the idea of screen limits.
Timing — analyzing screen time
I needed a way to see how much of her screen time was productive vs. wasted, leading me to Timing. Unlike other time trackers, Timing works automatically (it doesn’t require you to start and stop timers manually). It logs everything in a smart timeline, tracks how apps and websites are used, and even syncs with calendar events to provide a detailed breakdown of productivity.
Focused Work — for staying focused on the tasks that matter
Staying focused on work can be tough. That's where Focused Work comes in. It's an app that helps block distractions, keep track of how much you're getting done, and lets you set up your work or study schedule with easy blocking options. Plus, it lets you customize various types of focus sessions to help you stay on track without constantly checking in on yourself.
Read also:
How to set up parental controls on Mac: Recap
When setting up my niece’s Mac, I quickly realized that just limiting access with built-in tools wasn’t enough. She needed something to remind her to take breaks without feeling like she was being punished. That’s where Time Out came in. Then there was Timing, which helped track where she was actually spending time (spoiler: way too much on YouTube). And when it came to making sure she focused on her schoolwork instead of gaming forums? Focus had her back, blocking distractions while letting her take breaks when needed.
If you’re setting up a Mac for your kid (or even just for yourself), definitely try these tools — they make life so much easier. And instead of hunting for individual apps, just grab a free trial of Setapp. You’ll get access to these plus 250+ other apps to customize their setup (and maybe even improve your own productivity while you’re at it).
FAQ
Does Apple have built-in parental controls?
Apple has built-in parental controls, such as Screen Time and Family Sharing. You can set app limits, website restrictions, and downtime schedules. It’s a great starting point, but for deeper control and tracking, apps like Focused Work or Timing can help.
What happens to Apple's parental controls when a child turns 13?
When a child turns 13, Apple stops enforcing some restrictions, and kids can manage their own settings. They stay in Family Sharing, but you’ll need to manually adjust controls if you want limits to continue.
Are Apple parental controls good?
Apple parental controls are good for basic restrictions, like blocking content and limiting screen time. But tech-savvy kids may find workarounds. For better focus and tracking, apps like Focused Work, Time Out, or Timing can add extra control.