Main Apple AirPods connection issues and how to fix them
- Connection problems usually stem from Bluetooth glitches, low battery, or software errors.
They can often be resolved by toggling Bluetooth, recharging, or resetting your AirPods. - Check if only one AirPod isn’t working.
A single-earbud issue may come from an unbalanced stereo setting, hardware issues, dirt on charging contacts, or one AirPod not charging properly. Cleaning, unpairing, re-pairing, and factory resetting are common fixes.
- Mac connection issues need OS and Bluetooth checks.
Outdated macOS versions, incorrect Apple Account logins, or system glitches can block pairing. Reinstall updates and re-pair the AirPods to restore stable connections. - Apps like ToothFairy, AirBuddy, and Boom 3D improve connectivity and sound quality.
Manage, connect, and boost AirPods’ performance faster with these Setapp tools for 7 days free. Each enhances workflow and audio quality without extra effort.
Apple AirPods are considerably more robust than most earbuds, but they're not perfect. Still, if your AirPods won't connect, most issues can be resolved without calling Apple Support or requiring a costly replacement.
In this guide, I'll share the methods I've tried and found useful when my AirPods refused to connect. The instruction works both for AirPods and AirPods Pro.
What to do if one AirPod not working
If both AirPods don’t work, it’s almost always because they run out of battery. But if only one AirPod is working, then the problem could be something else. At best, we can only speculate, but the reason is often down to the following:
- One of the AirPod’s batteries might be depleted or failing to charge.
- The stereo balance settings may have been adjusted, sending sound to only one AirPod.
- One AirPod could be stuck in pairing mode.
- Software issues on your Mac or iPhone might be preventing proper pairing.
- Physical damage, such as dropping or exposure to liquid, may have caused one AirPod to fail.
Whichever it is, let’s try to get both of your AirPods connected again.
Fix #1. Toggle Bluetooth on and off
Just tap the Bluetooth icon at the Control Center, wait for several seconds, and turn it on again. Then, try listening to both AirPods to see if they’re working.
Fix #2. Charge your AirPods
Another reason people ask, ‘Why is only one of my AirPods working?’ is that one of them has run out of battery. Again, the fix is simple: Put both AirPods into the charging case.
When you do that, the indicator should turn amber or orange, which means the AirPods are charging. Remove AirPods when the indicator turns green and try them again.
Fix #3. Clean your AirPods
Sometimes, the dirt covering the contact surface isn't obvious, but after I remove it, it charges again. That's what happened with mine, especially if it's been a while since I cleaned them.
Dirt or dust can prevent AirPods from connecting, although not directly so. If your AirPods charging points are covered by dirt, they won't charge when placed into the case. This leaves only one of the AirPods at full charge and the other flat. So, if one AirPod has stopped working, check the charging contact points.
To clean your AirPods:
- Get a lint-free cloth and slightly dampen it.
- Then, wipe AirPods to remove grime and dirt.
- Do that for both AirPods (yes, even the one that's working).
Also, clean the charging case, especially the bottom part. Sometimes, the culprit is the case's charging point, which has dirt all over it. Gently wipe the metal contacts and the black ear detection sensors on your AirPods — this often fixes the issue.
Done? Place both AirPods into the charging case. Wait for 20 minutes and try reconnecting them to your device. Even if not fully charged, you should be able to get both AirPods to connect.
Note: If your AirPods get dirty with stuff like soap or oils, just wipe them with a damp cloth and then dry them completely with a cloth that doesn't leave any lint. Don't use them until they're totally dry, and avoid using anything sharp or rough to clean them.
Fix #4. Manage stereo balance settings
If one AirPod is not working but the other is, there’s a chance that you’ve misconfigured your device’s stereo balance. By default, the stereo is balanced to the center, which means the audio will play at equal loudness on both the left and right AirPods.
However, if the right or left AirPod is not working, the stereo might have been adjusted incorrectly. Although such incidences are unlikely, they are not impossible, particularly if you’ve been meddling with your device’s audio setting.
To check and resolve the issue on an iPhone, follow these steps:
- Open Settings.
- Tap Accessibility > Audio & Visual.
- Check the audio volume balance > Drag it to the center if it’s not.
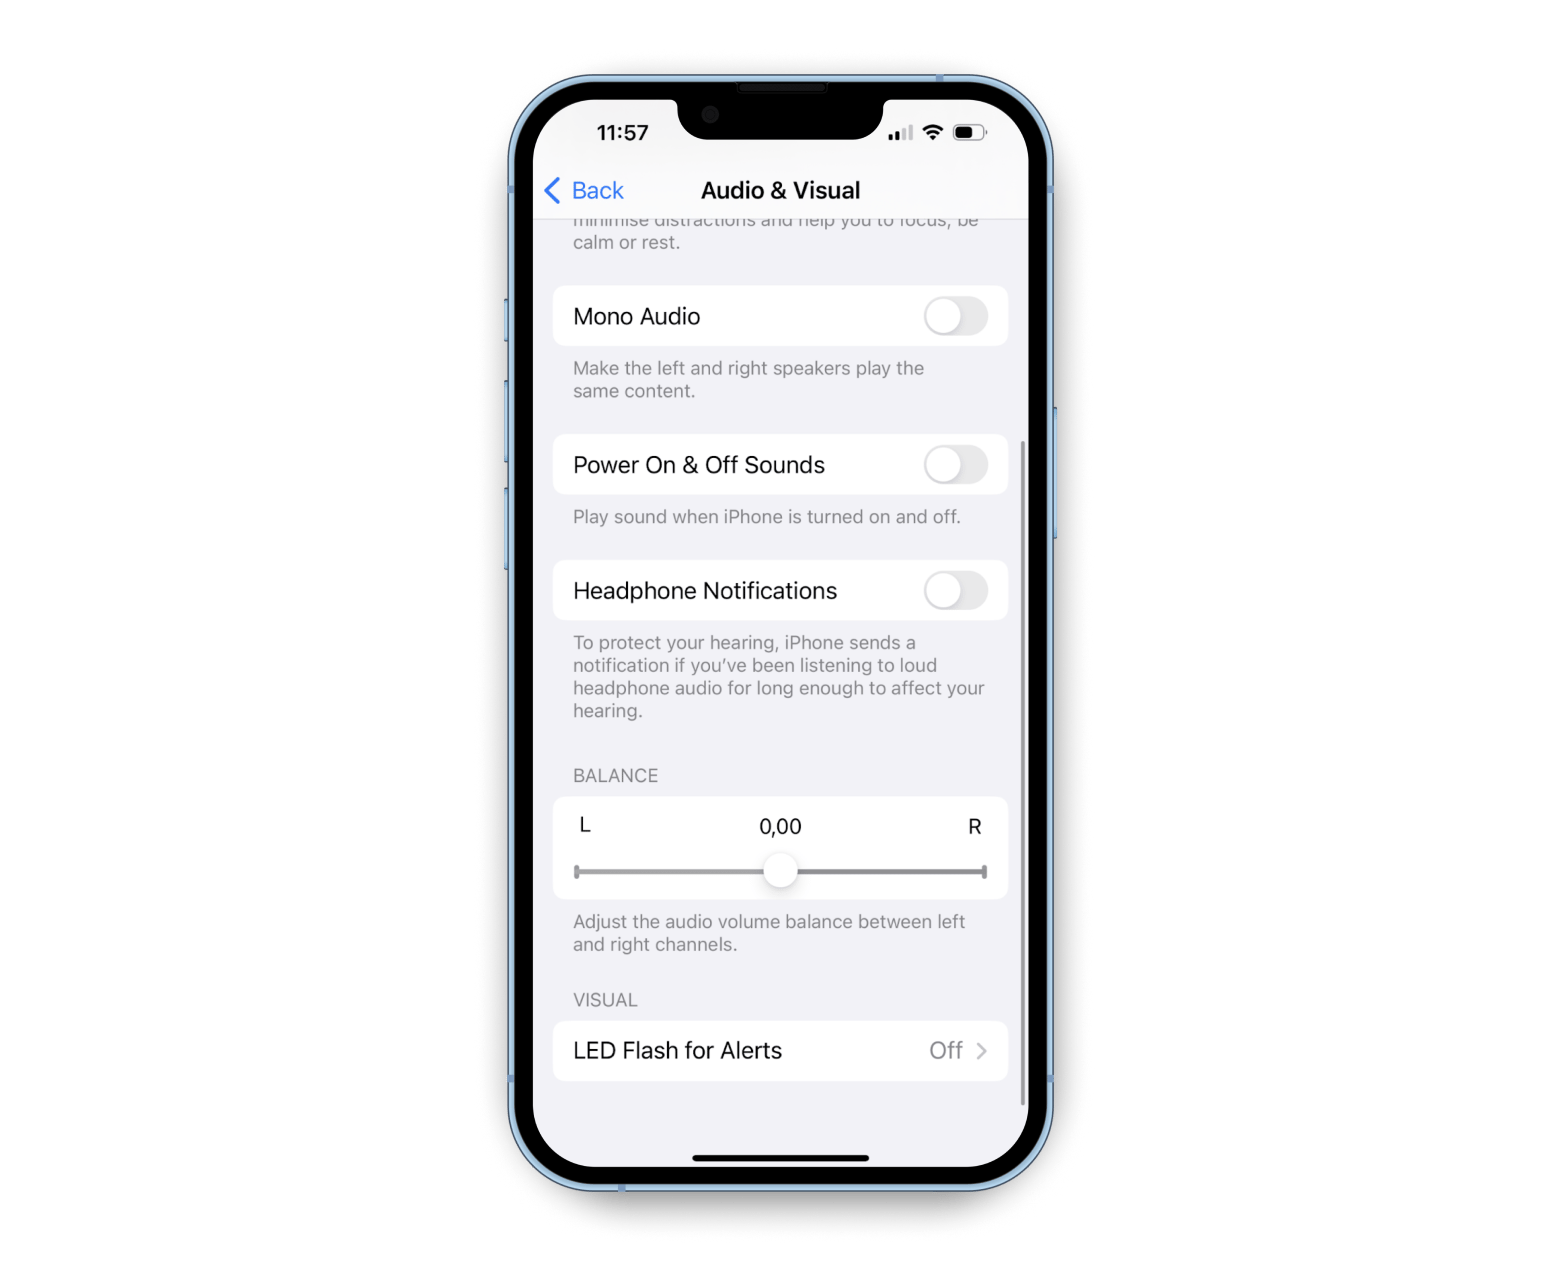
If you’re facing an AirPod connection issue with your Mac, check the audio balance using these steps:
- Click the Apple icon in the menu bar > System Settings.
- Click Sound > Output > Choose your Apple AirPods in the list of devices.
- Adjust the Balance slider so that it’s in the middle.
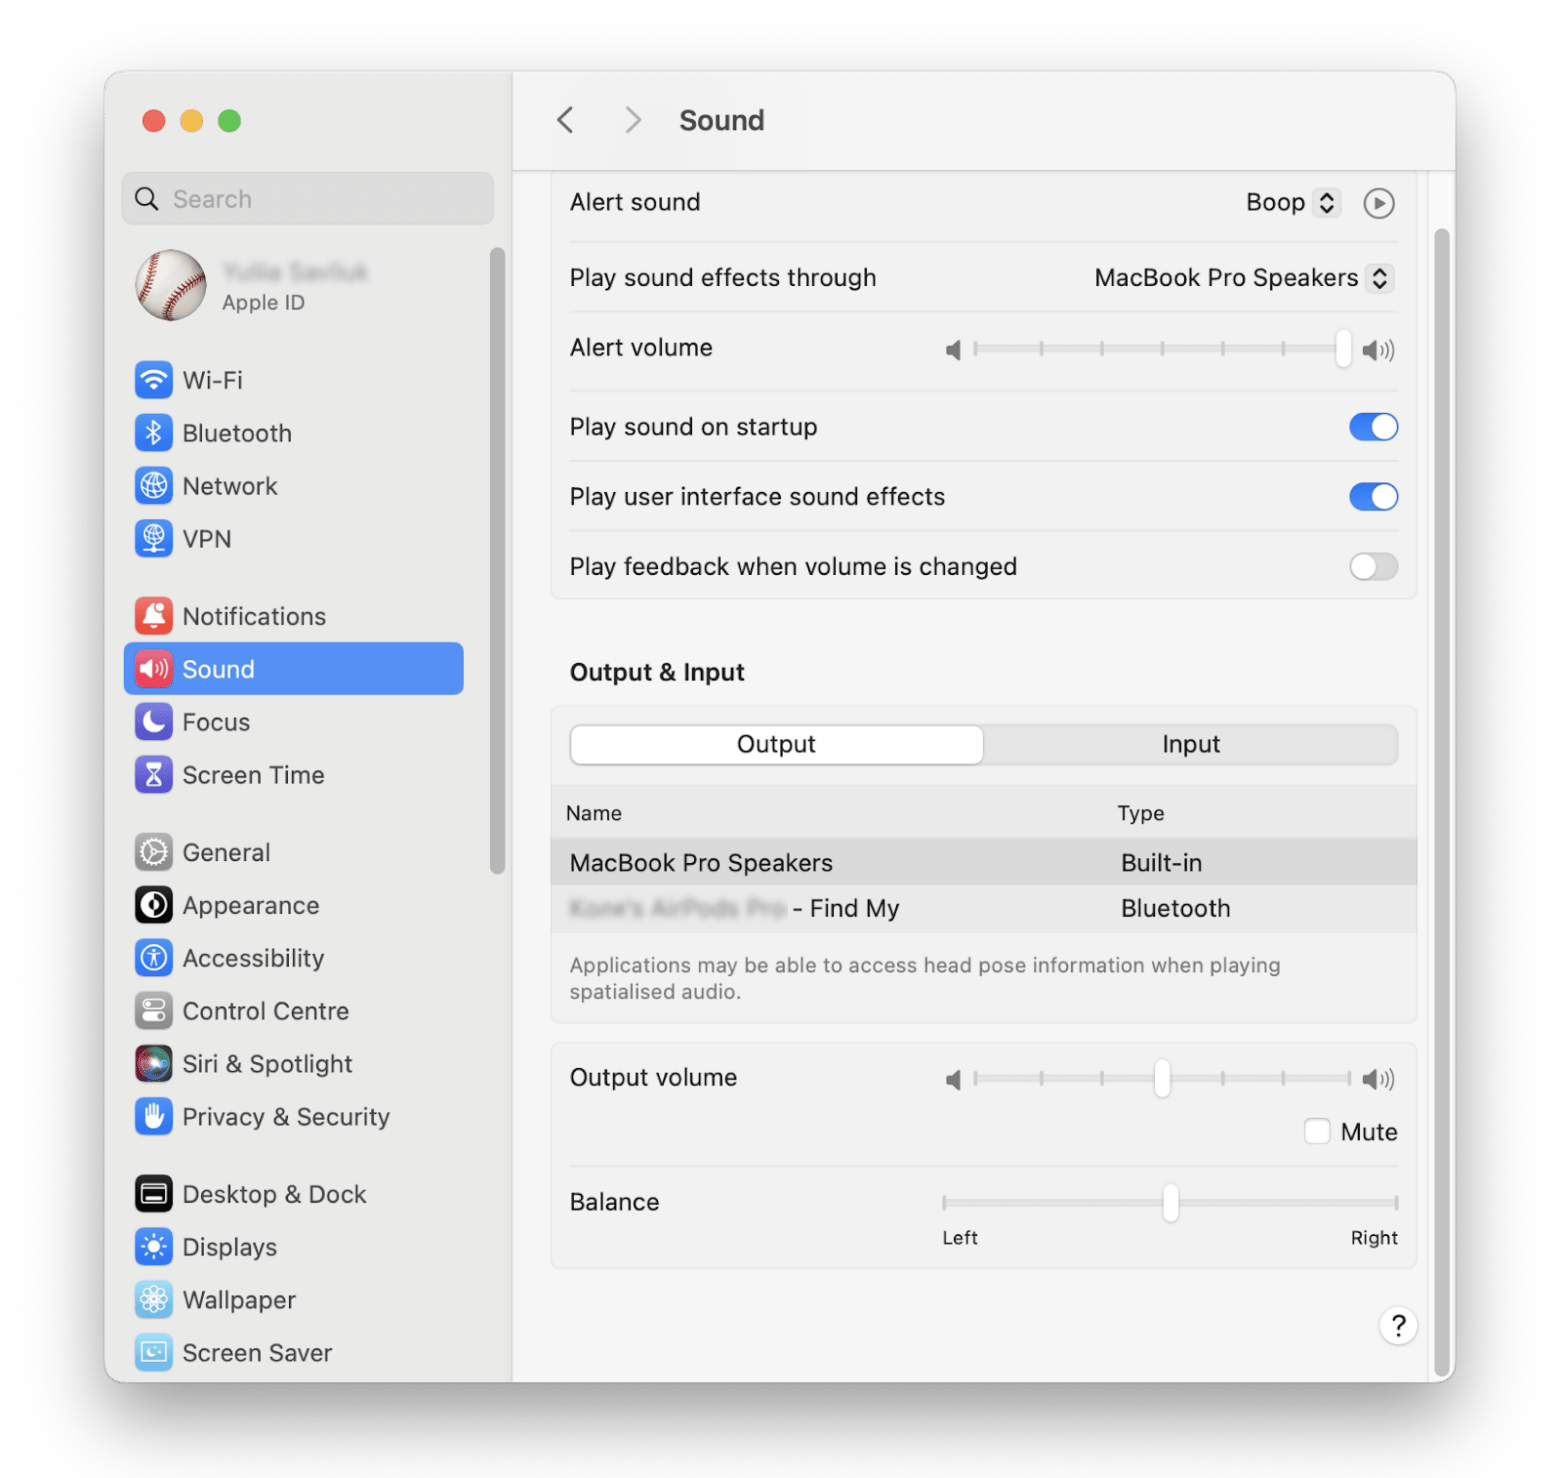
Connect and listen to your AirPods again. If the underlying issue is due to the misconfigured stereo balance, you’ll get audio from both sides after the readjustment.
Read more: All AirPod generations
Fix #5. Unpair and re-pair AirPods
AirPods come in pairs, but electronically, they are individual parts. When your iPhone or Mac pairs with AirPods, it stores the information of the left and right earbuds. That way, you can connect to either one of them.
System glitches may corrupt the information stored in the device, causing one or both AirPods to not work. The fix is easy in this case: just unpair and re-pair AirPods. Follow these steps:
- Connect AirPods to your Apple device.
- Open Settings.
- At the top of the screen, tap your AirPods.
- Then, tap Forget this device.
Now, your iPhone has removed all the information about the AirPods.
To pair them again:
- Go to your iPhone’s home screen.
- Put both AirPods in the charging case and bring it close to the iPhone.
- Open the AirPods case’s lid > Wait for a pop-up dialog showing AirPods on the phone > Connect.
- Follow the on-screen instructions.
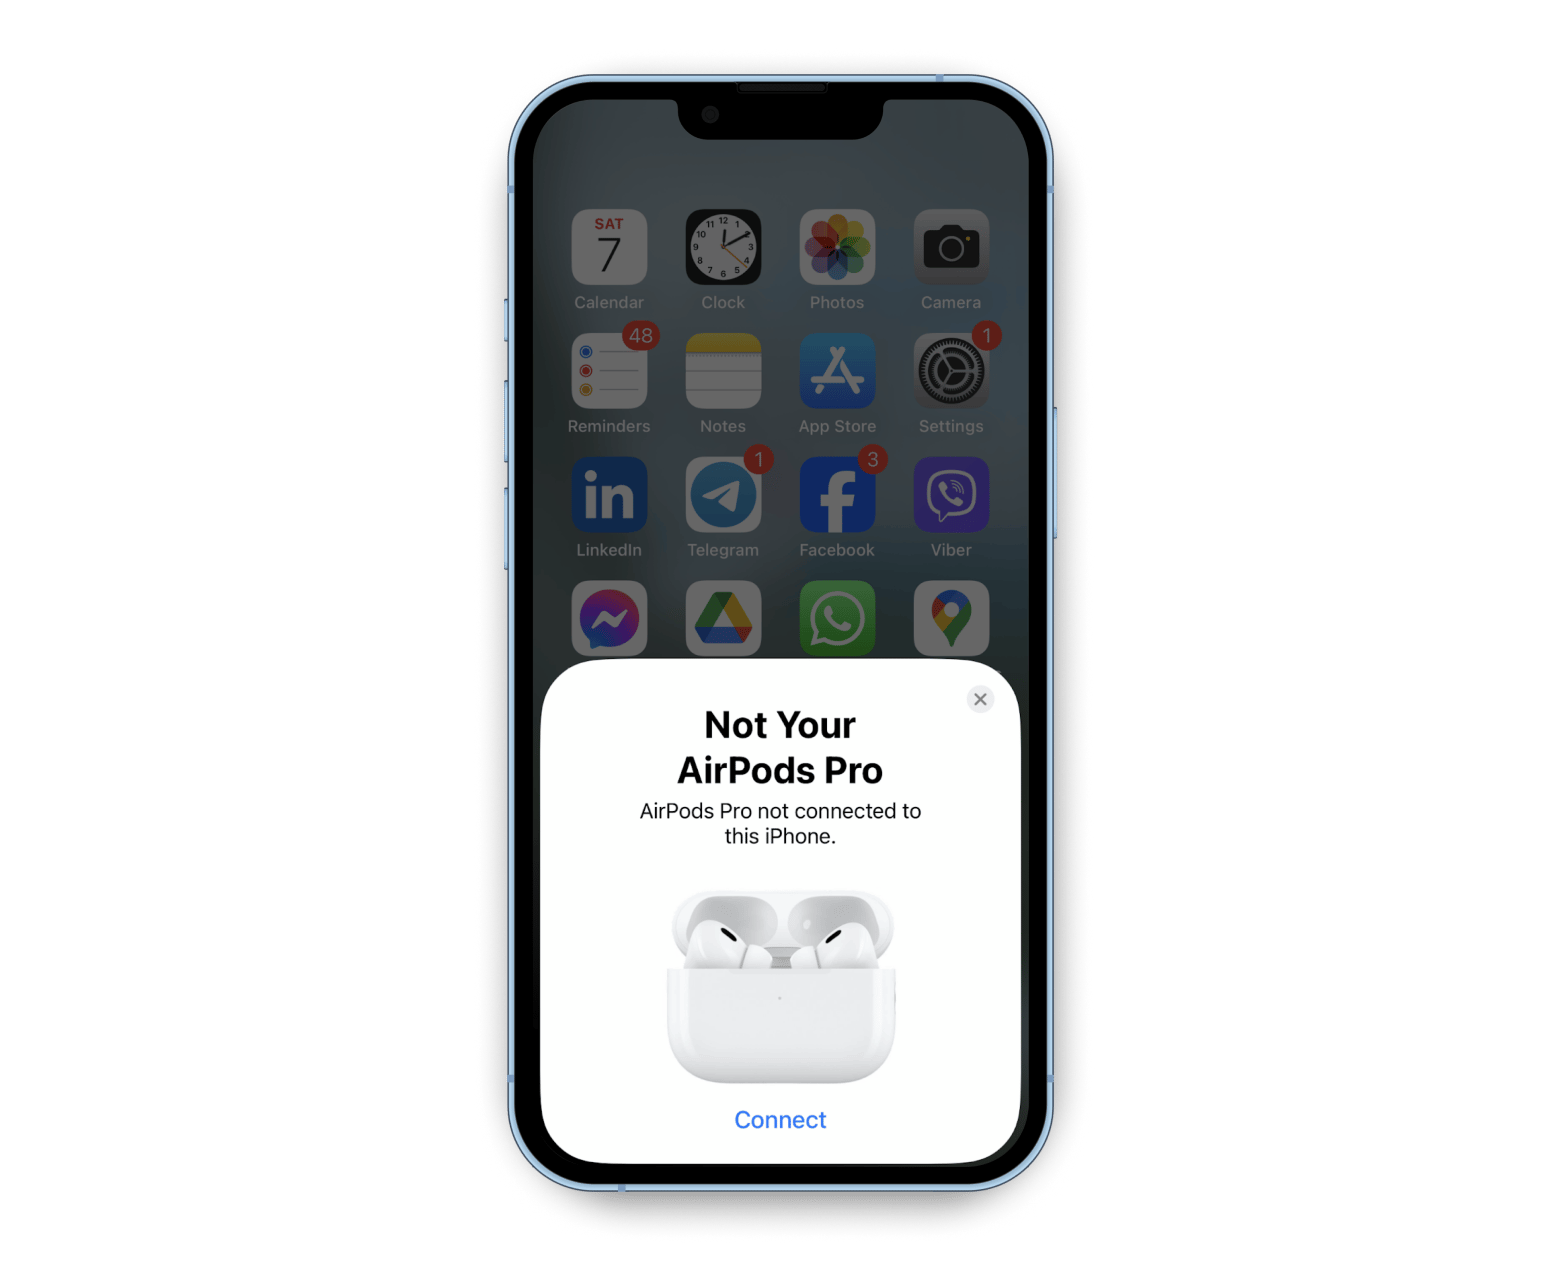
You can now use them as usual. However, sometimes, you may need to open and close the case a few times before your iPhone recognizes AirPods.
Tip: Sometimes, one of the earbuds gets stuck when you connect it to your device. If only the left or right one is not working, restarting both might solve the problem. To restart AirPods, put them into the charging case, close the lid, and wait for 10 seconds. Then, open the lid and reconnect AirPods.
Fix #6. Reset AirPods to defaults
Another way to connect both AirPods is to reset them to factory defaults. This basically restores their internal memory to the original state. I know it sounds intimidating, but the process is quite simple.
Follow these steps to factory reset AirPods:
- Put AirPods into the case and close the lid.
- Wait 30 seconds.
- Open the lid > Press and hold the button at the back for 15 seconds.
When the status light flashes white, AirPods are ready to connect. Re-connect them with your iPhone or Mac to see if both sides emit sound.
Fix #7. Make sure the AirPods case is charged
Yes, your AirPods themselves might be charged, but some users have noticed that they won’t display or connect if the case is out of power. Try charging the AirPods case for a bit and then reconnecting.
Fix #8. Set your Wi-Fi to the 5 GHz frequency
Bluetooth works in the 2.4 GHz frequency range, just like many other devices (such as Wi-Fi routers, microwaves, and smart home gadgets). Users noticed that if you’re surrounded by multiple active devices, Bluetooth interference can occur. Try minimizing the number of active Bluetooth connections or moving other devices farther away.
If your router supports it, switch your Wi-Fi connection to the 5 GHz band — it often helps improve stability.
Why won't my AirPods connect to my Mac?
If your AirPods are not connecting to your Mac, try the steps I described earlier. What works for the iPhone will also work for MacBooks.
That said, better ways exist to troubleshoot AirPods connection issues on a Mac. For example, you can manage your AirPods on a Mac and keep track of their status without opening the System Settings. I’ll share how to do that in the steps below.
Step 1: Check your operating system
If your Mac runs on an older macOS, it might not connect to some AirPods models.
Here’s a table for various AirPod generations and their necessary macOS versions:
| AirPods model | Compatible macOS version |
| AirPods (2nd generation) | macOS Mojave 10.14.4 or later |
| AirPods Pro | macOS Catalina 10.15.1 |
| AirPods (3rd Generation) | macOS Monterey |
| AirPods Pro (2nd generation) | Latest version of macOS |
Need to check your AirPods’ specs and model? Enter its serial number into our AirPods serial number check tool (a free GPT assistant) to reveal every key detail about your Apple device — including its tech specs, production date, model, warranty, and more.
Is your MacBook running a macOS that supports AirPods you’re trying to connect to?
If you’re not sure, check the steps below:
- Click the Apple icon in the menu bar > System Settings.
- Click General.
- Click Software Update.
Check the macOS version currently installed on your Mac. If an update is available, click Update or Upgrade to install the newest version that your Mac can support.
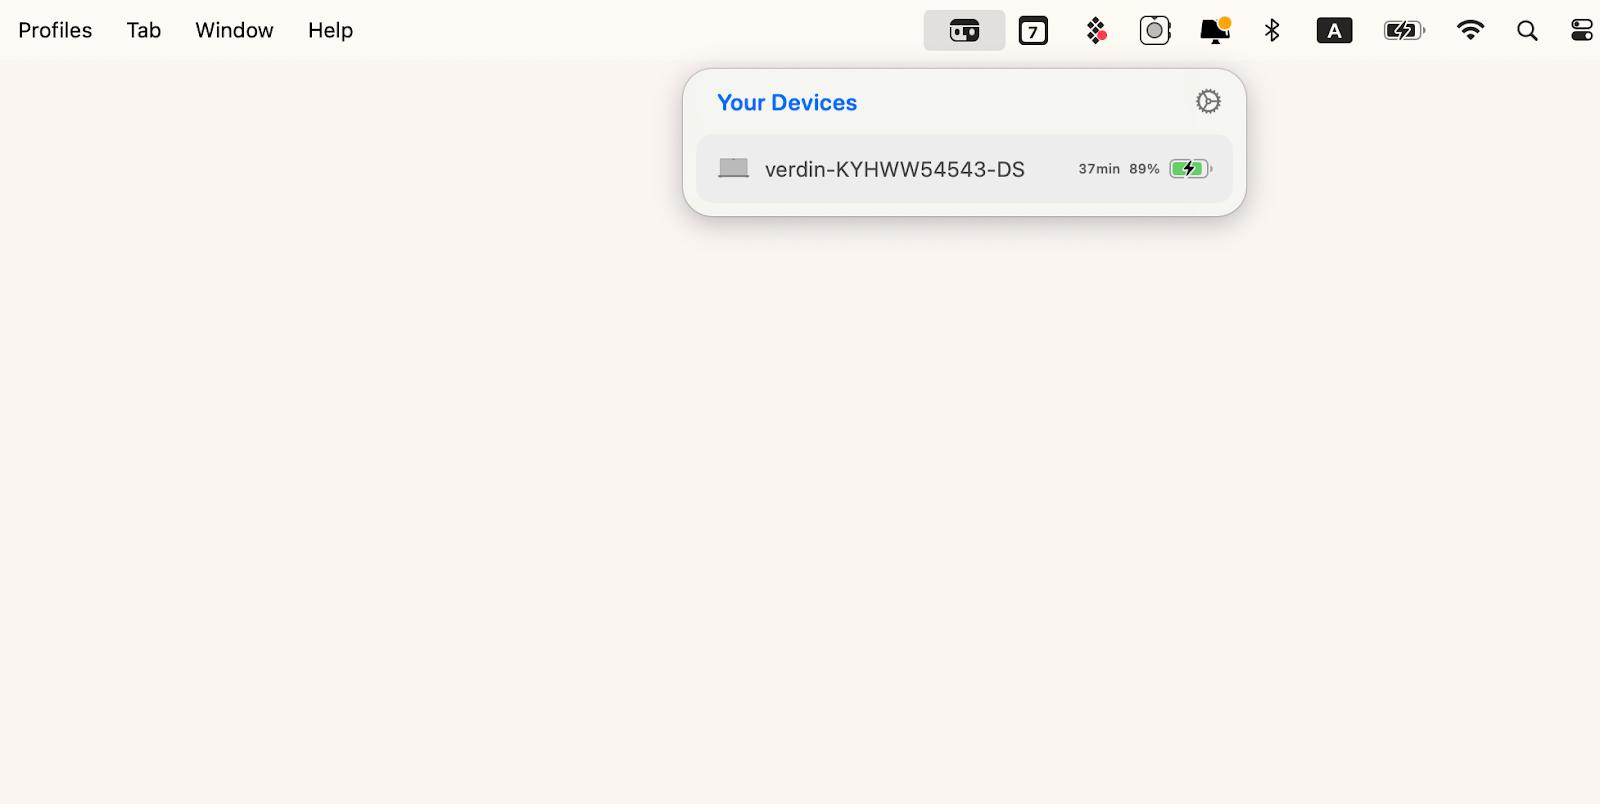
Then, try connecting to AirPods again. If you want a quick way to do that, try AirBuddy. The app lets you connect to AirPods and other wireless devices from the top menu bar in seconds. Moreover, you can track the AirPods’ battery level in real-time.
Step 2: Unpair your AirPods from Mac
Sometimes, the AirPods connection failed on the MacBook because of system glitches. Or perhaps some apps you installed have altered the Bluetooth settings for AirPods. Frankly, we can’t uncover the root cause of the problem because Apple designed Macs to be a closed, controlled, and protective environment.
So, the best thing to do is to unpair AirPods from your Mac. By doing so, Mac will remove all the previous settings from its memory so you can start afresh again.
To do that:
- Click the Apple icon in the menu bar > System Settings.
- Click Bluetooth.
- Click on the information “i” icon next to your AirPods.
- Click Forget This Device.
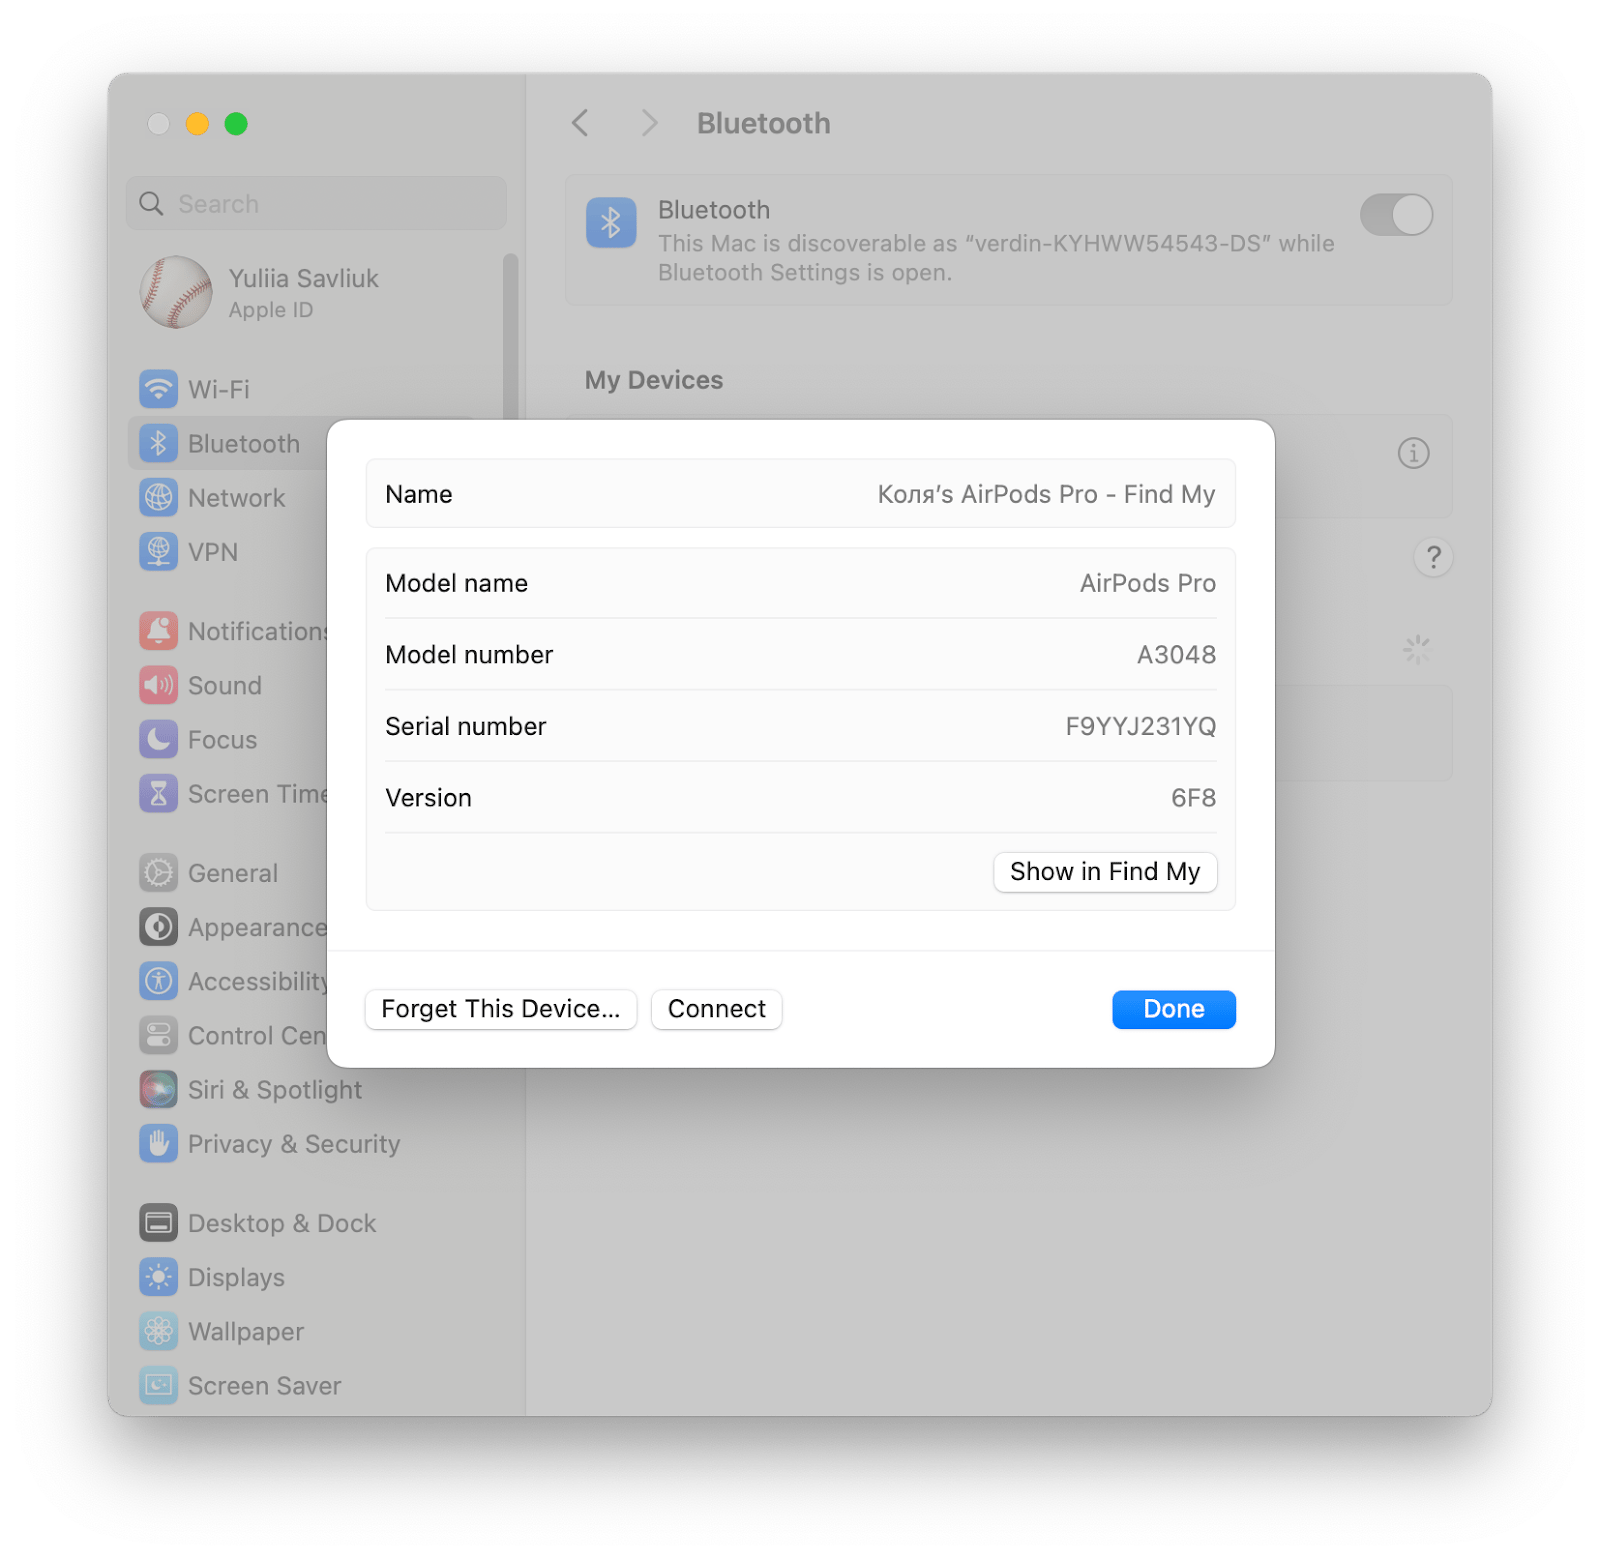
Once successfully unpaired, AirPods will be removed from the device’s list.
Step 3: Set a new Bluetooth connection
After getting your Mac to forget AirPods, you must re-pair them again.
Here’s how to do this:
- Click the Apple icon in the menu bar > System Settings > Bluetooth.
- Then, turn on Bluetooth.
- Put both earbuds in the charging case with the lid open.
- Then, press and hold the button at the back of the case until the status light flashes white.
- Find the AirPods name in the Nearby Devices > Connect.
Test if both AirPods can play audio from the Mac. Unless your AirPods have suffered physical damage, you will likely get them connected and working again. The question is — is there an easier way to connect and use AirPods?
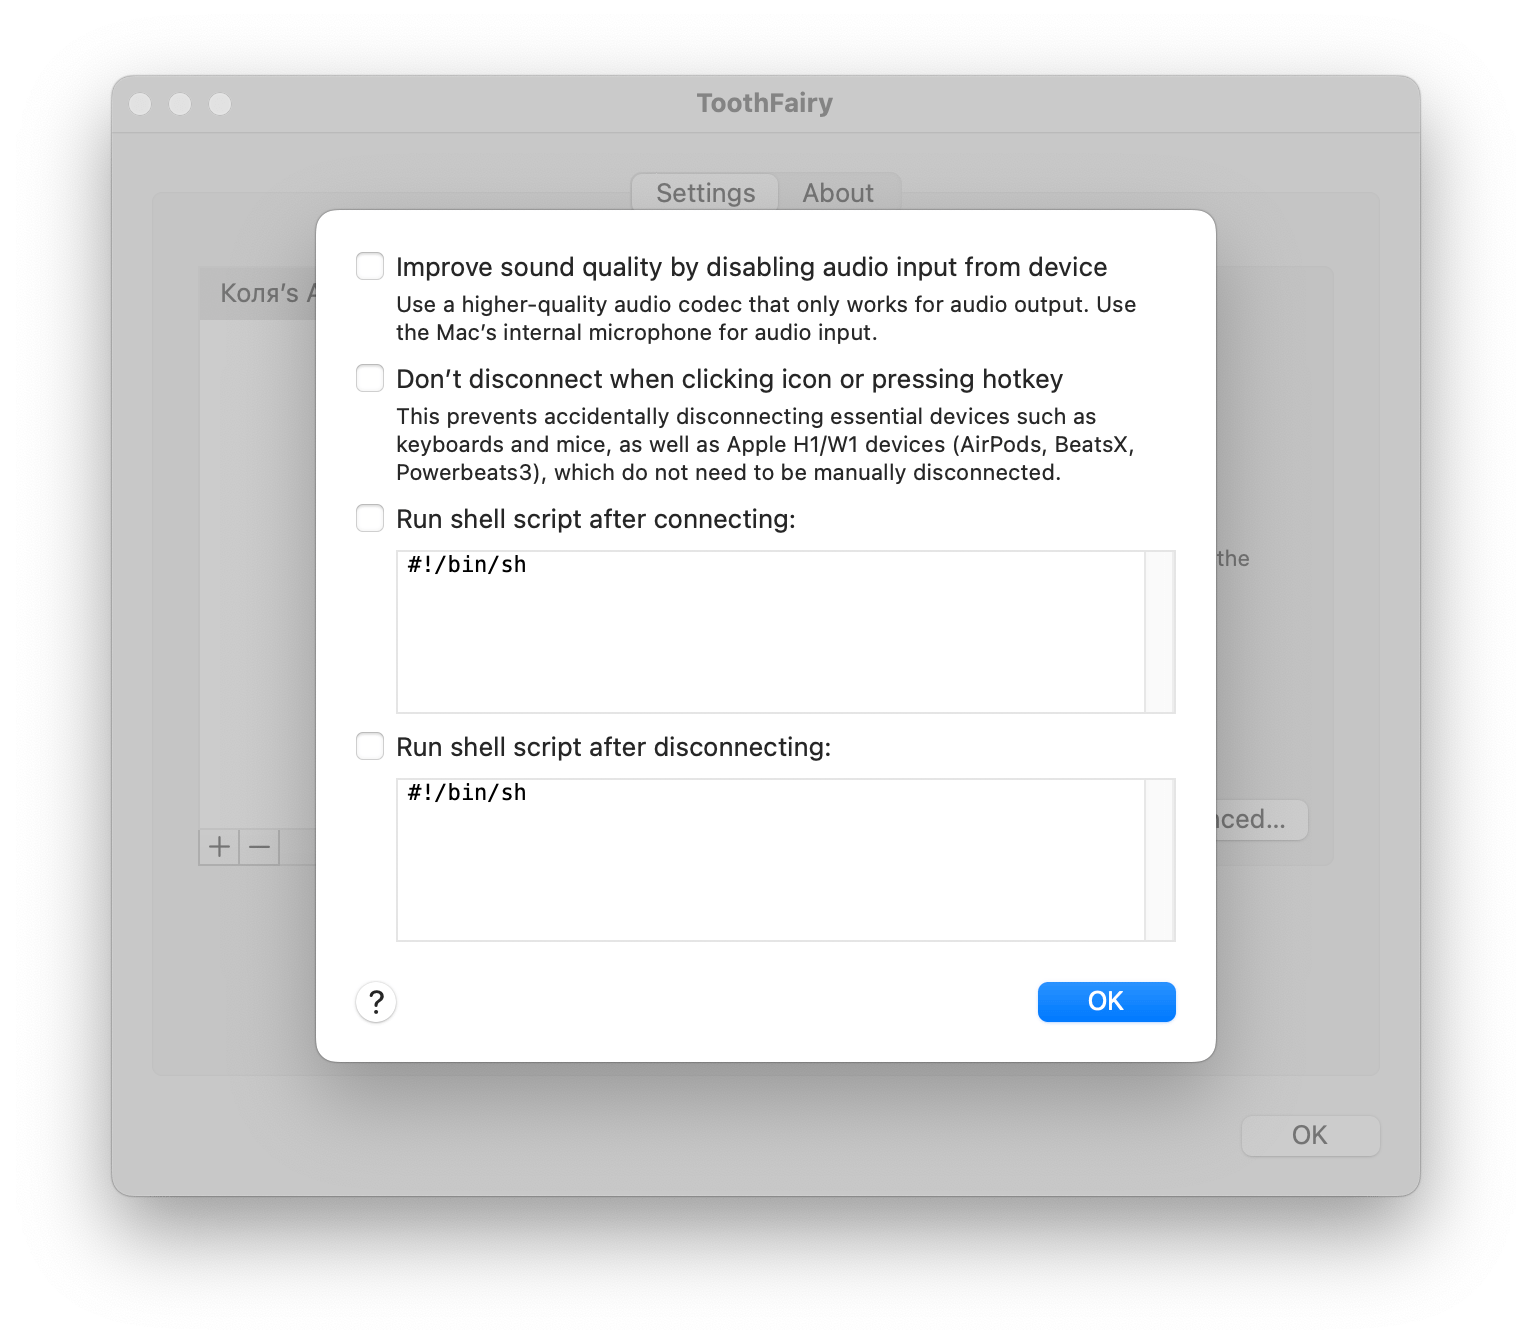
Well, there is with ToothFairy. The app adds an AirPods icon to your Mac's top menu. You can connect or disconnect from there with a few clicks or shortcuts. ToothFairy also lets you improve the AirPod's sound quality by switching to a higher-quality audio mode.
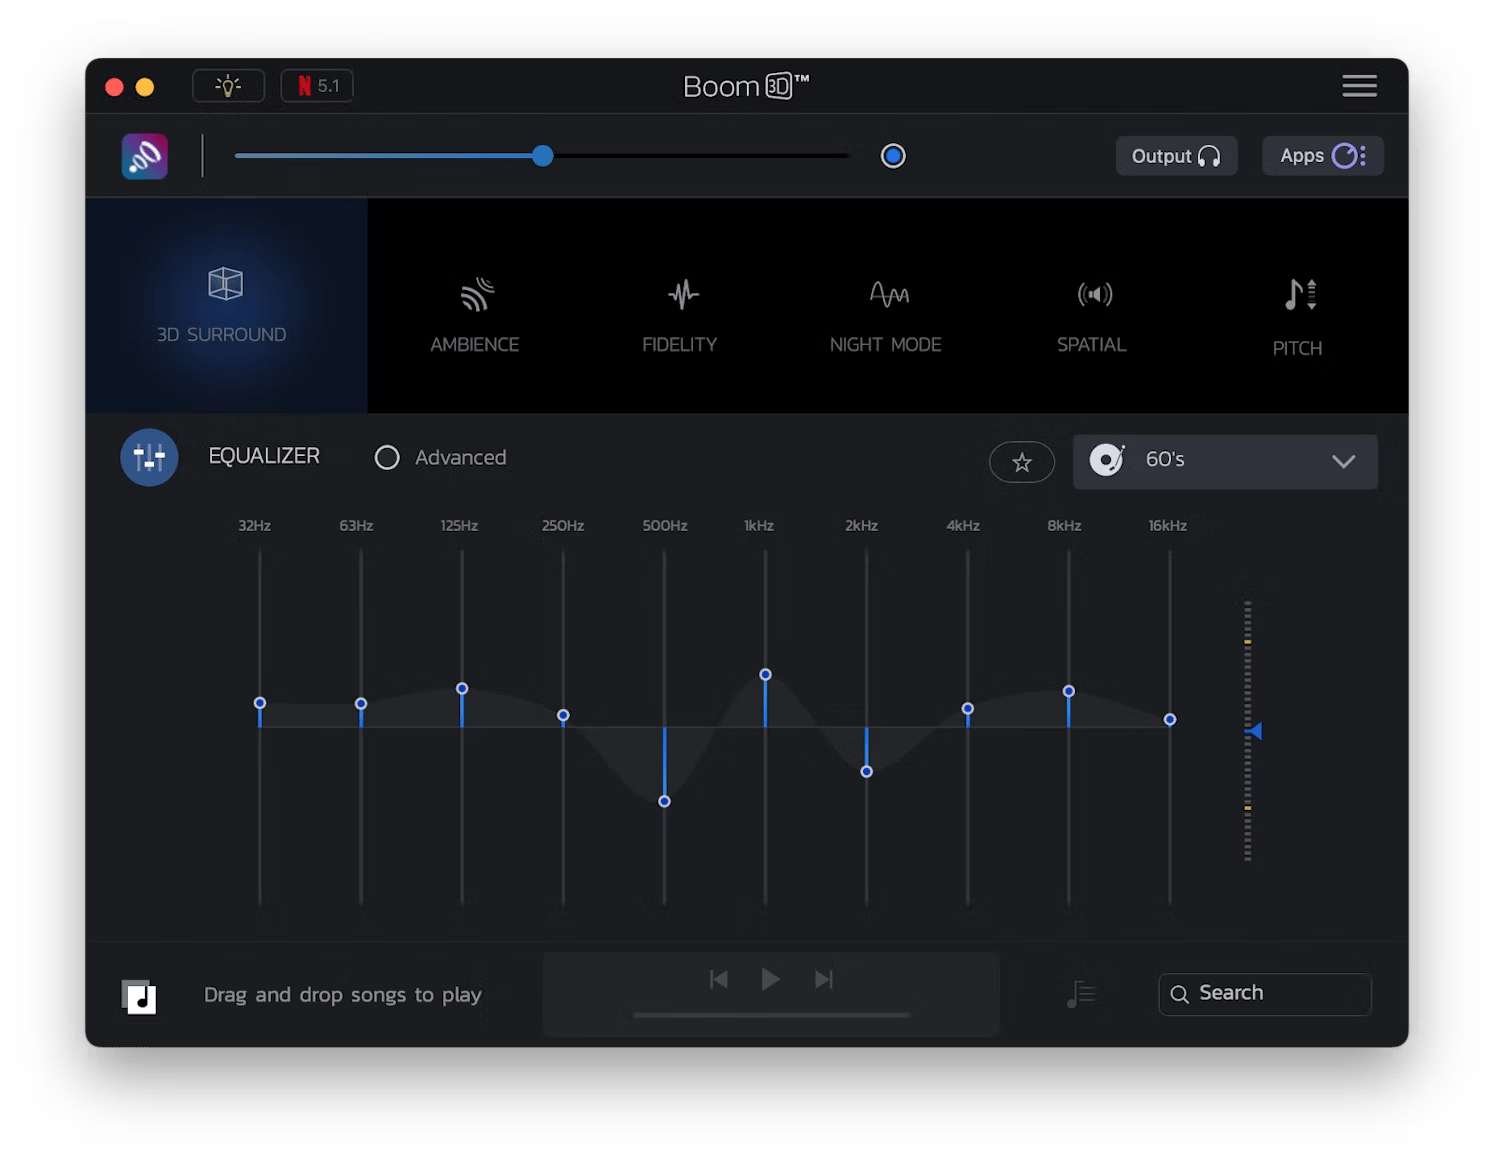
Speaking of audio quality, I must mention Boom 3D. The app is a gem, particularly if you want to immerse yourself in realistic surround sound with AirPods. The app provides several presets that can amplify your listening experience. For example, I love its night mode preset, which gives the meditation music I listen to a soothing quality. Here’s how to use Boom 3D:
- Install Boom 3D. The app will ask you to restart your Mac.
- Open the app > Click Output > Choose AirPods from the device list.
- Choose the audio presets you like.
You can also customize some presets to get the sound quality you want.
Step 4: Turn on Bluetooth
Sometimes, your AirPods fail to connect because you accidentally turn off your Mac’s Bluetooth. Before suspecting other causes, quickly check and turn on your Bluetooth (if it’s off). To do that, go to your Mac’s Control Center and click on the Bluetooth icon.
Step 5: Check your Apple Account
Do this if your AirPods are working with your iPhone or iPad but not on your Mac, particularly if you’re logged in to your Mac with a different Apple ID than the one you originally paired with the AirPods. Go to System Settings and see if you’re logged in with the correct Apple ID. Otherwise, sign out and sign in again with the correct one.
Step 6: Reset your AirPods
Still no luck getting your AirPods to work again? Try resetting it. Put AirPods in the charging case, close the lids, and open it after 30 seconds. Then, press and hold the back button for 15 seconds. Yes, it’s the same steps I’ve previously shared.
Now you know what to do if the AirPods connection failed on a MacBook or iPhone again
Like it or not, AirPods might behave erratically again. Perhaps one of them refuses to connect, or both stubbornly refuse to pair. But with the steps described, you can troubleshoot these issues systematically.
Also, with the apps I mentioned, you can manage AirPods connection more effortlessly and enjoy better sound quality:
- AirBuddy lets you instantly connect and disconnect AirPods and other wireless devices from your Mac’s desktop.
- ToothFairly, like AirBuddy, also gets you quickly connected with your AirPods. Plus, it enhances audio quality.
- Boom 3D allows you to elevate listening from AirPods with its range of customizable presets.
You can get these apps and dozens of other productivity apps for Mac and iOS via Setapp. The platform offers a single subscription for all apps, which you can try for seven days for free now. Don’t hesitate!
FAQ
How do I know if my AirPods are defective?
Your AirPods are likely damaged if you hear crackling sounds or can’t pair them with your device despite trying everything. Likewise, your AirPods are faulty if they overheat or drain the battery quickly.
How long do AirPods last?
With normal usage, most AirPods can last between 2 and 3 years. The exception is if you have been charging them daily because of heavy usage. In that case, the AirPods’ battery might degrade sooner than expected, eventually causing them to fail.
Can AirPod batteries be replaced?
Apple Support offers battery replacement for AirPods, but it is subject to certain terms. Some third-party vendors also offer similar services. However, be wary of replacing the earbuds' batteries through an unofficial vendor because it will void the warranty.
Should you keep AirPods in case all the time?
It’s better to store them in the case. First, the case protects AirPods from dust and scratches. Besides, when you put your AirPods in the case, you charge them. The only exception is, of course, when you need to use them.


.png)