If your printer supports duplex:
File > Print > check Double-sided > select On > Print.
If your printer doesn't support duplex:
File > Print > Paper Handling > Sheets to Print: Odd Only > print > reinsert pages > Sheets to Print: Even Only > print again.
In Microsoft Word:
File > Print > Copies & Pages > Layout > Two-Sided > Long-Edge binding > Print. Word uses its own print dialog — the standard Mac print window won't appear.
A lot of people these days have ditched printing documents since everything is on their devices. But, I’ve found that printing out my study materials is super helpful. When I’m deep into a course, jotting down notes and summarizing things on paper just feels right. Maybe it’s a millennial thing, but actually, holding a document helps the information stick better for me.
Yet we’re printing less than ever, to the point where many of us don’t know how to print front and back on a Mac. And this means using twice as much paper.
But don’t worry. My guide will show you how to print double-sided on your Mac so your documents look their best and save a few trees in the process.
Why and how to print on both sides of paper
For many, printing on both sides is all about saving nature. Every piece of paper we don’t use is one less tree that needs to be cut down.
But it’s not just about the environment; double-sided printing also helps to declutter the workspace. I hate piles of single-sided sheets taking over my desk. When I print double-sided, I create neatly organized documents that are easier to manage and review.
And let’s not forget the cost savings. If I can cut down on paper usage, I’m also reducing my printing expenses over time. So, embracing duplex printing is a win-win in so many ways.
Now, let’s explore how you can make this happen on your Mac.
How to print double-sided in 3 ways
Not everyone can print double-sided fast and easily. If you have a printer you bought in the last ten years or so, you’re very lucky. It most likely has the double-sided printing option built right in. If not, I’ll still show you how to print double-sided, no matter what printer you own.
Why am I going to show you three ways of printing? Because the way you access this “Duplex printing” feature might differ based on whether you’re printing from your Mac using Preview, Microsoft Word, Google Drive, or even other apps.
Method 1: Print double-sided on Mac
If your printer supports duplex printing, the process is pretty simple. Follow the steps below:
Open the document you want to print.
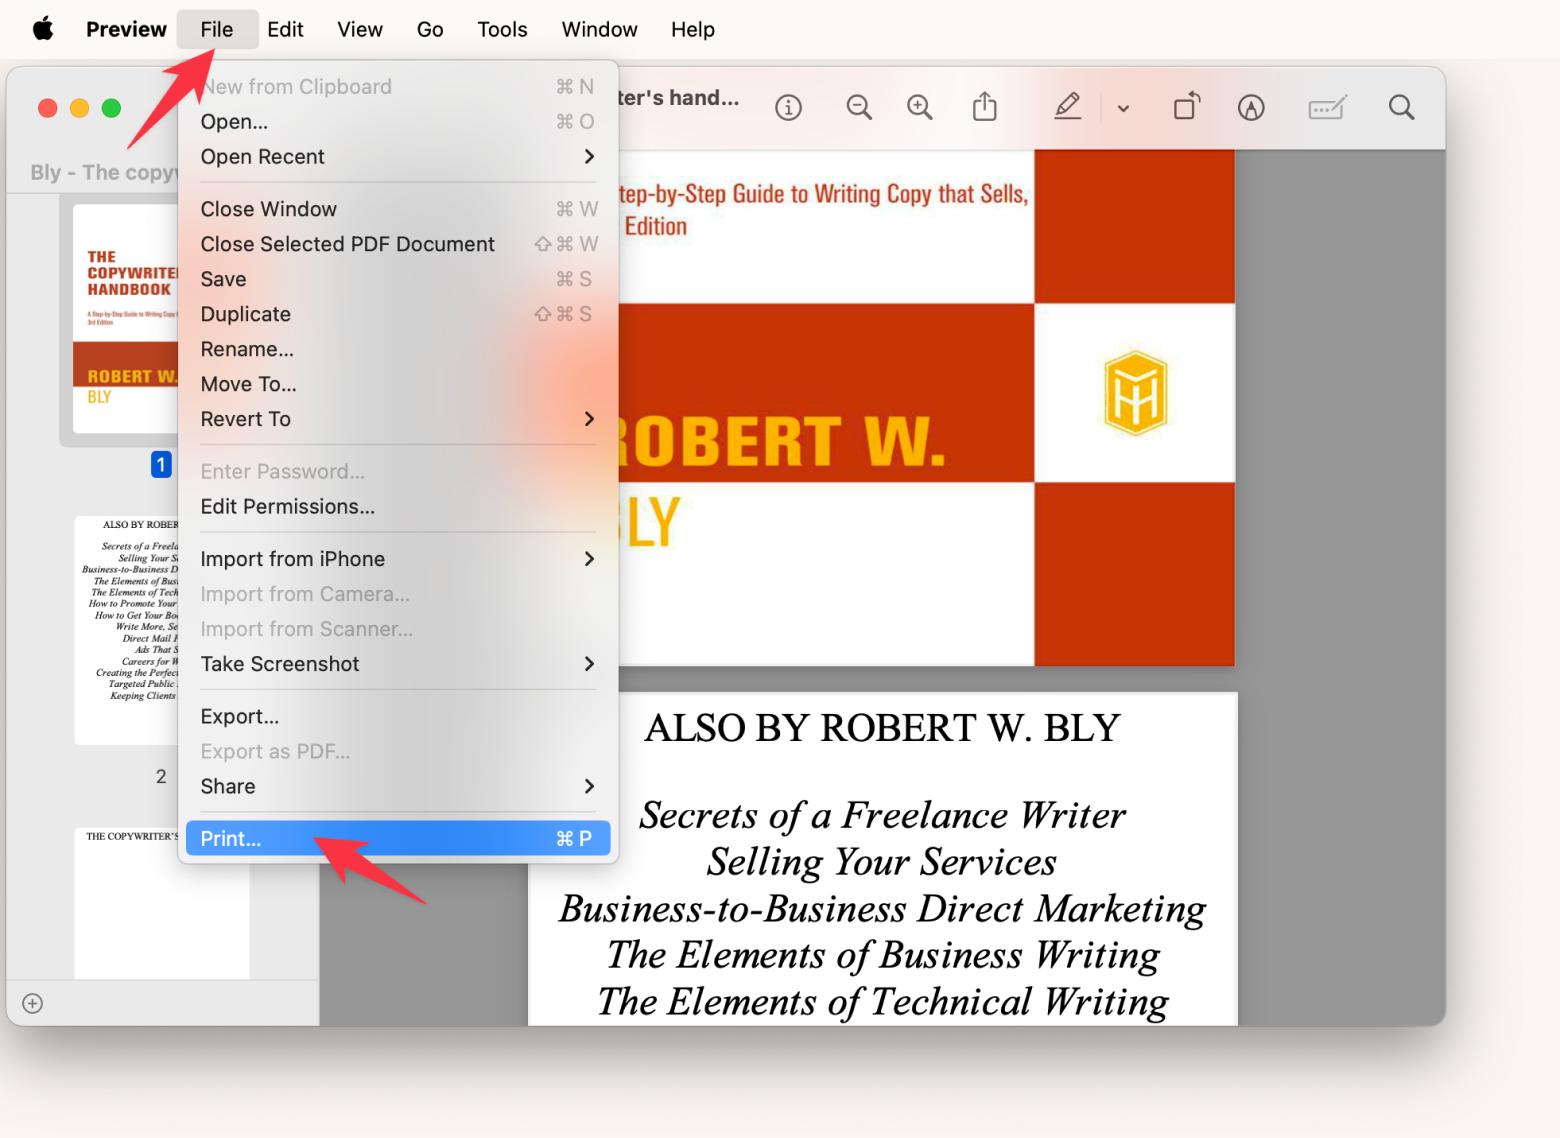
In the menu bar at the top, click File > Print. Alternatively, press Command + P on your keyboard.
Look for the Double-sided option in the print dialog box.
Select On from the drop-down.
Finally, click on Print.
How to manually print double-sided
As I mentioned, if your printer doesn’t have the duplex printing option, you can still print double-sided. However, you need to reinsert the pages manually, which takes a bit longer.
Follow the steps below to manually print double-sided on a Mac with a non-duplex printer:
Open your document and go to the Print dialog, as I showed you above.
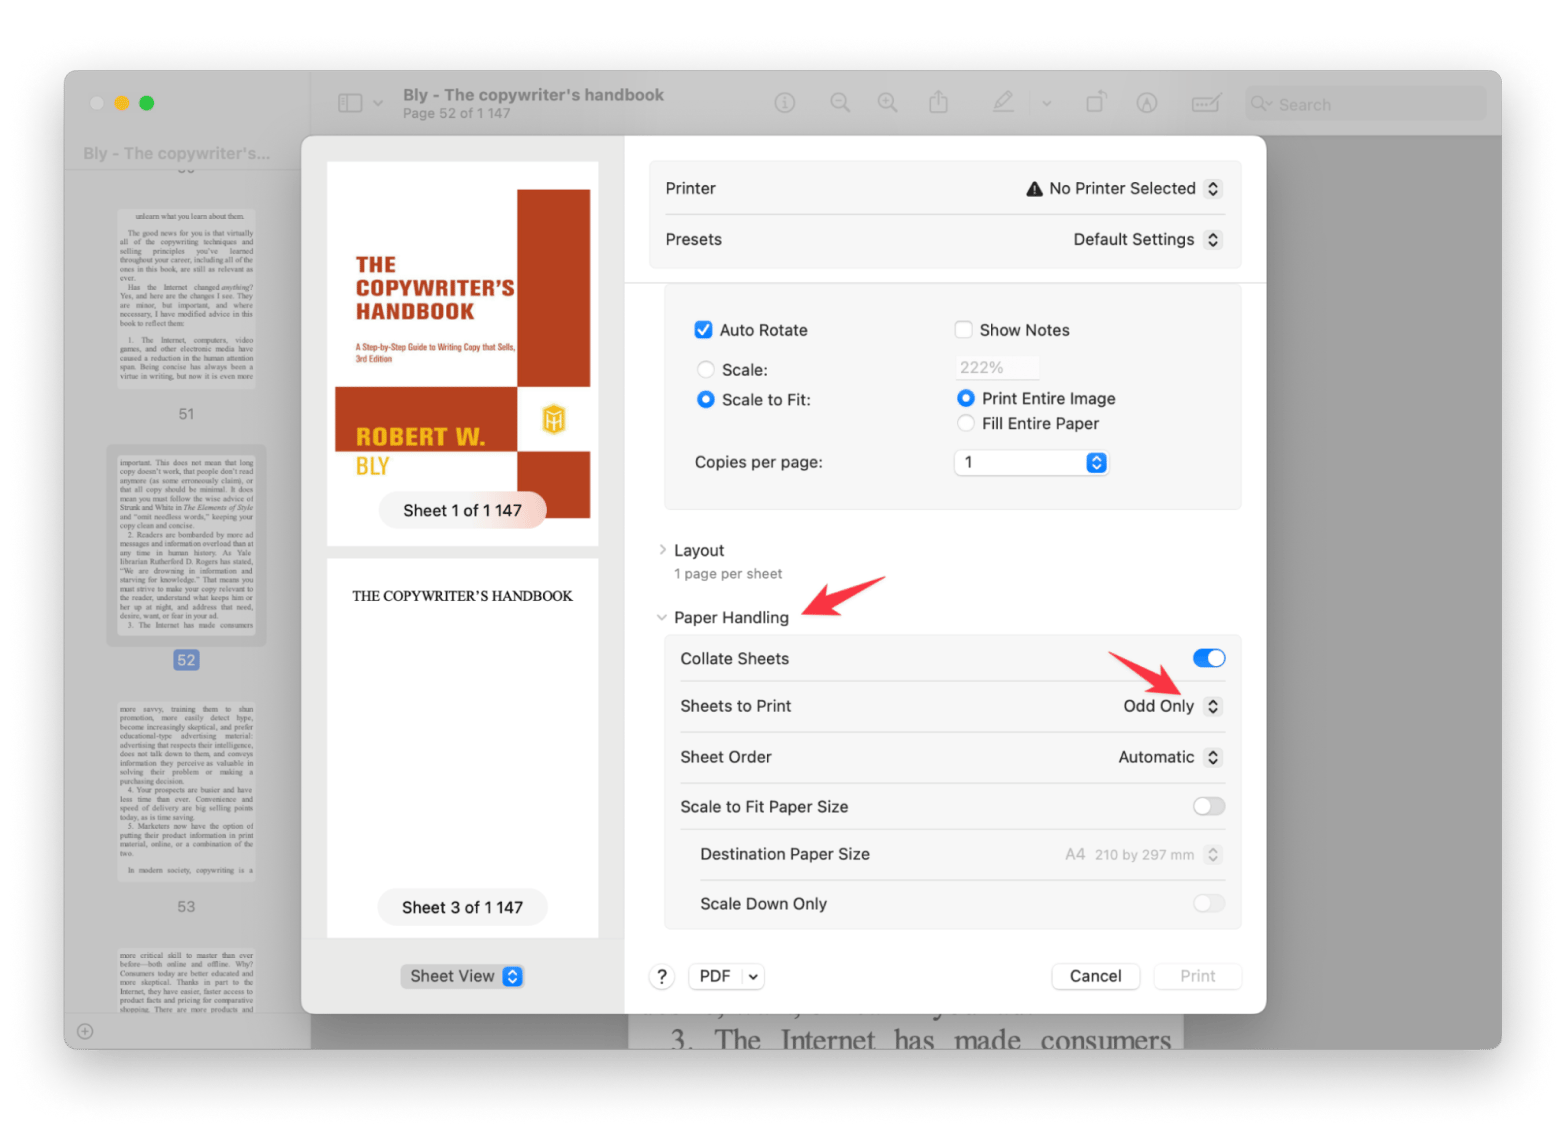
Scroll down and click on Paper Handling.
Change the Sheets to Print section to Odd Only.
4. Print the document.
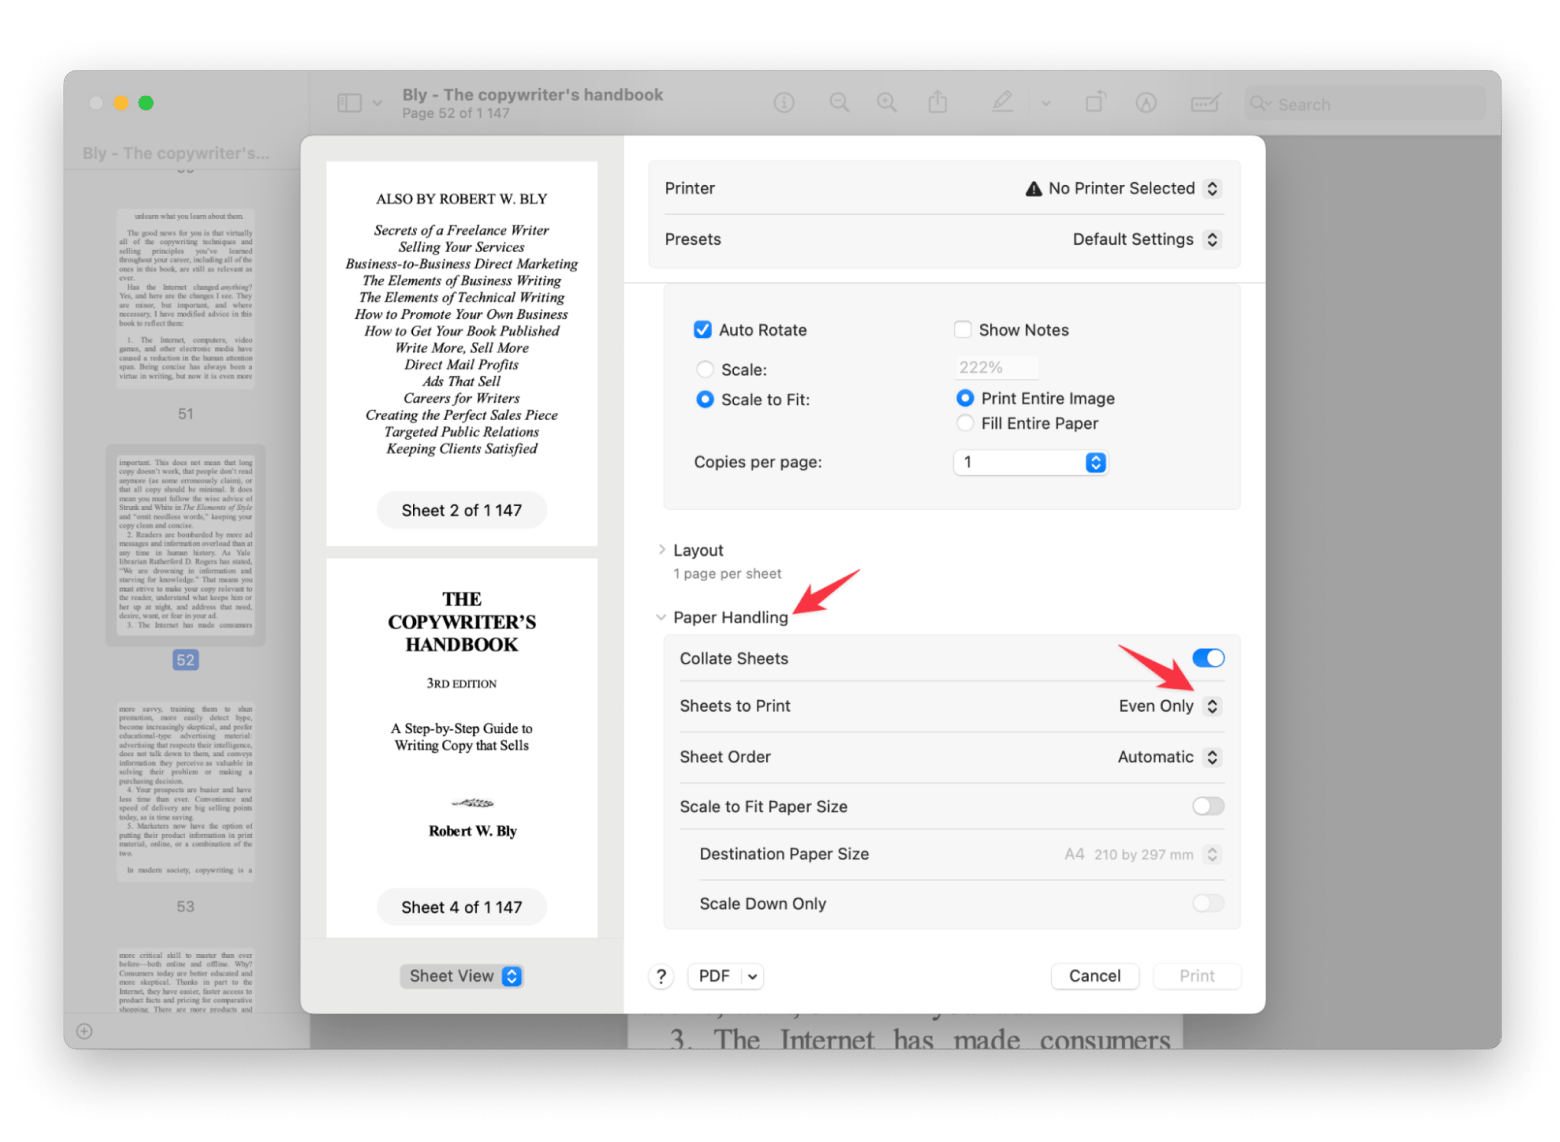
5. Once you’re done with the odd pages, stack them in the correct order and reinsert them into the printer’s input tray. Double-check if you placed them correctly so that the next set of pages prints on the back.
6. Go back to the Print dialog and choose Even Only in the Sheets to Print section.
7. Print the document again. Done!
Method 2: Print double-sided in Microsoft Word on a Mac
Microsoft Word behaves slightly differently when compared to other apps. It outputs its own custom printing dialog window. For me, it looks confusing. To start printing on both sides, follow the steps below:
Open your document in Microsoft Word.
Click on File in the menu bar, then select Print.
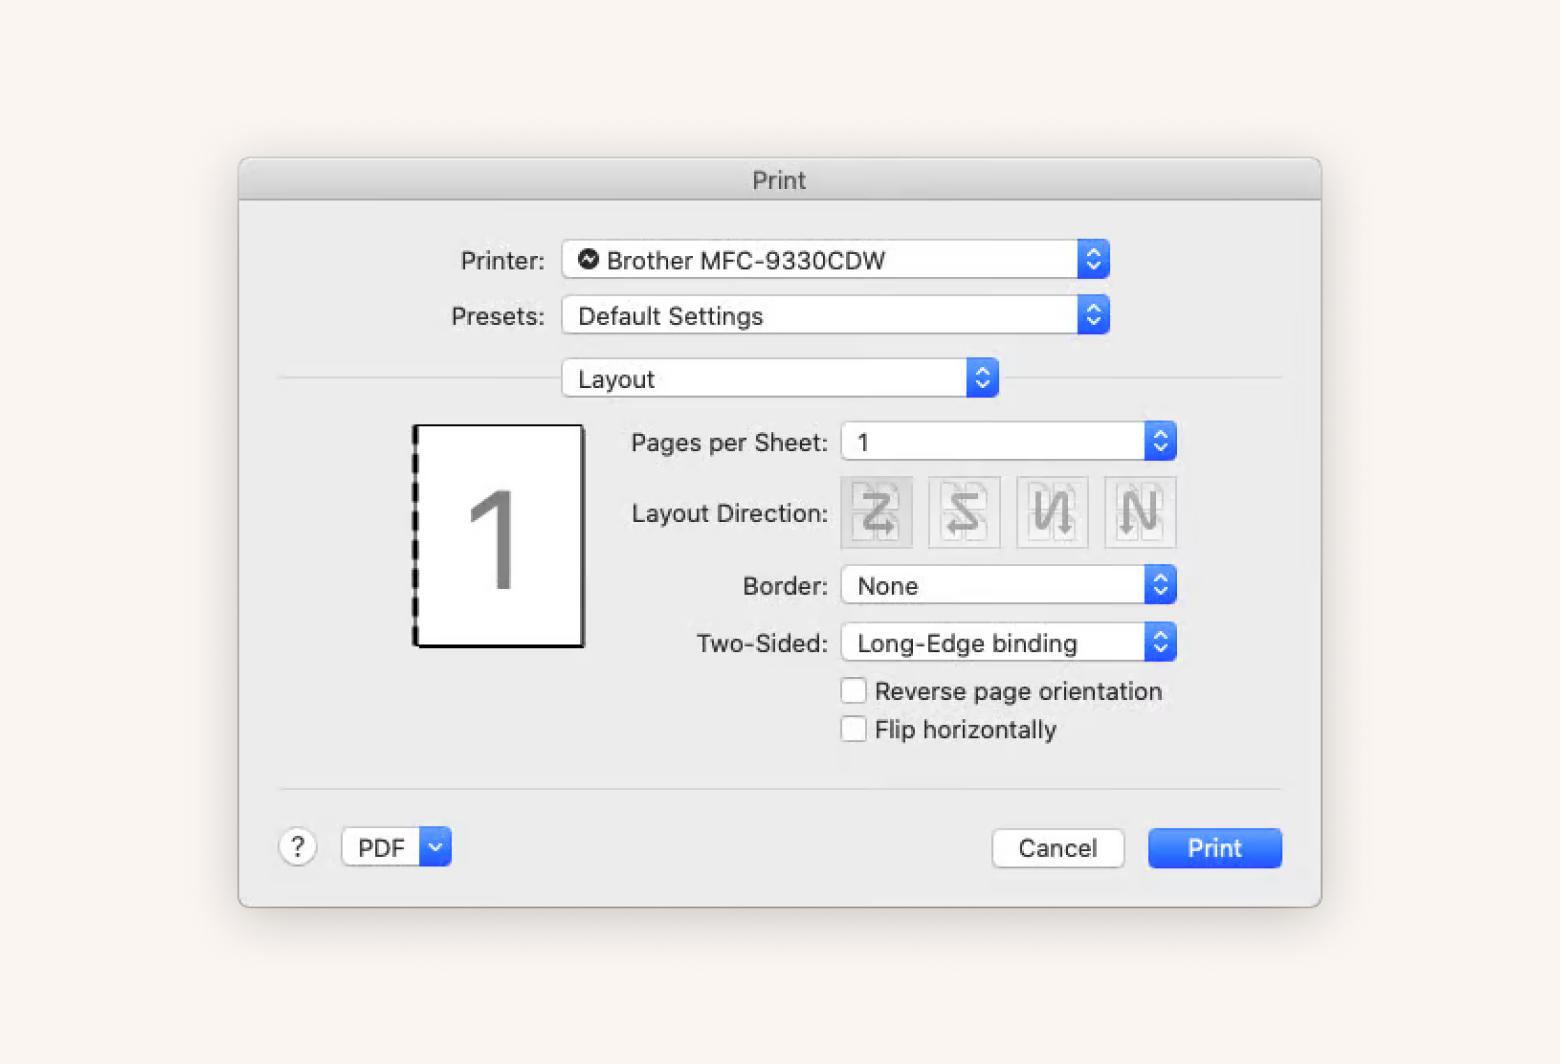
Click on Copies & Pages, then choose Layout.
Select Two-Sided and choose Long-Edge binding.
Click Print.
Note: Long-edge binding means the pages flip like a book, while short-edge binding flips like a notepad. For most documents, long-edge binding is the preferred choice.
Method 2: Print double-sided in Google Drive
Double-sided printing online is quite similar to method one in this guide. The one difference is that the document will be downloaded first.
Open your document in Google Drive.
Click on File, then select Print (this will download the document as a PDF).
Open the downloaded PDF and go to File, then Print. In the print settings, look for the Double-sided option. For instructions on how to do this, refer to the instructions above, “Method 1: Print double-sided on Mac.”
Addressing common double-sided printing issues
As with all things we do, something can go wrong with double-sided printing. Don’t get frustrated too quickly. Check the table below for possible issues and solutions:
What’s wrong
What can I do?
Printer doesn’t support duplex printing
You can still print manually by printing odd pages first, reinserting them, and then printing even pages.
Pages printed upside down
Ensure you select the correct binding option: Long-Edge flips pages like a book, while Short-Edge flips them like a notepad. Using the right setting keeps your document readable.
Incorrect page order
Check the print settings for the option labeled Print in Order, or use the Preview function to ensure the pages will print in the correct sequence.
Driver or software issues
Update your printer drivers regularly to avoid compatibility issues.
Duplex option not appearing
Go to System Settings > Printers & Scanners, select your printer and make sure the Duplex Module is enabled. If it doesn’t help, try deleting your existing printer from the System Settings. Then, download the latest driver from your printer manufacturer and restart it. It should work perfectly.
Idea: If small interruptions like this one with printing keep slowing you down, it may be a sign of a bigger workflow bottleneck. This free Quick Productivity Fix Finder helps spot the pattern and suggest quick fixes — so you’re not just treating symptoms.
Final thoughts on how to print double-sided on Mac
Even though I don’t have a printer with a duplex printing option, I’ve learned to quickly reinsert pages for double-sided printing. The process is really not as daunting as it sounds. With a little practice, it becomes second nature. What motivates me the most is that I feel pretty proud of minimizing my paper usage.
The main point to take away from this article is that the printing process can be a bit confusing because some apps output their own custom printing dialog window. That's why I’ve covered how to do it not only in Mac’s Preview but also in Microsoft Word and Google Drive.
And if you want to further enhance your productivity, be sure to check out the apps I mentioned (Craft and Focused). They can really simplify your tasks and elevate your workflow.
Best of all, both Craft and Focused are available to you absolutely free for seven days through the trial of Setapp, a platform with more than 260 Mac, iOS, and web apps to solve any problem at hand, from writing without distractions (Ulysses) to converting your audios, videos and images (Permute), and so much more. Try every Setapp app at no cost today and find your new favorite.
FAQ
How do I turn on double-sided printing on a Mac?
To turn on double-sided printing on a Mac, open the document you want to print. In the menu bar at the top, click File > Print. Then look for the Double-sided option in the print dialog box.
If you don’t see it, go to System Settings > Printers & Scanners, select your printer, and make sure the Duplex Module is enabled.
How do I change my Mac to print single-sided?
To print single-sided on your Mac, open your document and click File > Print. In the print dialog, simply uncheck the Two-Sided box and click Print.
Superpowers for your Mac
Tackle your tasks with dozens of helpful apps on Setapp.