When You’re New to Mac: A Full Guide for Beginners
The first thing you need to know when switching from Windows to Mac is this: it’s very, very similar, only better. Everything that used to be slow and annoying in Windows is mostly fluent and pleasant, and everything unintuitive and clumsy has been dealt with. So prepare for a better computer life and let’s look at your new system before you begin using a Mac.
What’s what in Mac and how to use macOS
Here’s a list of key names you’re going to need when using your Mac for the first time.
- Dock — It’s a quick-access panel in the bottom of your screen. It’s sort of like the usual items you’d have on your Windows desktop, only a little more useful. The usual Dock has Settings, Launchpad, Finder, Safari browser, App Store, and sometimes a few other tools.
- Finder — this is the My Computer of Mac. It’s the main window where all of your files, apps, and drives will be. Finder can be found in the Dock, first icon to the left.
- Launchpad — the rocket icon in your Dock opens a list of applications you have on Mac. Use the search bar or click any app to open it. Press any key to close Launchpad.
- App Store — this one opens the Mac App Store where you can purchase and download apps. You’ll need an account with an Apple ID for it, we’ll talk about it in a bit.
- Siri — present on Mac since a few OS updates ago, Apple’s digital assistant can help you go about your day. Siri can be turned on in Settings, it has its own menu. Simply check Enable Siri once you open it. Siri can order pizza, find documents, open websites, get directions, and other minor tasks. Nothing too grand though, Siri won’t do your work for you, nor will it edit photos of that wedding reception you attended last week. That you’ll still have to do on your own, even in the age of intelligent machines.
- Menu bar — it’s a new concept for switchers but quite similar to the bottom bar you used to have on Windows. It’s a permanent bar at the top of your screen, with its right-hand side taken up by indicators and menu-bar apps, and right-hand side showing preferences of the app/window that you’re currently working in. Wi-Fi, battery, time, language, and sound preferences can all be found there.
- Spotlight Search — your go-to search bar. How to find it: search icon in the menu bar or Command + Space. Spotlight looks everywhere for anything, apart from Googling, for that you’ll need a browser.
- Safari browser — use it to download Chrome (just kidding). Safari is a native web browser for Mac. It has a lot of goodies that people like, especially in the latest versions of the macOS. By the way, the new macOS 11 Big Sur has the best version of Safari. It’s 50% faster than Chrome, has built-in translation, and some top-notch security features.
- iTunes — is your link to Apple Music and also iPhone sync.
Getting started with a Mac
Files and folders
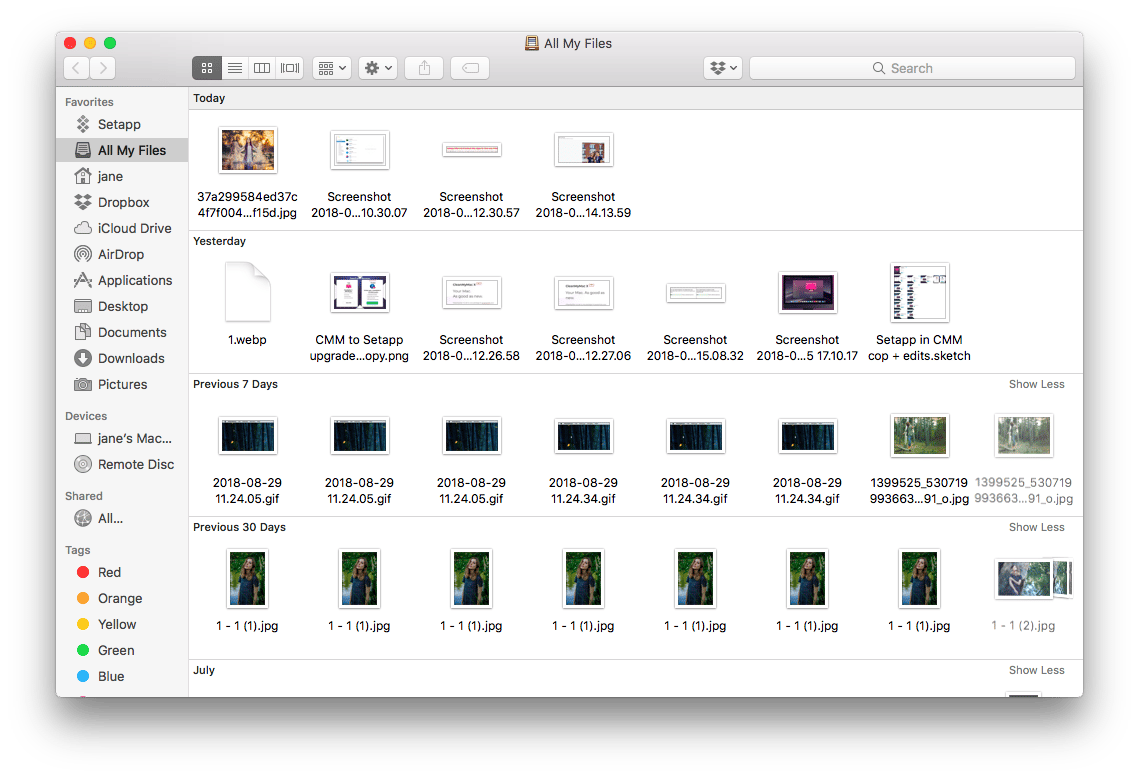
Finder, as we’ve mentioned, is your doorway to all the files. The smiley face on the Finder icon is smiling for a reason: there are really a few troubles in a Mac for beginners. Here’s how macOS Finder works:
- The panel on the left is your navigation. It has all you need, already broken down into categories and folders. You’ll find familiar Documents and Pictures. Once you install additional services such as Dropbox and Setapp, they’ll also appear here.
- Use sorting and view options. Macs have handy sorting for files in Finder, so make use of those. The icons in the top allow you to rearrange your files and view them as small icons or image galleries.
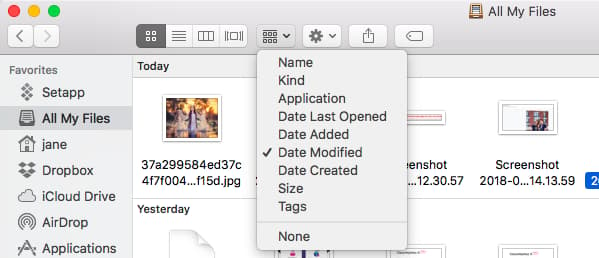
- Right-click opens usual available actions with files.
- Space bar on any selected file lets you preview it with Quick Look. Use arrows to move in-between file previews.
A few specific macOS differences for switchers
To delete a file, you need to select it and press Command + Delete. Or you can right-click and choose Move to Trash. There is no built-in clipboard history. To have access to things you’ve copied before, you’ll need third-party apps like Paste.
Using Trackpad on Mac
If you’re a mouse kind of person, we get it. But if you aren’t and trackpad is your way on the highway, Mac is going to make you so, so happy. You can see all controls in Settings > Trackpad. They’re very visual and can be switched on-off.
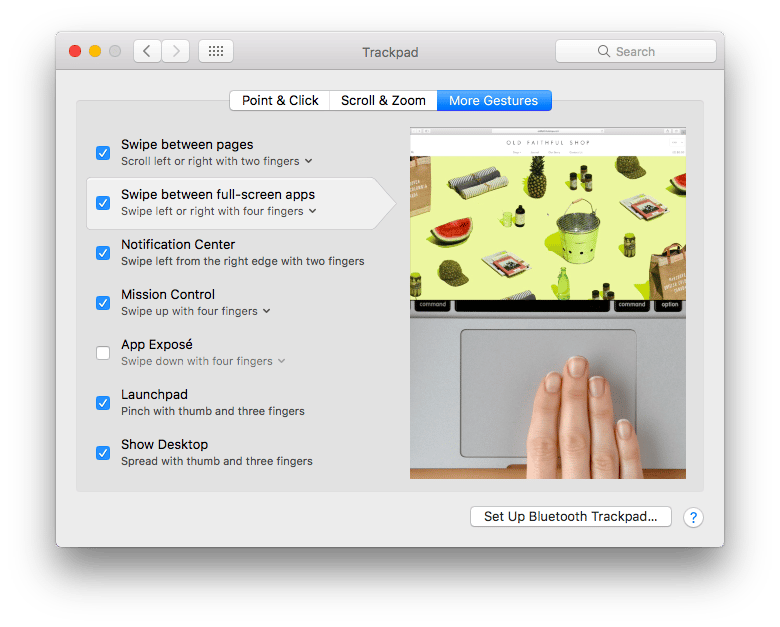
To accelerate your performance by customizing trackpad, as well as the other input devices, try BetterTouchTool. The apps allows you to add standard options and create your custom gestures for convenience. It’s going to be lightning fast.
Where to get applications for your Mac
You have some of the apps you’re going to need already pre-installed, so take a look at your Launchpad before going on a hunt. We have to mention that while a lot of the apps you’ll find there are solid, there’s better fish in the sea.
Talented devs around the world took native Mac apps like Keychain (password storing) and Time Machine (backups) and improved them greatly, ending up with Secrets 4 and GetBackup Pro, with more features, better performance, and higher security.
Where to find those better-than-you-have apps? Here are three main options.
The Mac App Store
Definitely the most common place to find and buy apps. Despite being the biggest storage of apps, it has a few downsides like indefinite app quality, odd reviews, and a lot of similar apps that basically do the same but are somehow different?
On the sunny side of that, in case you stumble upon an app that fails to live up to your expectations, you can easily request a refund through the link on the invoice email you receive after the purchase.
Setapp
Setapp is a new service that’s trying to alleviate some of the Mac App Store issues. It offers a collection of apps by subscription, which means you don’t need to buy every app separately. And the apps are pre-selected by their quality assurance team, so you won’t have to dig through 15 similar duplicate finders or drive cleaners. Setapp has a weekly free trial to test the waters before subscribing.
Browsing
Finally, you can take it to Google to find you the software you need. It takes time and the perils remain: you’re unprotected from shady apps and malware created by no-name developers, so it’s highly advisable to do some research before installing third-party apps outside of the Mac App Store and Setapp on your Mac.
Vital things to know about your Mac

Apple ID
Your whole apple experience is tied to one account, Apple ID. If you already own an iPhone, you have it and are probably familiar with it. If not, it’s an identifier that has your payment details, purchase history, and other important info stored in it. You can set it up by going to Settings > iCloud.

Password storage
Another useful thing in Macs is the Keychain app that we mentioned earlier, a virtual vault of all your passwords. You can find it through Finder, Spotlight, or in Launchpad and add all sensitive info there, so it’s always at hand.

Privacy and protection
Macs don’t have malware protection, probably because they were long considered immune to threats. Since they aren’t, you’ll be better off with a regular malware-finding scan through a specialized app, like CleanMyMac. It will also help prevent hardware health issues and clean unwanted system junk from your Mac. General advice for privacy is to keep all your passwords stored in a vault app, like Keychain or Secrets 4, and not on a Notepad. Just saying, definitely not based on personal experience.

Photos and images
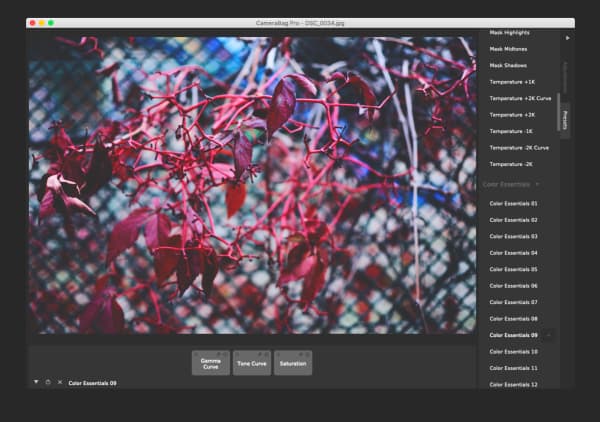
Apple has done a good job on its main photo gallery app, Photos. It sports its own (albeit limited) editing tools, convenient Import-Export options, sync with iPhone, and much more. Photos can also be found among the pre-installed apps. Sure, if Photos lacks some of the complexity you need as a photographer but you’re reluctant to buy expensive apps, try CameraBag Pro, it's free with Setapp subscription.
Multiple and Split Desktops
This one shows the true genius of the Apple company. On Mac, you can have up to 16 separate desktops, each with different apps open and different files at work. An indispensable tool for juggling multiple projects.

And, for when you need two separate apps in front of you, you can perform the split screen. To do it, simply press and hold the green button on any window.
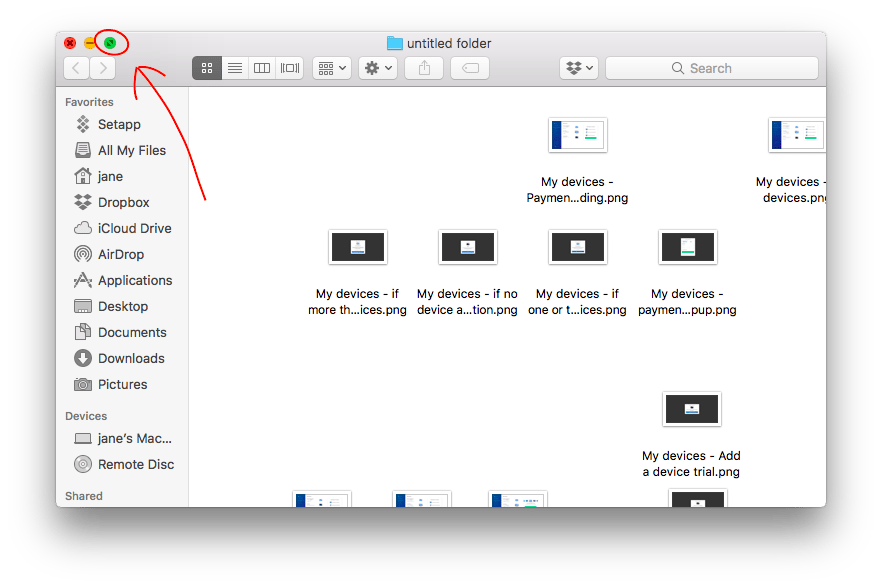
Chose the side of the screen you want it in and let go. Then, open the second app/file in the other side. To escape from the split screen, hover at the top of any side with a cursor until the bar drops down and then simple minimize or close the app.
Final notes
Your Mac is a tech gem and you’re going to love it, we promise. Try not to overload it with memory-heavy apps, make sure to steer clear from threatening websites, and keep your drive in order. Anyway, we hope this guide has been of help, enjoy your Mac, and have a lovely day. Cheers!


