How to access an external drive that's not recognized on a Mac [2025 edition]
- Check basic connections and settings to resolve external drive recognition issues
Start by ensuring the external drive is properly plugged in with a secure cable and try a different USB port. Adjust Finder settings (Finder > Settings > General > External disks) to ensure the drive appears on the desktop and under Locations. - Use Disk Utility to diagnose and fix drive issues
Use the Mount option to make it accessible, or run First Aid to diagnose and repair file system errors. These can often resolve unreadable or unmountable drives. - Reset NVRAM to address startup disk issues
On Intel-based Macs, press Option + Command + P + R for 20 seconds to reset NVRAM. If you have an Apple Silicon Mac, just restart it. - Reformat NTFS or unsupported drives for Mac compatibility
If the drive is NTFS or another incompatible format, use Disk Utility to erase and reformat it to APFS. Note that this erases all data, so back up files on another device first. - Use iBoysoft NTFS for Mac from Setapp to easily manage NTFS drives and iBoysoft Data Recovery to recover lost or corrupted files
Both apps are available via Setapp. Try all 250+ Setapp’s apps free for 7 days.
Most of the time, when you connect an external hard drive to your Mac's USB port, it appears on the desktop and in the Finder under Locations.
But sometimes, the external hard drive doesn’t show up. What causes Mac to not recognize external drives? Typically, users run into this because of corrupted data, improper formatting, and NVRAM issues. But there are plenty of other possible causes. Let’s take a look at what might be going wrong and how to fix it when your external drive isn’t showing up on your Mac.
How to fix an external hard drive not showing on a Mac — Step-by-step
| What happened? | Do this |
| Drive doesn’t mount | Recover your files with iBoysoft Data Recovery before troubleshooting. |
| Drive not showing up | Check connection and cable. |
| USB port issue | Try a different USB port. |
| Drive not visible in Finder | Finder > Preferences > General > External disks. |
| NVRAM issue | Shut down > Option + Command + P + R for 20 seconds |
| Disk not mounting | Disk Utility > Select drive > Mount. |
| Incorrect format | Disk Utility > Erase > Choose APFS format. |
| File system problem | Disk Utility > First Aid > Run. |
| macOS issue | Apple menu > Restart. |
| Cannot write to NTFS drive | Install iBoysoft NTFS for Mac to write it. |
How do you fix an external disk drive that won't show up on a Mac?
While it’s impossible to instantly figure out why an SSD is not showing up, there are some working methods that will help you get things right. Let’s go through the checklist.
1. Recover data from an external drive that still won’t mount on Mac
So, let’s say you've tried everything. You've checked cables, changed USB ports, used Disk Utility, and even tried force-mounting through Terminal.
But the drive still doesn’t mount.
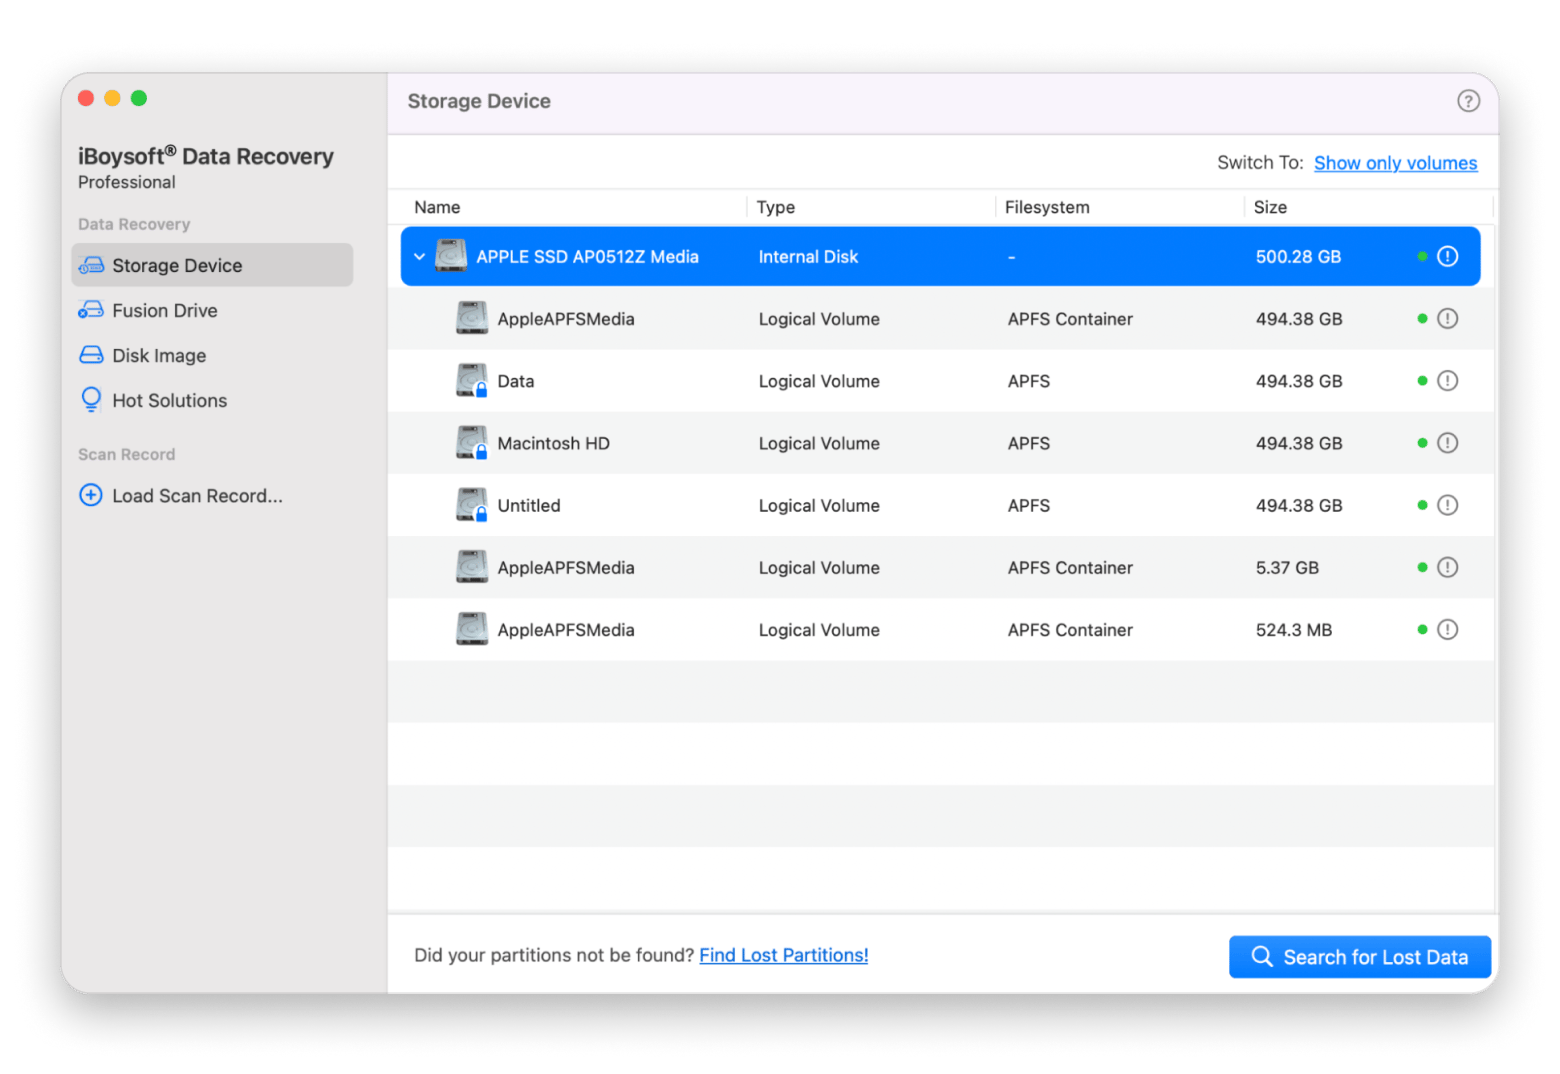
Before reformatting or giving up, there’s good news. You can still recover your files. I’ve used iBoysoft Data Recovery for Mac. It worked even when the drive didn’t show up in Finder or Disk Utility. It’s fully compatible with macOS 15 Sequoia and supports recovery from unbootable Macs, unreadable drives, and even formatted disks. It doesn’t require a bootable installer.
Here’s a 3-step recovery guide:
- Install and open iBoysoft Data Recovery for Mac.
- Choose the unmountable drive.
- Click Search for Lost Data, preview the files, and recover what you need.
2. Check whether the drive is properly plugged in
I know you've probably already checked this, but I still need to mention it, just in case. Since the connection relies on a wire — either a USB or HDMI cable — if it’s not connected properly, the drive won’t appear on your desktop.
Assuming it’s plugged in correctly, not wobbly or loose, the cable could be at fault. Try connecting the same device with a different cable.
3. Change USB ports to help Mac recognize the device
A damaged USB or flash drive port on your Mac could be the reason why external drives won’t show up. If you’ve got another port, try connecting the device to that one.
4. Edit Finder Settings to display external disks
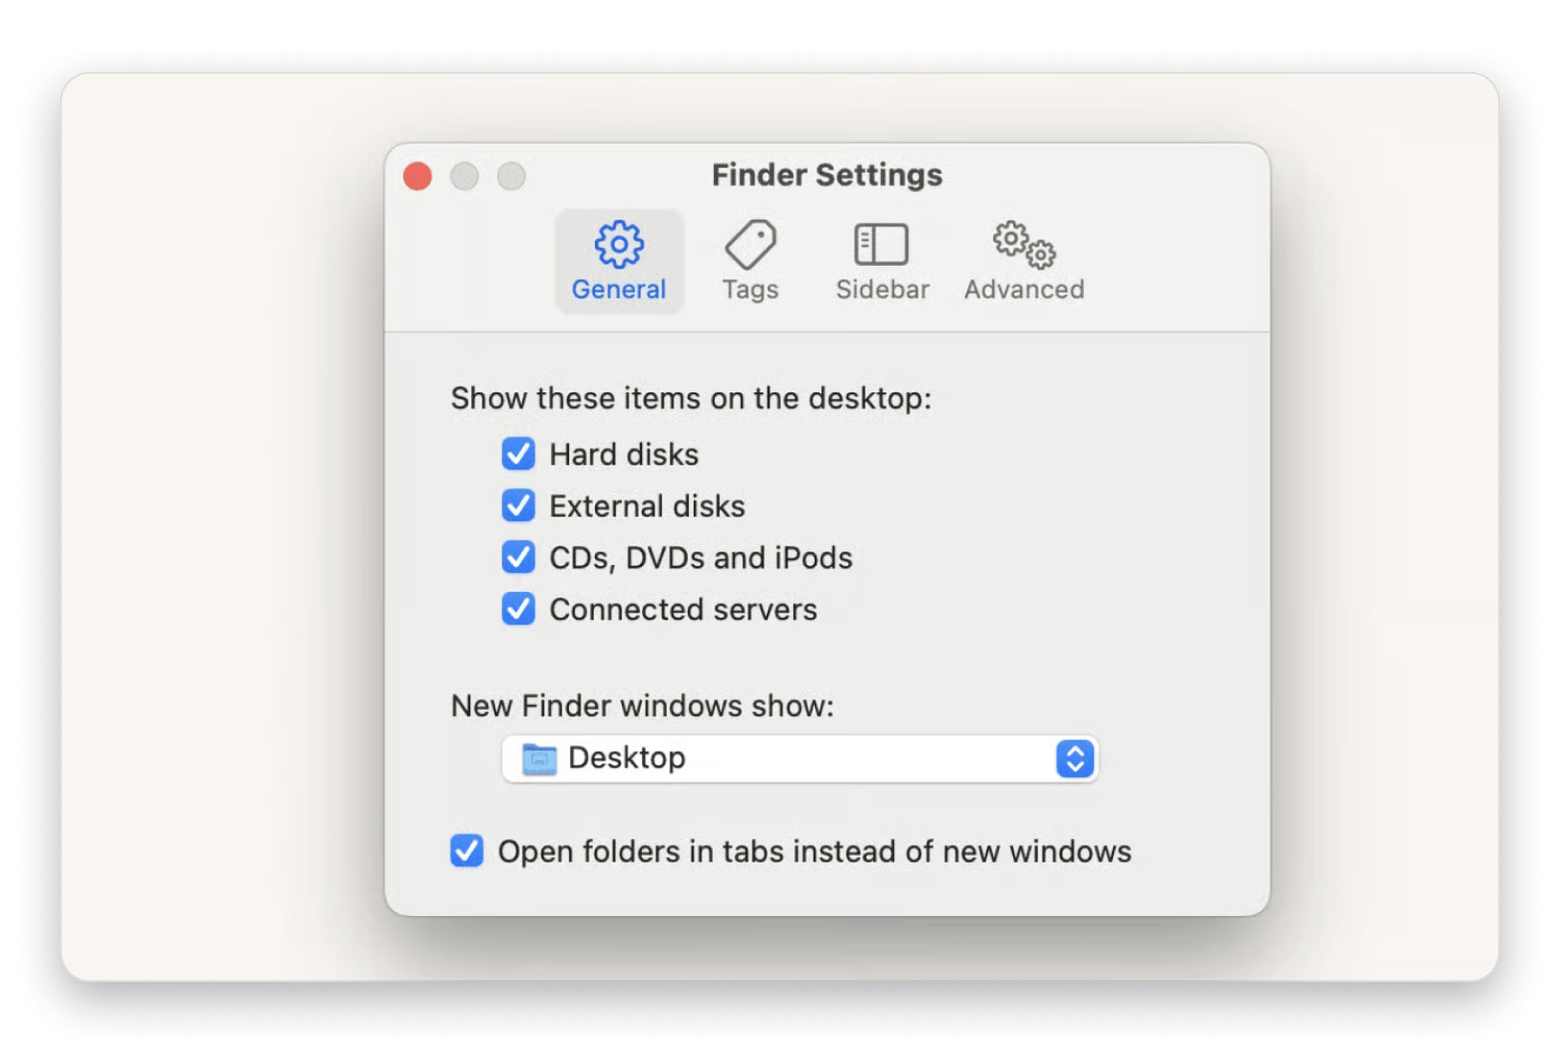
When you connect a drive to a Mac, it should appear in Finder under Locations. What to do if an external hard drive is not detected? In most cases, when Finder doesn’t see your drive, you just have to change a few things in Settings. This should also help if the drive shows in Disk Utility but not in Finder:
- Go to the Finder menu > Settings.
- In General, click on External disks to ensure that it shows on the desktop from now on.
- In the Sidebar tab, you can choose which folders and devices will be shown in the left-hand column of the Finder window.
5. Reset NVRAM to refresh settings
NVRAM has to do with storing different settings, including the startup disk selection settings. Therefore, if the USB drive is not showing up, resetting NVRAM may help fix the problem with those settings.
To reset NVRAM on an Intel-based Mac:
- Shut down or restart your Mac.
- Switch it back on and immediately press these four keys together for at least 20 seconds: Option + Command + P + R. It should look as though your Mac has started again.
- If it has, release the keys when you hear the second startup chime. Hopefully, the hard drive has shown up now.
NoteNVRAM works differently on Apple Silicon Macs and doesn’t require manual resetting. On these newer Mac models, NVRAM settings are being checked at startup and reset automatically when necessary. |
6. Use Apple’s Disk Utility to mount the external drive manually
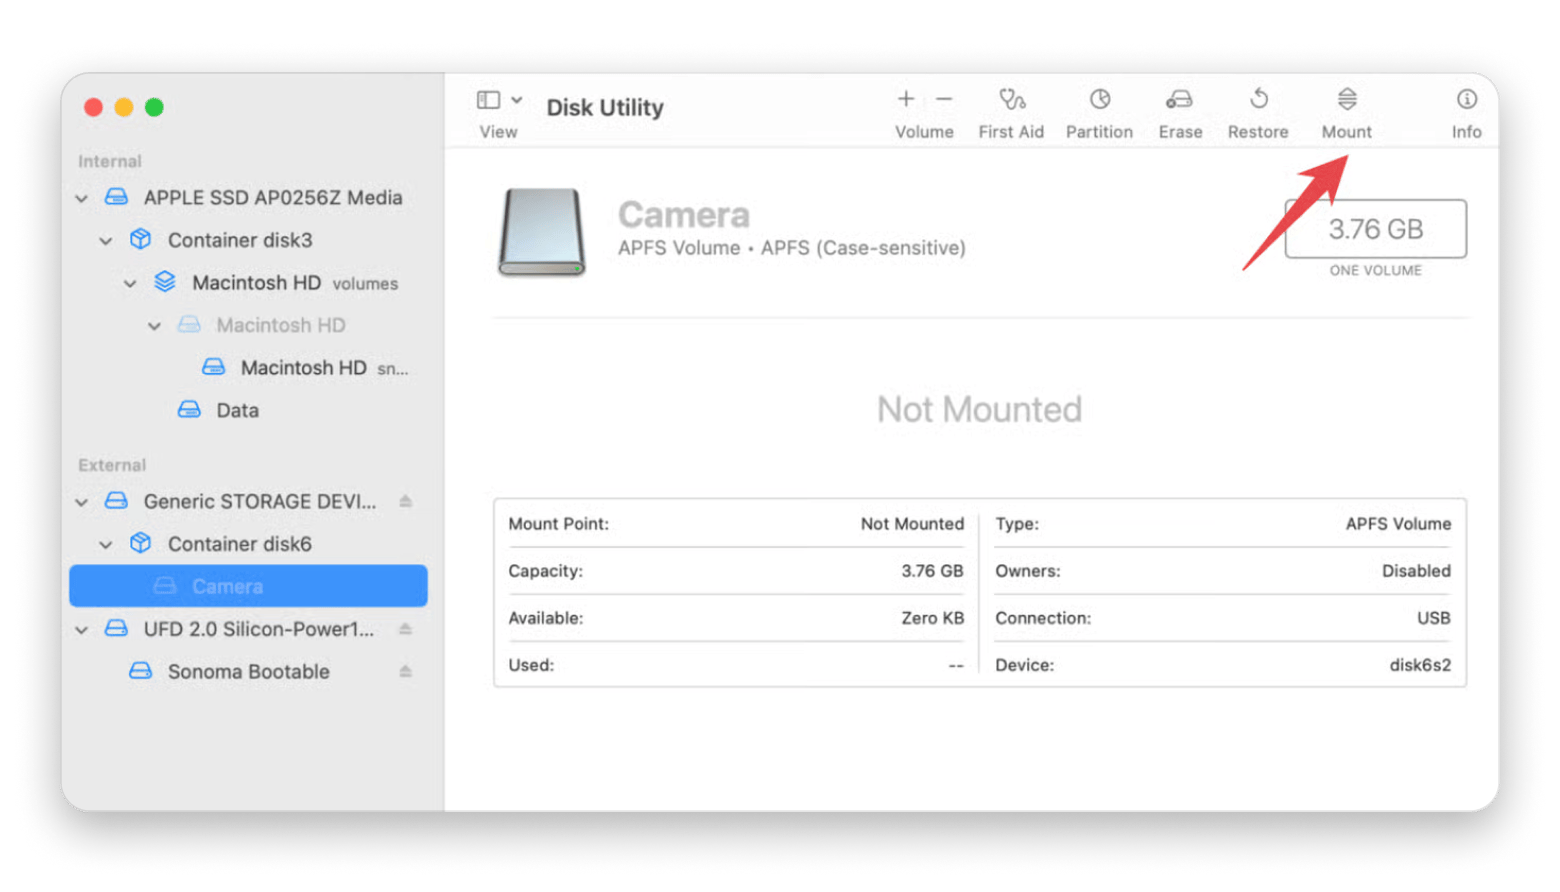
Here's how to mount an external hard drive manually on macOS:
- Open Disk Utility (you’ll find it via Spotlight or in Finder > Applications > Utilities).
- If the external drive is visible in Disk Utility, select it and click Mount. It should make it visible on the desktop and in the Finder menu.
- If the external hard drive doesn’t show up in Disk Utility, check your Mac's System Information (see the next step below).
If you want to learn more about Disk Utility, check out Apple’s Disk Utility User Guide for macOS Sequoia 15.
7. Check System Information to see if the system is trying to repair the drive
To check System Information, go to Applications > Utilities > System Information app and select USB (or Thunderbolt, if applicable).
Is your external drive listed there? If it appears in System Information but not in Disk Utility, it might mean that the system has detected the hardware but might be trying to repair the drive.
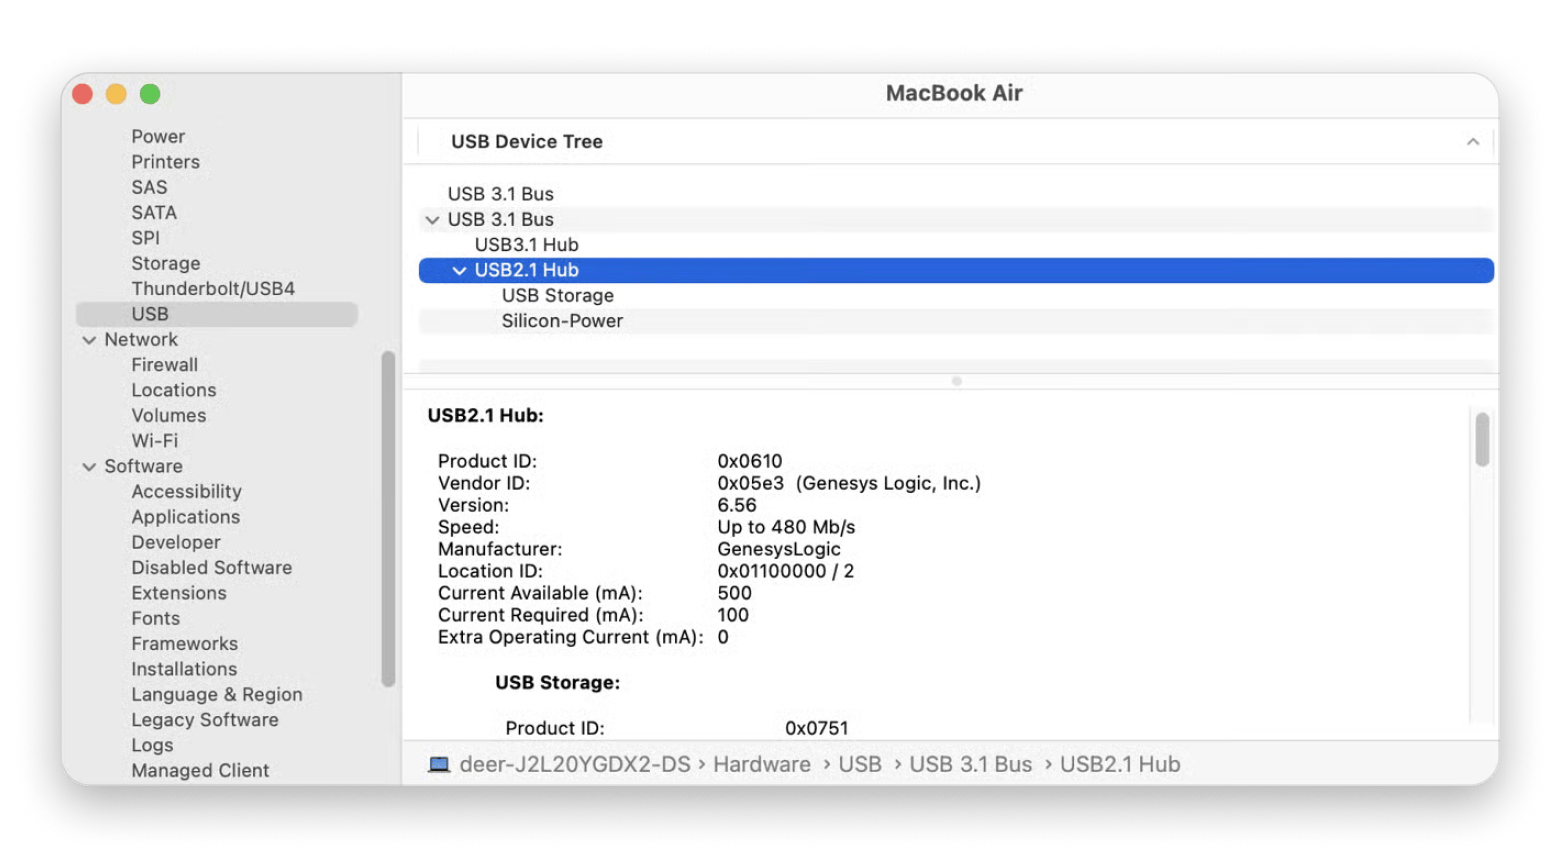
I recommend stopping this process, as it can be lengthy and disruptive, and trying to enable external hard drive visibility. Here’s how:
- Open Activity Monitor.
- Search for a process called fsck_hfs.
- Select it and click the X button in the top-left corner.
Now, check Disk Utility again; the drive may have appeared there. This solution may also work if your new hard drive is not showing up.
8. Force mount an external drive using the Terminal
Here’s how to mount an external drive using the Terminal:
- Connect the drive to a Mac.
- Open the Terminal (you can find it using Spotlight).
- Type the command: diskutil list. The Terminal will show you the list of available drives. Find the identifier of the disk you want to mount (e.g., disk2).
- Insert the command to mount the disk: sudo diskutil mount /dev/disk2 (Replace disk2 with the identifier of your external drive).
- Enter your password (no characters will appear on the screen; that's okay) and wait for the process to complete.
The key is to copy the instructions exactly as described. Any extra or missing character or space will result in an error.
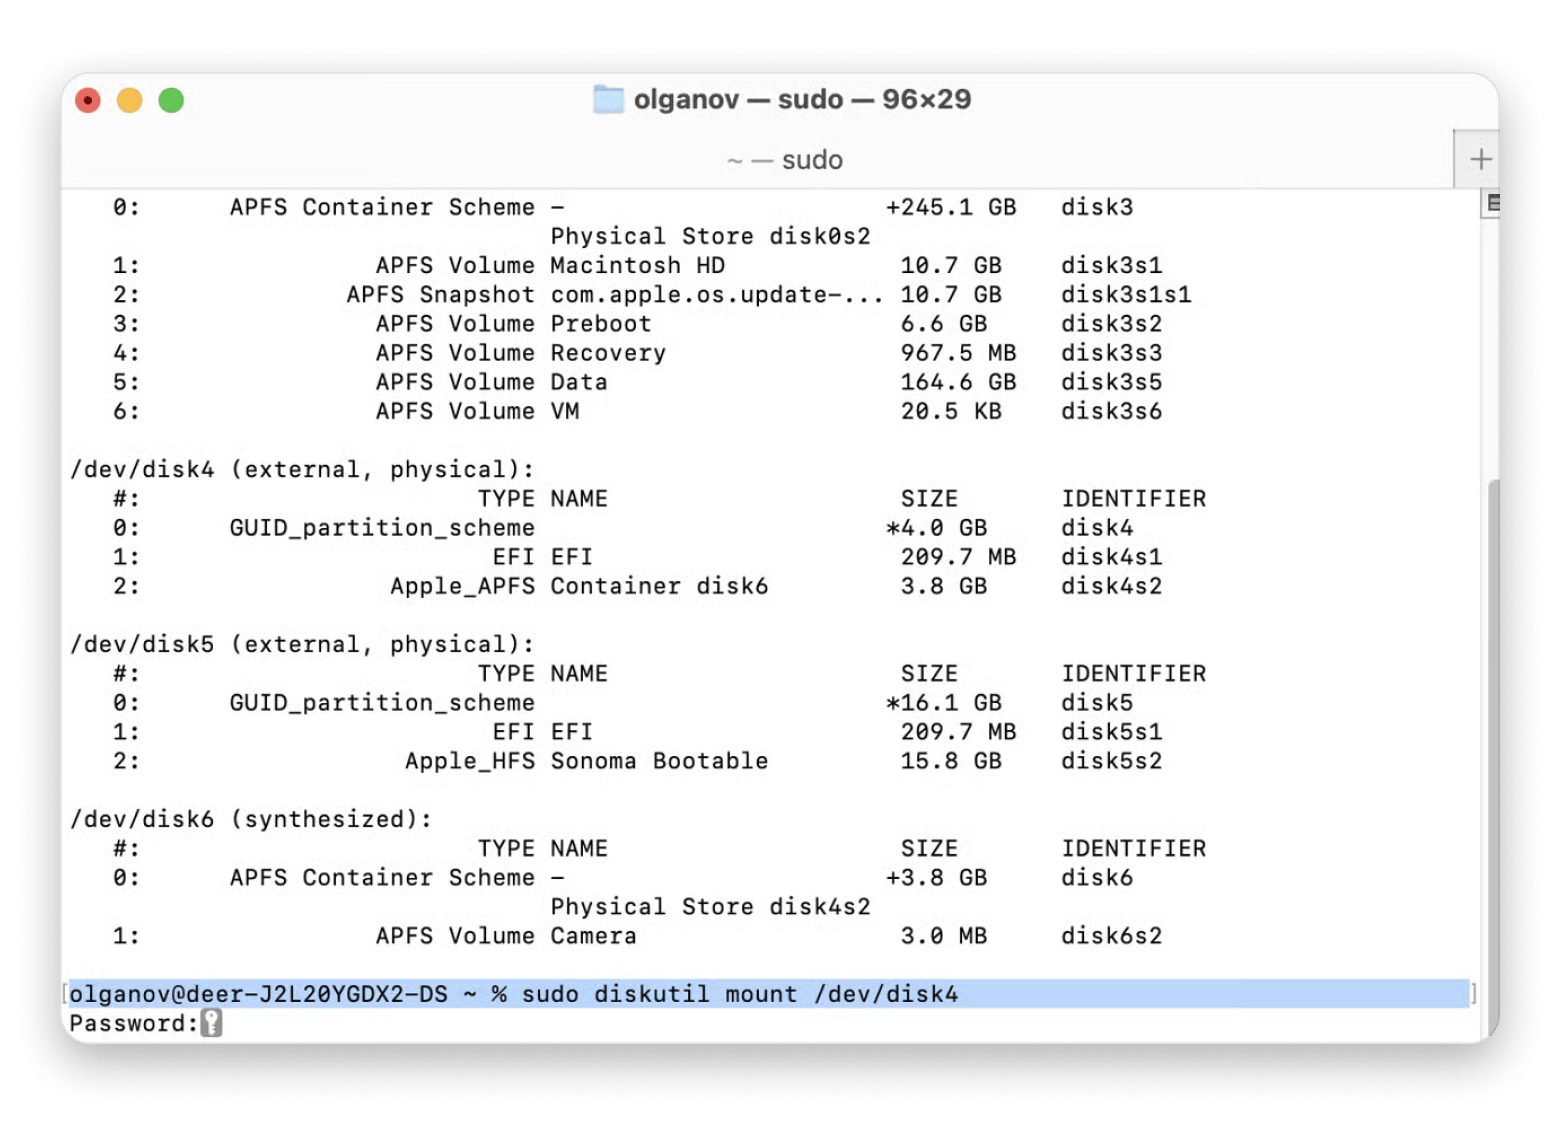
Note: If the method described fails, you can try mounting the specific volume: sudo diskutil mount /dev/disk2s1. Remember to replace "disk2s1" with the name of your drive partition. If the drive won't mount anyway, check if it needs to be repaired: sudo diskutil repairDisk /dev/disk2.
Read also: Check Apple serial number.
9. Change the format of your hard drive to make it readable
Here's how to change the drive format:
- Connect your external drive.
- Open Disk Utility, select the drive, and click Erase.
- Choose the right format under Format (APFS is standard for macOS) > Erase.
Note: Changing the disk format will erase all data on the hard drive, so make sure to back it up before taking any action.
Best file system format for Mac external drives: APFS vs. ExFAT vs. NTFS
| Feature | APFS | ExFAT | NTFS |
| Full name | Apple File System | Extended File Allocation Table | New Technology File System |
| Developed by | Apple | Microsoft | Microsoft |
| Native OS support | macOS (10.13+), iOS | Windows, macOS, Linux (with drivers) | Windows, macOS (read-only) |
| macOS compatibility | Full read/write | Full read/write | Read-only (write with third-party tools) |
| Performance | Optimized for SSDs, fast snapshots | Good for large files, cross-platform | High performance on Windows, slower on macOS |
| Best for | macOS-exclusive drives, Time Machine | Cross-platform drives | Windows-exclusive drives |
| Drawbacks | Limited cross-platform support | No native encryption, less robust | Limited macOS write support |
So, is APFS more reliable than ExFAT for Mac external drives? Generally, yes, especially if you use your external drives within the Apple ecosystem.
10. Run First Aid to fix the disk's failures
To run First Aid on an external hard drive:
- Open Disk Utility. You can search for it using Spotlight or via Finder > Go > Utilities.
- Select your external hard drive.
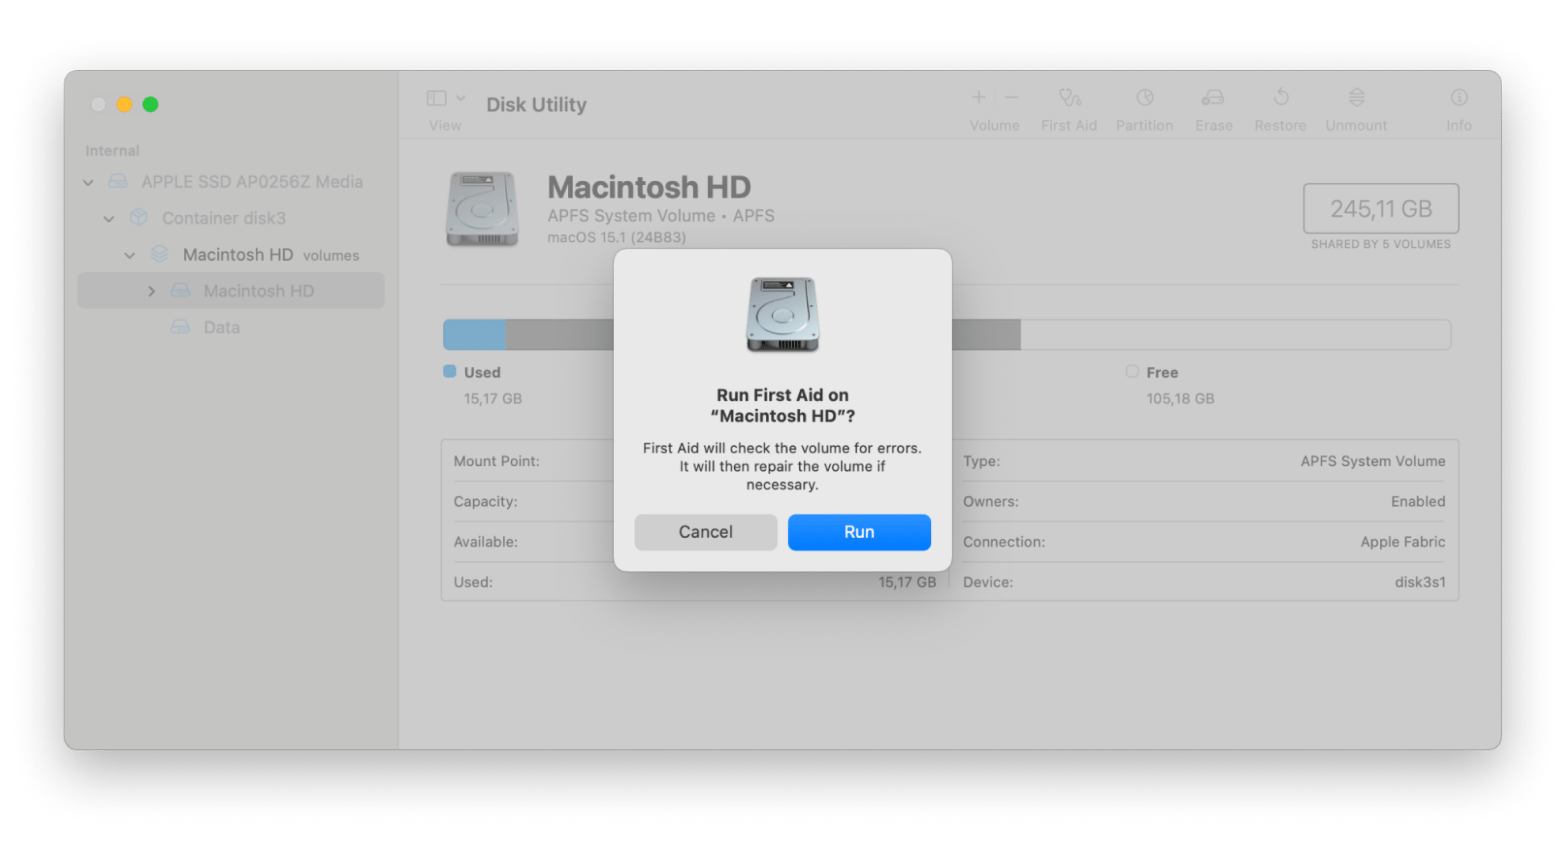
- Access the First Aid tab, and click Run to start running diagnostics.
First Aid tool will check the disk for errors and then attempt a repair as needed. It helps to verify and repair a range of issues related to startup HD and external drive problems. If you are able to fix the hard drive or SSD in your Mac (or any external drive) using Disk Utility you will hopefully be able to recover your files.
11. Reboot your Mac to refresh the system
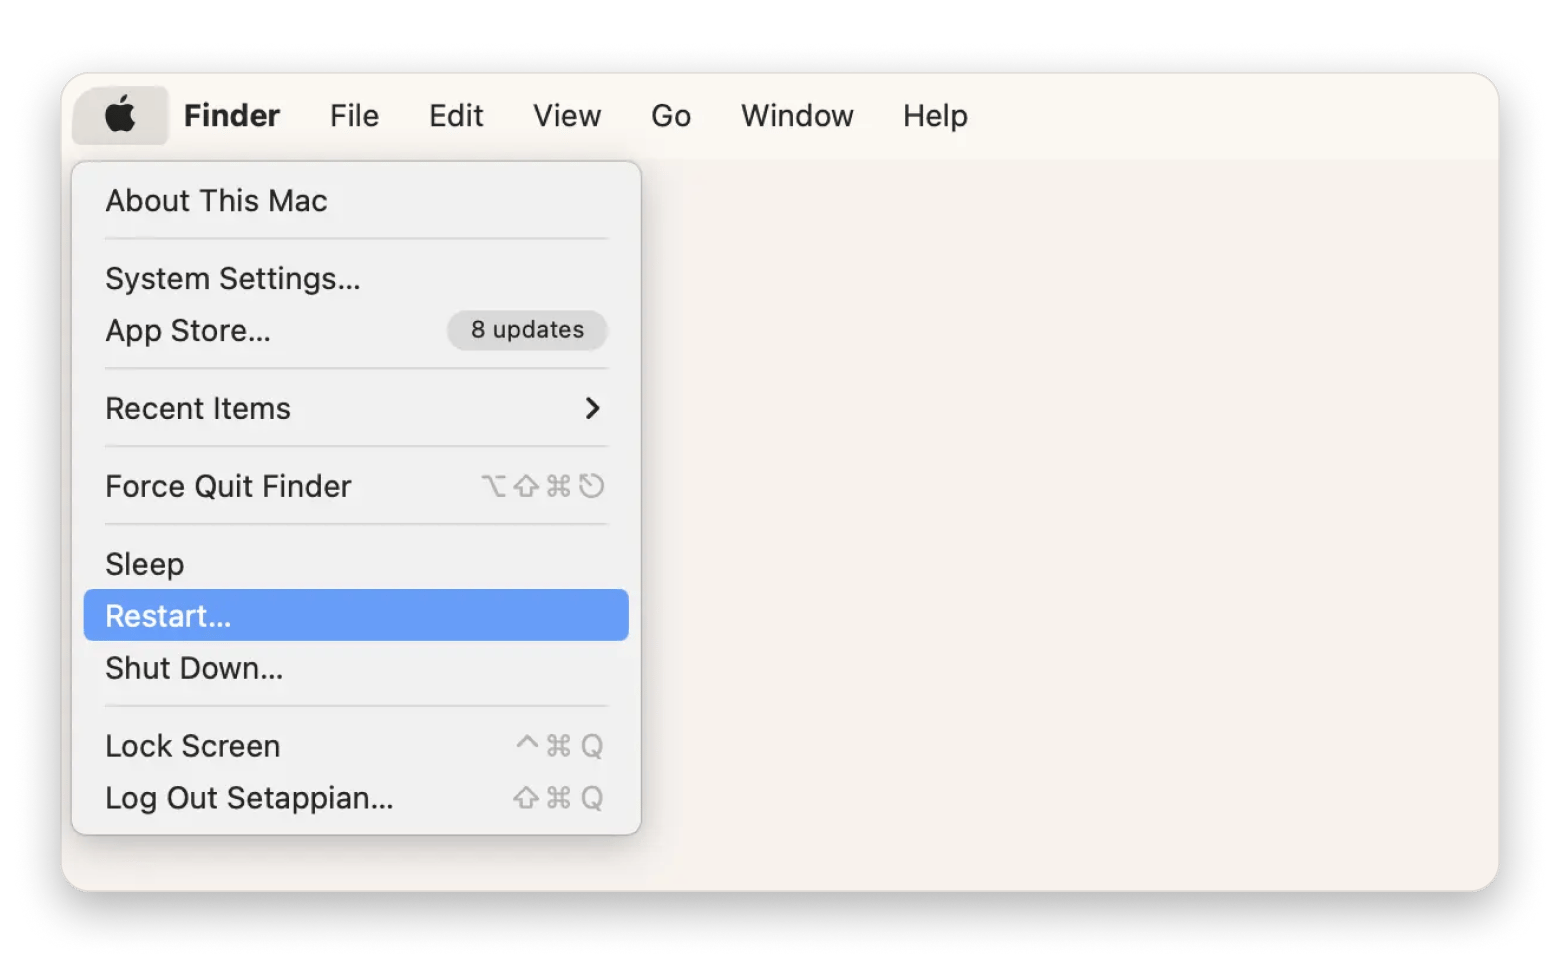
A hard disk not detected on a Mac can be a macOS issue. Hopefully, some data damage can be fixed by restarting your Mac. Go to the Apple menu > Restart. Or press and hold the power button, and when a dialog box appears, click Restart or press R. Rebooting your Mac essentially clears your macOS’s memory and starts it up fresh.
Read also:
12. Run Apple Diagnostics to check for Mac hardware issues
If none of these solutions work, I recommend running Apple Diagnostics as a last resort. It will check for any Mac hardware issues and may provide a hint if something is interfering with the normal operation of your external drive.
To run Apple Diagnostics on a Mac with the silicon chip, follow these steps:
- Disconnect all the devices from your Mac except for the essentials, such as a keyboard, monitor, mouse, etc.
- Shut down your computer.
- Start your Mac by pressing and holding the power button until you see the startup options.
- Press Command + D to run the Diagnostics test on your Mac.
If Apple Diagnostics finds problems, it will return an error code. Find it in the list of reference codes and research the solution.
The diagnostic process is slightly different for Intel-based Macs. Check out our article on how to run diagnostics on a Mac for details and additional solutions.
How do we fix the external drive NTFS read-only problem?
External hard disk detected but not opening? As I’ve mentioned before, one common reason your Mac doesn’t recognize the external hard drive is the file format. Windows uses NTFS file formats, while Macs, up until the introduction of Sierra, have used HFS+. Now, Apple has introduced the Apple File System (APFS) for newer operating systems.
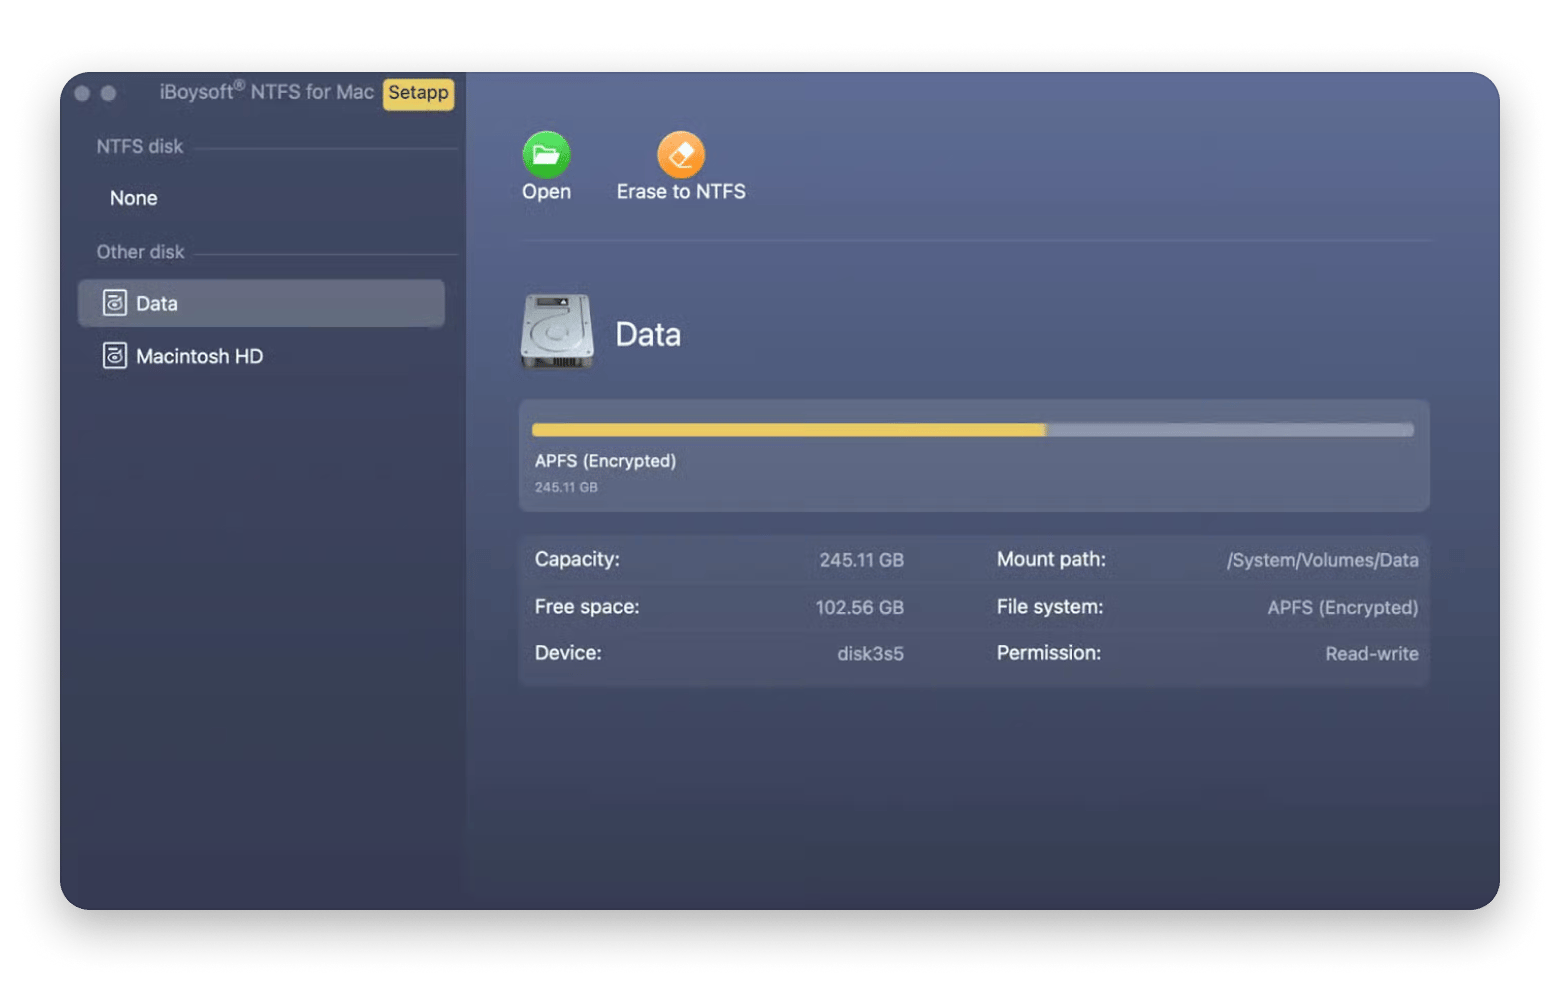
If you connect an NTFS drive, your Mac will be able to read it but not edit it. This means you can’t really complete your task (move, copy, or delete any files) as long as you experience the read-only problem. The easiest fix I've ever tried for this issue is iBoysoft NTFS for Mac, an app from Setapp that enables full read/write support for NTFS drives on Mac.
A few more tips on getting your files back
Here are a few more tips that I believe can help you avoid similar problems in the future.
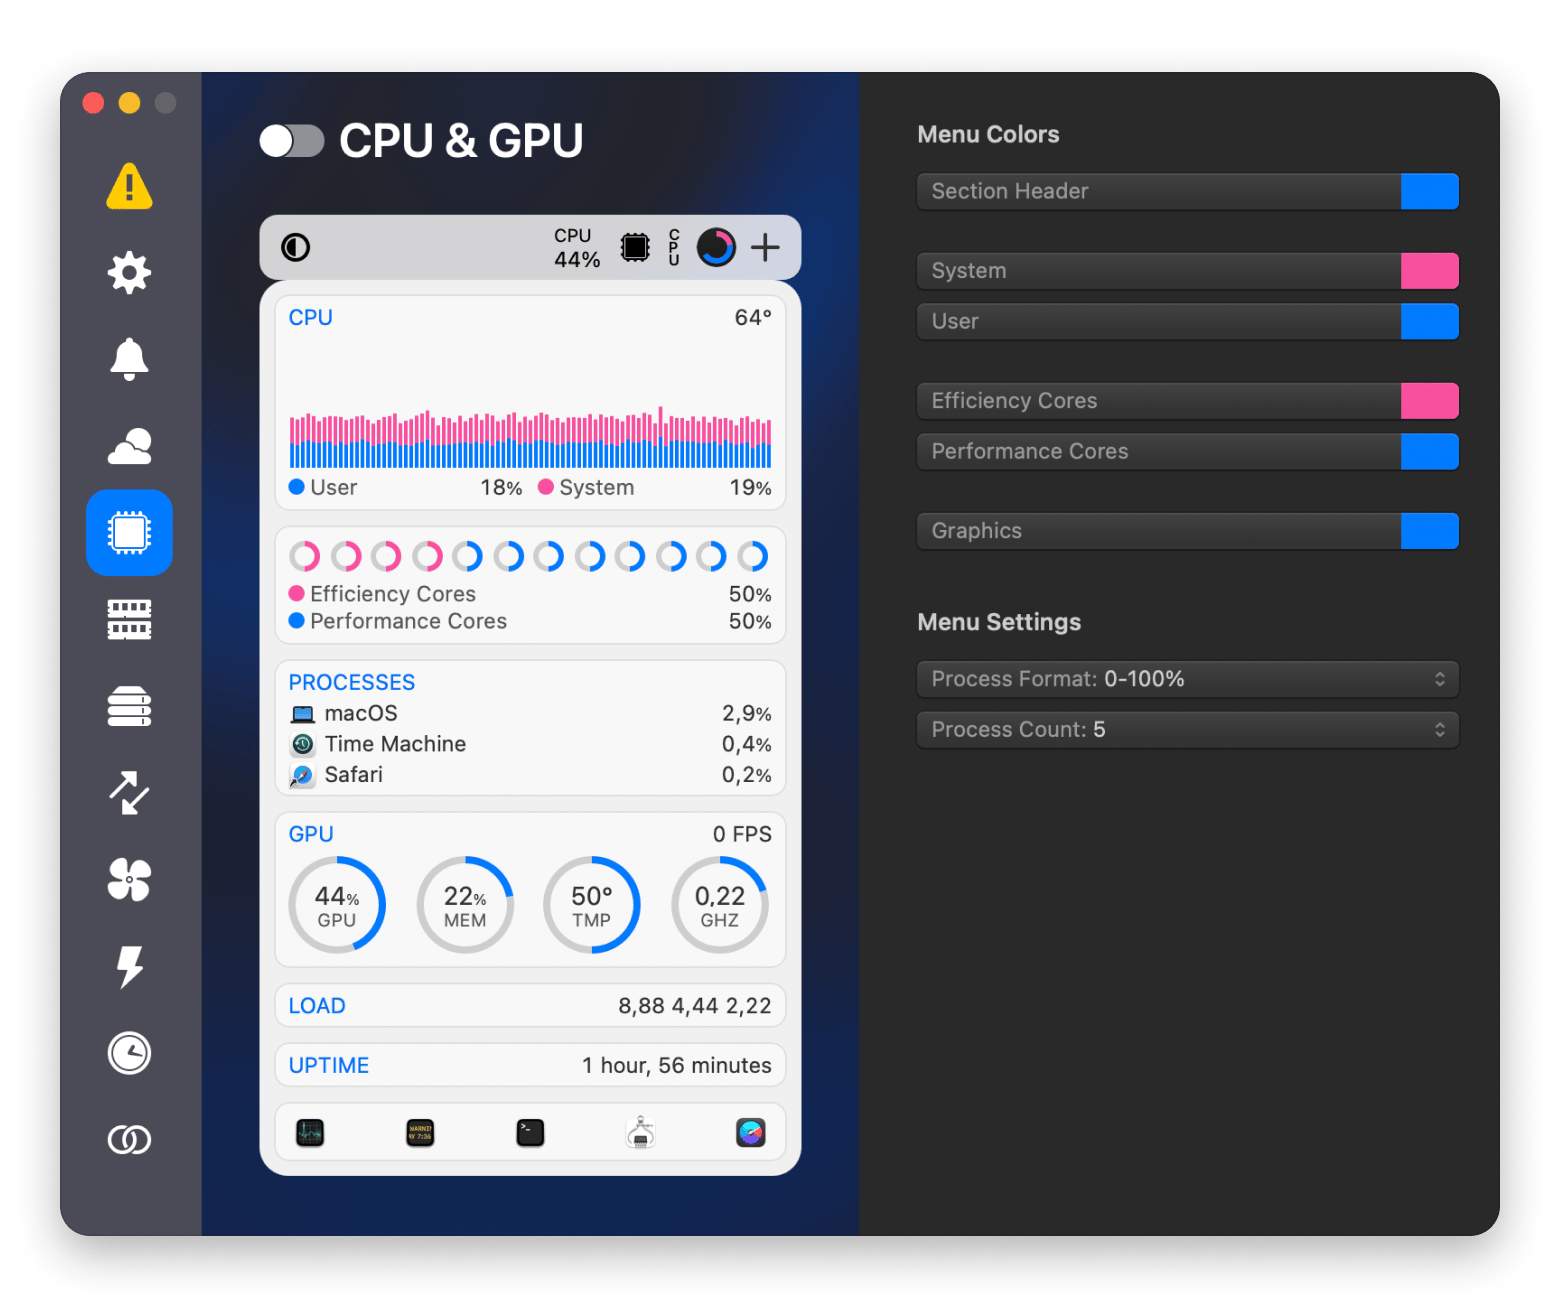
- Macs and third-party apps that look after Macs, such as iStat Menus, come with a S.M.A.R.T. (also known as Self-Monitoring, Analysis, and Reporting Technology) status monitor. If a SMART check reports errors, then it could mean the hard drive is at risk of failing completely. Within Disk Utility, there are several solutions for this: Repair Disk Permissions and Repair Disk. If neither of them works, I'd recommend backing up all of the data from the disk, erasing it, then running a SMART check again. The external hard drive should show as verified.
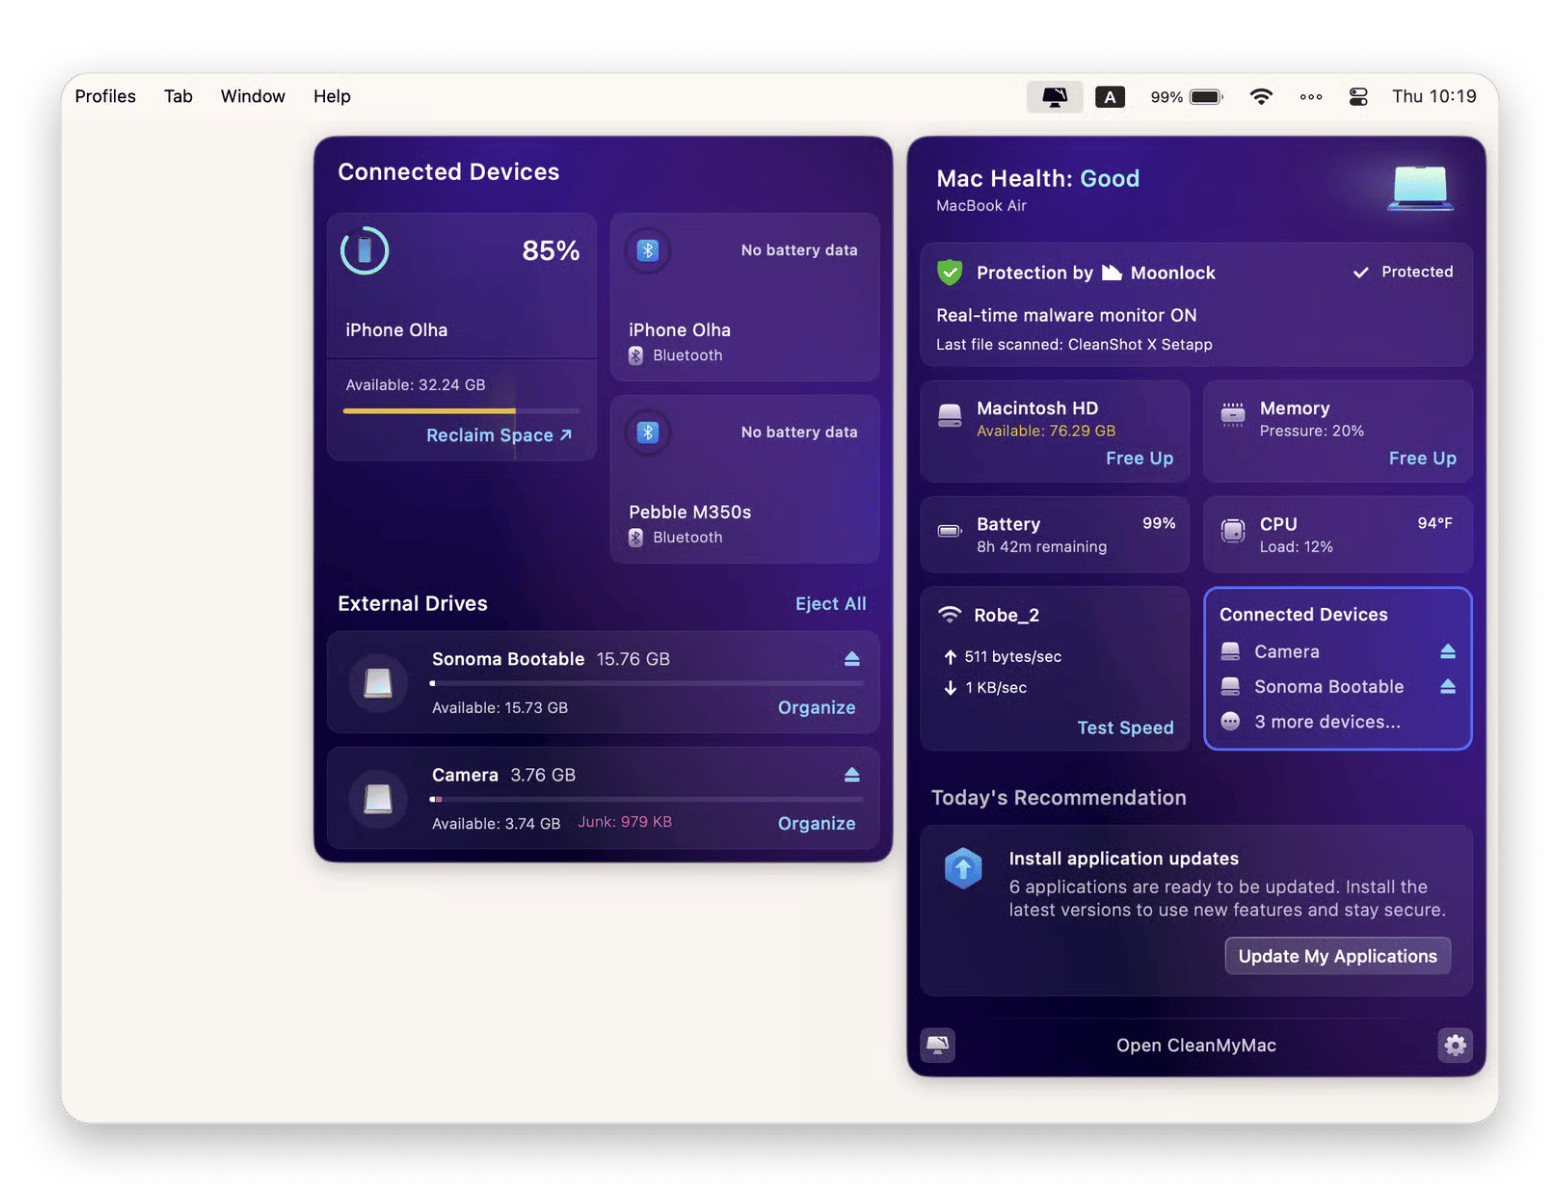
- CleanMyMac, another useful app available from Setapp, can help you identify and repair external hard drive errors. It is an essential tool worth trying when you’re having external hard drive difficulties.
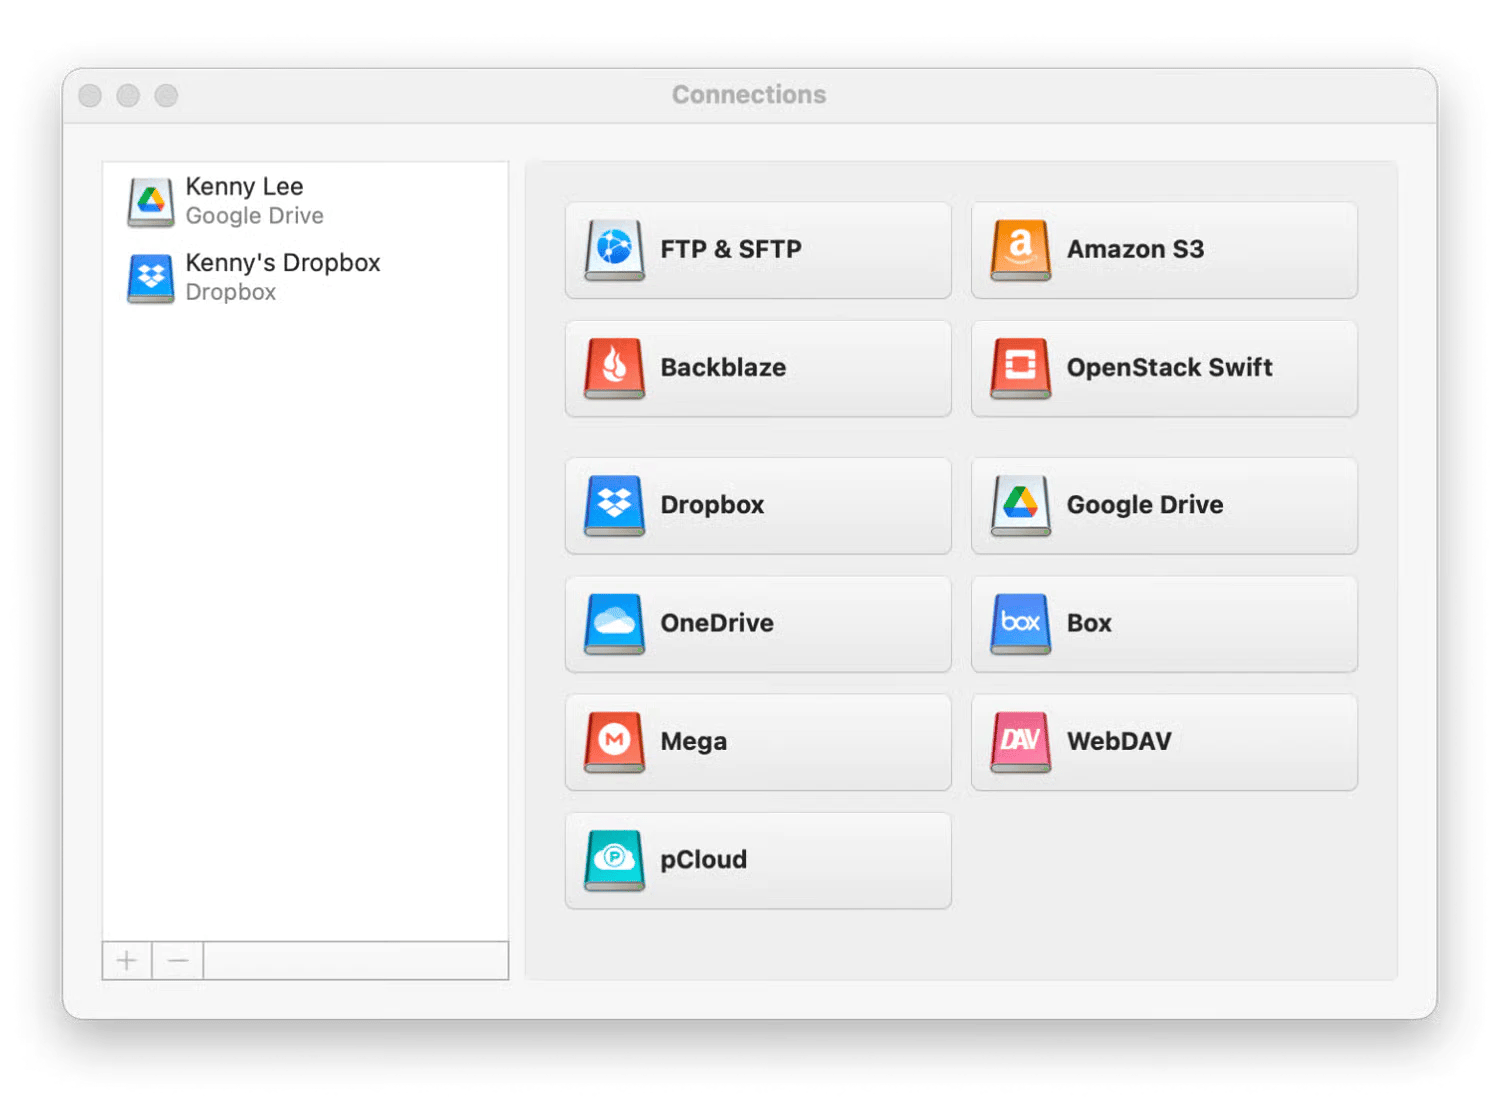
- A trick that can help you fix a hard drive not showing up on a Mac is to replace it with cloud storage. You can mount cloud storage as a local drive on your Mac. By connecting Google Drive, Dropbox, or Amazon to your computer, you get more space for securely accessing and sharing files. To add cloud drives to Finder and keep them close at hand, I use CloudMounter. I recommend you read detailed instructions on managing cloud storage as local drives.
Why doesn't your Mac recognize the external hard drive?
The most common reasons for the external hard drive not showing up are:
- There’s something wrong with the cable.
- There’s a power supply problem.
- Your drive has been corrupted or broken.
- The drive is not readable on macOS.
- NTFS read-only problem.
With M1 chips, the threat is very real due to the fact that it’s impossible to boot your Mac if your internal SSD fails.
Summing up: Tools to try if the external drive isn't recognized on a Mac
Hopefully, I’ve covered the topic, so you don’t have to Google “external hard drive disappeared from the computer” ever again. Always start with the basics: properly eject the external device, check that the USB port is clean and the connection is secure, and ensure your operating system is up to date.
If these don’t solve the issue, try more specific solutions. There are lots of potential solutions for a Mac not reading/writing an external hard drive. If you’re trying to connect an NTFS drive, do it with iBoysoft NTFS for Mac. If you need to add cloud storage, CloudMounter will help you.
iBoysoft NTFS, CloudMounter, and other powerful apps, such as CleanMyMac, are all available via Setapp, a platform that brings you 250+ apps for your tasks in one subscription that you can get in a 7-day free trial.
FAQ
Can I recover files from an unmountable external drive on a Mac?
Yes, you can recover files from an unmountable external drive on a Mac with iBoysoft Data Recovery.
Does iBoysoft work with Apple Silicon Macs?
Yes, iBoysoft works with Apple Silicon Macs. It supports T2, M1, M2, and M3 chips and runs on macOS Sequoia and earlier versions.
What if my external drive is physically damaged?
If your external drive is physically damaged, then you might need a professional recovery service. Some software tools work best when the hardware is still intact.
Will iBoysoft Data Recovery erase my files?
No, iBoysoft Data Recovery does not erase your files. The tool is designed to recover files without altering or deleting any existing data.
