How to install Linux on a Mac: Easy installation guide 2025
34.7K views
11 min read
Key Takeaways
- Back up your Mac before installing Linux
Use Time Machine or an external drive to protect your files. If something goes wrong during installation, a backup ensures you don’t lose important data. - Check compatibility with your Mac model
Not all Linux distros support every Mac. Verify that your chosen distribution, like Ubuntu or Fedora, works with your hardware and supports dual-booting if needed. - Create a bootable Linux USB
Download your Linux ISO, prepare a USB with at least 4-8 GB, and use a tool like balenaEtcher to flash the ISO. Restart your Mac, hold Option, and boot from USB to test or install Linux. - Partition your disk to install Linux
Use Disk Utility to create a partition for Linux. Restart, select the USB installer, and follow the on-screen steps to set up dual-boot or a full Linux installation. - Use supporting apps to prepare safely
Apps like CleanMyMac (optimization), iBoysoft Data Recovery (file recovery), and ChronoSync Express (data syncing) help safeguard your system and streamline the transition. All are available on Setapp with a 7-day free trial.
I recently installed Linux on my Mac, and it completely transformed the way I use it. If you, too, feel you could use a little more customization with the standard macOS, installing Linux on a MacBook could be the solution you’ve never thought of.
In this guide, I’ll discuss Linux and why you might want to consider installing it. I'll also show you how to prepare your Mac for this big overhaul and provide a step-by-step guide to the installation process.
Preparing your Mac for Linux installation
If you're new to installing an operating system, it can seem intimidating at first, especially with all the technical terms. But don't worry, I'll walk you through the process step by step:
- First, start by backing up all your data using Time Machine or an external hard drive. Big changes always carry some risk, and you don’t want to lose important files if something goes wrong. Time Machine automatically backs up data, keeping your files' hourly, daily, and weekly versions. If you can’t boot your Mac directly after a fresh OS installation, you can try using Recovery Mode on your Mac to troubleshoot the problem.
- Next, check if your Mac is compatible with the Linux distro you want to install, like Fedora or Ubuntu. Make sure it supports dual-booting and Mac hardware drivers and works with your specific Mac model, especially if it's an older one.
TipGoing back and forth between operating systems can be a hassle, especially if you need to access specific features unique to each system. So, imagine if there were a way to synchronize your files and data automatically. ChronoSync Express does exactly that, syncing data between Linux and macOS. Not only can you customize your syncing schedule, but you can also automate the backup process across various devices and locations. Not sure where to start? The setup assistant can guide you.
|

Recover your data before installing Linux on Mac
Creating a partition on your disk or tinkering with data files during the installation process can sometimes go wrong. One small mistake could delete all your memorable photos, important documents, or entire drive.
Without a backup, you could end up with a Mac that won’t boot after installing Linux or a wiped partition. My personal favorite tool for this is iBoysoft Data Recovery. The tool can easily recover deleted files on Mac from SSDs, HDDs, USB flash drives, and SD cards on macOS.
Here’s how to back up your files using iBoysoft Data Recovery:
- Install and open iBoysoft Data Recovery on your Mac.
- Select a storage device or disk image from the left-hand pane.
- Click Search for Lost Data to start scanning.
- Select the files you want, then click Recover.

Creating a Bootable Linux USB
To maintain your existing macOS operating system and have a working Linux operating system simultaneously, you'll need to create a bootable Linux USB. It's essentially a USB flash drive that contains your Linux installation file so your computer can boot directly from it.
Many Linux distros let you run the OS right from the USB without having to install anything, which makes it a super-flexible, portable environment that you can use on different computers.
To create one of these, you'll need to:
- Download a Linux distribution ISO from the official website of your chosen distro, such as Linux Mint or Ubuntu.
- Prepare a USB drive with at least 4 GB of space (8 GB or more is recommended for most distributions).
- Create a bootable USB using a tool. On macOS, you can use tools like balenaEtcher (recommended for its simplicity) or UNetbootin.
- Start the download and make sure you've chosen a compatible version for your system architecture.
- Create a bootable USB to "flash" the ISO file to your USB drive.
- Restart your Mac, hold down the Option key as it boots, and choose your USB drive from the startup menu. Most Linux distros allow you to run directly from the USB without installing.

Read also:
How to Install Linux on Mac
Now, let me walk you through the process of installing Linux on your Mac:
- Go to Finder > Applications > Utilities and click Disk Utility.
- Select a volume in the sidebar.
- Click the Partition icon at the top of the window.
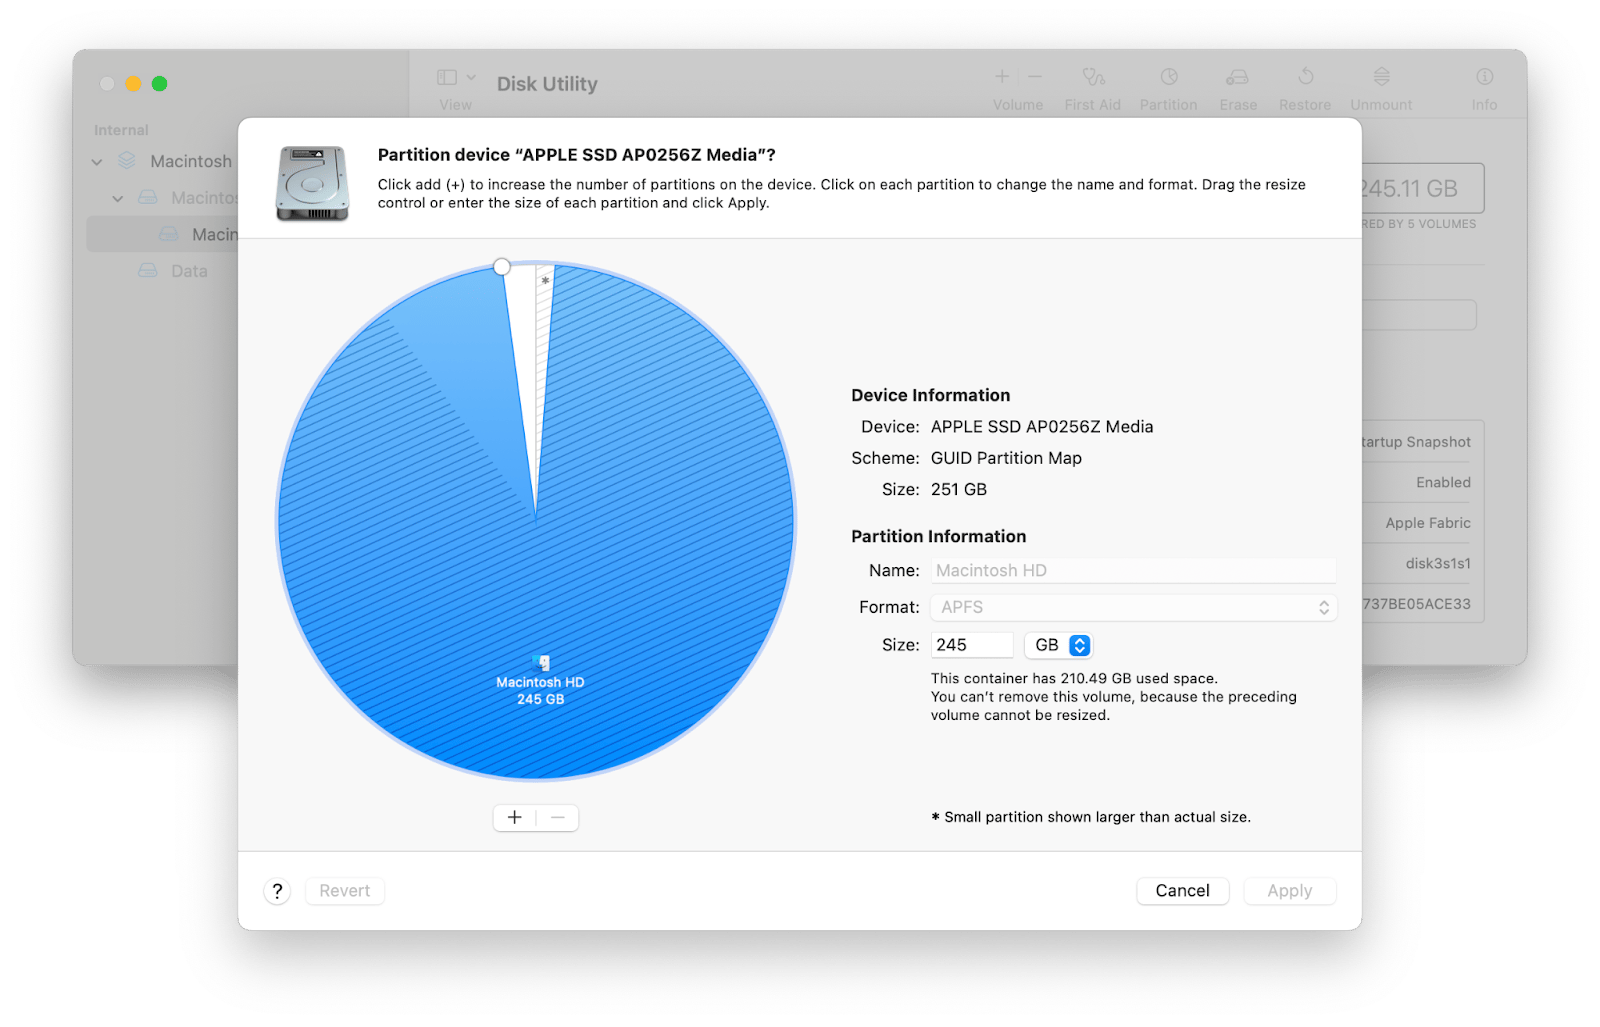
- Click the plus button below the pie chart.
- Click Add Partition.
- Choose a name for the volume.

- Click Format and choose a file system format.
- Drag the resize control to change the volume's size, or enter the size manually, then click Apply.
- Click Partition.
When you want to start the installation process or boot directly from USB, simply hold the Option key while restarting the Mac. Then, follow the on-screen installation steps for dual-boot or complete Linux installation.
What is Linux?
Linux is an operating system, just like Windows and macOS. What makes it different is that it’s an open-source operating system, which means anyone can access and modify its code. As such, the OS is much more flexible and customizable, and lets users personalize their experience entirely.
Linux has a range of what’s called distributions (or distros) that each serve a different purpose. Some are dedicated to programming, and others are dedicated to gaming. Since it’s compatible with many devices, including the older Intel and ARM-based Macs, you can give your computer a fresh start without buying new hardware.
Reasons to Install Linux on Mac
Don't get me wrong, macOS is one of the most superior operating systems out there because of its intuitive user experience. But there are countless reasons why someone might want to make the switch and install Linux on a Mac.
Some of the reasons include:
- Revive an older Mac: Linux helps bypass macOS updates that strain older Macs. It's a lightweight alternative for smoother performance.
- Improve performance: Linux uses fewer resources than macOS, which can lead to better hardware efficiency and less strain on your system.
- Access open-source software: You'll get access to a vast selection of free, open-source tools without being tied to Apple's apps like Numbers or Pages.
- Gain control over the OS: You can customize Linux by installing only the software you need and avoiding unnecessary macOS built-ins.
- Create a better development environment: Linux supports various programming languages and package managers. For developers, it’s often a better choice than macOS’s closed ecosystem.
Also, check out how to run Windows on Mac.
Personal adviceIf you're seriously thinking about making the switch, it's important to maintain your Mac's performance before and after you download Linux. CleanMyMac is the handiest tool in my digital arsenal. I use it for just about everything, from MacBook cleanups and optimization to protection against malware and other vulnerabilities. You can click on individual features using the sidebar or just click the Scan button in the Smart Care tab. The app will automatically detect junk and threats and suggest tasks to optimize your device.
|

Final thoughts on how to install Linux on a Mac
Installing Linux is a lot like getting ready for a big job interview or packing for an exciting trip. It takes a lot of preparation, but the more prep work you do, the more rewards you’re likely to reap. Backing up your data, creating a bootable USB, and using third-party apps to help safeguard your files are all essential steps that’ll help you successfully make the transition (or addition).
To make things easier, you can rely on third-party apps:
- CleanMyMac keeps your Mac optimized and clutter-free.
- iBoysoft Data Recovery gives you peace of mind in case something goes wrong.
- ChronoSync Express makes it simple to sync and back up data across systems.
The three apps are all available through a 7-day free trial of Setapp, a subscription service that gives you access to 250+ iOS, macOS, and web apps. Take them for a spin and see how much easier they make preparing your Mac for Linux.
FAQ
Is it possible to install Linux on a Mac?
Yes, you can install Linux on a Mac. You can either set up a dual-boot system that works alongside your macOS or as a complete installation that overrides your existing operating system.
Is it legal to install Linux on a Mac?
Yes, it's legal to install Linux on a Mac. As an open-source operating system, Linux distributions can be downloaded and installed on any hardware as long as you comply with any existing licensing agreements.
Can I install Linux on a Mac M1?
Linux can be installed on ARM-based M1 Macs and Intel-based Macs, but the installation process for M1 models is more complex due to hardware differences. Projects like Asahi Linux are working on better support for Apple Silicon Macs.

Join closed beta
 Security-tested