How to record Zoom meetings on Mac
For years, Zoom has been a useful video-conferencing tool for all kinds of companies worldwide. But since the start of the COVID-19 pandemic, Zoom usage and adoption has simply skyrocketed beyond anyone’s imagination.
Today, it’s hard to spend a day at work without attending at least one Zoom call. And if you can’t attend a certain meeting for any reason, it’s likely for your coworkers to share a recording of the meeting with you so you can catch up.
That’s another massively important shift in the way we work right now — nearly all of our meetings are recorded. It’s easy to do, it allows people to catch up at the time convenient for them, and it’s perfect when you want to refer to something specific later on.
So you might wonder how to record a Zoom meeting coming up soon, as well as what’s the best Zoom video recorder and what are some limitations for recording Zoom meetings. Let’s explore all these questions.
How to Record a Zoom Meeting on Mac
Recording Zoom meetings is really easy, as this functionality is already built into the Zoom app. You can start and end the recording at any time during the meeting as well.
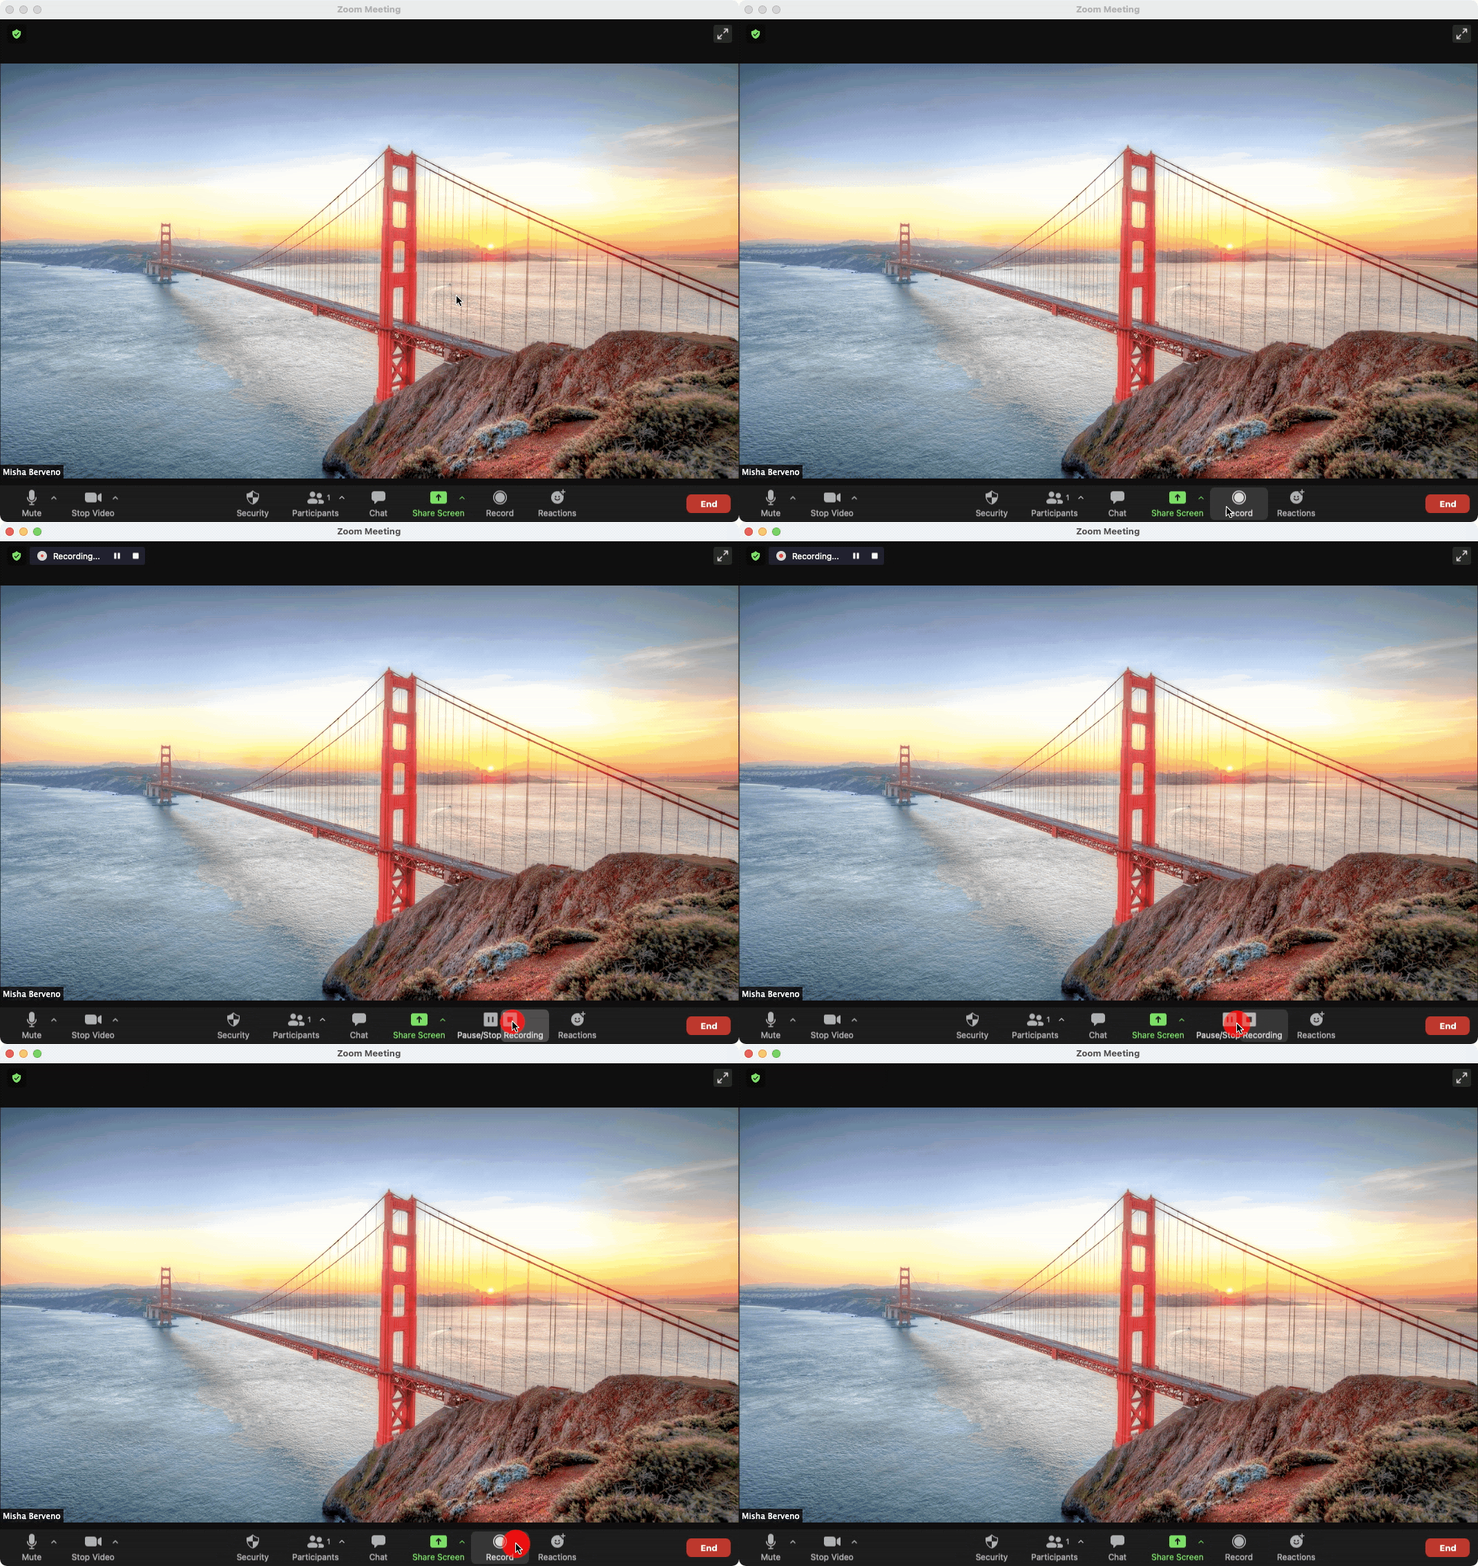
Here’s how to record a Zoom meeting on Mac:
- Launch Zoom
- Start a New Meeting or Join a meeting you’ve arranged beforehand
- Click the Record icon in the bottom panel
- Pause or Stop the recording at any time from the bottom panel as well

As soon as you end the meeting, all the recorded files will be saved to the Downloads folder on your Mac. Usually, there would be an audio file, a screen recording, and a recording of participants. You can change the download destination at Preferences ➙ Recording.
What are cloud storage recording limits on Zoom?
If you have a free Zoom account, your video recordings will be saved locally to your Mac. But if you’re a paid Zoom subscriber, you have an option to record your meetings on the cloud. Then you can easily share the recording with others and stream it from the browser on any device — super convenient!
However, you can’t just expect to record hundreds of hours of video and store it on Zoom’s servers forever. There are limits. Pro and Business accounts as well as Zoom Rooms get 1 GB of storage per user, whereas Education gets 500 MB.
It’s possible to buy additional storage, but it’s not cheap:
- 100 GB for $40 a month
- 500 GB for $100 a month
- 3 TB for $500 a month
You can always switch to local recordings in Preferences when you start to run out of space. Another option is to just regularly delete old recordings from the cloud:
- Visit zoom.us and sign in to your account
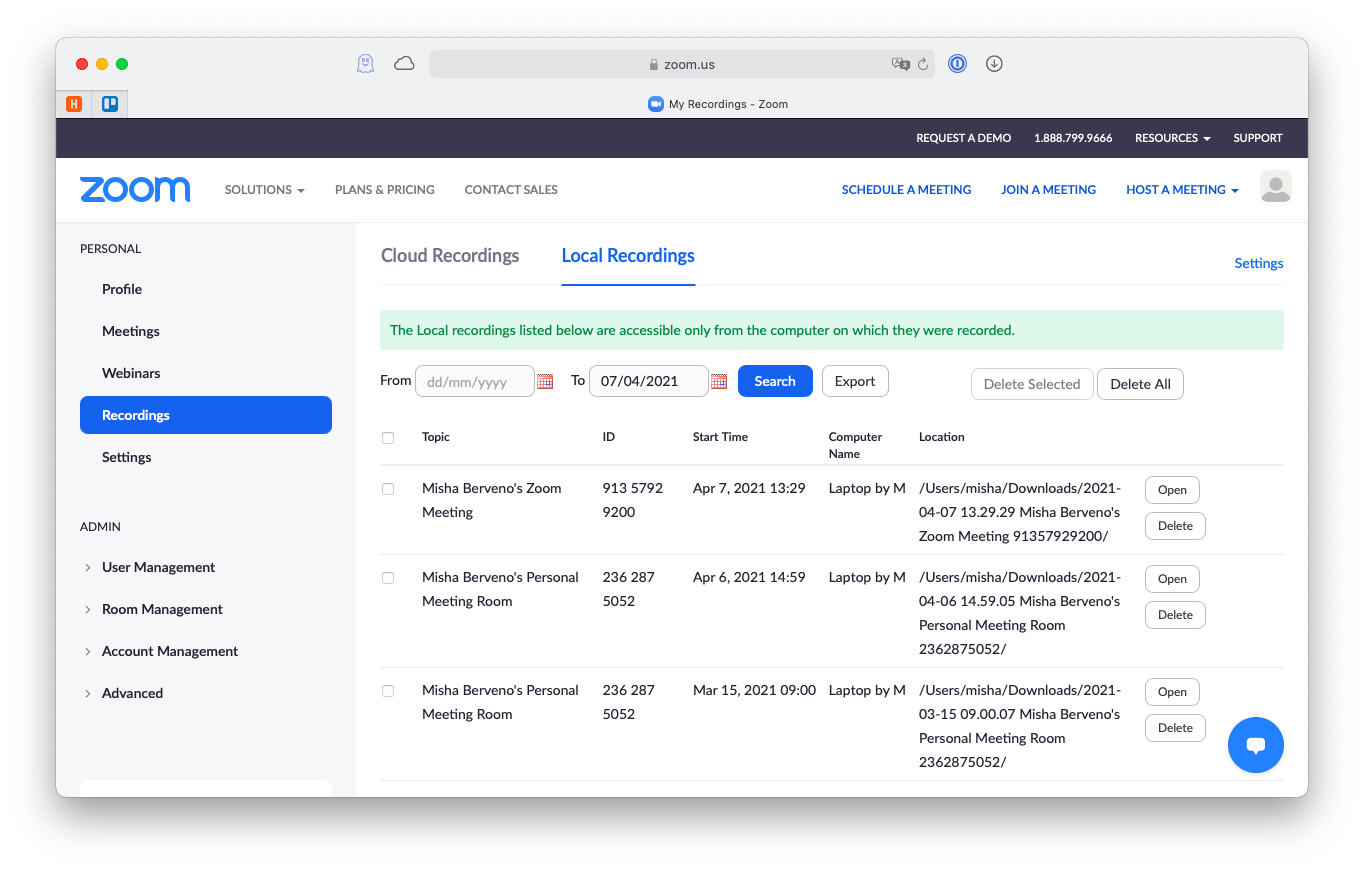
- Go to My Account ➙ Recordings
- Check Cloud Recordings and Local Recordings
- Click Delete on videos you don’t want

Who can record Zoom calls?
You might be surprised not to find Zoom recording functionality on all Zoom calls. That’s because, by default, only hosts have the ability to start a recording.
It’s possible for participants to record zoom meetings as well — but you need to ask the host to allow it first:
- Host needs to click Manage Participants
- Select More next to your name
- Pick Allow Record
How to record Zoom meetings on mobile
Since the bottom menu panel on mobile devices is not as wide as on your Mac, you might notice that some buttons are missing there. Notably, there’s no Record button in the iOS or Android Zoom app.
In fact, the recording functionality is just hidden. To turn on the Zoom video recorder on mobile apps, click the three-dot More icon and choose Record from the menu. Repeat the steps to control the recording process.
One downside of recording Zoom meetings on mobile is that it’s impossible to use local storage, which means you have to rely on Zoom cloud, which means that you have to be a paid user to do so.
How to capture Zoom meetings at any time
It’s not all the time that you need to record the whole Zoom meeting. Quite often you just want to remember a specific 30-second part of it or simply take a screenshot of a chart, or even a GIF. Zoom’s native tools don’t really let you do that effectively — you need to leverage the power of third-party apps instead.
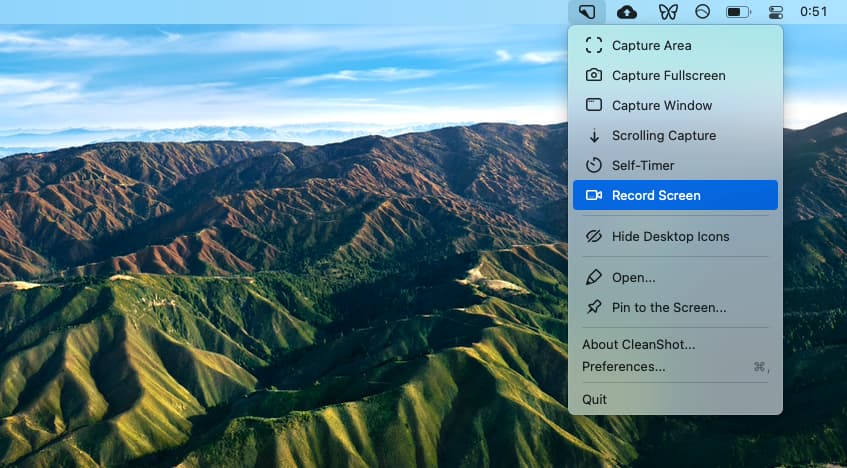
CleanShot X is the perfect example of what a professional-grade recording tool can do. You can capture app windows, selected areas, or full screens (while hiding desktop icons) and annotate them immediately to highlight the most interesting parts. You can record videos and GIFs, saving them to the CleanShot cloud. You can even replace your system’s default shortcuts for taking screenshots with launching CleanShot X for better results.

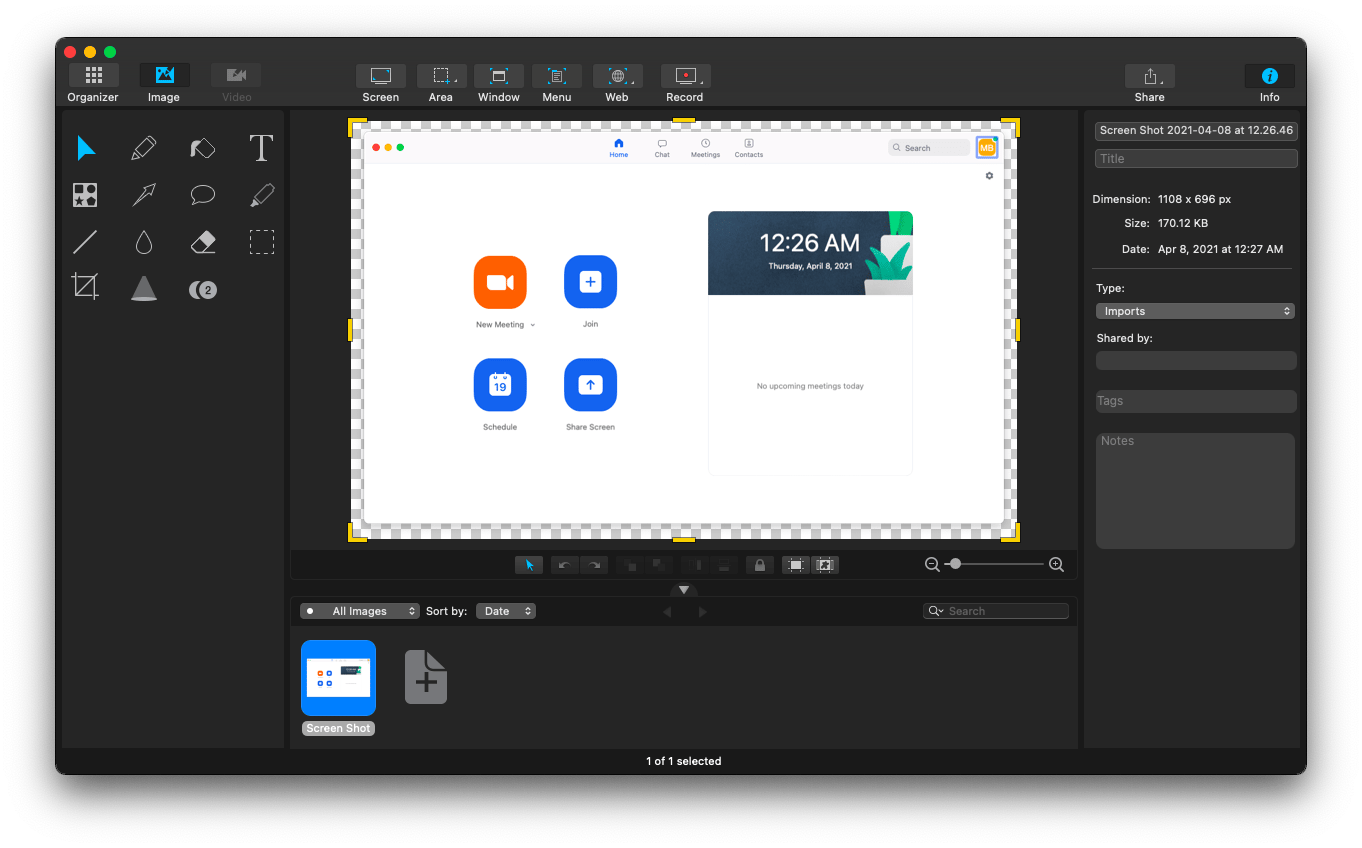
Capto is another great app when it comes to keeping records of your Zoom meetings. With Capto, you can take all variations of screenshots with simple keyboard shortcuts and even record videos. But where Capto really shines is in the ability to edit your images and videos in just a few minutes. So you essentially get the benefits of speed and unlimited creativity in one product. ;

As you can see, figuring out how to record Zoom meetings isn’t hard — if you’re a host, you can access that option by default in the bottom panel. You can also ask for permission to record as a guest. Besides, if you’re a paid user, make sure to keep an eye on your cloud storage limits. Otherwise, use seamless tools like CleanShot X and Capto to record parts of your Zoom calls at any time.
Best of all, CleanShot X and Capto are both available to you absolutely free through a seven-day trial of Setapp, a platform with more than 220 essential and highly-rated Mac and iPhone apps for everyday tasks, from keeping your menu bar clean (Bartender) to cleaning up storage (CleanMyMac X). Try as many Setapp apps today as you want at no cost and discover your new favorites.


