How to reduce picture file size online on Mac and iPhone
- Compress images without losing quality using the right tools.
Apps like Squash and PhotoBulk let you reduce file size while keeping your images sharp and clear — perfect for web use or freeing up storage space. - Resizing vs. compressing: know the difference.
Resizing changes dimensions (e.g., 2000px to 1000px), which reduces file size. Compression keeps the resolution intact but uses smart techniques to shrink the file — ideal when you need high-quality images. - Format conversion can drastically reduce file size.
JPEGs are smaller and best for photos, while PNGs preserve quality and work well for graphics with text. Converting from PNG to JPEG can cut file size significantly.
- Try Squash and PhotoBulk on Setapp for hassle-free compression.
Both tools offer powerful compression and batch processing features. Get instant access with a free 7-day Setapp trial and explore 260+ other apps for your Mac.
Modern technology makes it easy and convenient to create and share digital images. However, large image files may slow down websites and take up precious storage space, so learning how to reduce image file size is important.
Here I’ll share some useful and practical methods to make picture file size smaller without losing image quality.
Best apps to reduce picture file size on Mac
We value your time and have systematized all the solutions in this article to help you find the best tools quickly and easily.
Squash for speedy image compression
Squash is best for quick, everyday compression when you want results fast. With Squash, you can:
-
Drag and drop images to compress them instantly
-
Preserves visual quality while shrinking file size
-
Works well for screenshots, photos, and web images
PhotoBulk for mass image compression
PhotoBulk is best for compressing dozens or hundreds of images at once. With PhotoBulk, you can:
-
Compress multiple images in one batch
-
Resize, rename, and optimize files simultaneously
-
Ideal for photographers, designers, and content teams
Permute for converting images to different formats
Permute is best when format conversion helps lower the image file size even more. With Permute, you can:
-
Convert images between PNG, JPEG, HEIC, and more
-
Combine format conversion with compression
-
Useful when PNG files are larger than necessary
How to compress pictures on Mac to reduce file size
As you already know, changing an image’s dimensions is likely the easiest way to reduce the file size of a photo, but if you want to print or enlarge your photo later, it’s better to compress it in a way that doesn’t change the image’s resolution. Let me show you the methods I use to reduce image size on a Mac.
Easy methods to compress image size on Mac
The quickest ways to reduce picture file size on Mac include:
Using built-in tools like Preview
Using third-party apps like Squash, PhotoBulk, and Permute.
Let’s look at each method in detail.
Squash: Fast and efficient compression
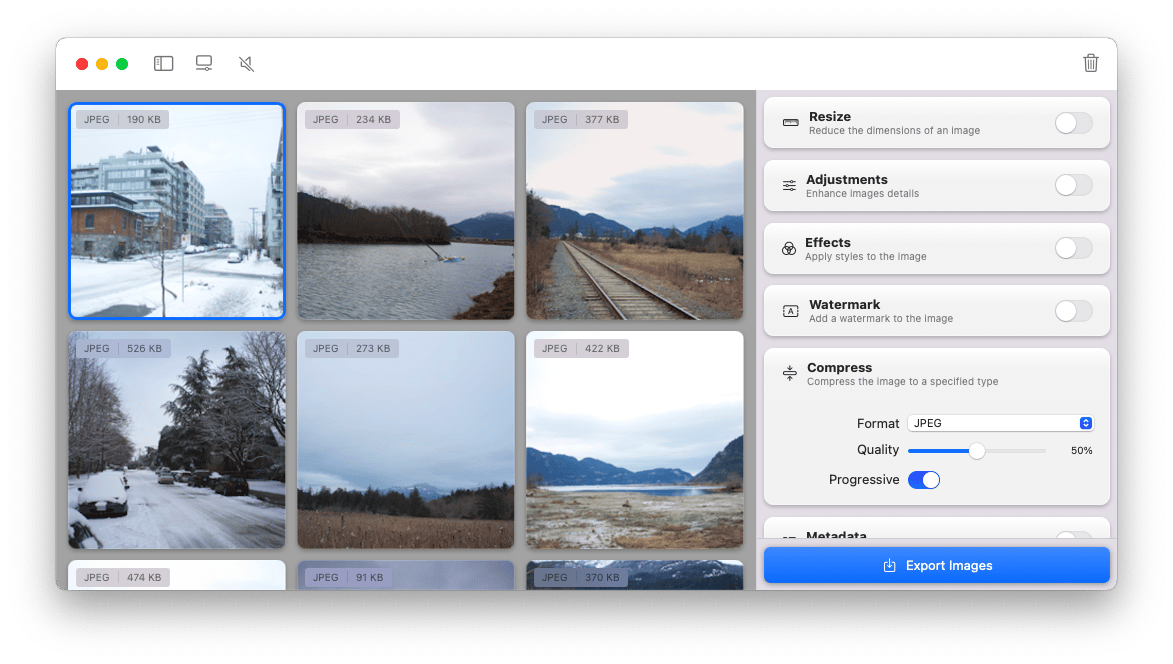
One of my favorite ways to reduce image file size on a Mac is by using Squash. The process is so easy that you never want to use any other methods but Squash. You just need to drag an image or set of images onto its Dock icon or into the Squash window. Then it works its image compression magic in seconds and prompts you to save.
I uploaded a 10MB image. After compression, I got a 779KB image without losing image quality.
PhotoBulk: Ideal for bulk image compression
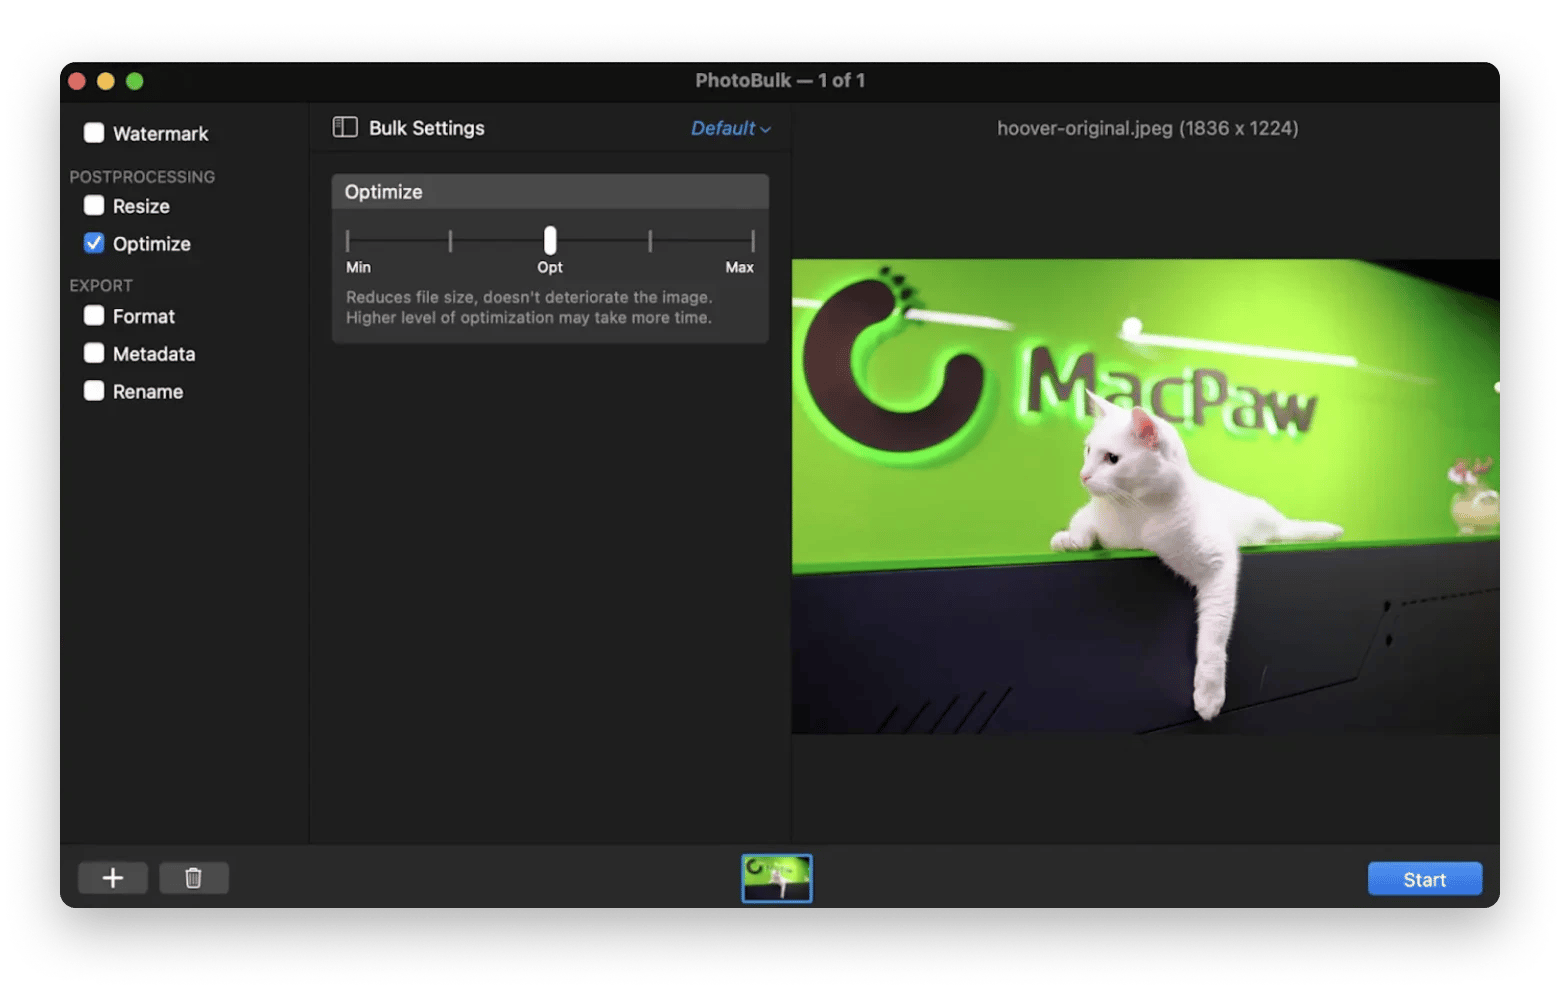
Another great app I sincerely recommend is called PhotoBulk. The best part about this tool is that it can easily compress images in bulk.
The process is as simple as with Squash. Simply drag and drop the image into the app and check the Optimize box to reduce file size without deteriorating the image.
Preview: Built-in Mac compression method
Preview is another method I used until I discovered the Squash image file size reducer. To compress an image without losing quality in Preview, follow these steps:
- Double-click the file you want to work with to open it in Preview.
- Then, click File > Export…
- Set the file format to TIFF and the compression to JPEG.
- Click Save.
- After that, open the new TIFF file in Preview. Go to File > Export again.
- Choose Export…, set JPEG.
- Click Save and rename the image if you want.
This way, we reduced the file size, but has the image quality changed after compression?
The picture is clear, high-quality, and not blurred. Well, you can judge for yourself. Just take a look at the screenshot below.

Tip: While researching creativity apps, I tried the Productivity Tools assistant to narrow down what would work best for my needs. It gave me some solid suggestions without the usual marketing noise, which made the decision process much simpler.
Reduce picture file size by format conversion
In digital imaging, JPEG and PNG are the most common image formats. At first glance, a single picture shown in both formats might look the same, but if you look closely and dig into the data, you can see that they’re very different. Each format is made to be used in certain situations based on your needs for image quality, file size, and more. This means that one format isn’t always better than the other.
When dealing with image compression, you should know that JPEGs easily lose quality and are best suited for photos and realistic images. PNGs don’t lose quality when they’re compressed, so they’re good for line art and images with a lot of text and fewer colors.
Also, JPEGs contain less data than PNGs – and, therefore, are usually smaller in size.
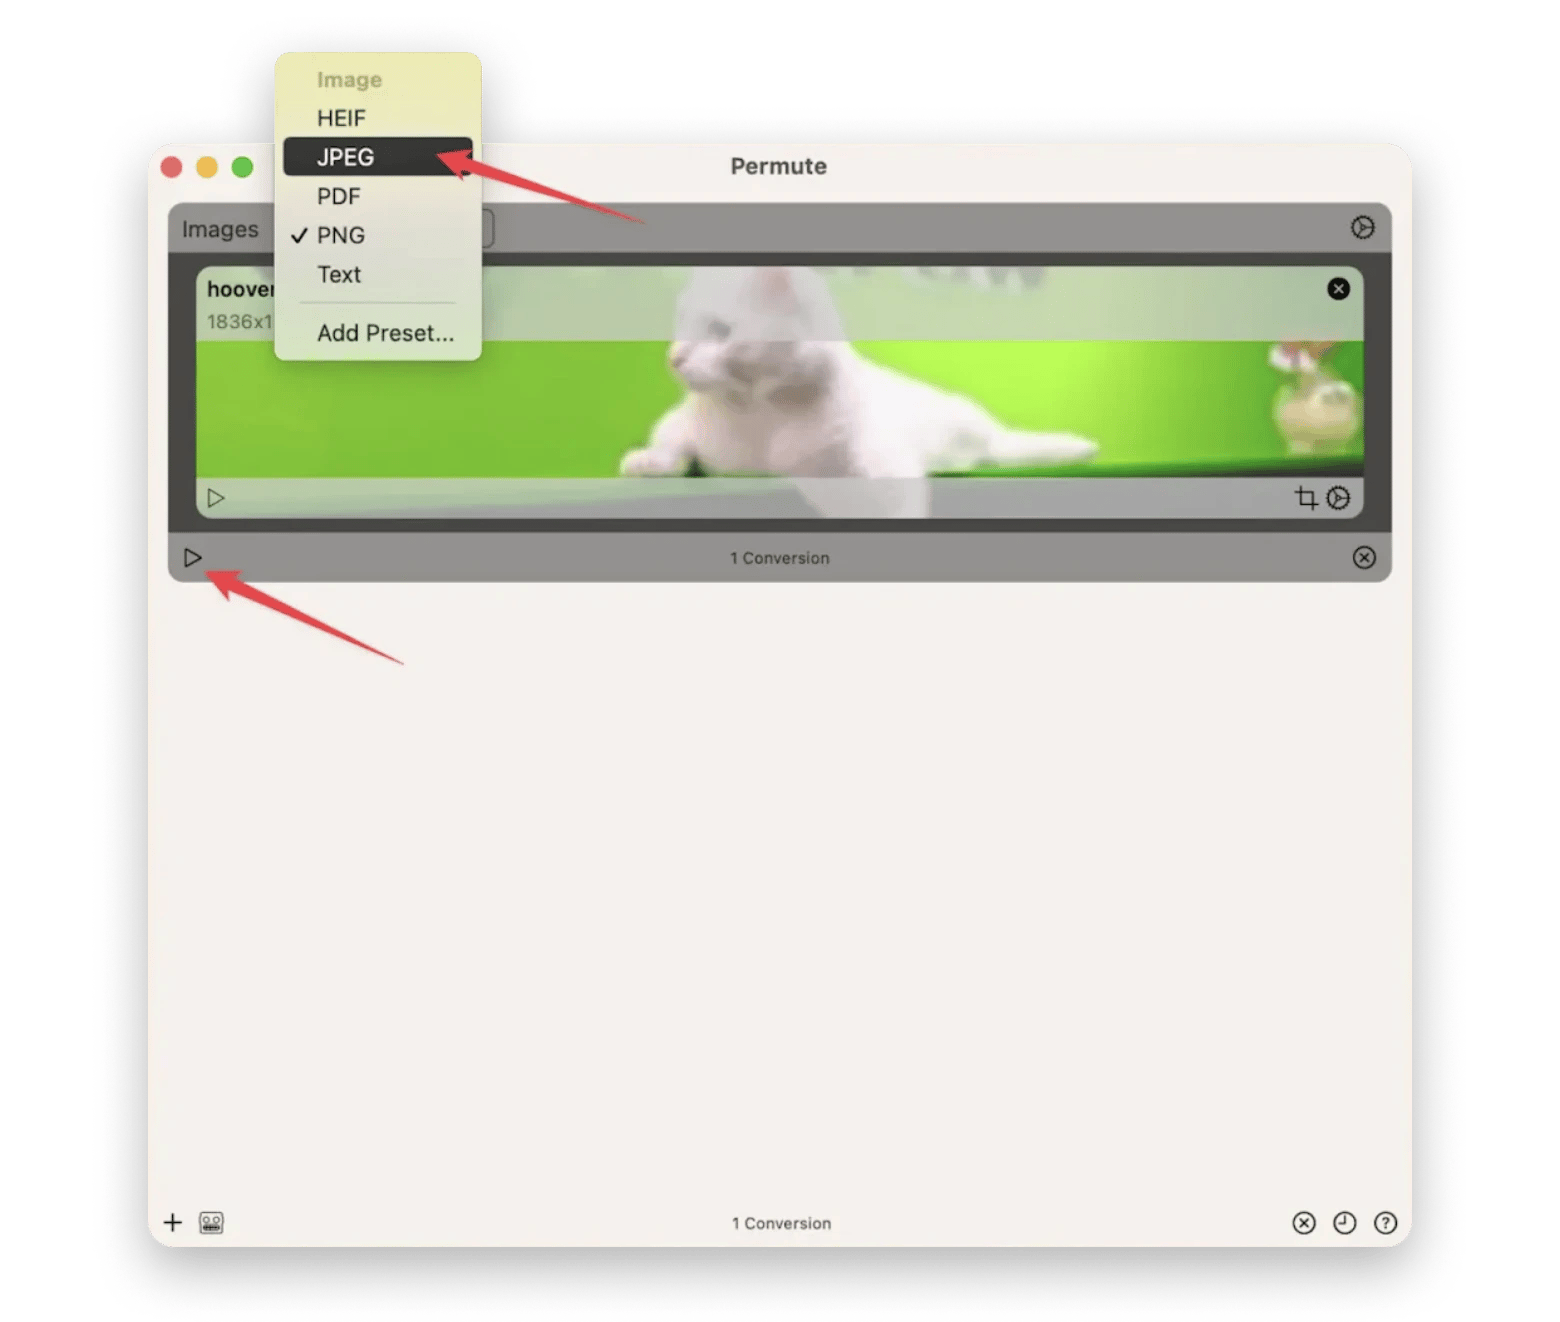
So next time you compress images, consider the formats. Sometimes, you just don’t need the image to be PNG, and you can reduce its size from MB to Kb by simply converting it to another format. The simplest way to do that is Permute. Here’s how you convert images with this app:
- Open Permute.
- Drag your image into the main app’s window.
- Choose the desired format from the drop-down menu and click Start.
- Click the magnifying glass icon to open the folder containing your new image.
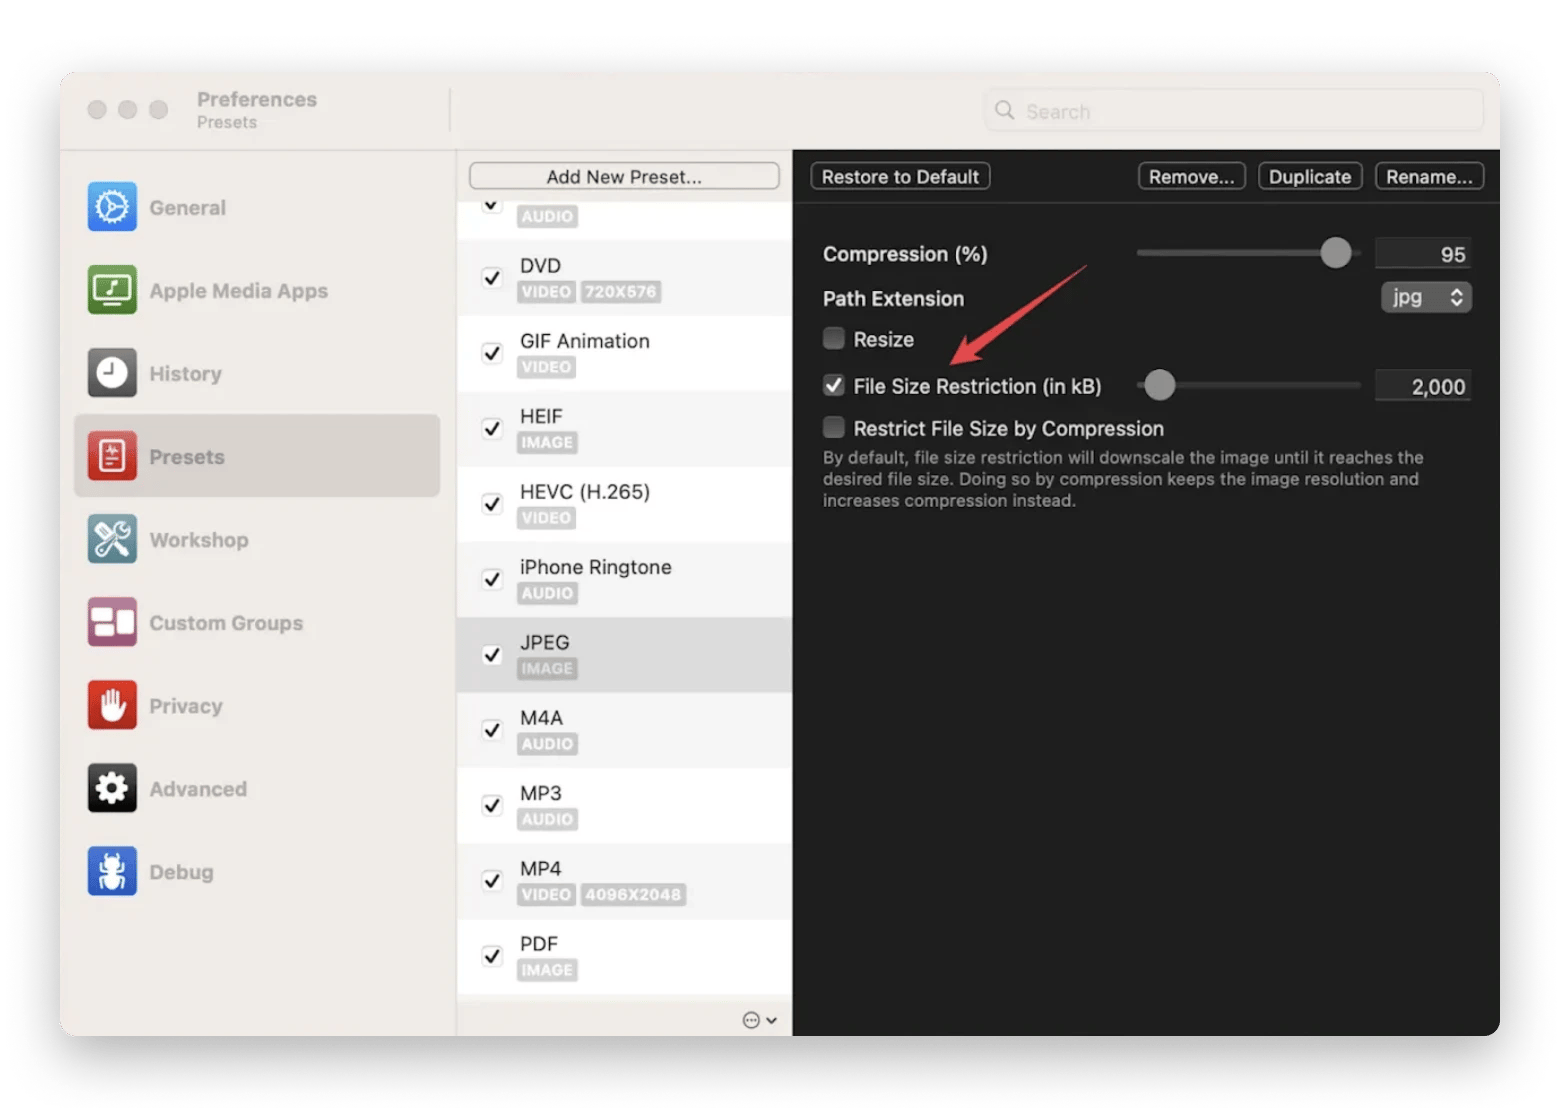
On top of that, you can use the file size restriction option of Permute. Follow the instructions:
- Open the app.
- Go to Permute > Settings > Presets.
- Find the image format you want to use (for example, JPEG) and check the box next to File Size Restriction. Set the desired size and go back to image conversion.
Learn more about why Permute is convenient image, audio, and video converter.
Should you resize images before compressing
By resizing before compressing, you significantly reduce the file size. Compression then further reduces the size to the desired level.
Resizing an image means reducing its length and width, which also reduces its file size. First, decide what dimensions you need, such as the optimal sizes for website images.
I prefer to resize images in batches using the Squash app I’ve mentioned above.
How to reduce picture file size on iPhone and iPad
Now that you know how to reduce the file size of photos on your Mac, let’s take a look at how you can do the same on your iPhone and iPad.
Below are the methods I use to reduce file size on my iPhone.
Using built-in editing tools on iPhone and iPad
My first choice is very simple — an iPhone native editing tool. To use it:
- Open the Photos app and select the picture you want to compress.
- Tap Edit and make minor adjustments (e.g.,cropping) to reduce the file size.
- Save the edited image.
This can slightly reduce the file size, but cropping is not always the best option.
Reducing image size using online tools
To lower the image file size using this method:
Visit sites like TinyPNG or JPEG Optimizer using your browser.
Upload your image.
Compress it and download the smaller version.
This approach is nice for a quick on-off compression, but it could have compression limits, multiple ads, and cybersecurity threats.
Lower file size by adjusting camera settings
To reduce picture file size on iPhone or iPad without losing quality, switch your camera to HEIF/HEIC formats. These formats store images more efficiently than JPEG, keeping the same resolution while lowering file size.
Steps to enable High Efficiency:
Open Settings on your iPhone or iPad.
Scroll down and tap Camera.
Tap Formats.
Select High Efficiency (HEIF/HEIC).
This method helps lower image file size and saves storage space on your device.
Want to free up storage space on your iPad? Read “iPad storage full? How to free up iPad storage space.”
Shrink picture file size online in KB
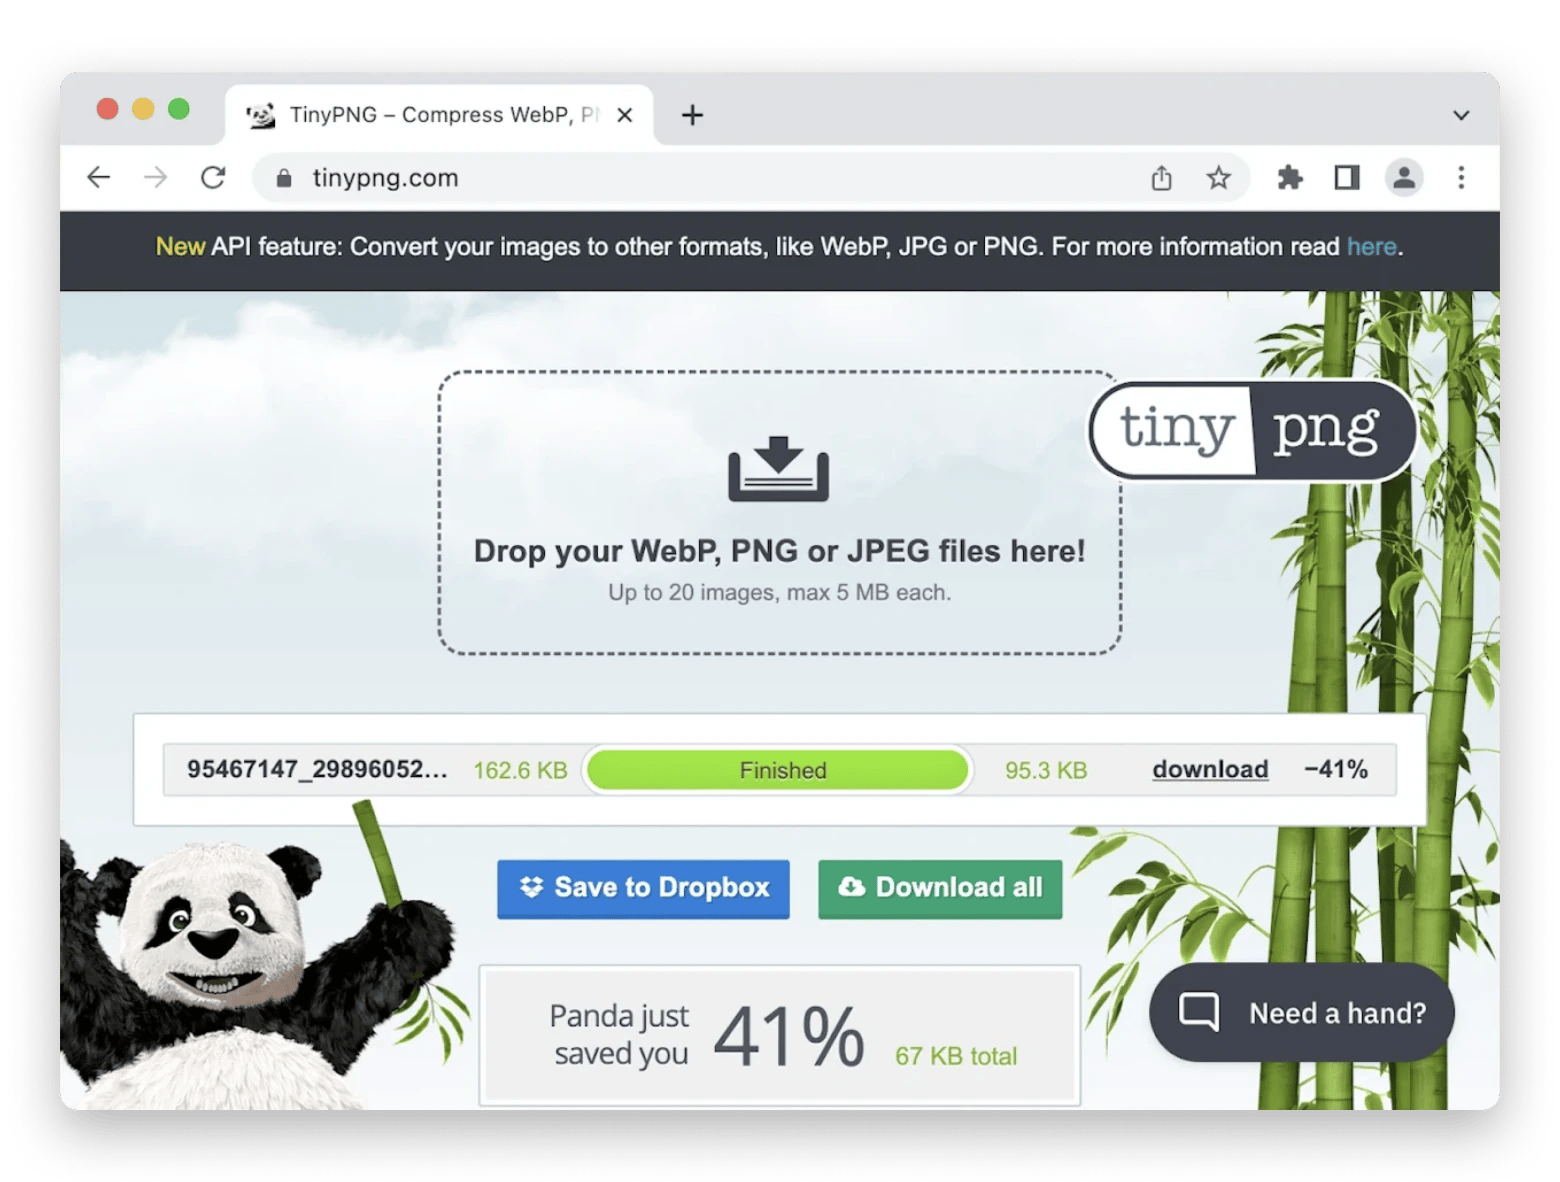
It’s also possible to reduce image size in KB online. For perfectly compressed photos, I prefer the tinyPNG tool. It uses intelligent lossy compression techniques to reduce the file size of your WEBP, JPEG, and PNG files.
Simply drop your files into the selected area, wait a moment, and download the compressed image to your computer.
Why you should reduce picture file size
You may want to reduce image size for several reasons:
- Save storage space. You can save valuable storage space on your device by reducing the image size.
- To improve loading times. Smaller images load faster. This improves your site’s performance and provides a better user experience.
- Lower bandwidth usage. Smaller images use less bandwidth, which makes it easier for users with limited data plans to access your content.
- Improve SEO. Faster-loading pages are favored by search engines, helping to improve your website’s search engine ranking.
- Improve mobile experience. Smaller images load faster on mobile devices. This provides a seamless browsing experience for users on the go.
Understanding image compression
There are two main options to reduce picture file size. You can:
- Resize your images to make them smaller in dimensions and weight.
- Compress the images to reduce the file size.
When you resize an image, you typically think of it as simply changing the visual dimensions of the image. For example, you can take an image that is 2000 px x 2000 px and resize it to 1000 px x 1000 px. Adjusting the dimensions of an image will reduce the file size.
Image compression uses special mathematical techniques to reduce file size while maintaining resolution (remember the number of pixels?) and visual dimensions. Think of it as a way to fit more data into the same amount of space. After you compress the image size, it should still look good and not pixelated.
In many cases, image compression is the way to go simply because the image keeps the original resolution and looks pretty much the same after the compression. It’s important, as with modern displays, it’s better to always have a bigger image.
Also, check out how to reduce JPGs on Mac.
Recommended tools to reduce picture file size
In my experience, Squash is my go-to tool for image compression, which is perfect for quick, high-quality compression tasks.
I also frequently use PhotoBulk for mass compression. Its ability to handle bulk tasks without compromising quality is a big plus.
I tend not to use Preview for image compression because of its limited features and basic compression capabilities. While it gets the job done, it doesn’t offer the advanced options that other tools do.
As for tinyPNG, it’s a great online tool for intelligent lossy compression, but I prefer not to upload all my photos online for security reasons. Still, I use tinyPNG on my iPhone from time to time for quick compression on the go.
As you can see, each tool has its strengths, and you may find that one method suits your needs better than another. But once again, for me, Squash and PhotoBulk remain the favorites.
The best part? You can try Squash plus other apps I’ve mentioned (PhotoBulk, Permute, Gemini, and CleanMy®Phone for seven days at zero cost on Setapp, an app subscription service that hosts dozens of apps for almost any task you can imagine. Give it a try!
FAQ
How can I reduce picture file size on my Mac?
You can reduce picture file size on a Mac by:
- Resizing images
- Compressing images with tools like Squash, PhotoBulk, Permute, Preview, and TinyJPG
- Converting image file formats
What is the best way to lower image file size without losing quality?
How do I compress images on iPhone or iPad?
You can compress images on iPhone or iPad by:
- Using built-in tools like the Photos app
- Using online tools like TinyJPG
- Adjusting your camera settings
Does converting image formats help reduce file size?
Yes, converting images to more efficient formats like JPEG or HEIF can significantly lower image file size while maintaining good quality. This is especially useful for saving storage space or sharing photos online. Combining format conversion with compression tools can further reduce file size without noticeable quality loss.
Are online tools safe for compressing images?
Many online image compression tools are generally safe, but there’s no guaranteed way to fully protect your files. For sensitive or private images, it’s safer to use offline tools on your Mac or iPhone, such as Squash, PhotoBulk, or Preview, which keep your data local while reducing picture file size effectively.


