How to check battery on AirPods
- To check AirPods battery on iPhone or iPad, open the AirPods case lid near your iPhone or iPad, and a pop-up will show battery levels
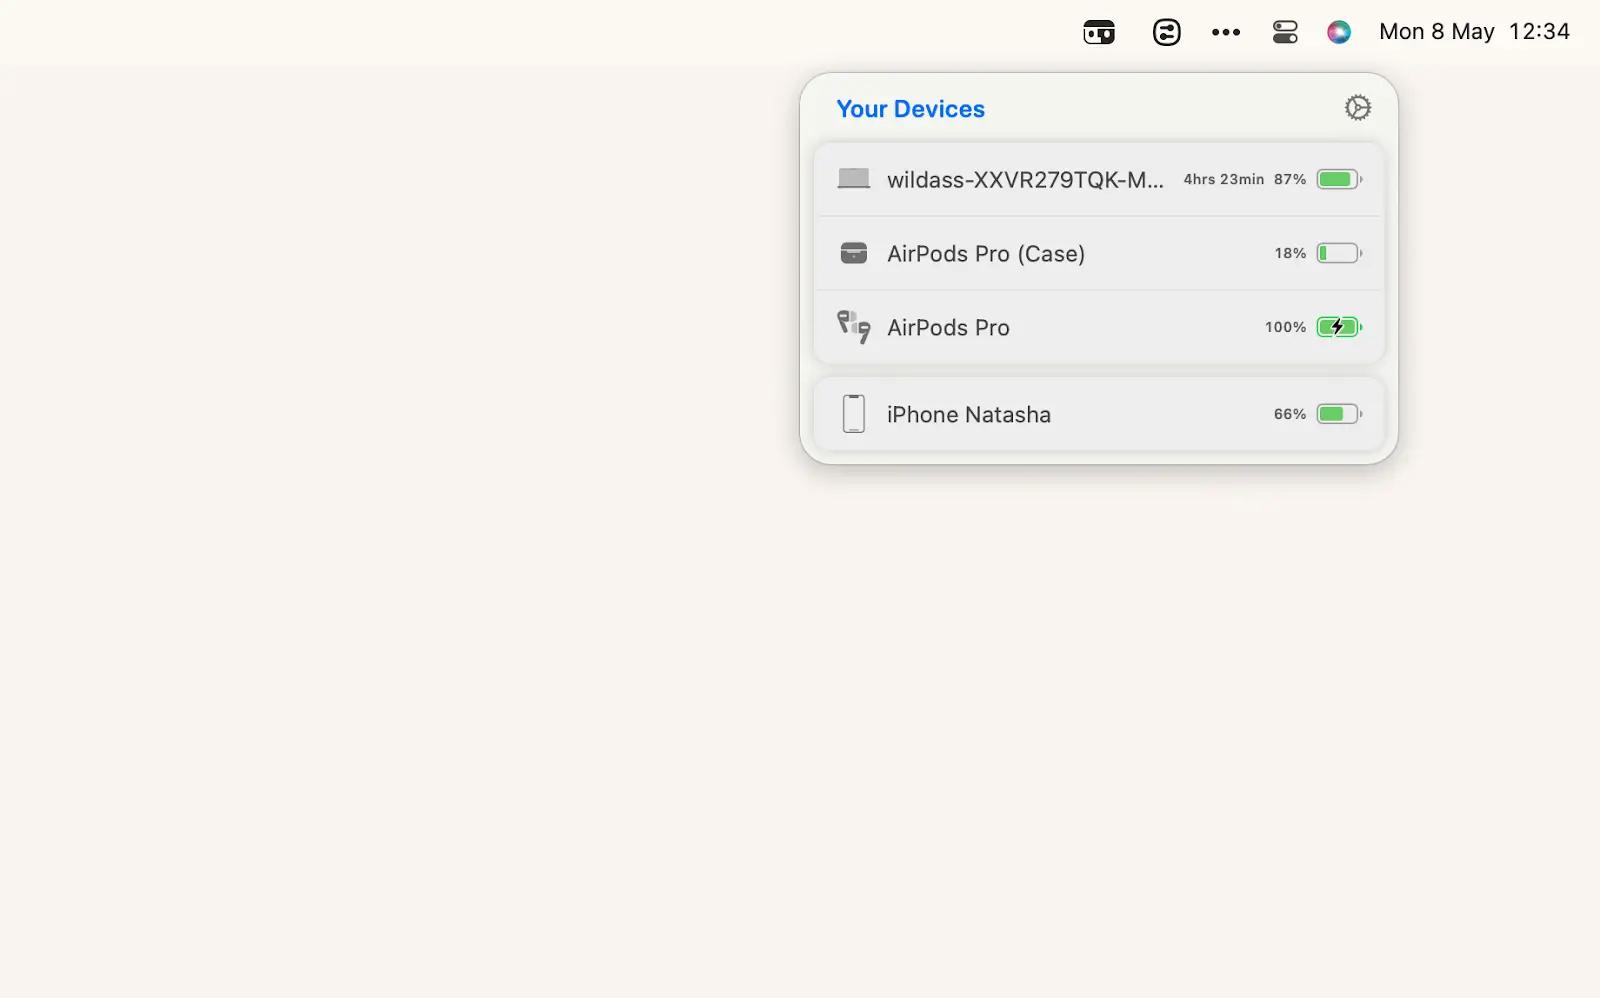
The battery levels will be available for each earbud and the case. You can also add the Battery widget to your Home or widget screen for real-time tracking. - On your Mac, click the Bluetooth icon in the Mac menu bar when AirPods are connected
It displays the battery level of both AirPods and the case. You can also add a widget via Notification Center > Edit Widgets. - Understand Charging Status from the Case Light
- Green (with AirPods inside): Fully charged
- Amber: Charging
- Flashing amber or green: Possible error — try resetting your AirPods
- Enhance Tracking with Apps
- Batteries: Replaces your Mac battery icon and shows real-time battery info for all Apple and Bluetooth devices, with low-battery alerts.
- AirBuddy: Adds detailed AirPods battery info to your Mac's menu bar, including individual earbud and case levels, charge status, and custom alerts. Try these apps free via a 7-day free trial on Setapp.
You’re in the middle of a great playlist, lost in the music when suddenly your Apple AirPods die. Oops, you’re left with nothing but silence and the realization that you should have checked the battery level before starting your jam session.
Don’t worry, though, because, in this article, we’ll show you how to avoid this unfortunate situation, how to check AirPod battery, and keep it fully charged. Keep reading for tips and tricks you need to have your AirPods ready for whatever tunes you want to listen to next.
How to know if AirPods are charging
The first step in checking the battery percentage in your earbuds is to see if they’re charging. Let’s see how to know if AirPods are charging.
You can tell when your AirPods are being charged by looking for the status light and its color. The status light is a tiny dot of light on your charging case that can glow green, white, or amber. These colors indicate whether your AirPods are charged, connected, or charging, so it’s important to know what they mean.
The location of the status light may vary from model to model. Just look inside the case (between the earbuds) and on the front of the case.
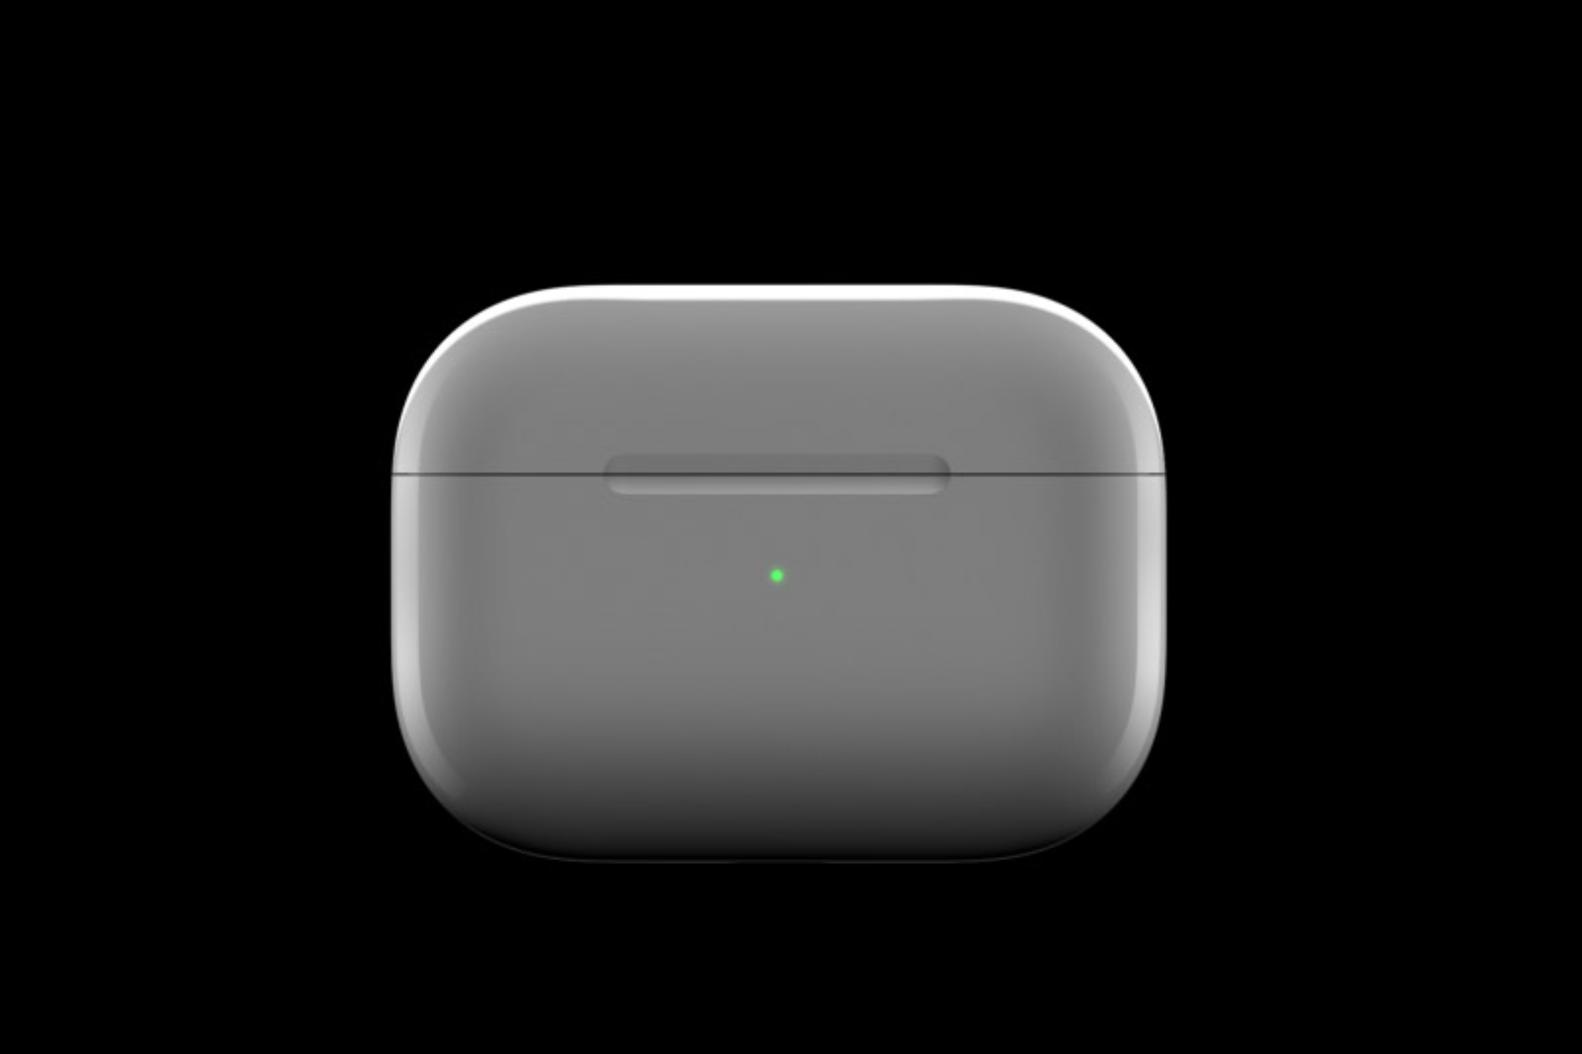
Once you know where the status light is located, the next challenge is to interpret what each of the colors means. When the battery is charging, the status light can be green or amber, and it can either be blinking or not blinking. Each of these lights conveys a different piece of information from the other. While this may seem confusing at first, don’t worry.
Here’s a quick guide to what each status light means.
With Airpods inside the case and lid open:
- An amber light means that your earphones are charging in the case.
- A green light indicates that the case and AirPods are fully charged.
- A flashing green light signals about a problem detecting one of your earbuds.
- A flashing orange or yellow light means something is wrong. It usually indicates a pairing or connection error that can be resolved by resetting your AirPods. Here’s how to resolve AirPods connection issues.
When AirPods are not in the case
- An amber light means that your case is currently charging.
- A green light indicates that your case is fully charged.
How to check AirPods battery status
Now, let’s see how to check the battery of AirPods.
Checking the battery levels of your AirPods on your Mac, iPhone, or iPad is a quick and easy process.
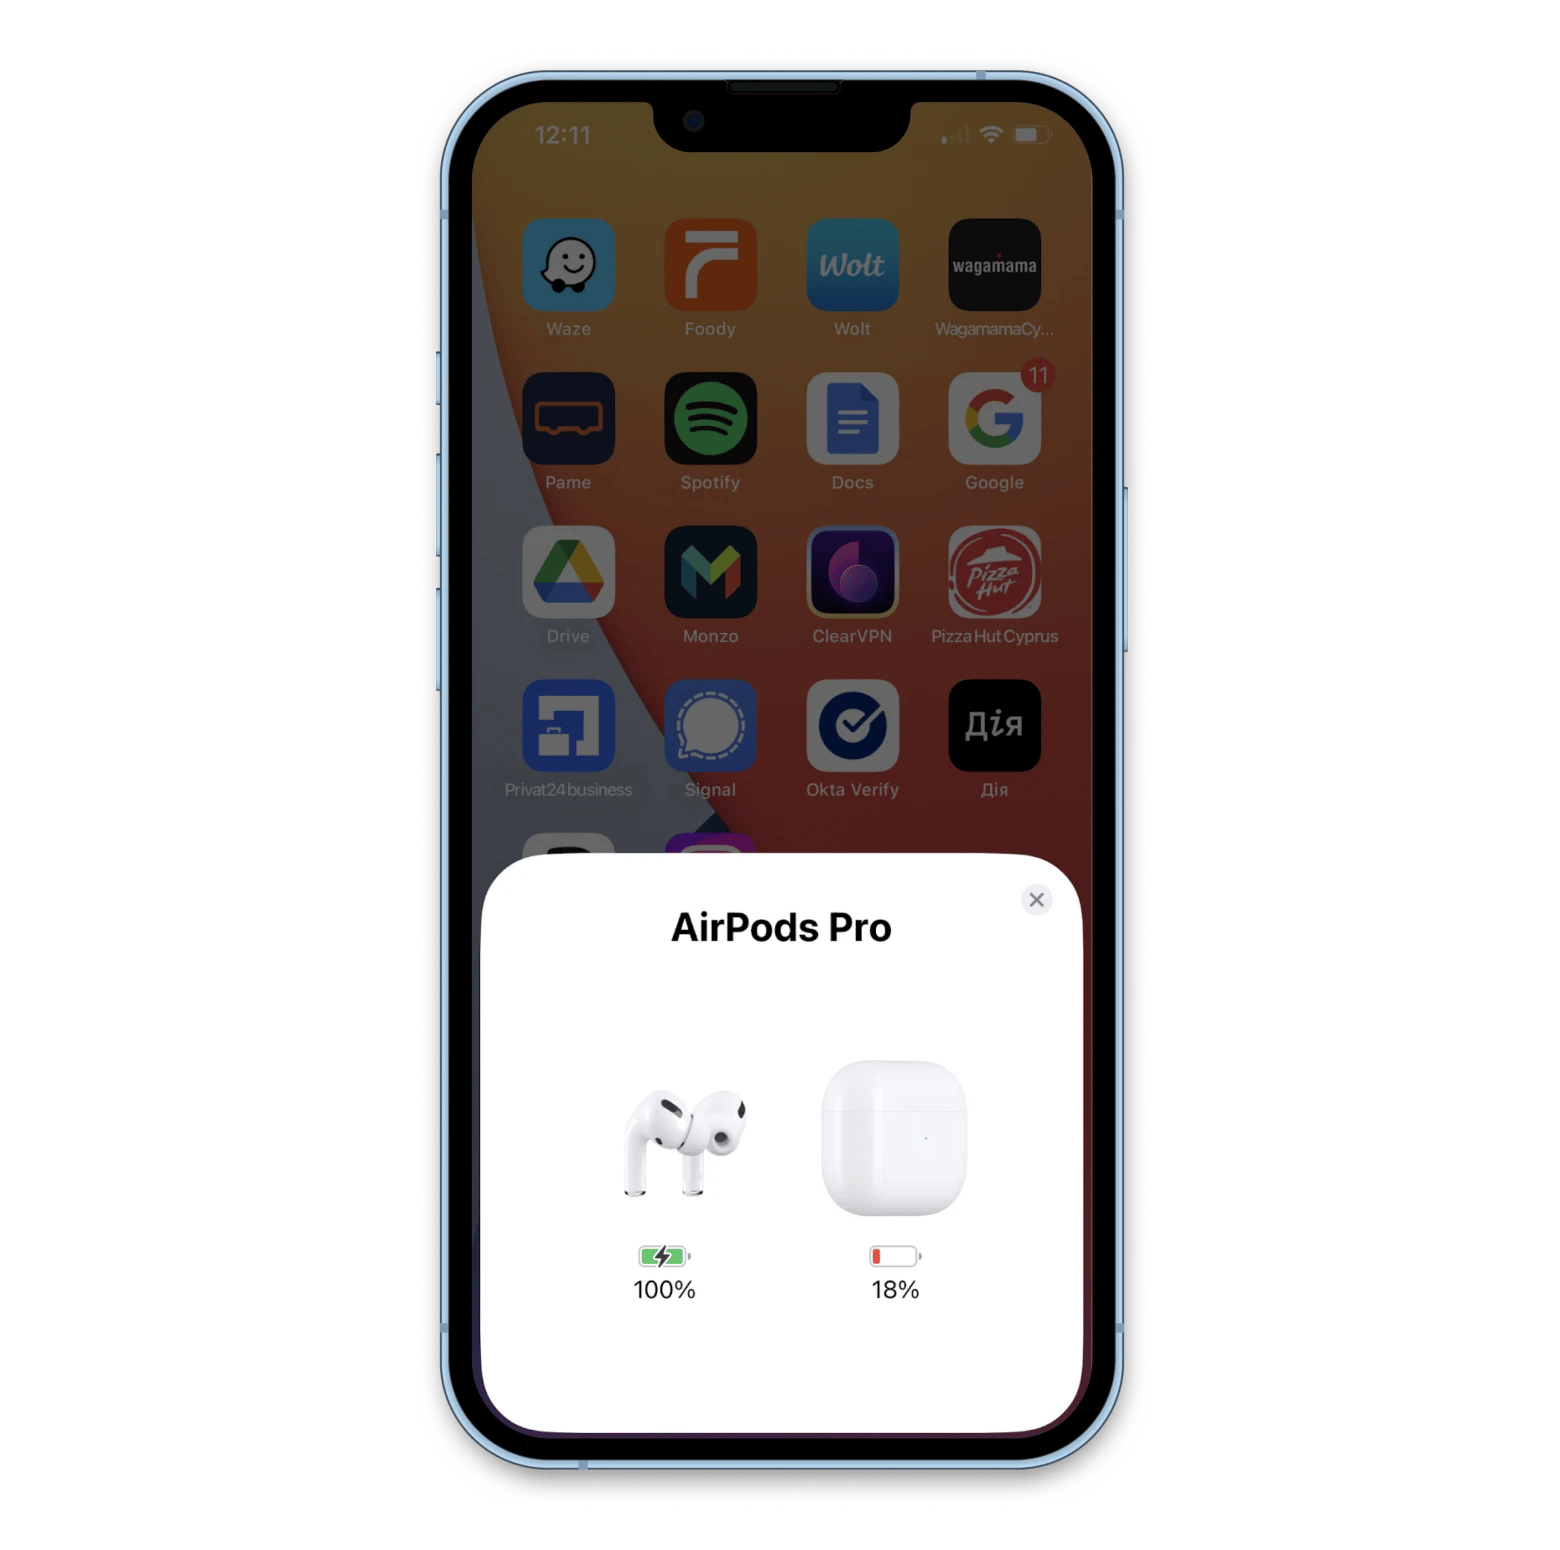
On your iPhone or iPad, simply open the lid of your AirPods case and hold it near your device. A battery status popup will appear on your screen, showing you the battery levels of your AirPods as well as the battery level of your charging case.
On your Mac, click on the Bluetooth icon in your menu bar. There you’ll see your AirPods if they’re connected to your Mac. Here you can check the battery levels of your AirPods and their charging case.

If you’re someone who wants to keep an even closer eye on your AirPods’ battery levels, there are a number of great apps you can try. For example, Batteries is your one-stop control center for easily managing the battery status of your AirPods, iPhone, iPad, and any other Bluetooth device. This lightweight utility replaces your regular Mac battery meter and augments it with real-time battery levels for all your devices. Plus, Batteries automatically notifies you when a battery is low, so you’ll never forget to charge anything again.
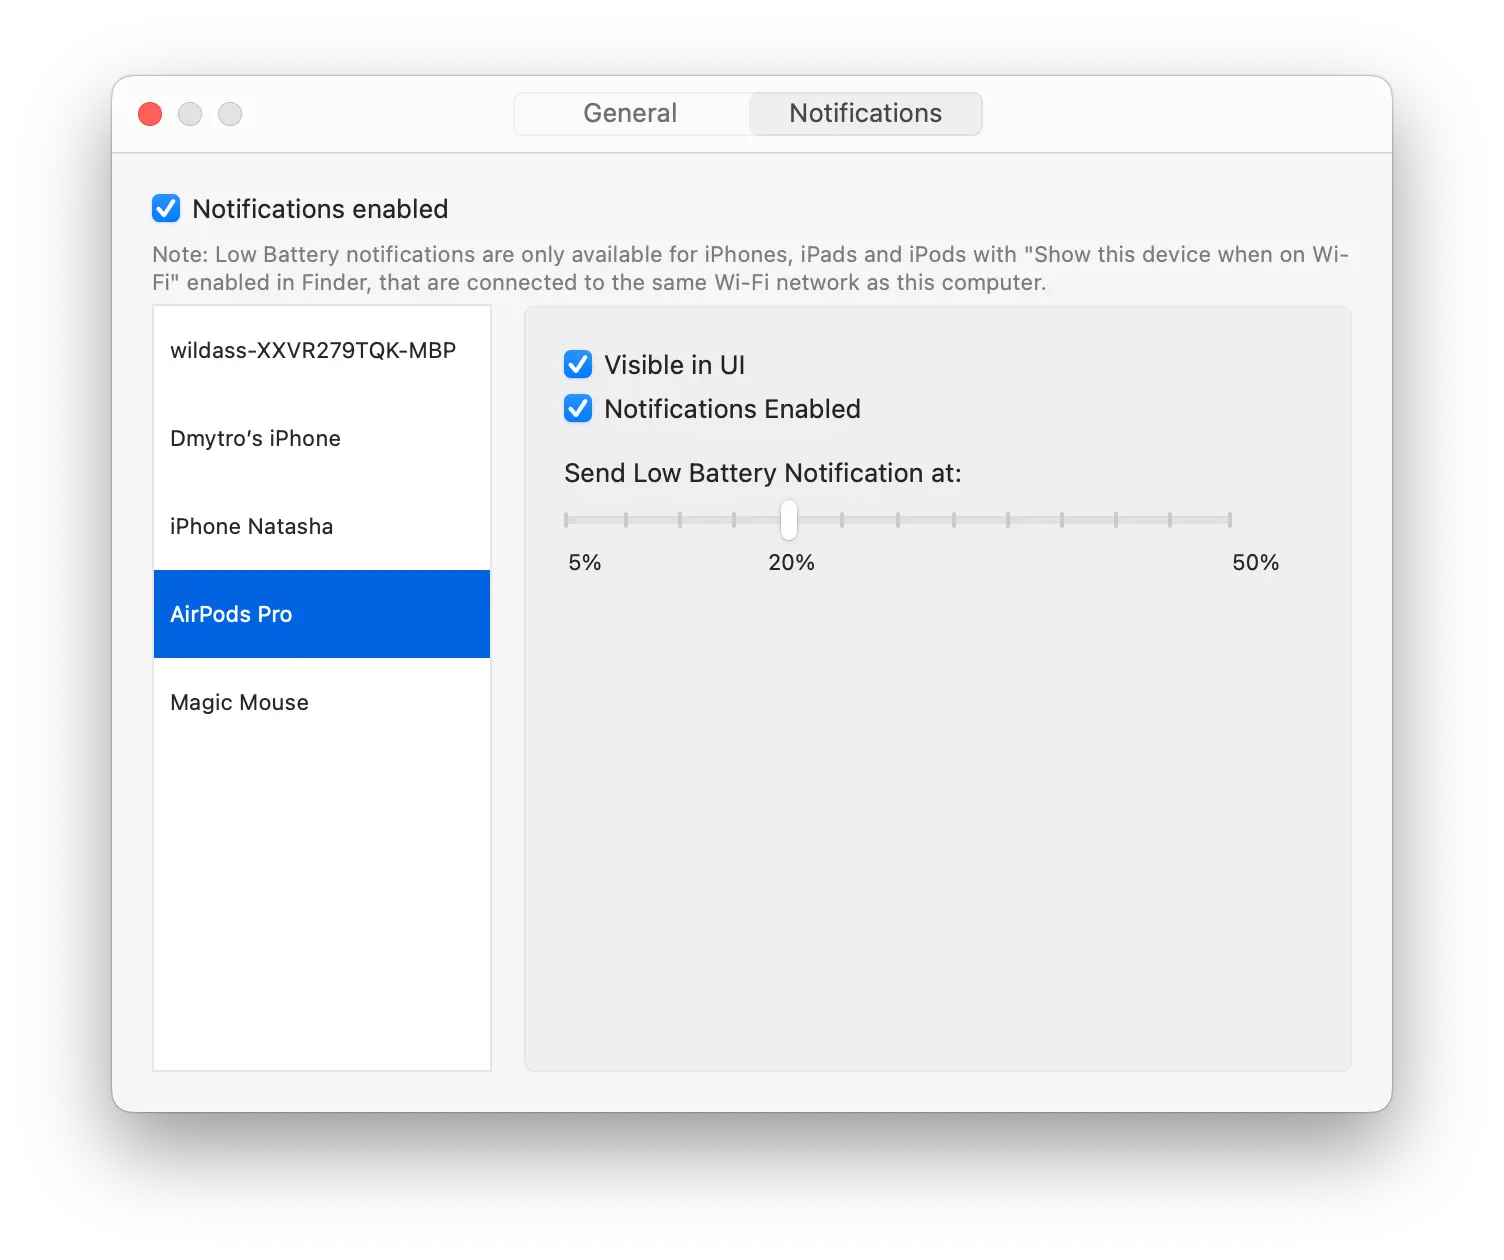
Now that you know how to check AirPods battery, you might be wondering if there’s a more effective way to pair your AirPods with your Mac than going through the Bluetooth menu. Actually, there is!
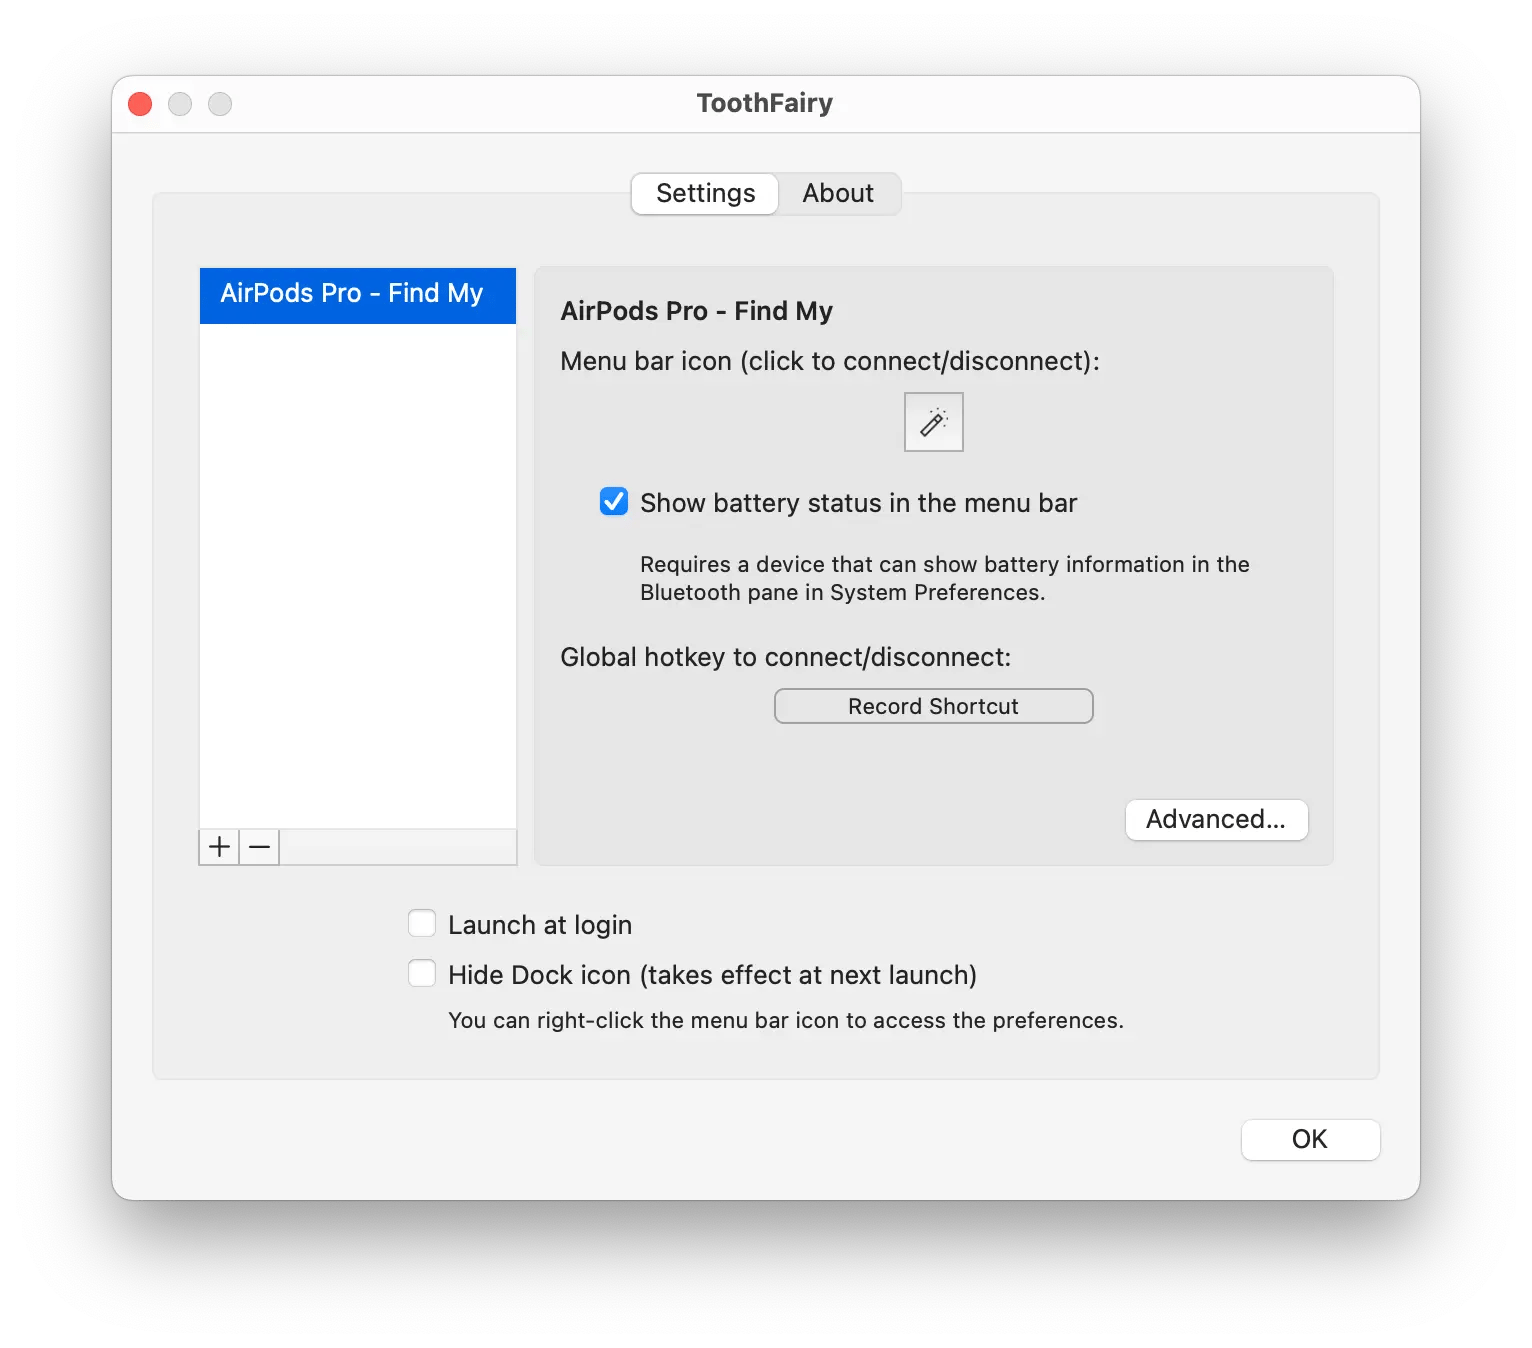
ToothFairy (available on Setapp along with 250+ other apps) is a magical utility that lets you introduce a one-click shortcut to your menu bar to connect your favorite Bluetooth devices, whether it’s AirPods, external speakers, keyboards, etc.
To pair a device with the help of ToothFairy:
- Open the app and choose your Bluetooth device
- Change the menu bar icon to something representative
- Record a shortcut if you want to activate the device even faster
- Click OK.
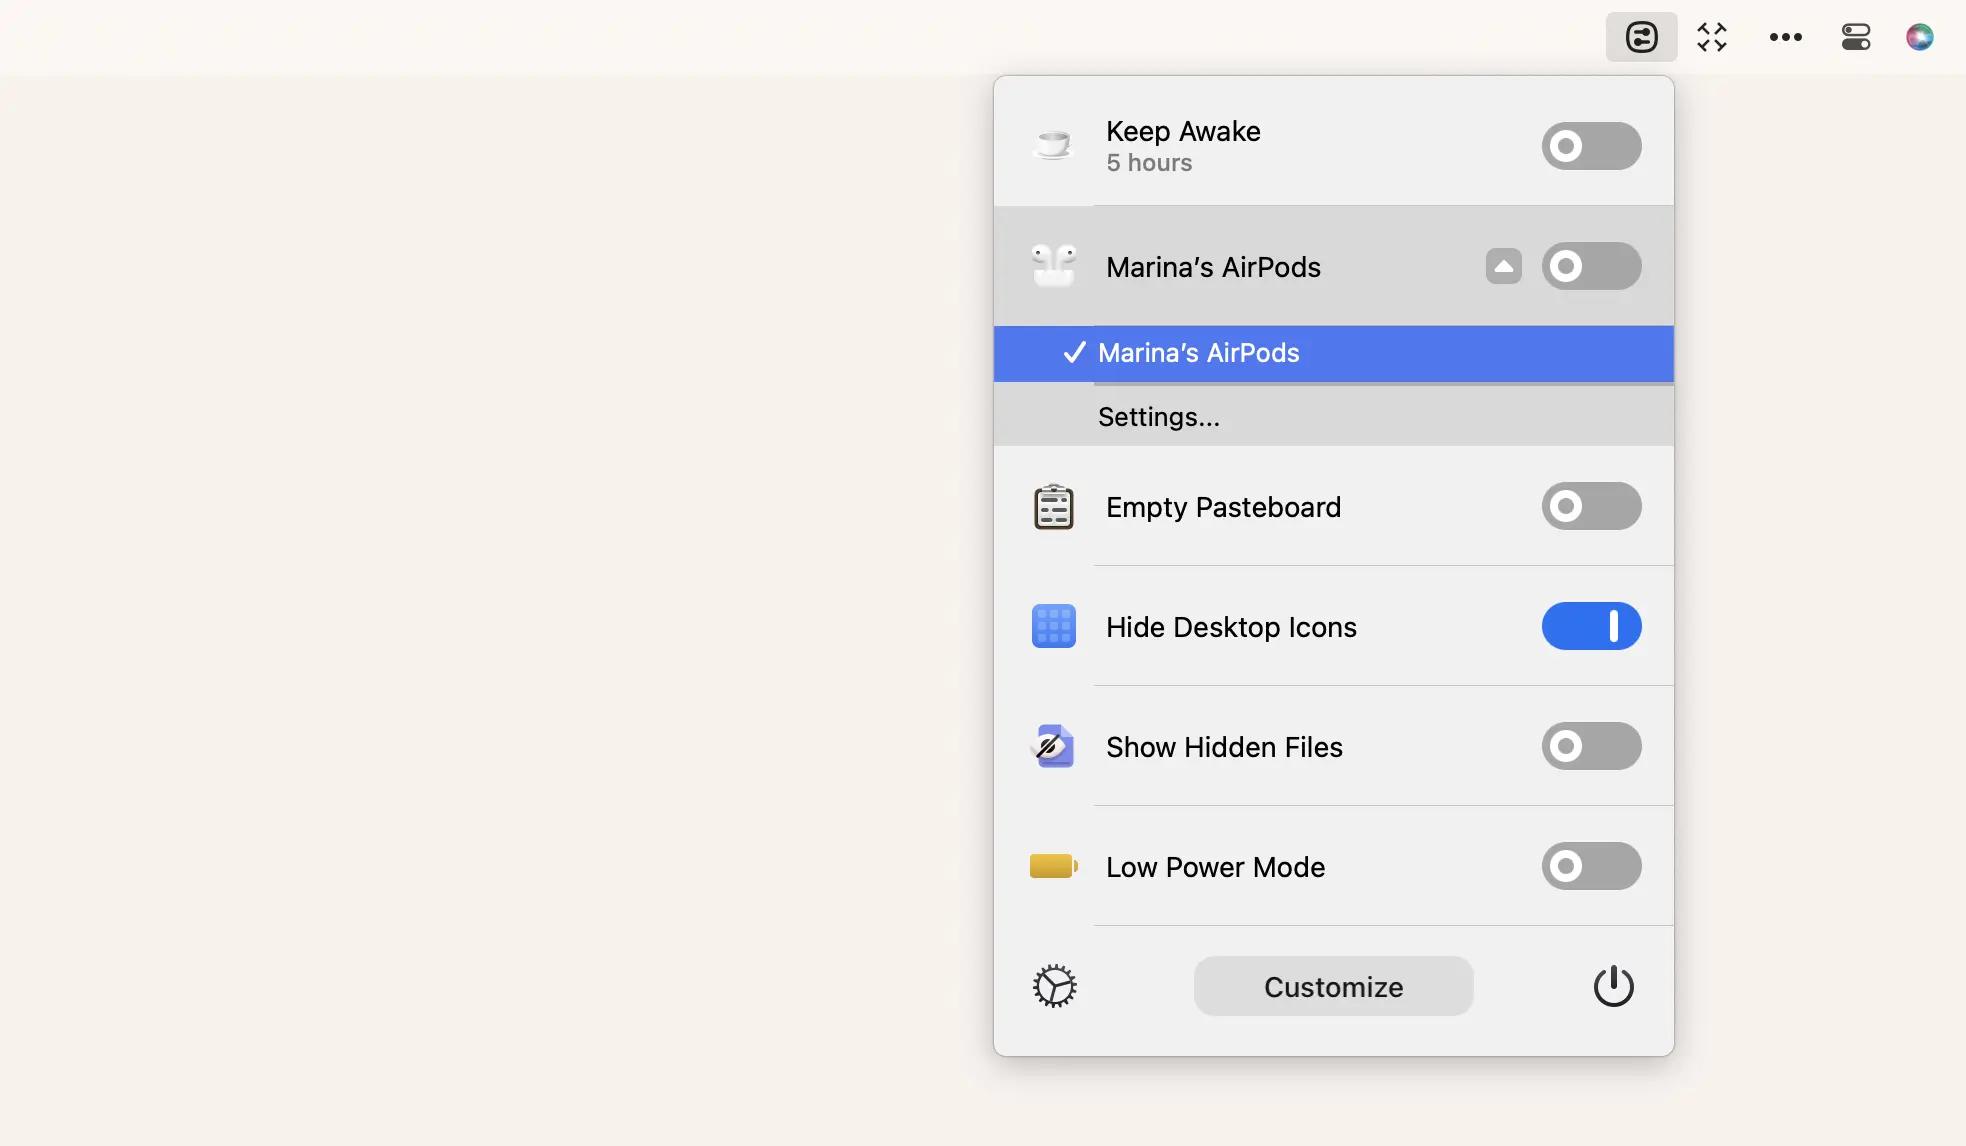
Alternatively, you can use OneSwitch from Setapp to quickly connect your AirPods.
This app also lets you perform a variety of actions that are typically controlled by individual apps. Some of these actions include hiding desktop icons, toggling dark mode, activating a screen saver, and more.
Read also: AirPod generations
How to add AirPods to the battery widget
One more way to check AirPod battery is the battery widget. This method is for you if you want to see the battery life of your AirPods while you’re wearing them. To display the Battery Widget on your device’s interface, follow these steps:
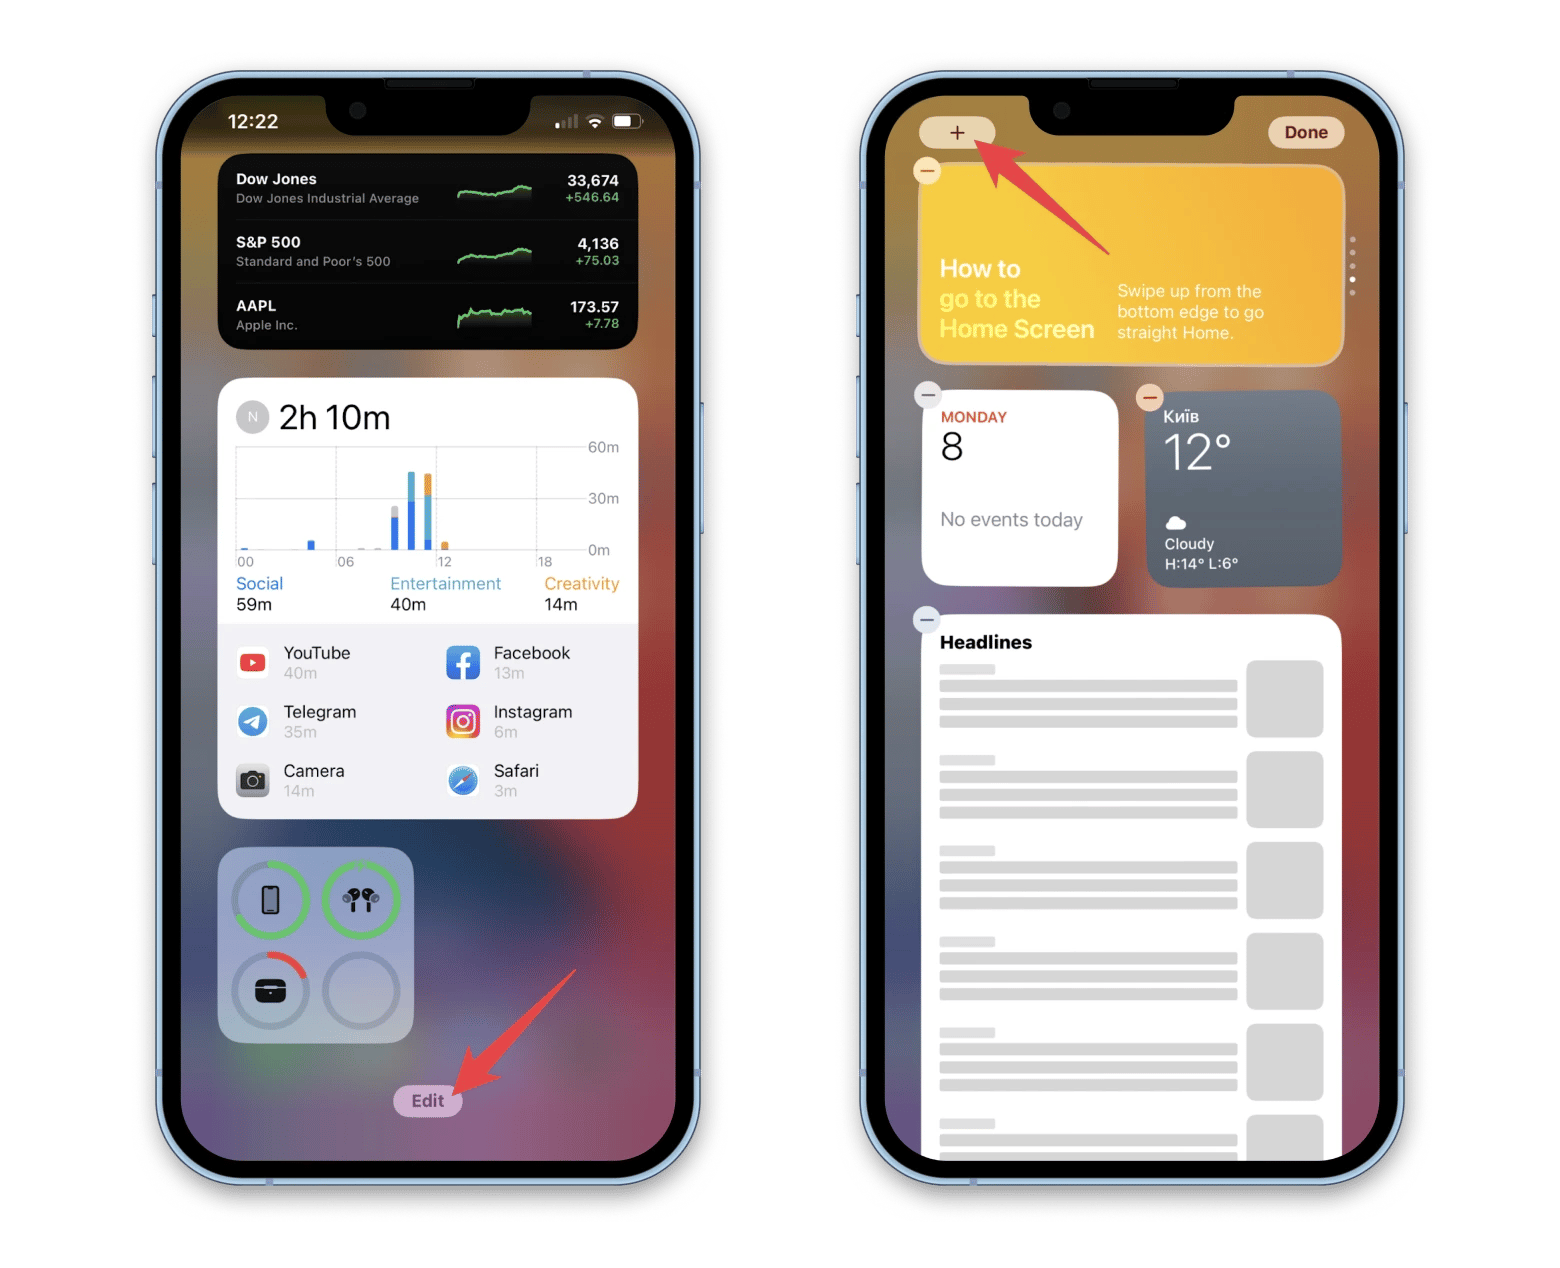
- Unlock your iPhone or iPad and go to the first home page
- Then swipe right to get to the widgets page
- Next, scroll down and tap Edit
- In the upper left corner of the screen, you’ll see a “+” icon. Click on it
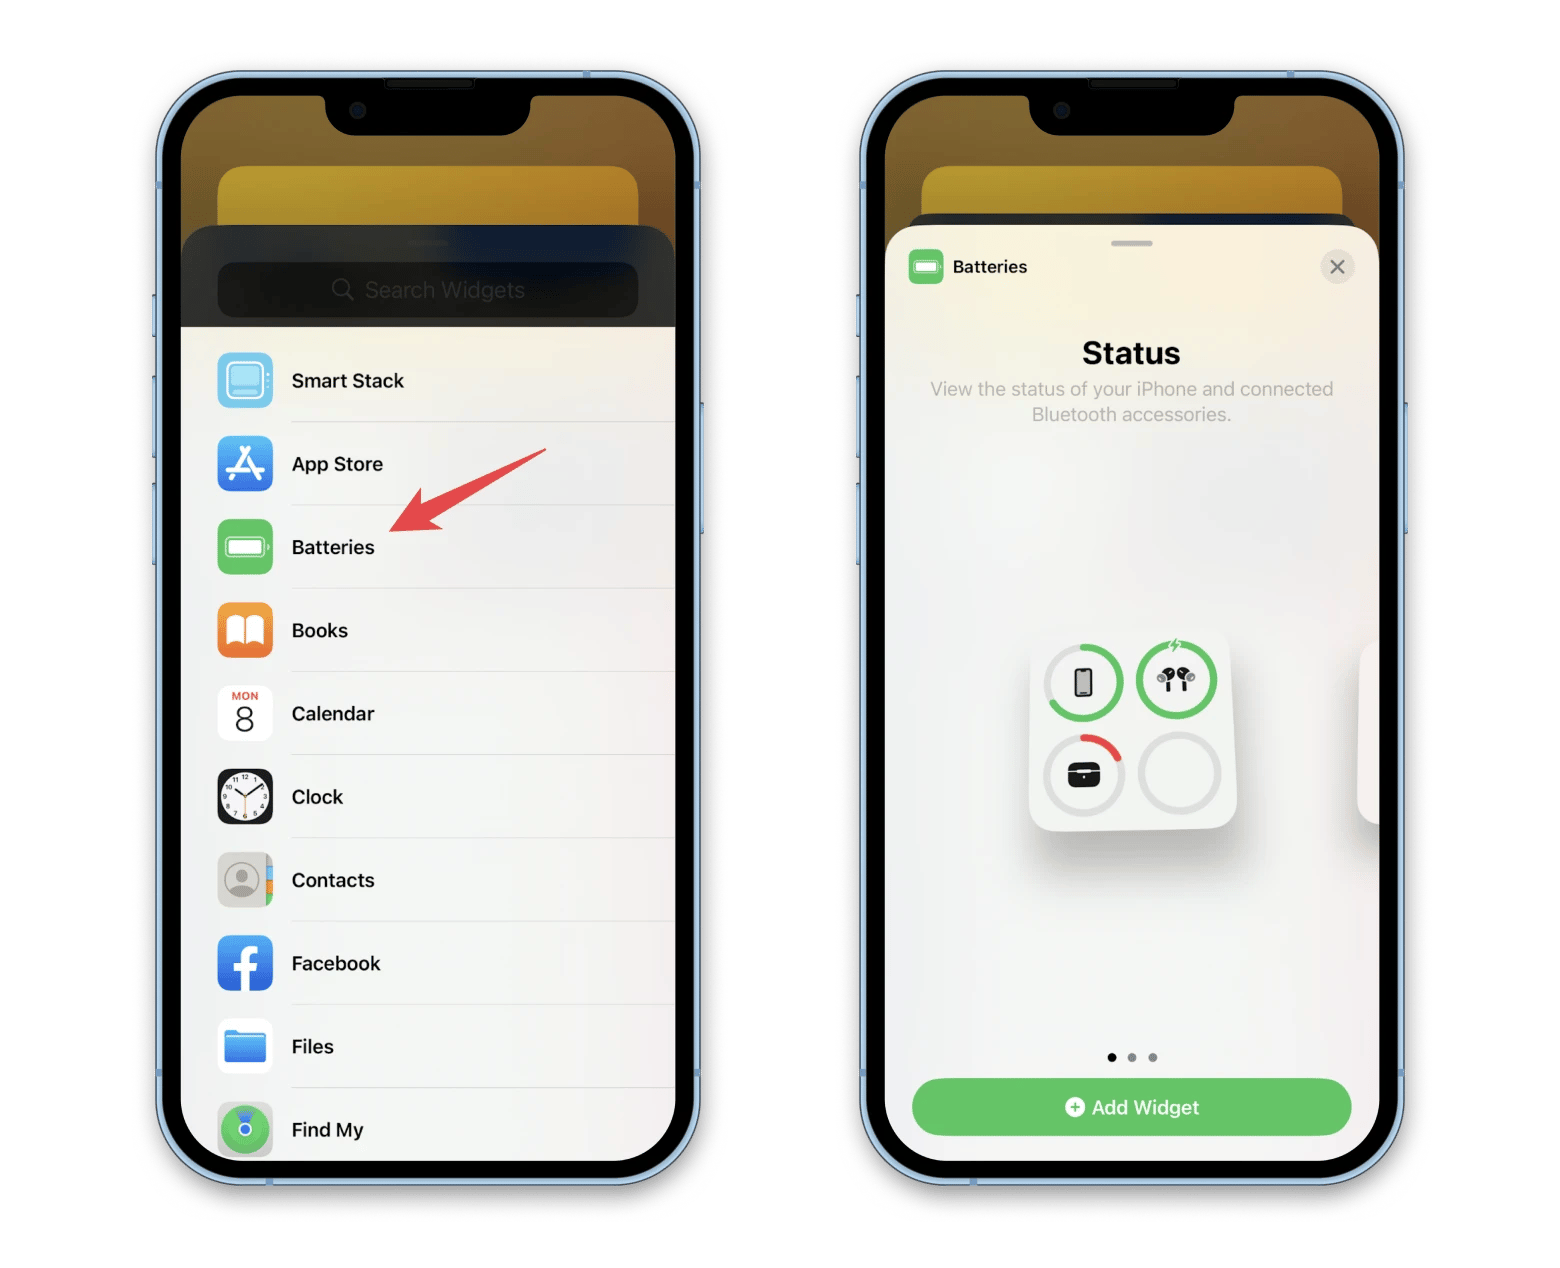
- Next, when the page loads, scroll to the bottom of the widget list and tap Batteries
- When the popup window appears, choose a widget size
- Next, choose where you want to place the new widget on the page. Tap Done in the upper right corner
- When you finish, you’ll see your AirPods battery life on the widget page, as well as the battery life of your iPhone/iPad and any other connected devices, such as Apple Watch.
Adding widgets on a Mac is also a simple process. Here are the steps you need to take:
- Click the date and time in the upper-right corner of your screen
- Scroll down to the bottom of the Notification Center to find the Edit Widgets button. Click it
- You’ll see a list of widgets that are currently available. Some widgets come in different sizes; click on a size to preview the information it displays.
- To add a widget, simply click the “+” icon next to it.
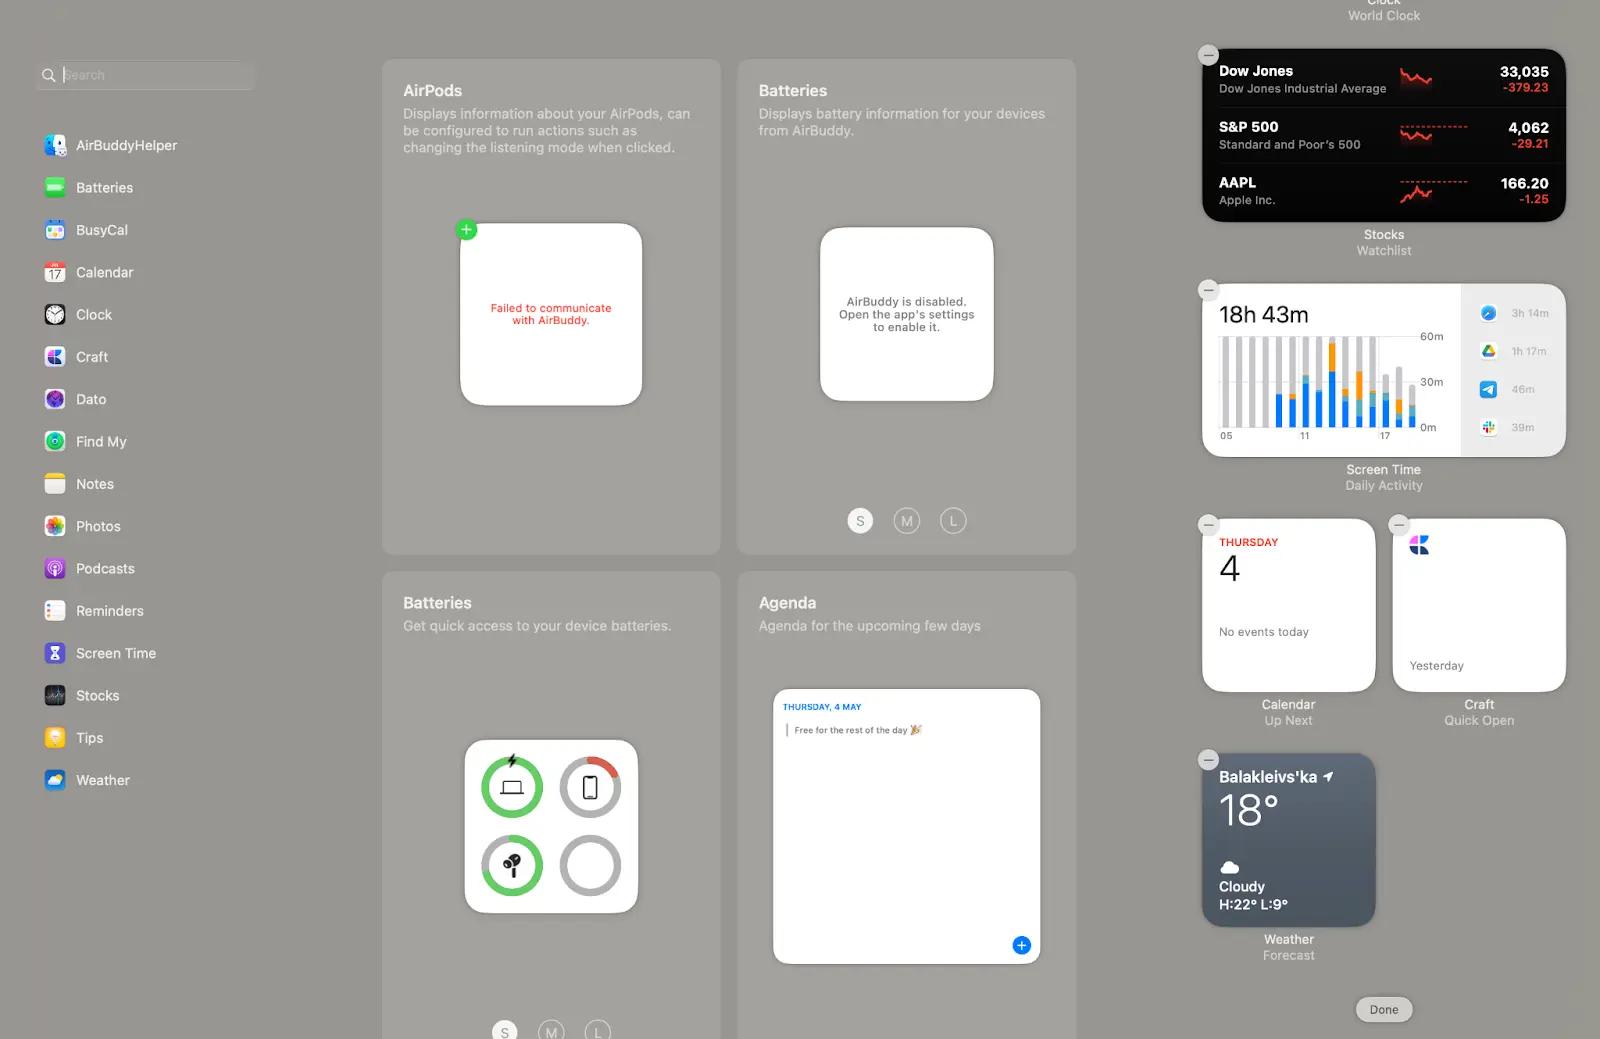
AirBuddy (from Setapp), on the other hand, offers a number of features designed specifically for AirPods users. For example, it can display the battery levels of your AirPods in a customizable drop-down menu bar, making it easy to see your AirPods’ battery levels at a glance. It also provides more detailed information about your AirPods’ battery, including the battery levels of the left and right AirPods separately and the battery levels of the charging case. In addition, AirBuddy can show your AirPods’ charging status in real-time, and it can even notify you when your AirPods are low on power or when they’re fully charged.
Battery health vs. battery level in AirPods and AirPods Pro
When managing your AirPods battery, you’ll come across two key terms: battery level and battery health. Understanding the difference between them is essential if you want to dive deeper into battery performance and maintenance.
Battery level refers to the current charge percentage of your AirPods and their charging case. It’s the number you see when using methods I described above, like the pop-up on your iPhone or third-party apps that display real-time charge info.
Battery health, on the other hand, reflects the long-term condition of your battery. It tells you how well your AirPods can hold a charge over time. Unfortunately, Apple doesn’t offer a built-in way to measure battery health for AirPods, and from my experience, no third-party app reliably does either.
Even though you can’t see an exact battery health percentage, there are some clear signs your AirPods batteries may be wearing out:
- Fewer hours of listening time on a full charge
- More frequent charging
- Quicker battery drain
- Sudden disconnections
These symptoms usually indicate reduced battery capacity.
But can you maintain battery health?
Since there’s no official battery health monitor for AirPods, your best option is to follow general battery care practices:
- Avoid draining the battery to 0% whenever possible.
- Store your AirPods in a cool, dry place.
- Reset the device if you notice performance issues.
- Use battery-intensive features, like Active Noise Cancellation (ANC), only when needed
While you can't stop battery wear entirely, these habits, from my experience, can help extend your AirPods' lifespan.
The best AirPods battery check method
Checking the battery life of your AirPods is an important step in ensuring uninterrupted listening sessions. By interpreting the color codes of the light, you can tell if your AirPods are charging, fully charged, or if there is a connection error.
Also, there are several ways to check the battery life of your earbuds, including using the built-in battery widget on your iPhone/iPad, Mac, or apps, such as AirBuddy and Batteries. With these little helpers, you can easily manage the battery status of your AirPods and other Bluetooth devices and receive low-battery notifications. If you want to pair AirPods with your Apple devices with a single click, try ToothFairy and OneSwitch.
All apps are absolutely free for seven days via Setapp, a platform with more than 250 top macOS, iOS, and web apps, from time trackers (TimeMator, Timing) to a powerful Mac cleaner (CleanMyMac). Try them all and find your favorites today!


