How to activate your new iPhone and set it up? Tips from my decades of experience
When I got my first iPhone, I was too excited to see my device with all the latest and premium features. But it was not easy to activate a new iPhone without any guidance.
After some years, I became experienced with Apple devices. If you are also among those iPhone enthusiasts wondering how to activate a new iPhone, this is for you.
Today, I’ll walk you through everything I did to activate my iPhone and set it up smoothly. Let’s get started!
| What happened? | Solution |
|---|---|
| Need to preserve old iPhone data | Back up the old iPhone using iCloud or a local backup via Mac. |
| Missing important setup info | Gather essential details: Apple ID, Wi-Fi credentials, and SIM/eSIM info before setup. |
| Unfamiliar with new iPhone setup | Power on the device and follow the on-screen instructions. Sign in with your Apple Account. |
| Apps and data not appearing | Use Quick Start for direct transfer or iCloud Backup to restore everything. |
| Can't access mobile network | Insert a SIM card or go to Settings > Mobile Data > Add eSIM to set up. |
| Device not secure | Set up Face ID or Touch ID, and enable Automatic Updates (Settings > General > Software Updates) for optimal security. |
| Want to ensure secure browsing | Install and use ClearVPN for encrypted and private internet usage. |
| Need to transfer files quickly | Use Dropshare for instant file sharing between devices. |
Preparation before iPhone set up
When I unboxed my iPhone, I quickly realized that setting up my new iPhone was more than just powering it on. I had to do some preparations to avoid losing any data from my old iPhone. Moreover, I had to ensure I had everything from transferring contacts to apps on my new iPhone. Let’s take a closer look at what I needed to do first to set up and how to activate a new iPhone.
Backup your old iPhone before activating your new iPhone
Before you start activating your brand new iPhone, there’s a small step you must go through first: backing up your old iPhone. So let us go through some simple steps through which you can safely back up all of your old data:
Option 1: Backup to iCloud
- Connect your iPhone to Wi-Fi.
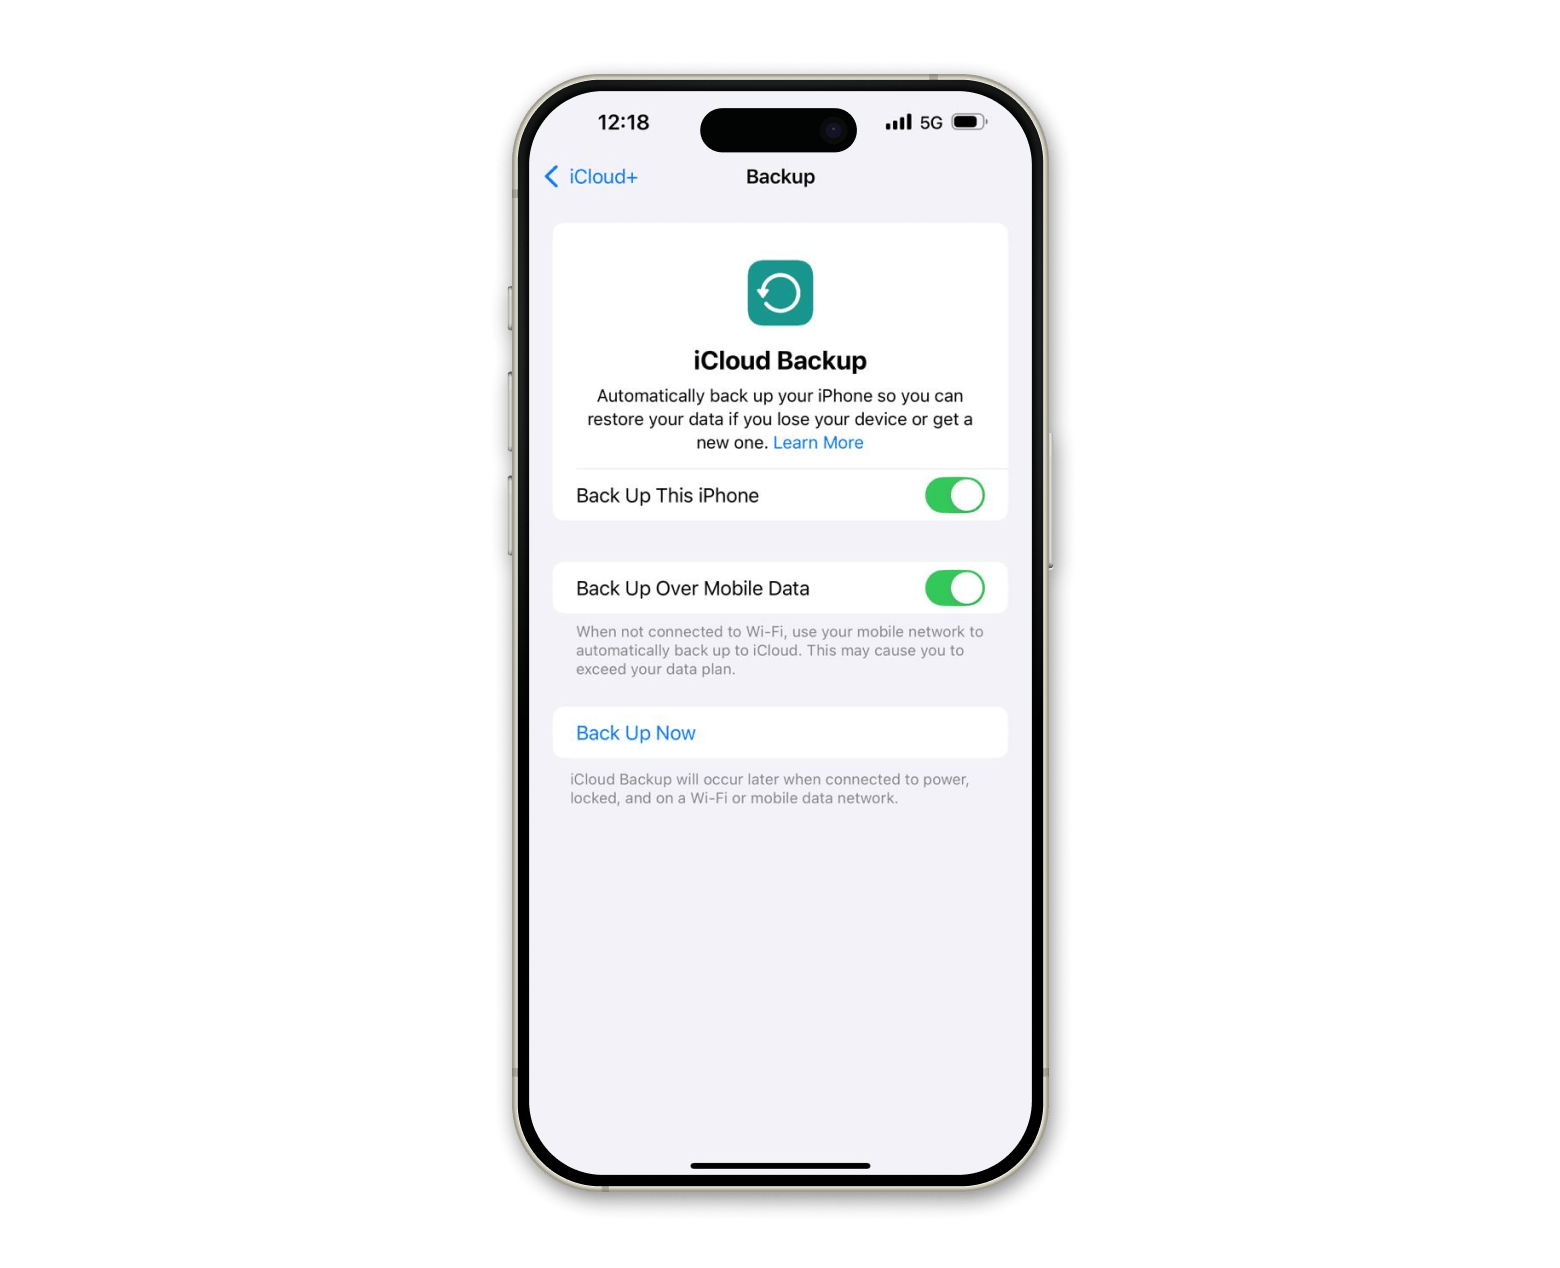
- Go to Settings > Apple Account > iCloud > iCloud Backup.
- Turn on iCloud Backup if it’s not already enabled.
- Tap Back Up Now. Ensure your iPhone remains connected to Wi-Fi until the backup is complete.
Option 2: Backup to your Mac
- Use a Lightning or USB-C cable to connect your old iPhone to a Mac.
- Go to Finder (On older macOS, use iTunes).
- Find your iPhone under Locations.
- Click General > Back Up Now.
- Wait for the process to complete.
And now your backup is ready to be used.
Gather essential information
How to activate iPhone was the question on my mind as I prepared to set up my new device. To do this, I gathered a few essential details before I started activating it. Having all the information on hand before made the setup process much easier. Here’s the checklist I had ahead of time.
Apple Account
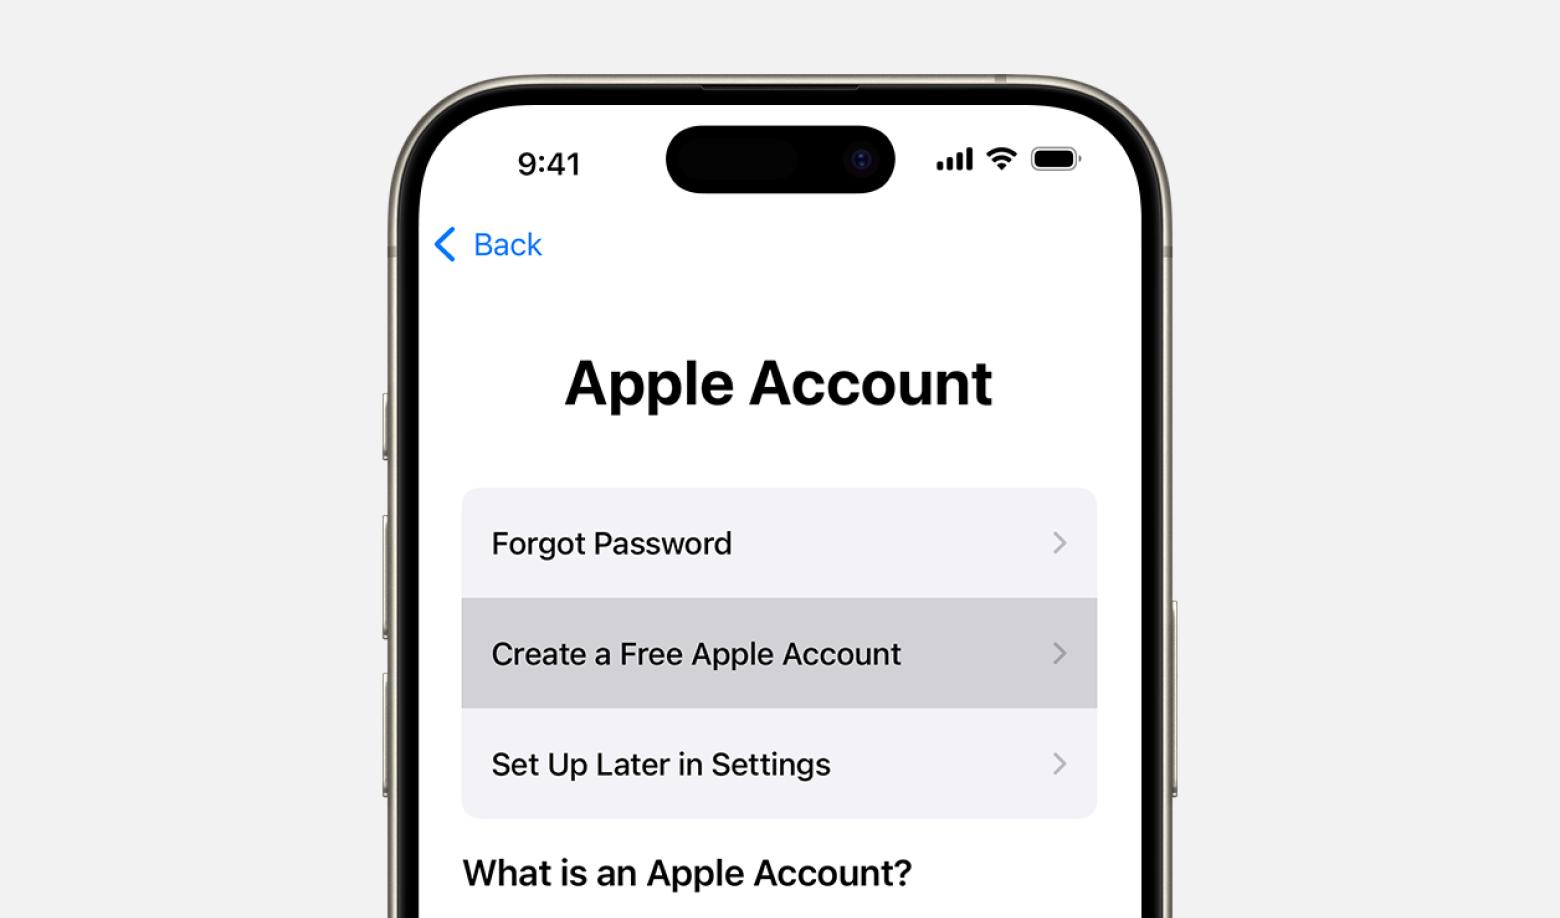
You need an Apple Account to sign in to the App Store, iCloud, and other Apple services to sync all data, apps, and settings across devices. However, if you need a new Apple Account and Password, you can simply create it by following the steps on your new iPhone:
- When you set up your new iPhone, choose the “Forgotten password or don’t have an Apple Account?” option.
- Tap Create a Free Apple Account.
- Set your name and birthday > Continue.
- Enter the email address that you will use to sign in to your Apple Account.
- Follow the on-screen instructions.
Source: support.apple.com
Checking Wi-Fi network details using NetSpot
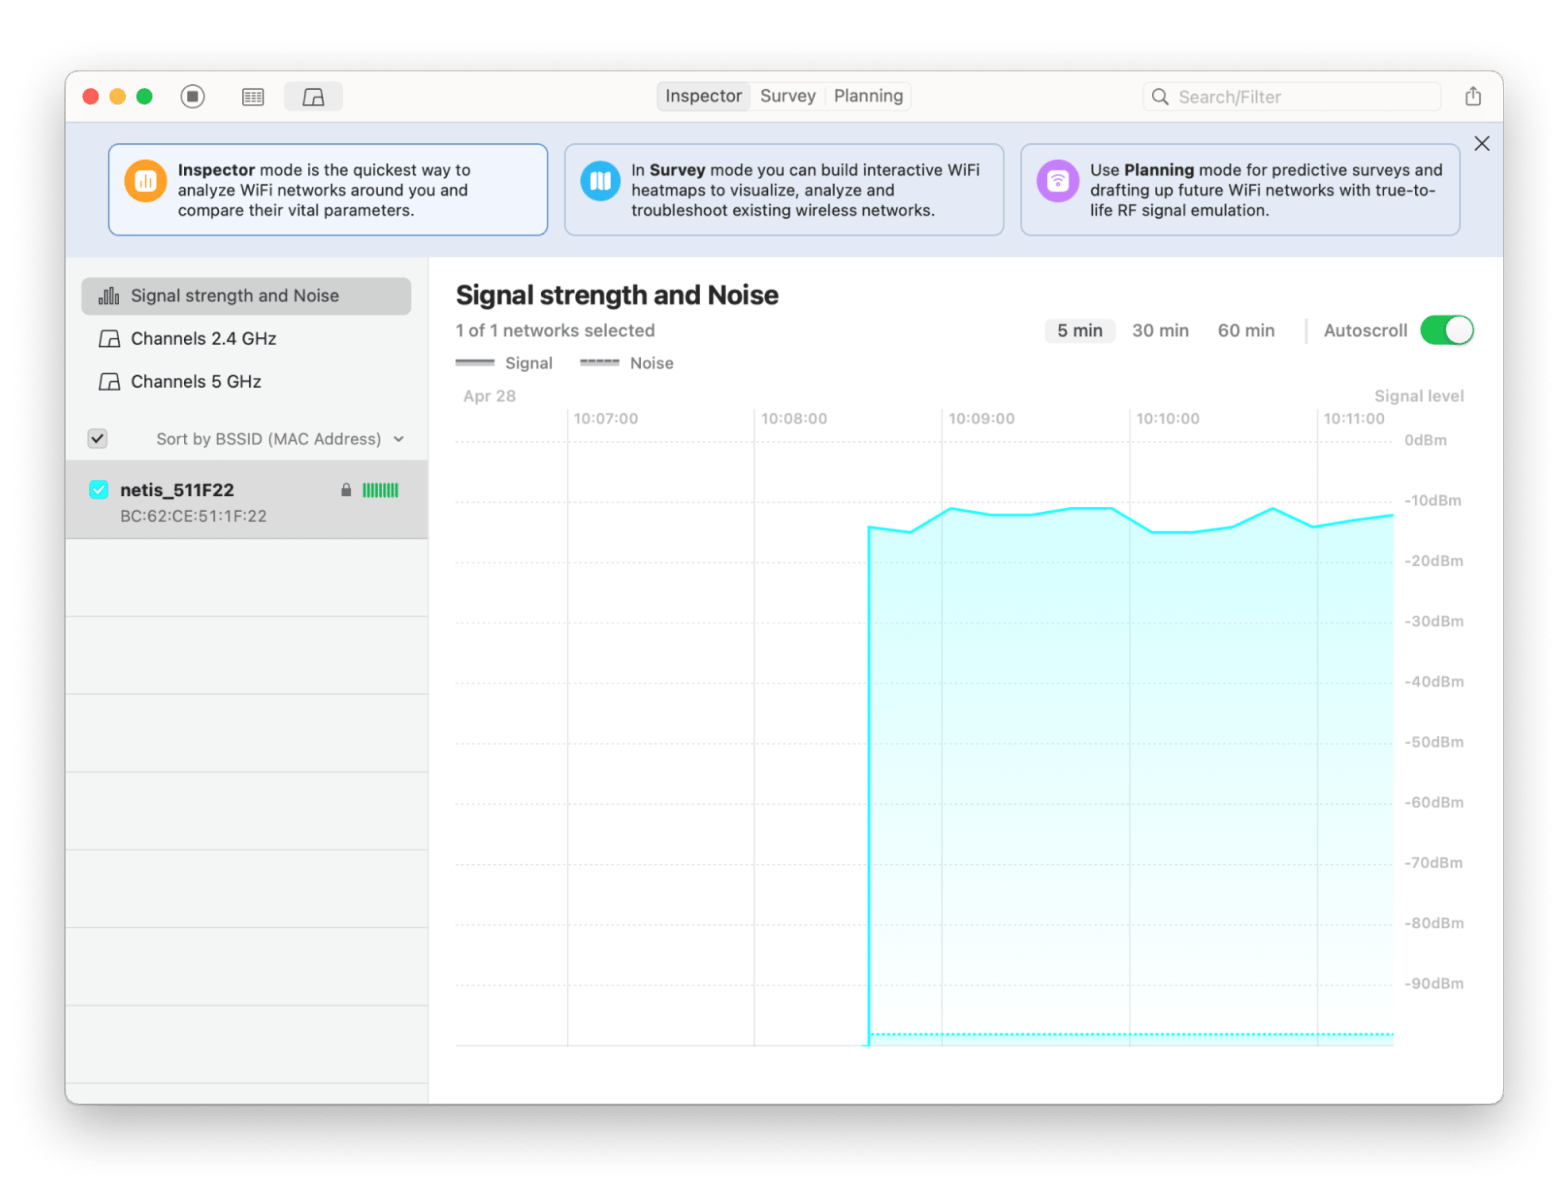
Make sure to have your Wi-Fi network ready to connect your new iPhone to the internet easily. If you are having some issues connecting, you can use the NetSpot app to analyze your home Wi-Fi. This app is very helpful in testing signal strength and selecting the optimal Wi-Fi connection during setup.
Here is how to use this app:
- Install and open NetSpot.
- Click the Inspector tab.
- Check your network signal strength.
SIM card or eSIM setup requirements
If you’re using a physical SIM card, ensure that you have the SIM card pin to open the tray. The pin can usually be found in the new iPhone box. However, if you use eSIM, the process would be slightly different.
Here is the process of how to set up new iPhone eSIM:
- Make sure your new iPhone is connected to Wi-Fi (eSIM requires network for setup).
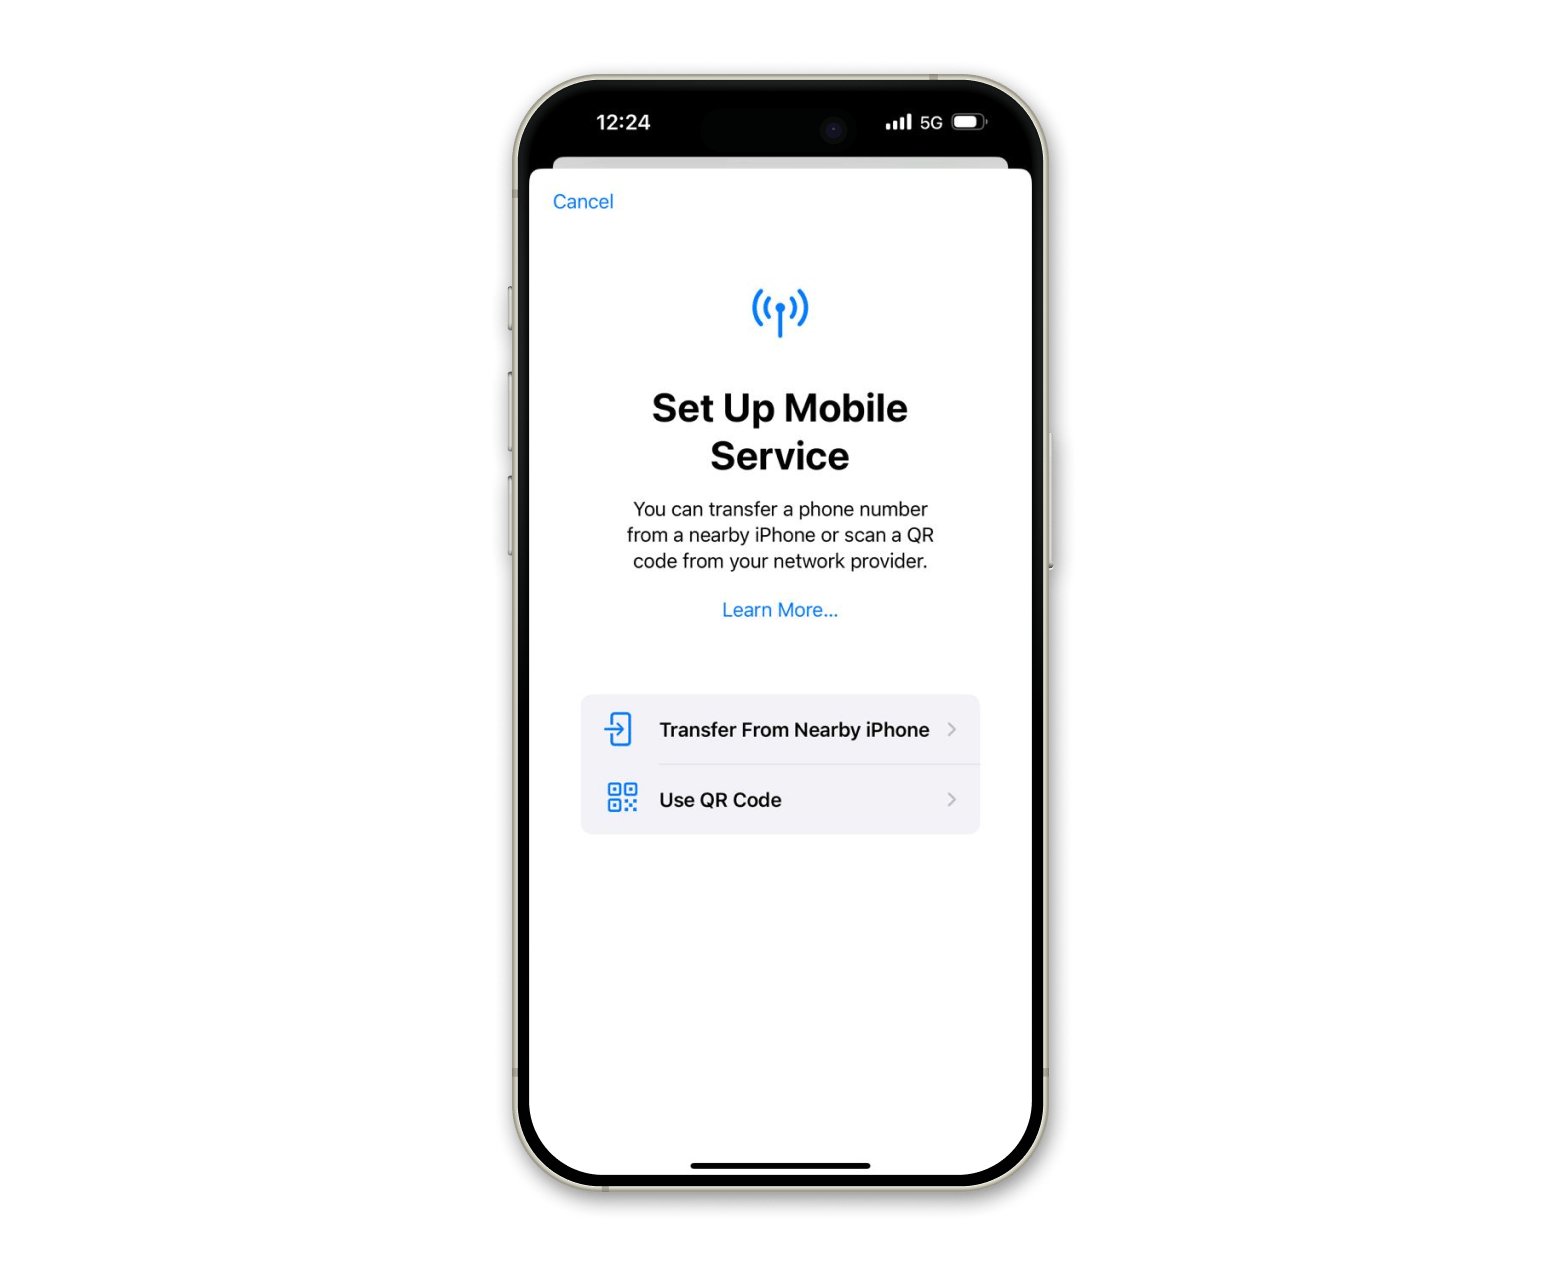
- Go to Settings > Mobile Service > Tap Add eSIM.
- Choose Transfer From Nearby iPhone or Use QR Code.
- Follow the on-screen instructions.
Data transferring to a new iPhone
Once your iPhone is activated, it is time to transfer all the important data from the old device to the new one. Here is how you can transfer your data.
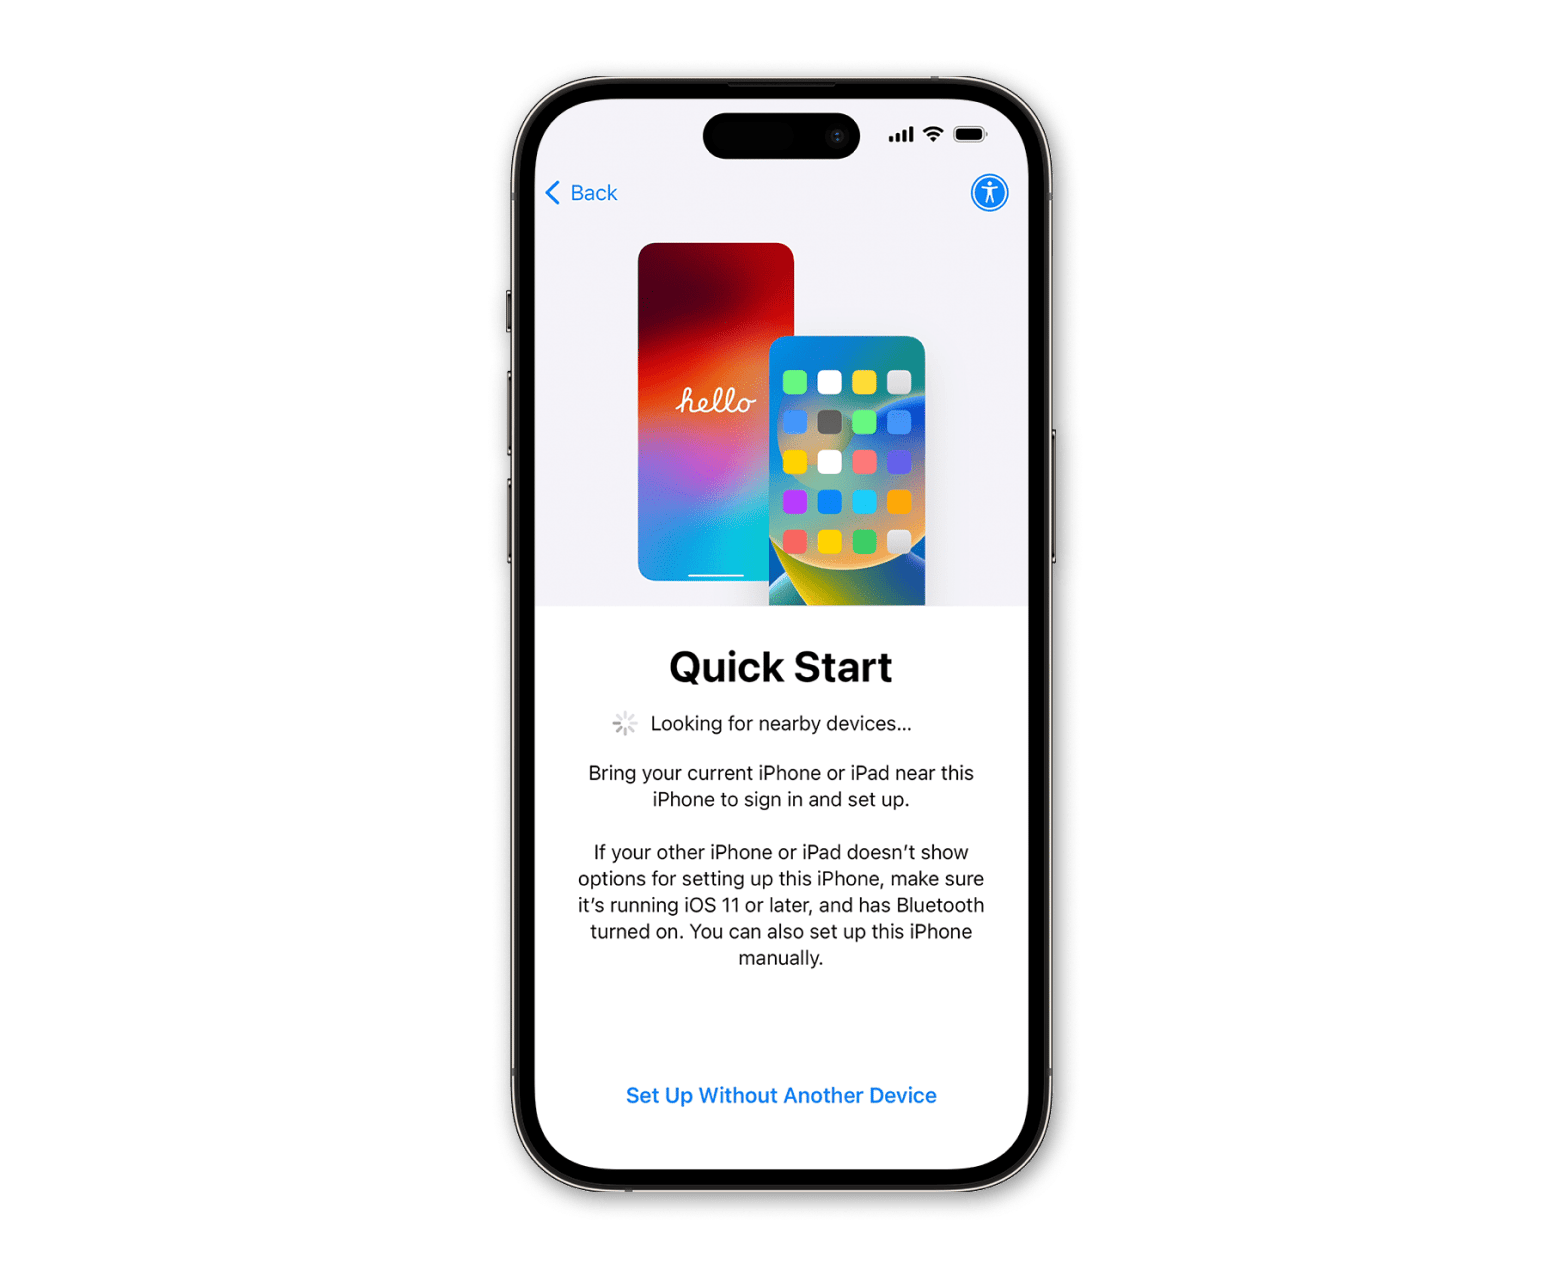
Use Quick Start
- Connect the old iPhone to Wi-Fi and turn on Bluetooth.
- Power on your new device, connect to Wi-Fi, and place it next to your old device.
- Follow the onscreen prompts and get started with the setup process.
- If onscreen prompts don’t pop up, restart both devices and place them close again.
- Set up Face ID or Touch ID for more security.
- Choose how to transfer data:
- Download from iCloud: Your apps and data will slowly download in the background.
- Transfer directly from your old device: Wait for the transfer to complete on both devices.
- Keep both devices close to each other and plugged in until the transfer is all done.
Source: support.apple.com
Restoring data from iCloud Backup
Restoring data with iCloud backup will set up your new device efficiently without the need to transfer data manually.
Here is how:
- Turn on your new iPhone.
- Follow the on-screen setup steps.
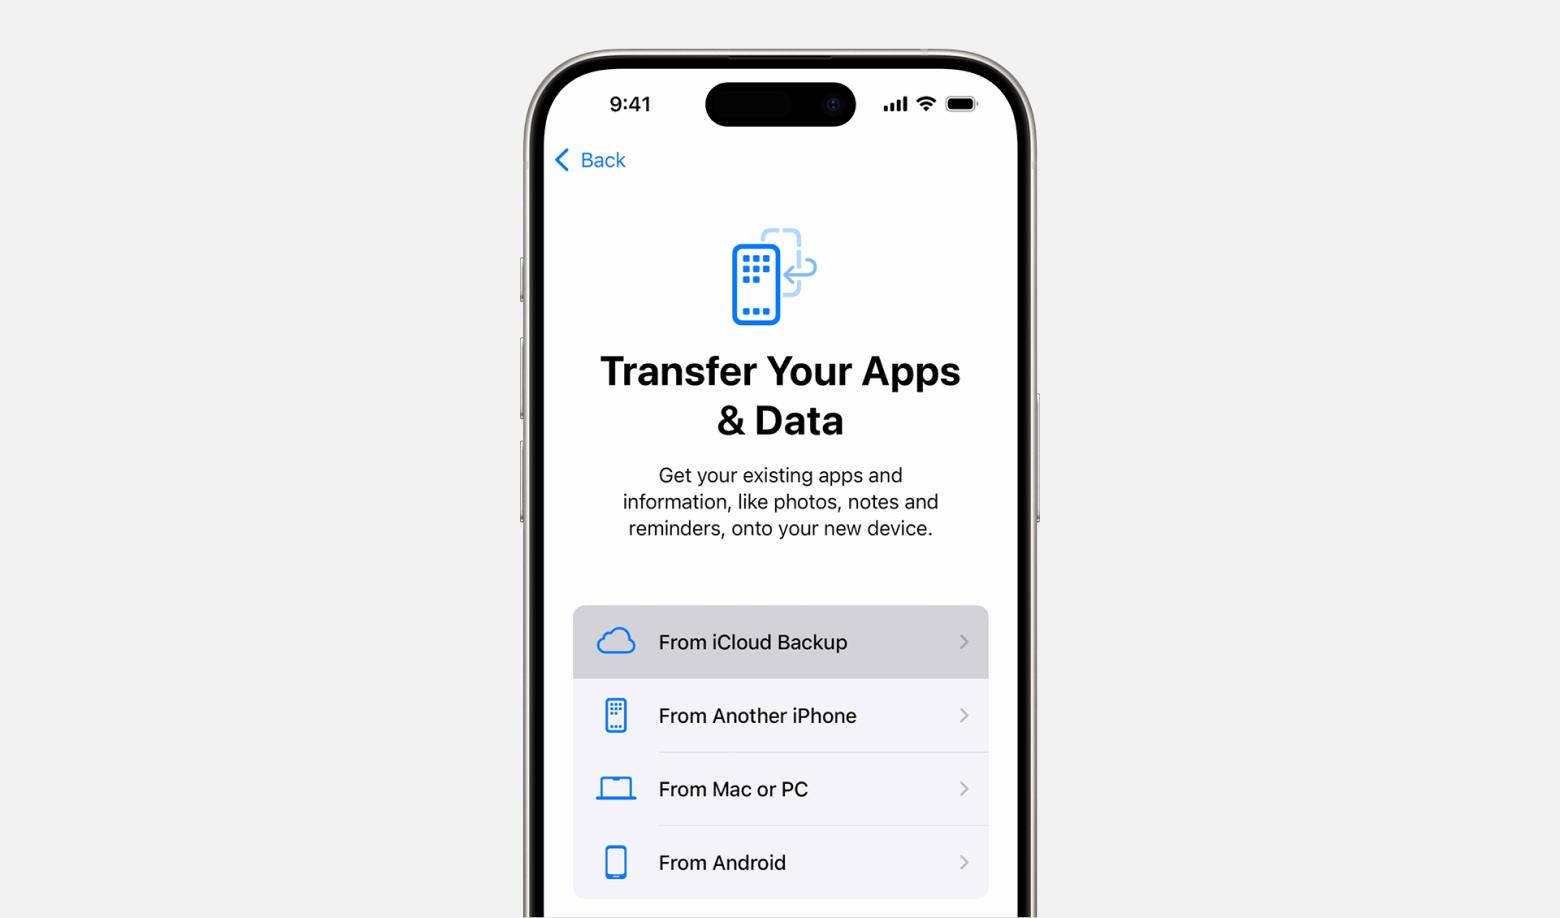
- Tap Transfer Your Apps & Data > From iCloud Backup.
- Sign in to iCloud using your Apple Account.
- Choose a backup by checking the date and size, then start the transfer.
- Now, restore all apps and purchases.
- Keep your device connected to Wi-Fi and power for the smoothest experience.
Source: support.apple.com
A short thought on SIM
Depending on your setup, you can use a physical SIM or eSIM (instructions above). To set up a physical SIM, follow these steps:
- Find the SIM tray on the new iPhone. You will usually find the tray on the right-hand side.
- Insert the SIM ejector pin (provided in the box) into the small hole next to the tray.
- Place your SIM card in the tray.
- Gently push the tray back into the iPhone.
Now, you can make calls, send texts, and use mobile data.
Adding other accounts to your new iPhone
Here is how you can add other accounts (Gmail, iCloud, etc.) to the new iPhone. I’ll show you how to add your email account:
- Go to Settings > Apps > Mail.
- Tap Mail Accounts, then tap Add Account.
- Choose the email service you want to use, like iCloud, Microsoft Exchange, or Gmail.
- Enter your email account information.
- If your email service isn’t listed, tap Other.
- Tap Add Mail Account, and then enter your email account information.
Troubleshooting for iPhone set up
Setting up my iPhone was a smooth process. However, with various considerations in mind, several issues arose during and after I set up new iPhone.
Testing key features
I set up the iPhone and tested the basic features like:
- Make a call to test cellular functionality: The best way to check the network connection on your new iPhone is to make a call. If you can’t make a call, check the network and see if the SIM is inserted properly.
- Send a message: You can test your phone’s messaging system to see if it is working properly.
- Trying out FaceTime: Test the FaceTime app to ensure it is working as expected. Connect to your favourite person, or if you own a second phone.
Troubleshooting activation issues
During the setup process, activation failed on my phone. Here are the few steps I followed to resolve it:
- Check your internet connection: Activation issues often happen due to poor or interrupted connections. Therefore, check the Wi-Fi network or cellular data, ensuring it is stable.
- Restart your device: It’ll give your device a fresh start. Restarting the phone resolves temporary issues.
- Check for software updates: I go to Settings > General > Software Update and choose Download and Install for the latest iOS version.
- Contact Apple support: I reached out to Apple support for further help when I could not resolve the activation problem on my own.
Here’s also a useful guide on how to activate Apple Card.
How to activate security settings
One final step before you begin…
I know you are raring to go, everything is set up, and the online world is calling you. But wait! Surfing the web without proper security for your phone can lead to many disasters: somebody could hack your iPhone, or your data may be stolen! You should activate your security settings to nip these problems in the bud. Let’s learn how it is done.
Face ID and Passcode
To activate Face ID and Passcode:
- Go to Settings and tap Face ID & Passcode.
- Enter your passcode or create one if you haven’t already set it up.
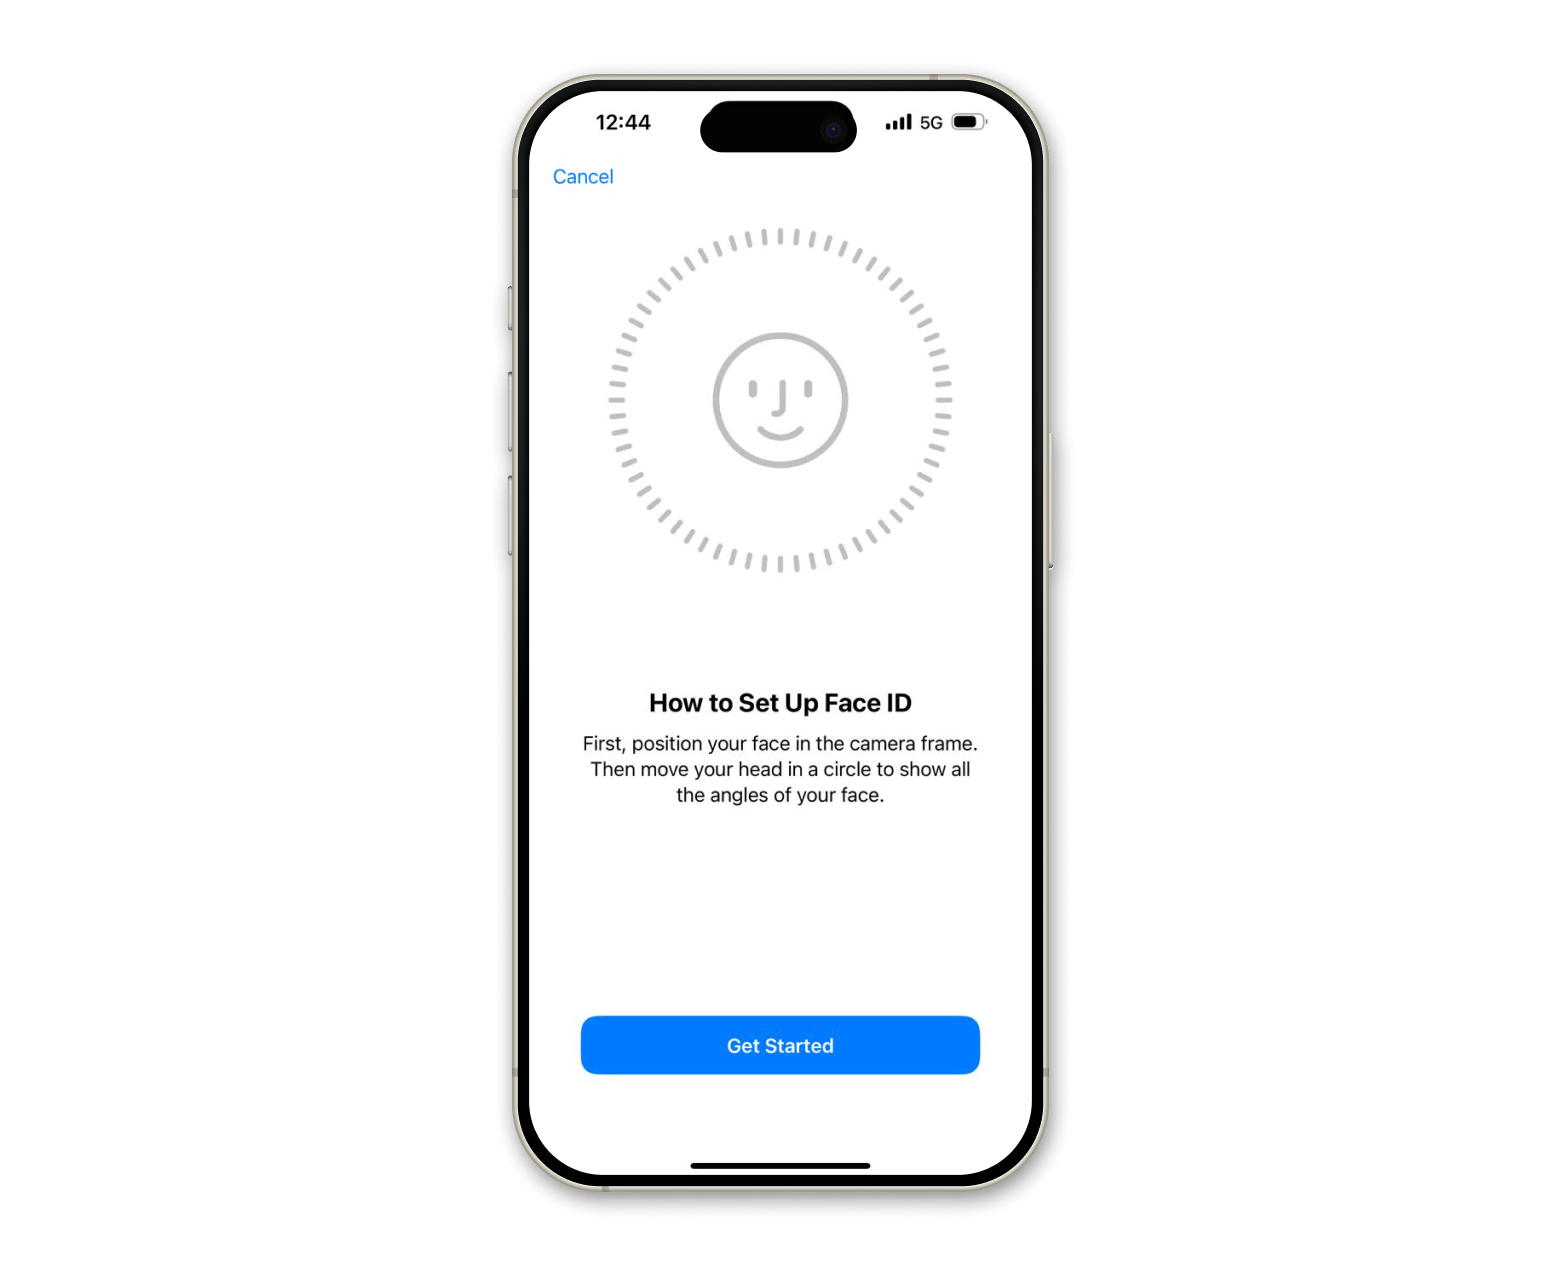
- Tap Set Up Face ID.
- Hold your device in portrait mode and tap Get Started.
- Tap Continue after the first scan.
- Move your head to complete the circle a second time > Done.
Update phone automatically
Automatic updates save you a lot of hassle if you don’t want to deal with manual updates all the time.
To turn on automatic updates:
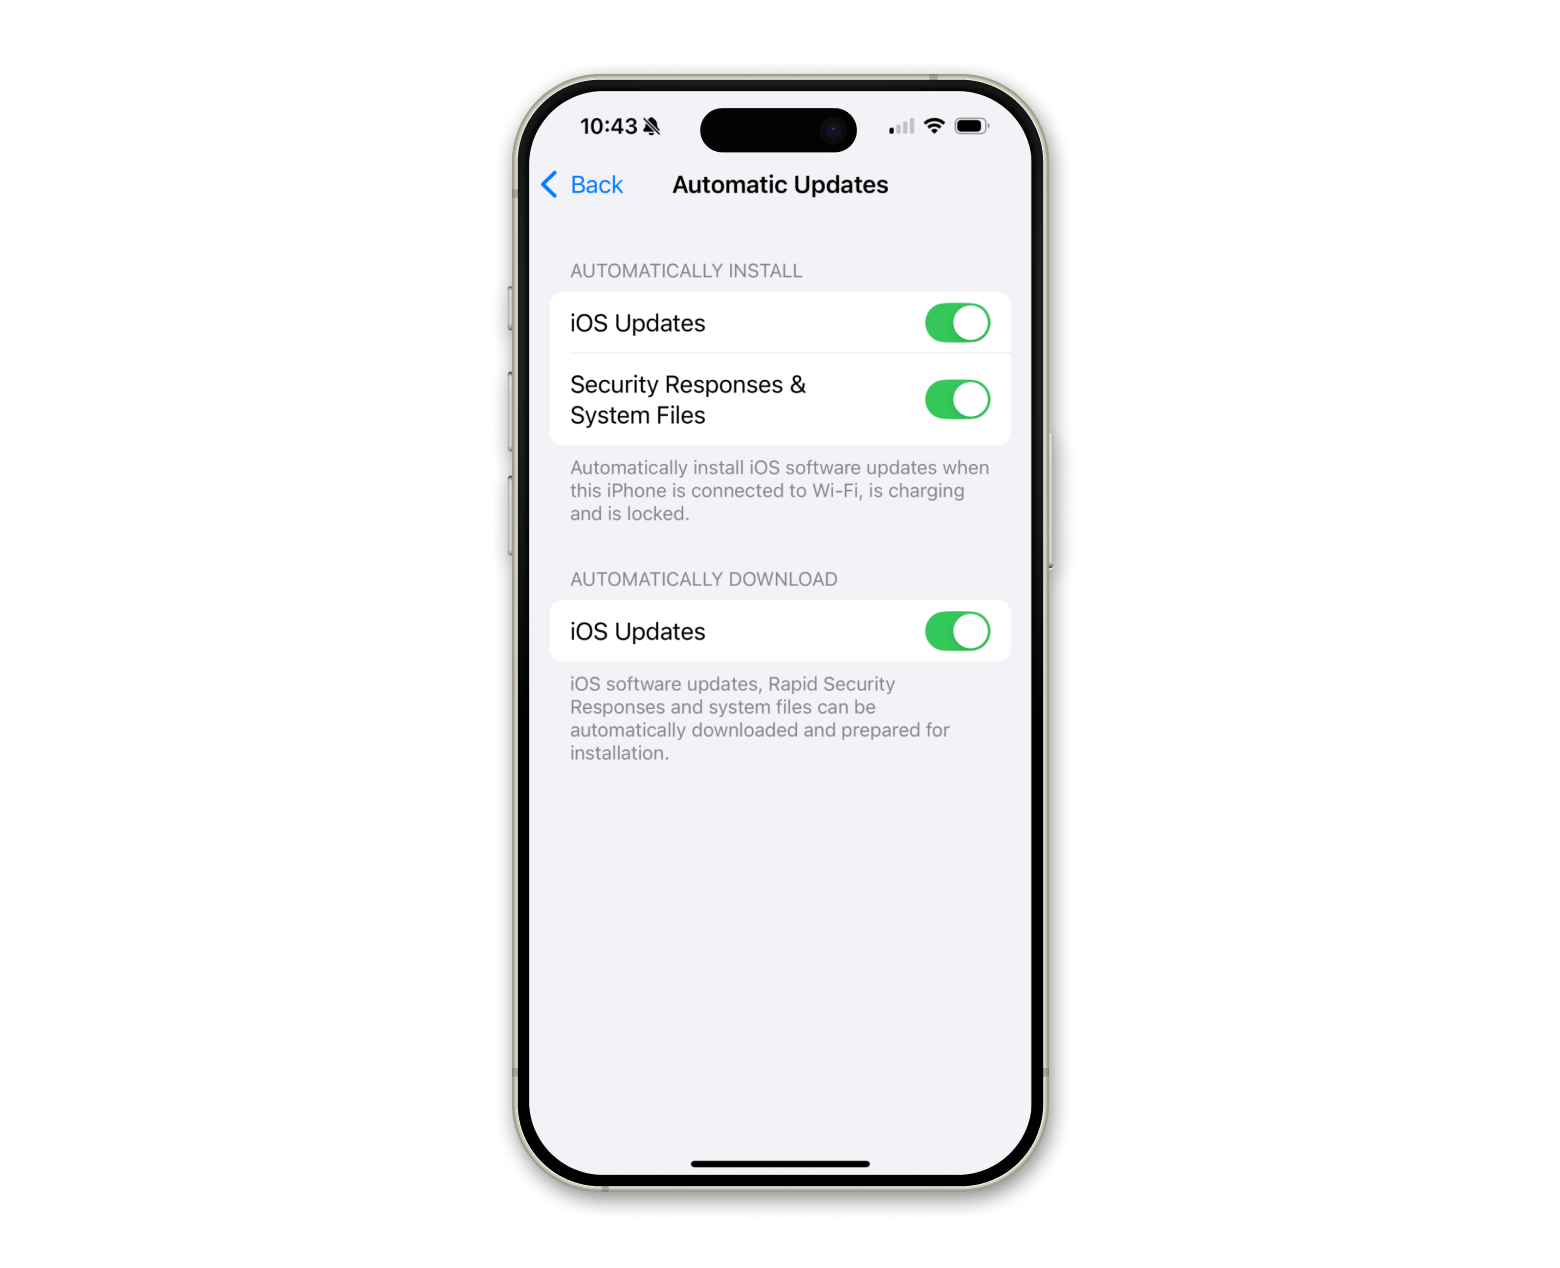
- Go to Settings > General > Software Update > Automatic Updates.
- Turn on the iOS Updates toggles.
- The iPhone will automatically download and install updates whenever a new update is available.
Add Touch ID
Touch ID makes your iPhone secure against unauthorized access and makes everyday tasks like unlocking your phone or authorizing app downloads.
Here’s how you can set up Touch ID on your iPhone:
- Go to Settings > Touch ID & Passcode.
- Turn on the options under Use Touch ID For and follow the on-screen instructions.
Note that Touch ID is available on:
- iPhone SE (1st, 2nd, and 3rd generations)
- iPhone 5s
- iPhone 6 / 6 Plus
- iPhone 6s / 6s Plus
- iPhone 7 / 7 Plus
- iPhone 8 / 8 Plus
On newer models without a Home button (like iPhone X and later), Apple uses Face ID instead.
Secure your internet connection
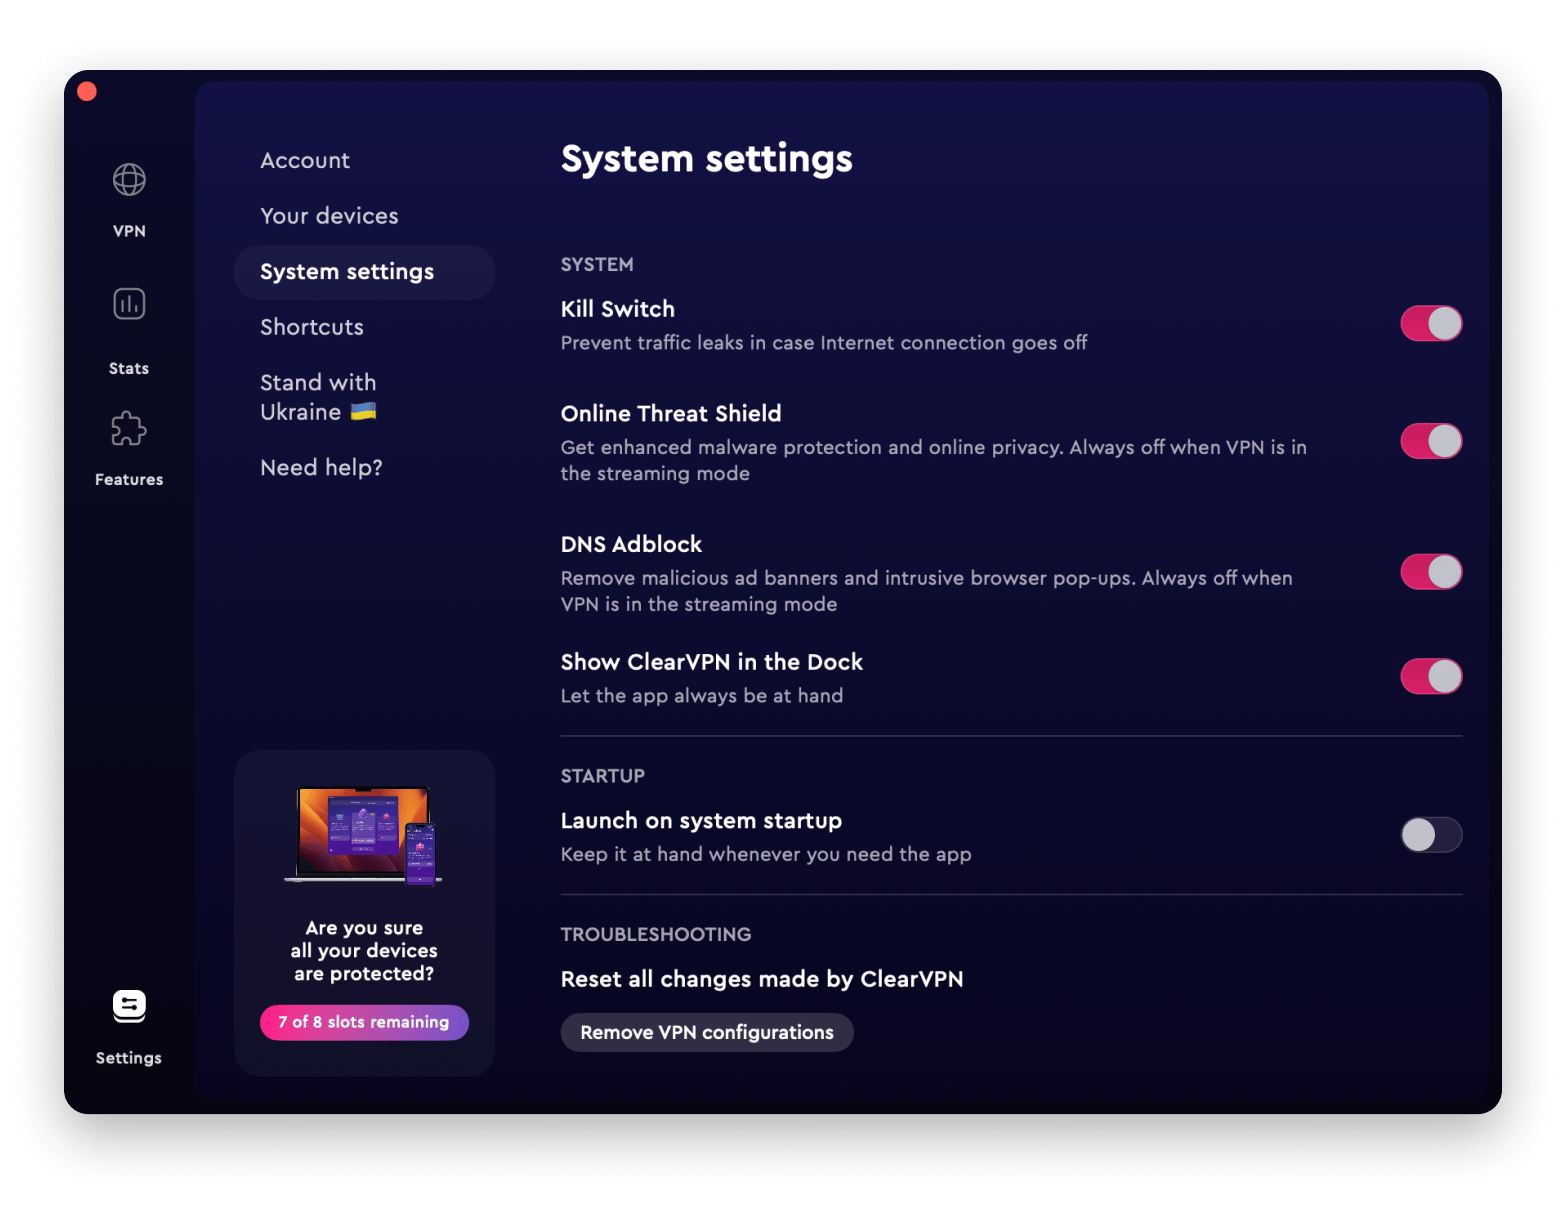
Your iPhone is all set up, but your internet connection can still cause security issues. Public Wi-Fi networks and unsecured websites can still leave your data vulnerable. That’s why I use ClearVPN to maintain a worry-free and private connection while browsing the web on my iPhone.
I like its Kill Switch feature, which disconnects you from the internet if the VPN is cut off, so no data leaks to worry about. You can turn this feature on and off anytime.
As a new user, how can you create an Apple ID?
Your Apple Account (formerly Apple ID) is your key to the world of Apple. Apps, updates, features, games, or even purchases require an Apple Account.
Here’s how to do this:
- On your new iPhone, tap Forgotten password or don’t have an Apple Account?.
- Tap Create a Free Apple Account.
- Set your name and birthday > Continue.
- Enter the email address that you will use to sign in to your Apple Account.
- Follow the on-screen instructions.
Now, you’re ready to dive headfirst into the Apple world.
Activate and set up your new iPhone smoothly!
Activating and setting up your new iPhone is now easy. I followed the right steps and used some apps like CleanMy®Phone to prepare my old device for transfer, NetSpot to connect my iPhone with an optimal Wi-Fi during setup, ClearVPN to keep my browsing safe, and Dropshare for transferring files between devices with ease.
All these apps are available on Setapp for Mac and iPhone. Setapp is a collection of apps and powerful tools that help you accomplish any task that you can think of. You can enjoy 250+ apps for 7 days free on Setapp and make setting up your new iPhone hassle-free.
FAQ
How do I back up before setting up a new iPhone?
To back up before setting up a new iPhone, you can use iCloud Backup or your Mac to create backups and then transfer them to your new iPhone.
Can I activate a new iPhone without a Wi-Fi connection?
No, you can not activate a new iPhone without a Wi-Fi connection unless you have a working SIM card with a mobile data plan. Normally, iPhone activation requires an internet connection to contact Apple's servers and complete the setup.
What is the best way of transferring to a new iPhone?
The best way to transfer to a new iPhone is using Quick Start, the Dropshare app, iCloud Backup, or creating a local backup using Finder on macOS or PC.
Do I need to set up Face ID or Touch ID during activation?
While setting up Face ID or Touch ID is not mandatory during activation, it’s highly recommended for added security and convenience.


