FocuSee zooms in on your clicks automatically: This Mac screen recorder adds auto-zoom as you record, so viewers can follow every step. You can still change how far it zooms or delete any zoom on the timeline.
The frame follows your cursor: When zoomed in, the view moves smoothly with your pointer. Each click gets a small ripple, so nobody has to guess what you pressed.
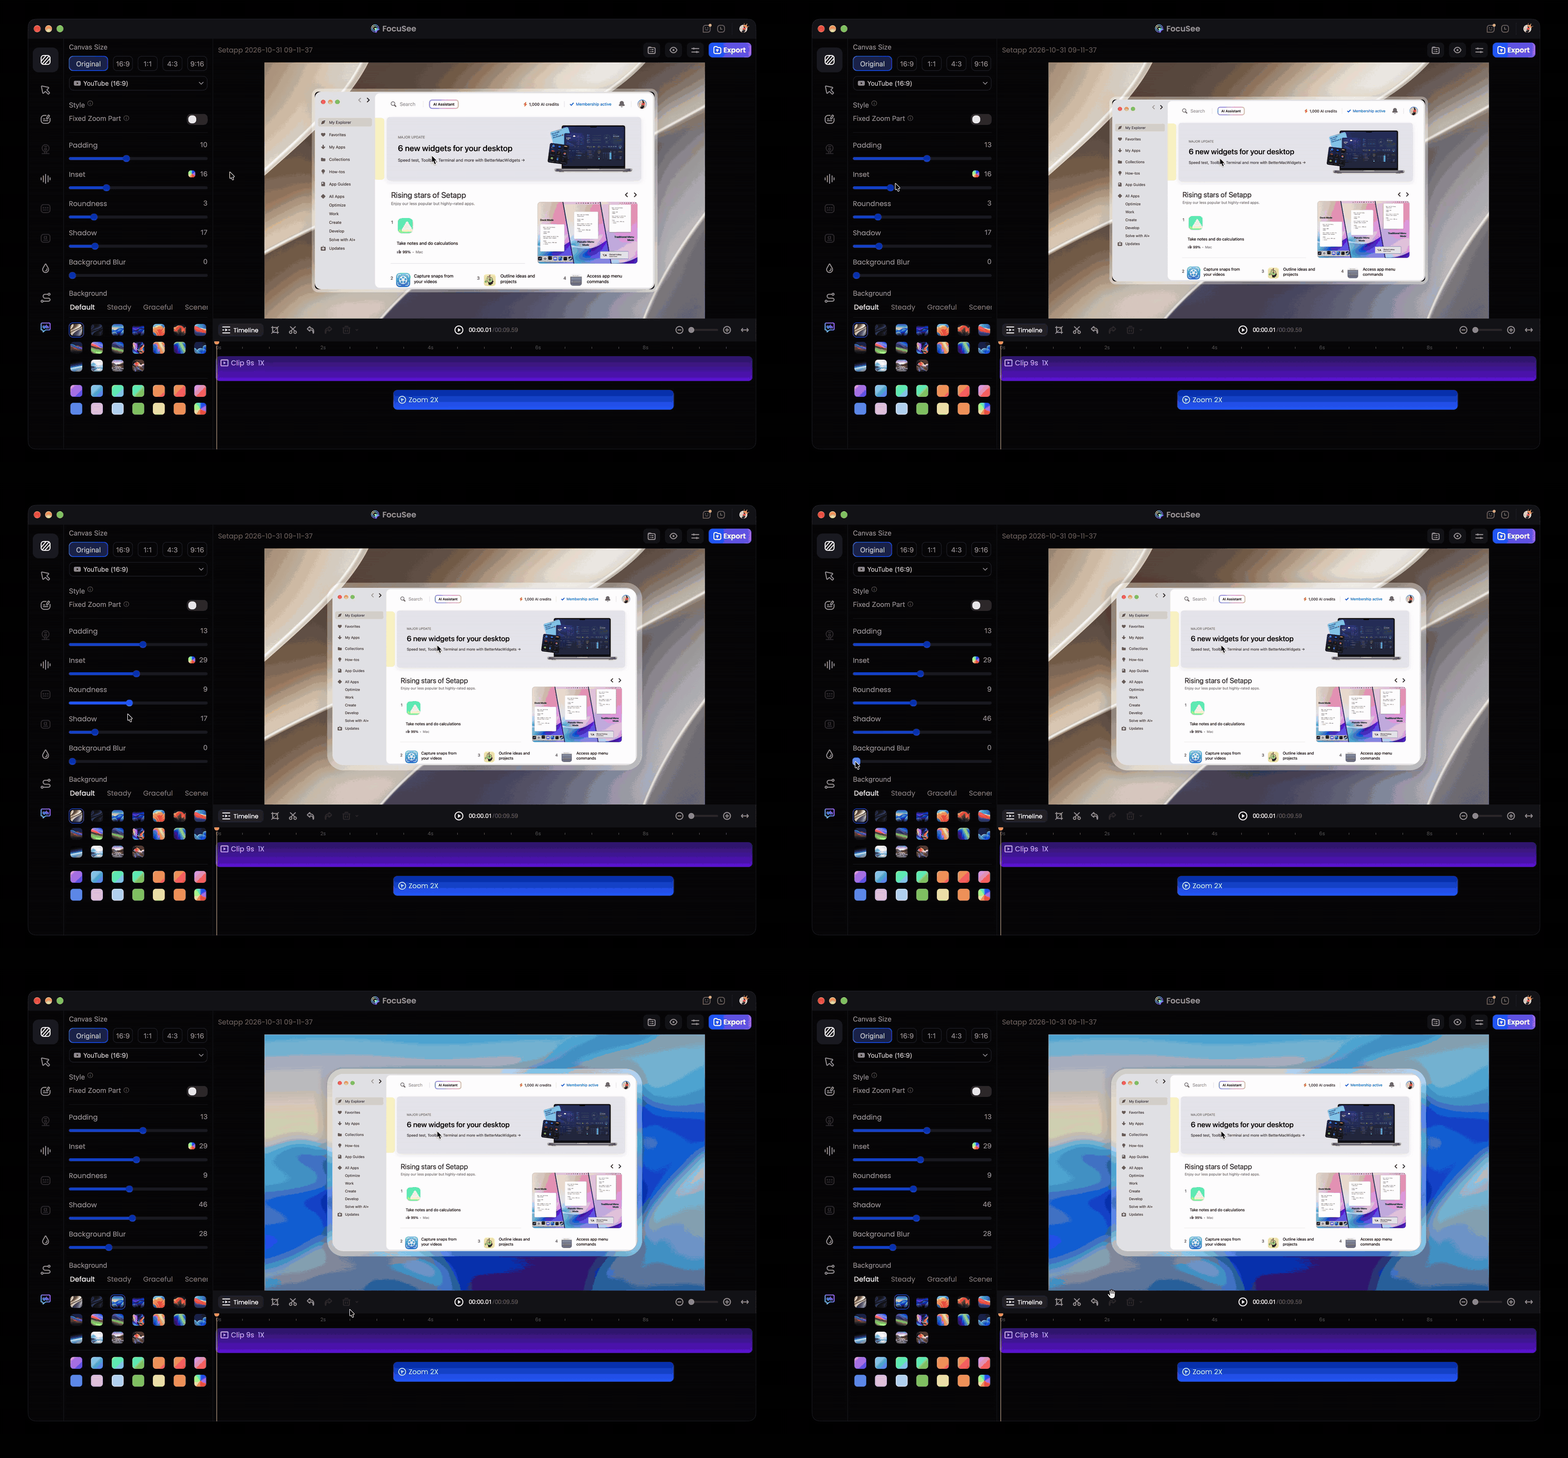
Backgrounds look consistent across videos: Blur or replace the background, adjust shadows, padding, and roundness, then save it as a preset for your next recording.
The editor covers the basics: Trim mistakes, speed up segments, add auto captions, and reduce noise. Then export MP4 or GIF in up to 4K at 60fps without opening another app.
FocuSee for Mac is a screen recorder with a built-in zoom effect, available on Setapp. It zooms in on every click, follows your cursor, and cleans up the frame while you record, which lets you skip most of the editing.
Regular screen recordings look flat, and editing them takes time, so I’ve been using FocuSee for tutorials, quick walkthroughs, and “here’s where the setting is” videos. This FocuSee app review covers setup, the settings worth trying, and when it fits.
To see what FocuSee adds, I compared it with the screen recorder built into macOS, feature by feature:
Feature
Apple’s built-in recorder
FocuSee
Auto-zoom on clicks
No
Yes, automatic
Cursor-following zoom
No
Yes
Click highlights
Basic click circle
Ripple on each click
Background styles
No
Blur, padding, shadows
Reusable presets
No
Yes, save as preset
Trim recordings
Yes
Yes
Speed up segments
No
Yes
Auto captions
No
Yes
Noise reduction
No
Yes
Export formats
MOV
MP4 and GIF
What is FocuSee?
FocuSee from Setapp is a screen recorder with a zoom effect built in. It records your screen, webcam, and voice, then handles most of the editing too: zooming in on clicks, following the cursor, and cleaning up the frame.
The FocuSee screen recorder is just the ideal tool for:
Tutorial creators: YouTube how-tos, course lessons, and app walkthroughs
Product teams: Feature demos, release videos, and quick explainers for customers
Educators: Lessons where students need to see exactly where you clicked
It's not 100% automatic, and you still get to fine-tune things. But for me, the first version is usually good enough to share.
How to record with FocuSee
Setting up FocuSee on Mac takes a couple of minutes. Most of that is giving macOS the right permissions.
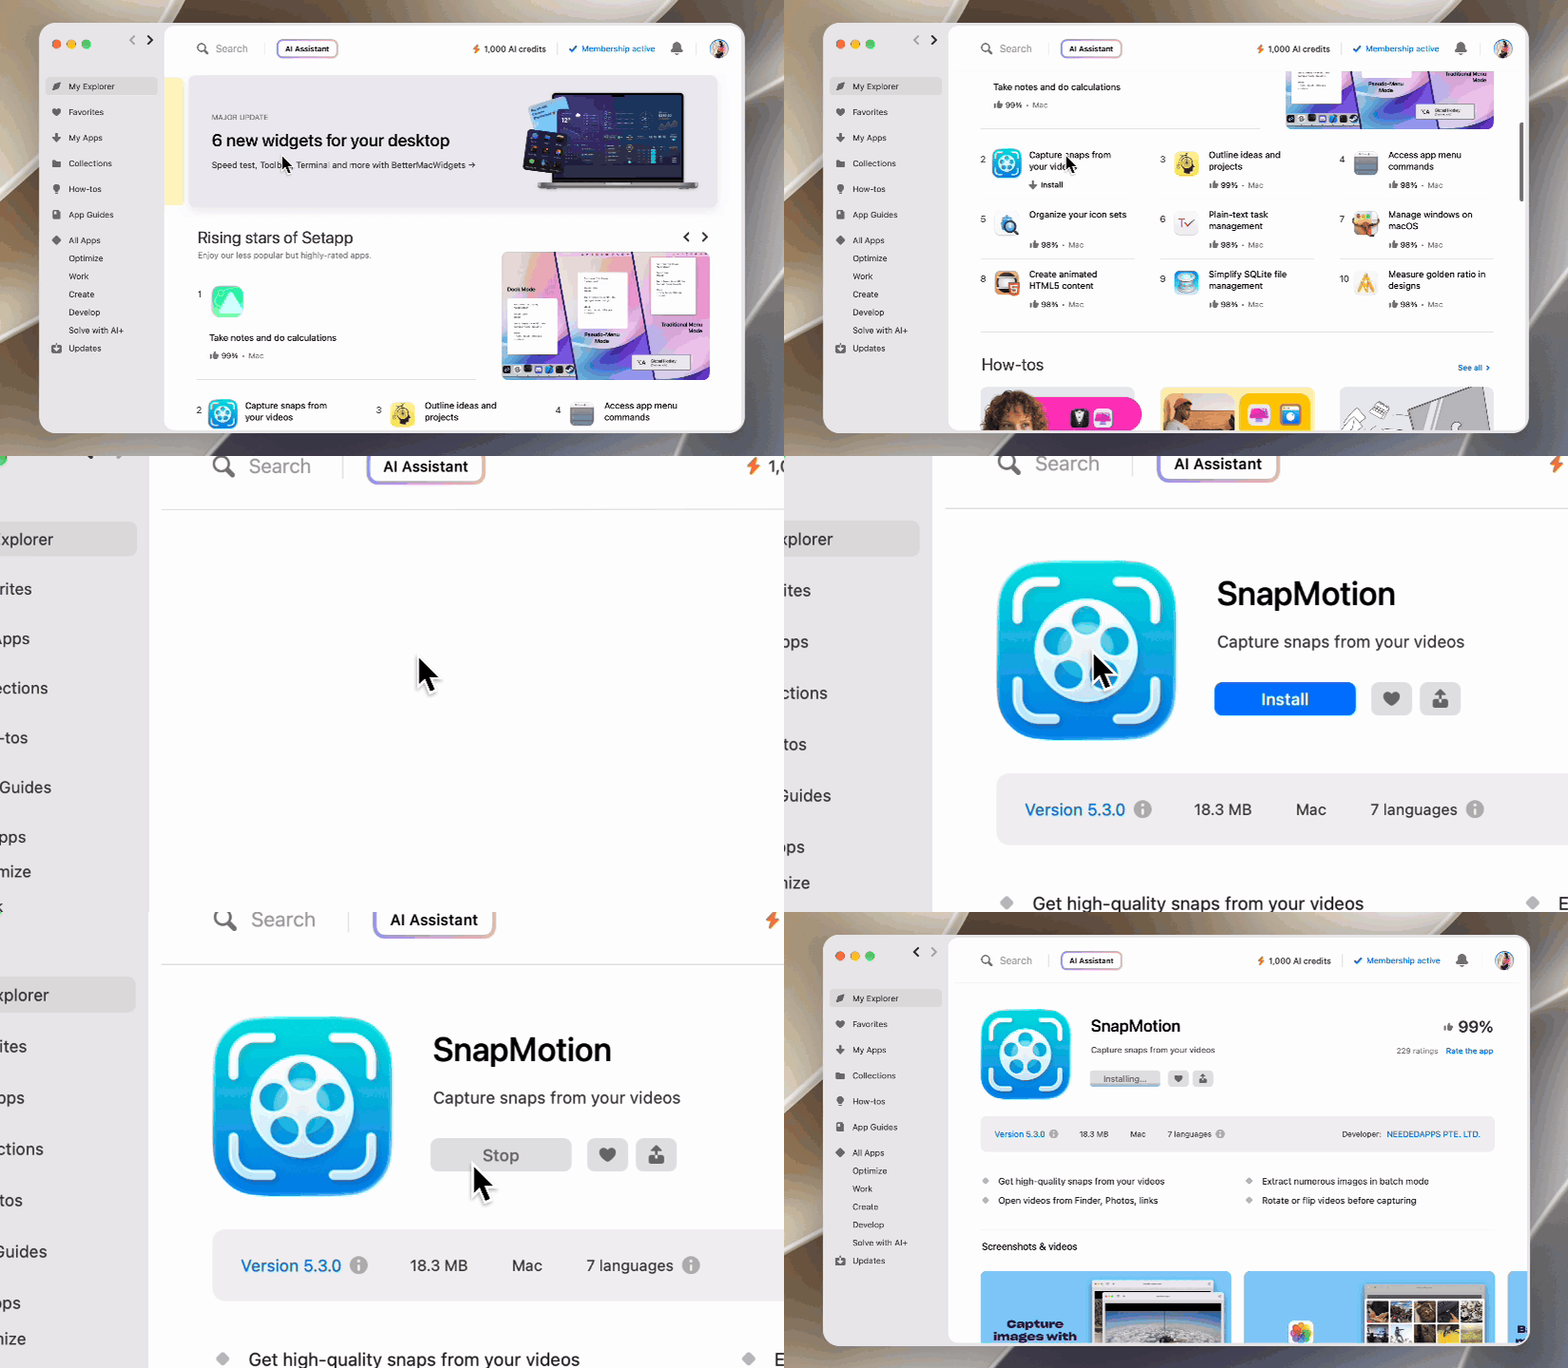
Install FocuSee via Setapp
Get FocuSee through Setapp, a subscription platform that offers 300+ macOS, iOS, and web apps for $14.99 USD/mo + tax and includes a 7-day free trial. After you activate your subscription, follow these steps:
With Setapp, you get FocuSee Standard. It covers everything except the AI avatar feature, which is a digital presenter that talks through your video instead of you.
Configure your recording area and inputs for FocuSee
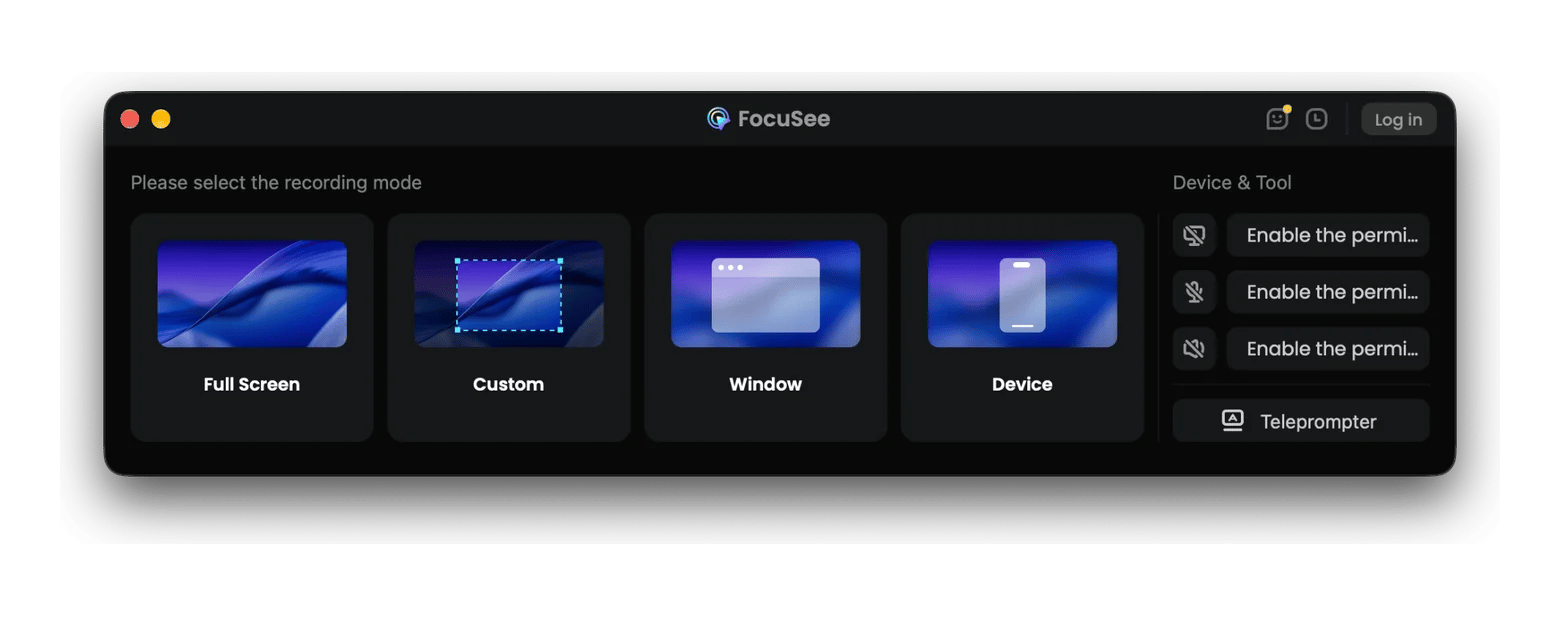
On first launch, FocuSee asks for Recording, Camera, and Microphone permissions (as you can see on the right side of the image below). Allow them all.
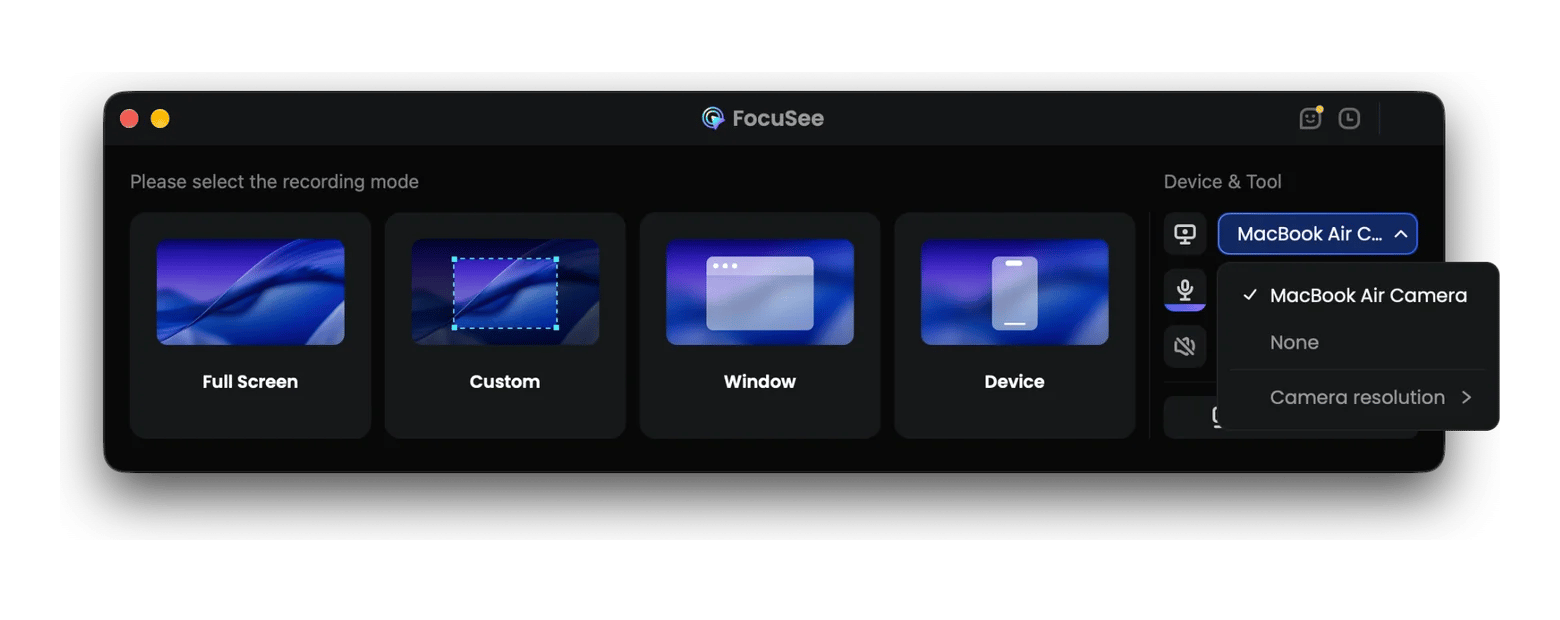
Then, choose your preferred microphone and camera if you are using any external devices.
Pick a recording mode in FocuSee
FocuSee gives you four recording modes:
Full screen: Records everything on your display
Window: Records one app only
Device: Records the screen of an iPhone or iPad connected to your Mac
Custom: Lets you drag a frame around just the part you need
I use Window mode most of the time. It keeps stray notifications and a messy desktop out of the shot.
Start recording with FocuSee
Here’s how to start recording:
Click the mode you want. If you pick Window, click the window you’d like to record.
Use the toolbar at the bottom of the screen to turn your mic and camera on or off and adjust the zoom effect settings.
Click REC to start recording, and click Stop when you’re done.
The editor opens with your recording, ready for the next step. Below is a short clip I recorded and exported with the default settings. No extra editing.
Adjust auto-zoom settings in FocuSee
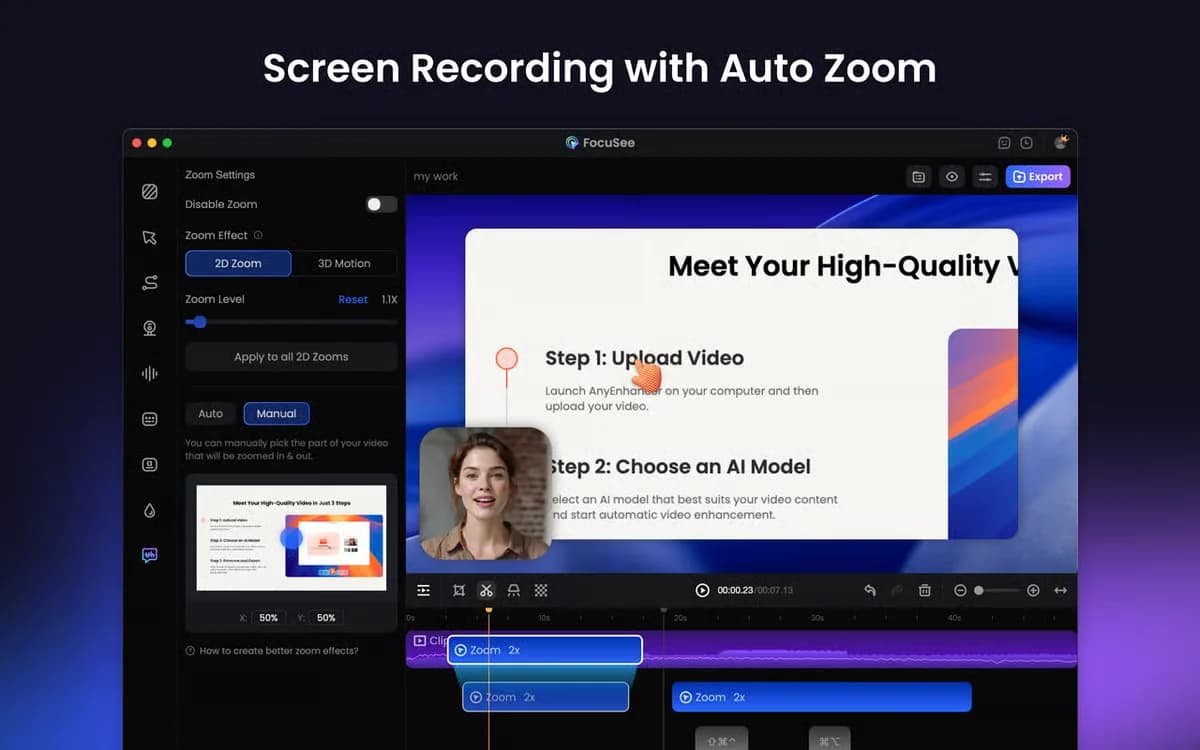
By default, FocuSee adds a zoom wherever you click. In the editor, each auto zoom of the screen recording shows up as a block on the timeline. From there, you can:
Change how far it zooms in
Drag the edges to make a zoom start earlier or last longer
Delete zooms you don't need
Add your own zoom and drag the blue circle to the exact spot
The defaults are good. I usually just remove a zoom or two where I clicked something unimportant.
Source: https://setapp.com/apps/focusee
Key features of FocuSee
I have tried different screen recording tools, including Apple's default. I can recommend FocuSee for Mac for the following reasons.
Cursor-following zoom
The frame follows your cursor when zoomed in, so viewers never lose track in tutorials. The zooming is smooth, which gives your video a premium look. That’s what you want from a good screen recorder with a zoom effect.
Background customization
One useful customization is the background. You can blur it, change the background, and adjust shadows, padding, inset, and roundness. You can also save it as a preset, so every video has the same background. It's a great finishing touch, a perk for creators making video series.
Click highlights
Each click shows a small ripple, and it’s a nice touch. In many screen recordings, you can’t even tell whether the person clicked a button or just switched windows. With FocuSee, viewers notice every click.
You can make the cursor bigger for people watching on a phone. FocuSee can also show the keyboard shortcuts you press.
In-app editing
The editor is also pretty useful. It covers the basics, so you don’t have to look for another app to edit. You can:
Trim the ends or cut out mistakes
Speed up segments
Add auto captions from your voiceover
Reduce noise and boost quiet audio
Add a webcam frame or a call-to-action
On longer edits, save your project every now and then, since some users have reported crashes.
Export options
First, set the canvas size in the editor to match where your video is going:
16:9: YouTube and most tutorials
9:16: Shorts, Reels, and TikTok
1:1 or 4:3: Social posts and other platforms
Then click Export and choose:
Format: MP4 for videos with sound, GIF for short, silent clips
Quality: From 720p up to 4K, at up to 60fps
Long 4K videos sometimes take a while to export, and that’s normal.
When FocuSee is the right tool
Here are the use cases where FocuSee has saved me the most time, with the setup I’d use for each:
Product demos: Use Window mode, a background in your brand colors, and a 16:9 canvas.
Tutorial videos: Many creators call FocuSee the best screen recorder for tutorials on Mac. Turn on captions and shortcut display, and switch to 9:16 for YouTube Shorts.
Bug reports for dev teams: A short GIF nails a bug report better than three paragraphs. Record in Custom area mode and keep the clicks highlighted. You can drop the GIF straight into a ticket.
Team onboarding videos: Record the walkthrough once and share the link with every new hire. Turn on the webcam and noise reduction for a more personal touch.
Is FocuSee worth it for polished screen recordings?
Yes, FocuSee is worth it if you record your screen for other people. This Mac screen recorder adds auto-zoom, cursor following, click highlights, and a clean background while you record, so in my experience the first export is usually good enough to share.
FocuSee is included in Setapp Membership, along with 300+ macOS, iOS, and web apps, for $14.99 USD/mo + tax. Start your 7-day free trial, record your next tutorial with it, and cancel anytime.
FAQ
Is FocuSee free on Mac?
No, FocuSee isn't free on Mac, but you can try it free for 7 days with Setapp. After the trial, it's included in Setapp Membership for $14.99 USD/mo + tax, along with 300+ other macOS, iOS, and web apps.
What is FocuSee used for?
FocuSee creates easy-to-follow screen recordings, like tutorials, product demos, onboarding videos, and bug reports. The FocuSee screen recorder automatically zooms in on your clicks, follows your cursor, and adds a clean background, so your videos look edited without much effort.
Does FocuSee record audio?
Yes, FocuSee records audio. It can capture your microphone for voiceover and your Mac's system audio at the same time. In the editor, you can reduce background noise, boost quiet audio, and generate captions from what you said.
Can I use FocuSee for YouTube tutorials?
Yes, you can use FocuSee for YouTube tutorials, and that's one of the things it does best. Choose a 16:9 canvas for regular videos or 9:16 for Shorts, and export in up to 4K. Auto-zoom and captions are why many people call it the best screen recorder for Mac tutorials.
Is FocuSee on Setapp updated?
Yes, FocuSee is updated regularly on Setapp, and Setapp installs updates for you. So you get new features and fixes without reinstalling anything. Setapp includes the Standard edition of FocuSee for Mac, which covers recording, auto-zoom, editing, captions, and export.






 Best solution
 Best solution