YouTube is one of those services where a quick search or link quickly turns into three videos, and then, suddenly, it’s an hour later. But beyond the entertainment, it’s also a powerful place to publish your own content, grow a business, and advertise.
I’ve been using the platform for years and managed a few channels along the way, so I’ve gone through the beginner phase, dealt with messy uploads, and watched many YouTube tutorials on how to use, well, YouTube.
In this guide, I’ll walk you through everything step by step. We’ll look at how to use YouTube as a beginner and then proceed to creating a channel, uploading videos, using YouTube Studio, and growing over time.
Before we go into the details, here’s a quick overview:
I want to…
Do this…
Watch YouTube videos easily
Open the app or browser, search, and play
Interact with videos
Sign in with Google, like, comment, and subscribe to channels
Start my own channel
Sign in > Profile > Create a channel > Add basic details
Make videos look professional
Use Filmage Editor to trim, add effects, animations, and adjust audio
Upload a video
Sign in, click Create > Upload video, add title, description, thumbnail, set privacy, and publish.
Use YouTube Studio to check analytics, manage content, and reply to comments
Grow my audience
Post consistently, focus on quality, optimize titles, descriptions, and thumbnails
If you need to pull video clips from online sources for your editing projects, the All Video Downloader video download assistant is worth checking out.
How to use YouTube for beginners
YouTube is actually quite easy to use, as you just need to search for something and click on it. It also has a bit of everything, whether you are looking for music, tutorials, reviews, lectures, or some late-night rabbit holes.
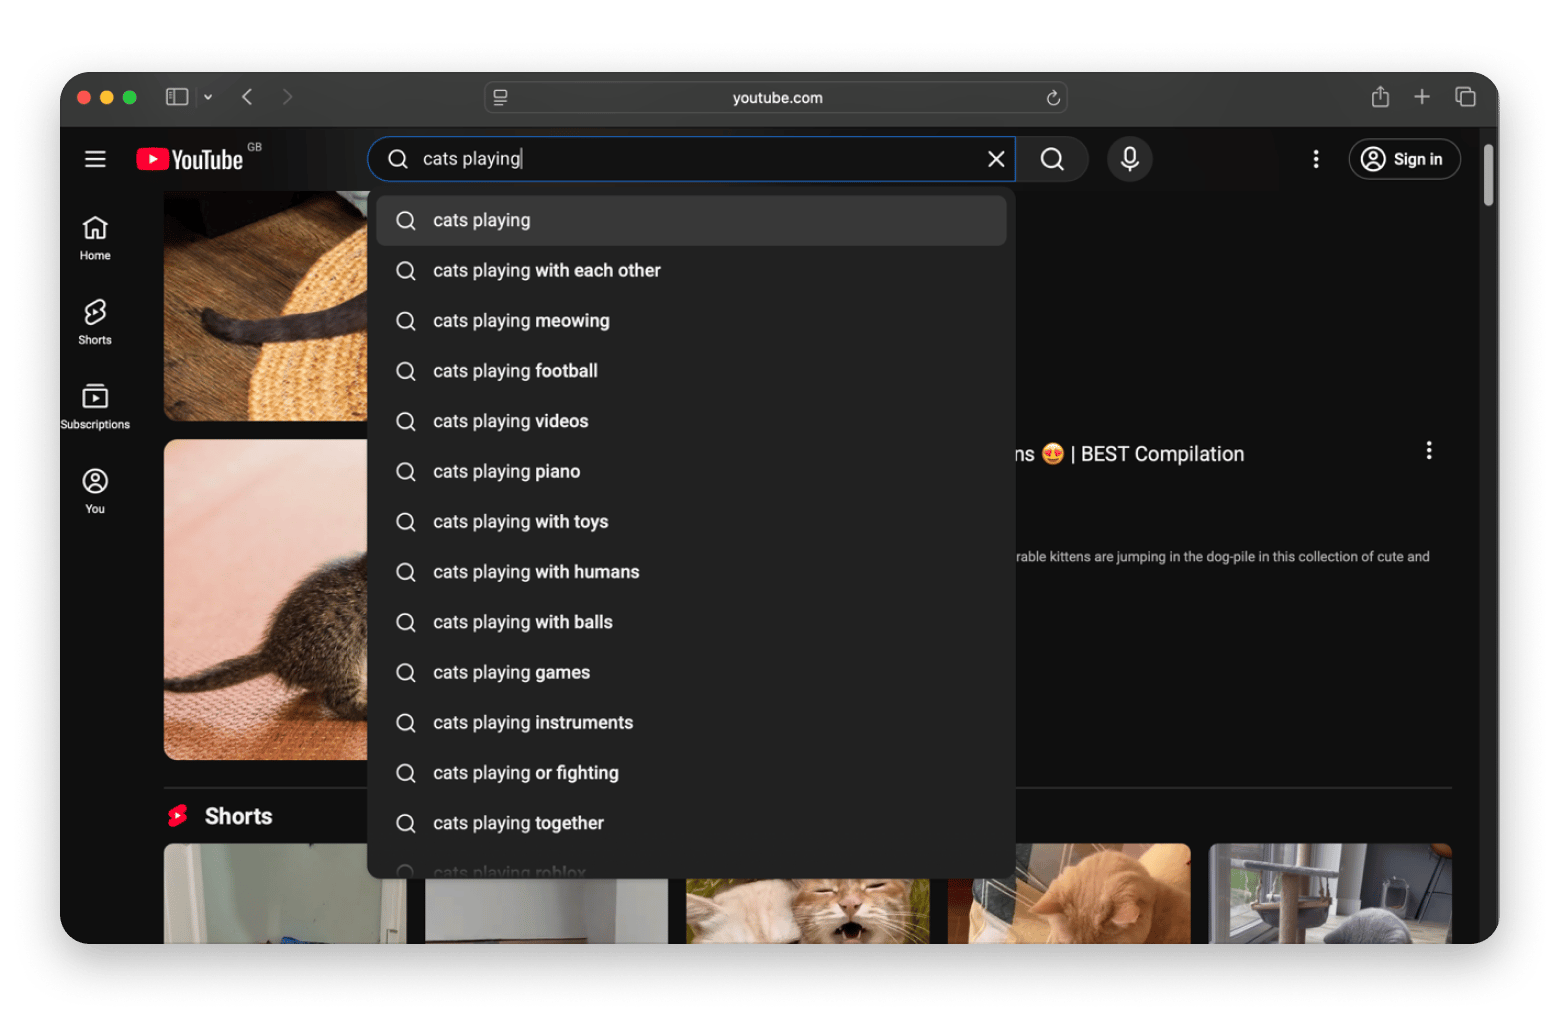
How to watch videos on YouTube
Here’s how to use YouTube for beginners:
Open the mobile app or go to youtube.com on your browser.
Search for a video.
Tap or click on it to play.
Once the video starts playing, you can adjust it to suit your preferences. YouTube offers several options:
Tap the full-screen icon to expand the video
Adjust the video quality to suit your internet speed or plan
Turn on captions (cc) for subtitles
Adjust the volume
Adjust the playback speed (0.5x, 1x, 1.5x, 2x)
Enable autoplay to play the next video automatically.
After a couple of clicks, it all feels quite natural.
How to interact with videos
Watching is only half the fun. YouTube thrives on personalization, so it becomes more useful when you start interacting with content you enjoy. Recommendations change based on what you like, comment on, and subscribe to.
Here’s what the three mean:
Like: It tells YouTube the kind of videos you enjoy watching.
Comment: Sharing your thoughts or asking questions below a video.
Subscribe: Following a channel so that its videos show up in your feed.
While you can watch without an account, you need to sign in with a Google account to interact with videos.
Understanding YouTube's main video sections
When you open YouTube, search for a video and play it to get recommendations the next time you log in.
From there, YouTube organizes your feed in different ways, with the main categories being on the left side. These help you quickly learn how to use YouTube for beginners:
Home – Personalized recommendations based on what you like to watch.
Shorts – YouTube’s short videos, mostly up to 60 seconds.
Subscriptions – New uploads from the channels you follow.
You – It has content that’s based on your activities. Things like History, Watch later, and Liked videos.
Explore – It allows you to find content not related to your watchlist. It’s grouped into categories like Music, Podcasts, and Sports.
More from YouTube – The options here are YouTube Studio (more on that later), YouTube Music, and YouTube Kids.
To make these sections more personalized, like the videos you enjoy and subscribe to various channels.
How to create a YouTube channel
To upload content to YouTube and become a creator or promote your business, you need to start a channel.
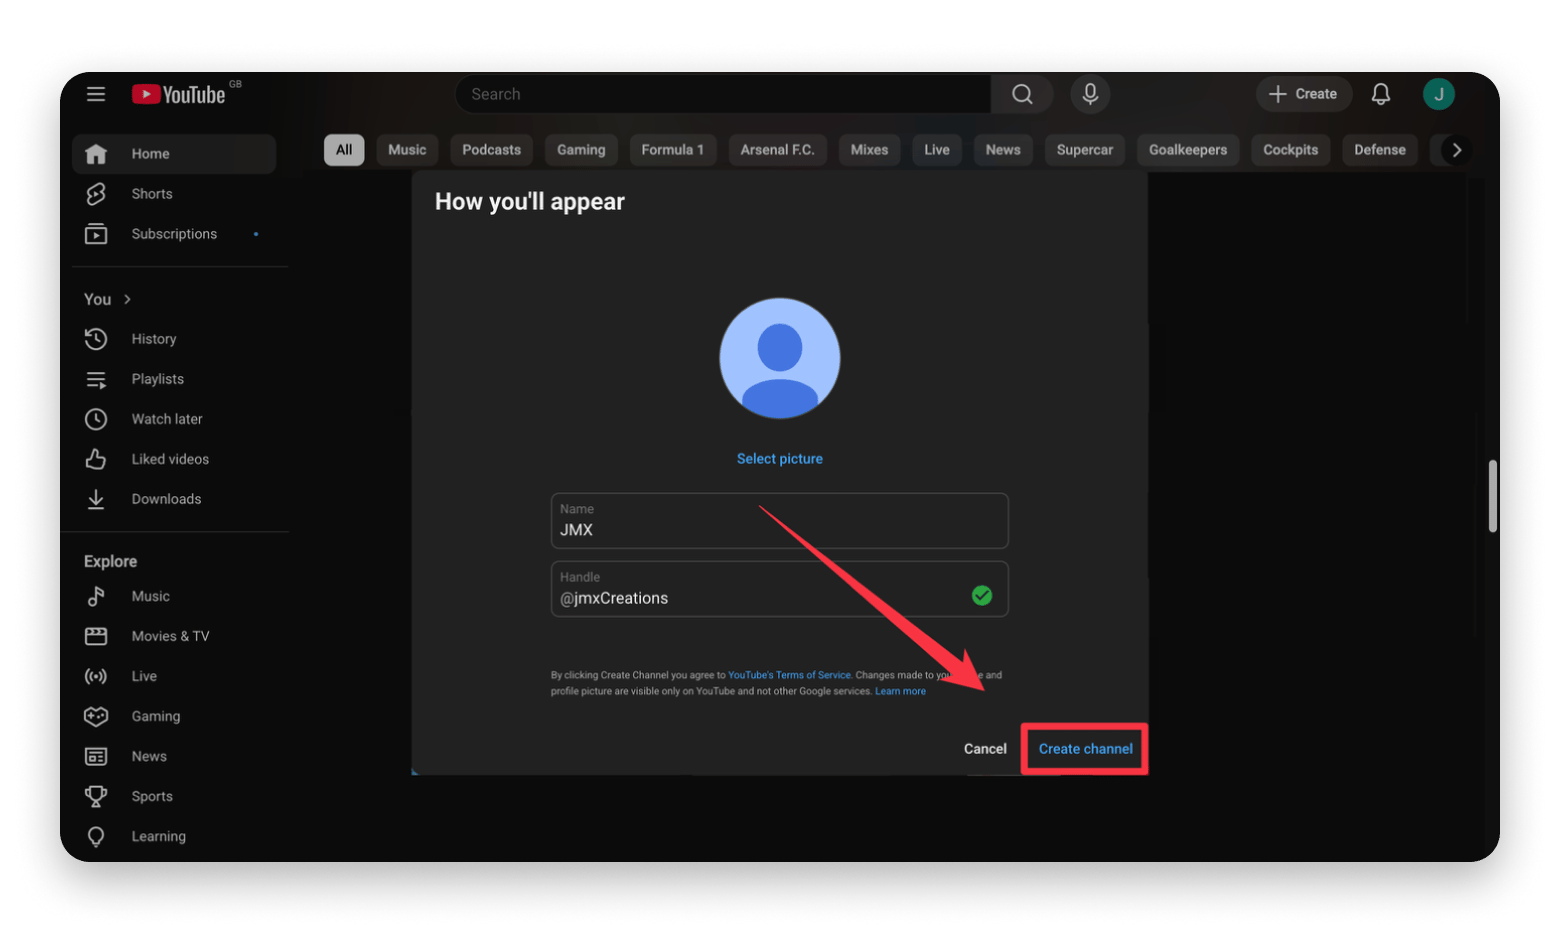
Here’s how to create a YouTube channel:
Sign in to YouTube with your Google account.
Click your profile picture in the top right.
Click Create a channel.
Type your channel name.
Add a profile photo and basic details.
Click Create Channel.
Your channel is now live, but you still need to customize it to reflect the type of content you’ll be providing. We’ll look at that in a few.
Personal vs brand YouTube channels
When creating a YouTube channel, you can either base it on yourself or your brand. The two types of channels operate differently and fit different purposes.
Feature
Personal channel
Brand channel
Setup
Fastest, automatic with your Google account
Takes one extra step to create
Ownership
Tied directly to you
Separate identity from your personal account
Multiple managers
Not supported
You can add team members or editors
Best for
Hobbies, casual uploads, experimenting
Businesses, creators, teams, long-term projects
Flexibility
Simple but limited
More control as you grow
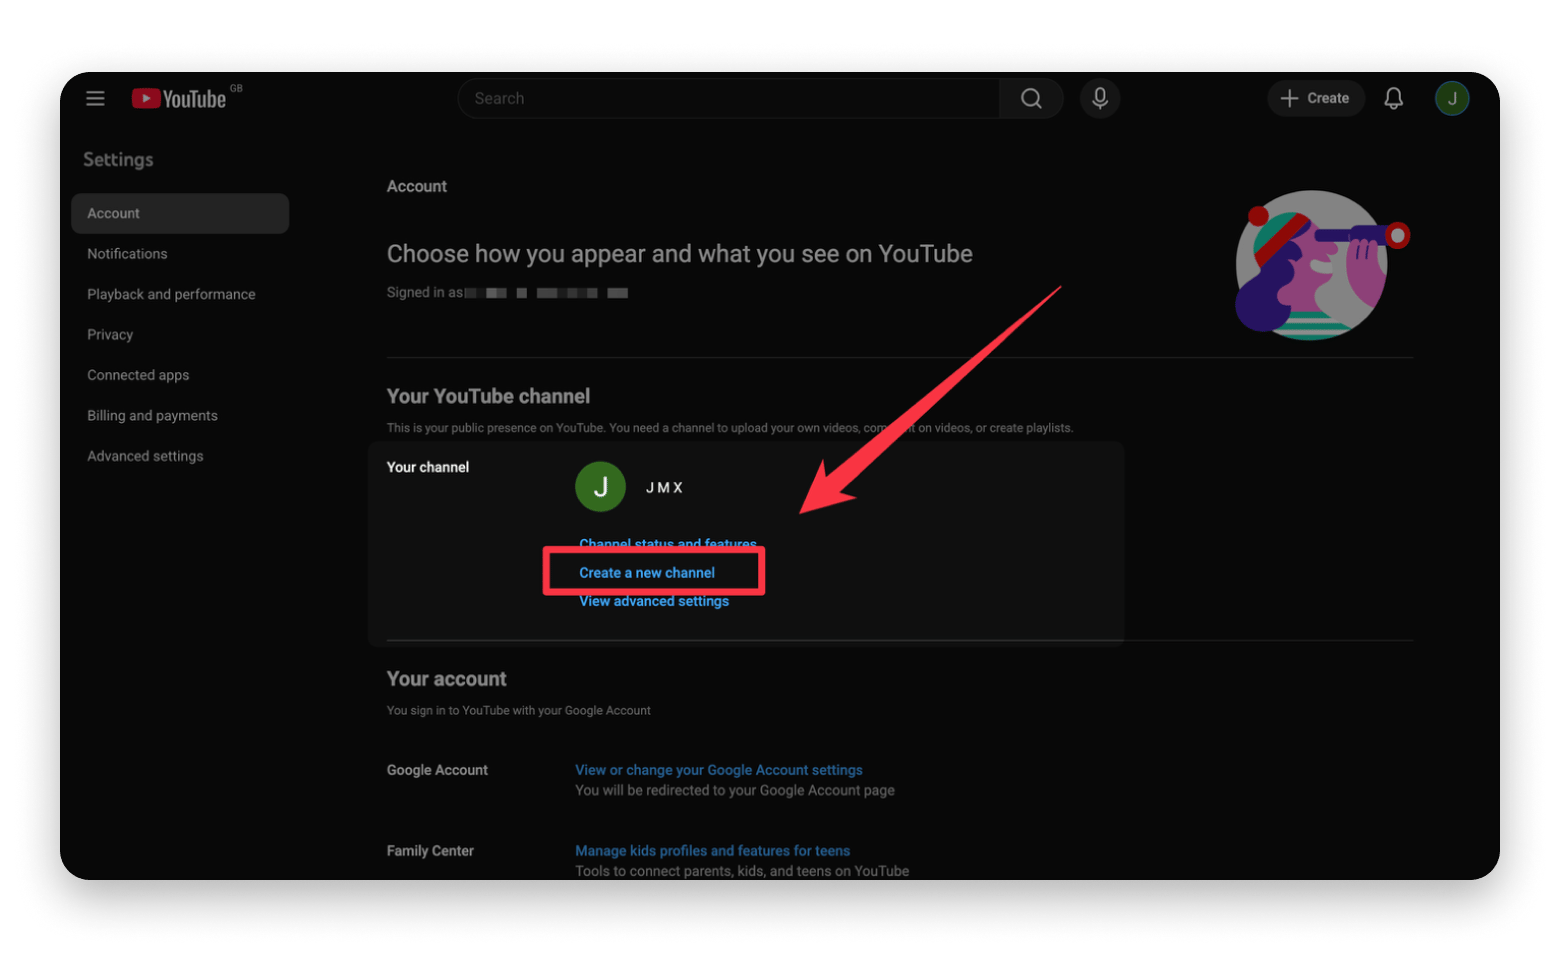
By default, YouTube creates a personal account. To convert it to a brand account, you’ll need to create a second channel and then merge the two.
Go to the YouTube main page.
Click on your Profile > Settings.
Click Create a new channel.
Give it a name and a username.
Click create channel.
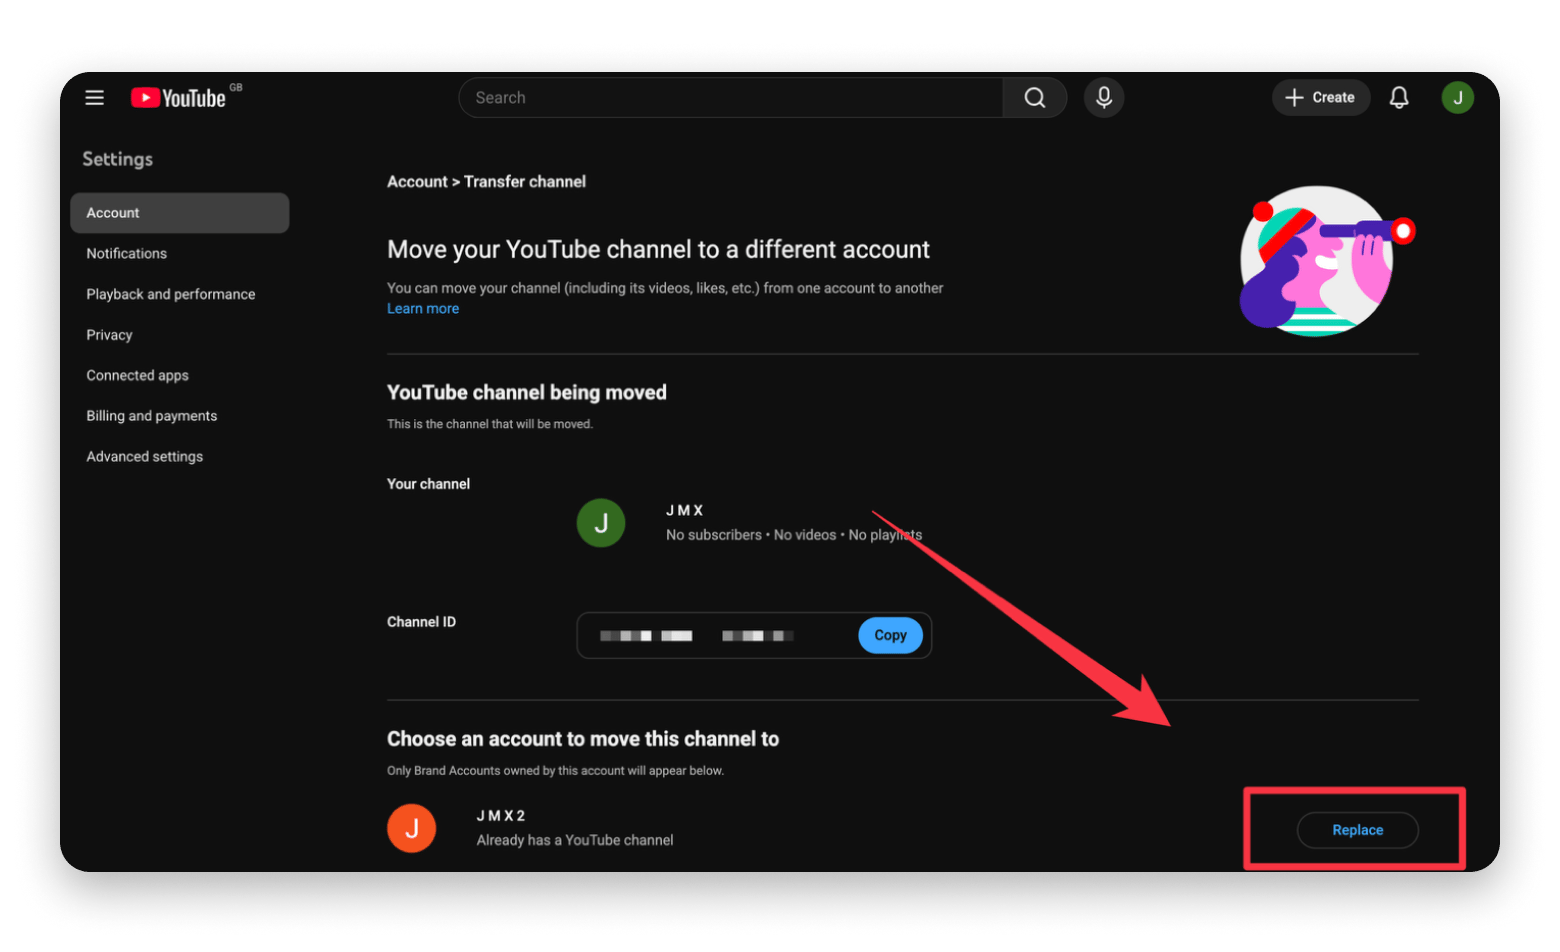
The second channel is usually a brand account, but we can convert the first one to take its spot.
Go to the YouTube main page.
Click on your Profile > Settings.
Click Add or manage your channel(s).
Select the first channel.
Click Advanced settings on the left pane.
Click Move channel to a brand account.
Enter your password and verify your identity via SMS.
Click Replace under Choose an account to move this channel to.
Click Delete channel.
Click Move channel.
The first channel will now convert to a brand channel and move your subscribers and videos, if any. However, note that if it’s an existing channel, the comments will be dropped.
Setting up your channel for success
Once your channel exists, you need to spend a few minutes making it look complete. First impressions are very important in a platform where people aren’t short of content.
Start with the basics:
Profile photo – Set an easily recognizable image, either a headshot or a logo.
Banner image – It should show what the channel is about when people visit.
Channel description – A short explanation of what viewers can expect.
Links – Add links to your website, Instagram, or other platforms if you have them.
Essentially, when someone comes to your channel, they should instantly understand who you are and what you post. It helps drive the decision to subscribe and also helps the YouTube algorithm understand who to recommend your videos to.
How to upload videos on YouTube
A major part of learning how to use YouTube as a creator is uploading a video. It’s usually a moment every creator enjoys after spending time recording, editing, and maybe rewatching a few times.
The good thing is that YouTube keeps the process simple on both the web and the mobile app.
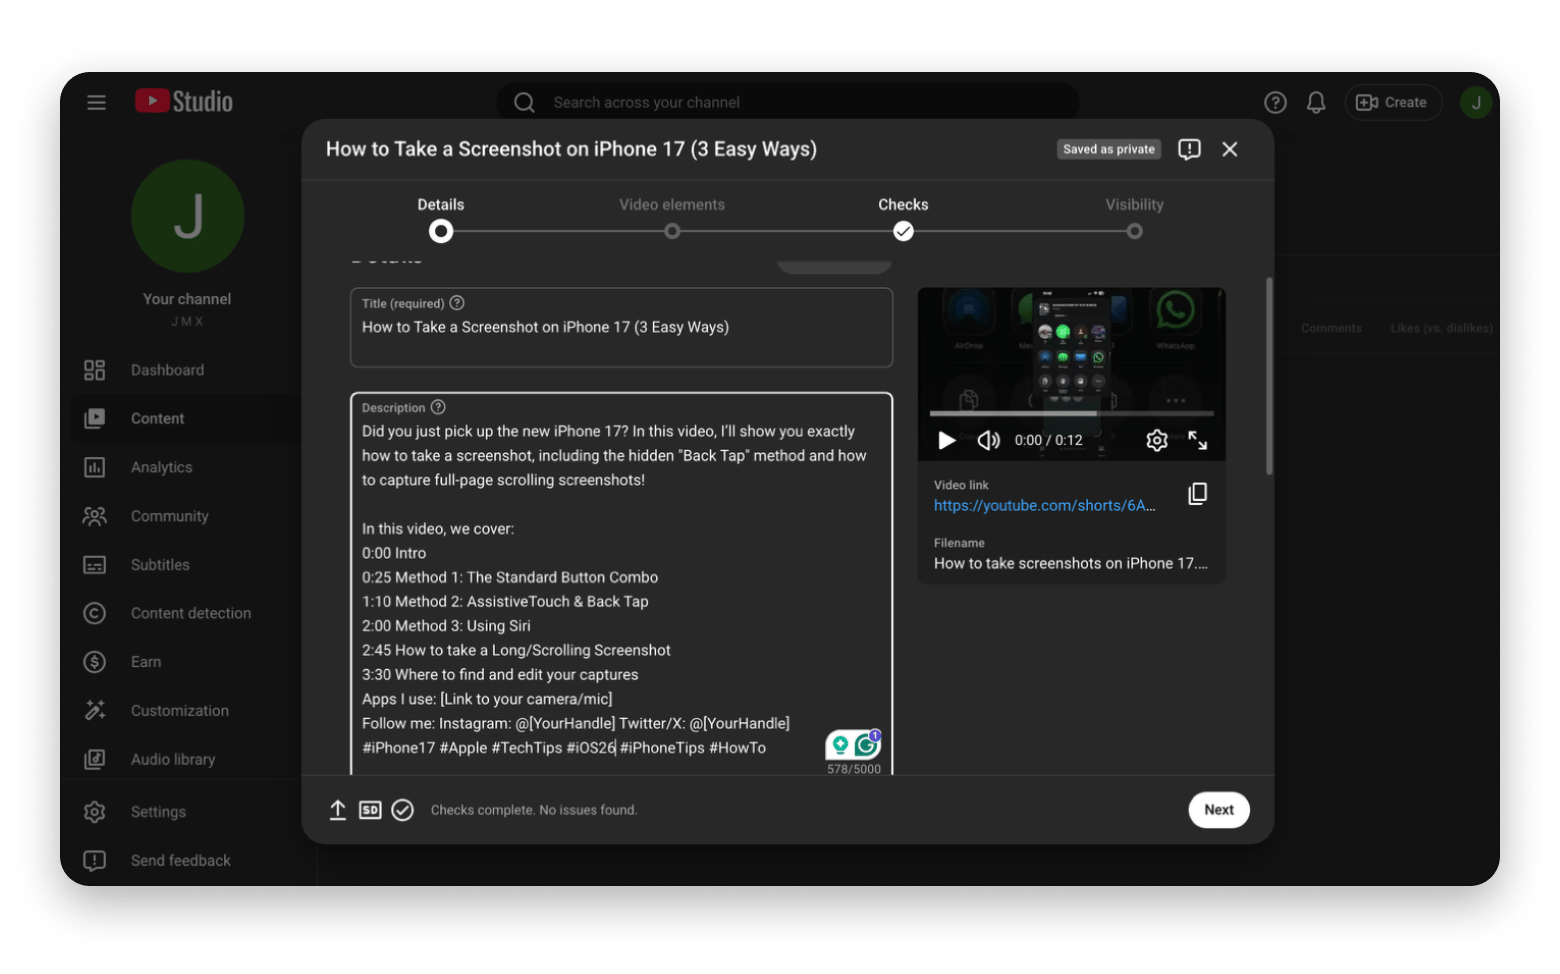
Here’s how to upload videos on YouTube on a desktop:
Sign in to YouTube.
Click the Create button (camera icon with a +) in the top right.
Click Upload video.
Drag and drop your video file or select it from your computer.
Add your title and description.
Upload or choose a suggested thumbnail.
Set your audience and age restrictions.
Click Next and add video elements.
Click Next and set visibility.
Click Publish.
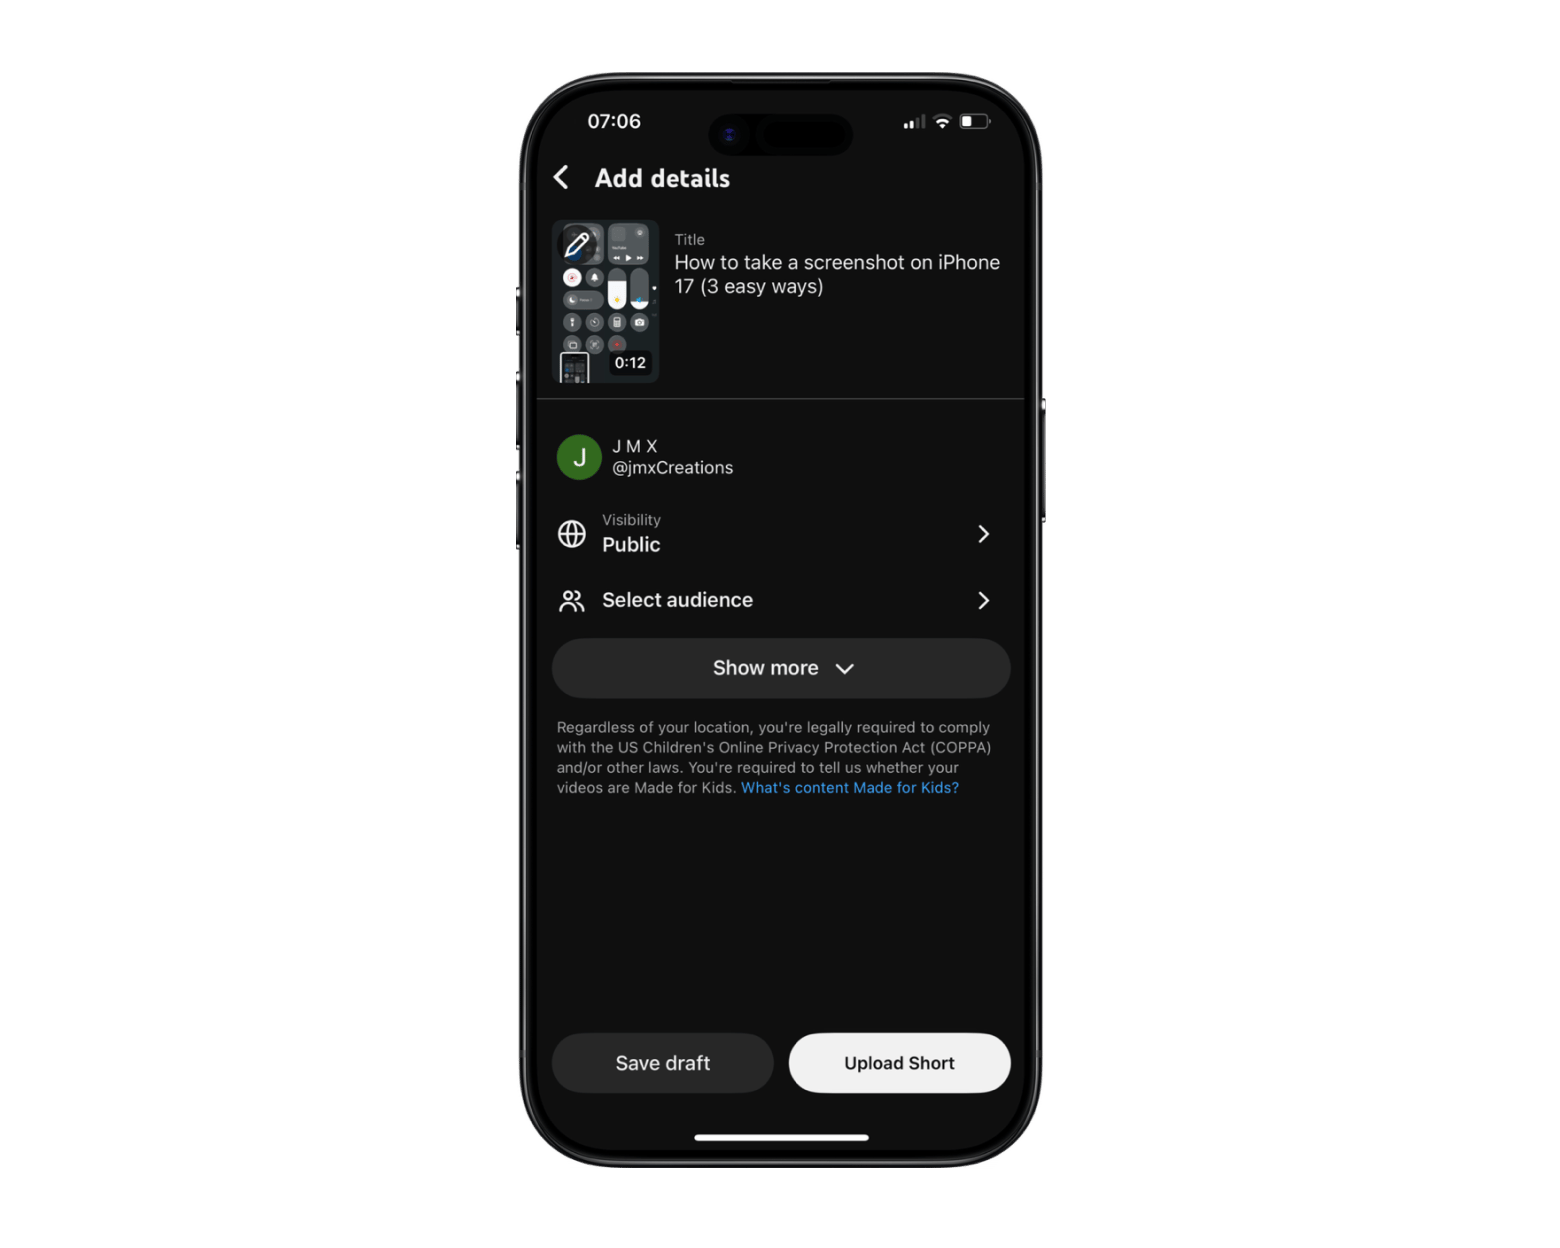
Some videos can be recorded and edited right on the phone, and you can use the YouTube app to upload them directly.
Here’s how to upload videos on YouTube via the mobile app:
Open the YouTube app.
Tap the + button.
Tap Add from Photos
Select your clip and click Next.
Add a title, description, and privacy settings.
Tap Upload.
Keep in mind that the quality of your videos and the editing are significant, so it’s good to spend some time learning how to edit YouTube videos.
Best practices before uploading
Sometimes you can’t wait to upload as soon as you finish recording. I’ve done that plenty of times after quick edits only to notice a typo in the title or an awkward five seconds of silence in the video.
Taking a few extra minutes and adding a bit of diligence can save you from those small regrets and make your videos look more polished.
Here’s a simple checklist I like to run through before I upload a video:
Trim the silence or set up time at the beginning and end of a video.
Confirm the video quality to ensure it’s at least 1080p.
Ensure the audio is clear to match the visuals.
Add an interesting thumbnail that’s easy to read (big, clear text).
Confirm the title tells viewers exactly what they’ll get while still drawing them in.
Add a helpful description with context, links, and timestamps.
Note that well-edited videos perform better than those that aren’t. This doesn’t mean that you should add Hollywood-style CGIs, but you should ensure everything is tight and clean.
Create polished videos with Filmage Editor
I personally edit my videos with Filmage Editor as it offers pretty much everything I need for high-quality videos while still keeping things simple. For example, when you delete an awkward pause in the video, it automatically connects the remaining sections.
One other aspect I really like about the editor is that it offers lots of tools that let me add flair to my videos. I can easily add stickers, logos, and animations wherever I like. I can also slow down or speed up specific sections, giving the video a movie-like feel.
How to use YouTube Studio
YouTube Studio is the creator’s space. While here, you can customize your channel, upload videos, check performance, and manage comments. It’s a part of YouTube every creator visits often, so I keep it bookmarked for quick access.
Learning how to use YouTube Studio doesn’t require a lot of effort; YouTube keeps the different functionalities on the left menu pane.
Managing videos and analytics
The three main sections for managing your content and performance are:
Dashboard – This feature gives you a quick overview of your channel’s performance.
Analytics – You can see detailed metrics of your channel’s performance, including the audience demographics.
The numbers in the analytics section can look like a lot at first, but you need to focus on what matters most.
Some key metrics to focus on when learning how to use YouTube Studio are:
Views – the number of times people have watched your video.
Watch time – How long they stayed to watch.
CTR (click-through rate) – How often people click your thumbnail.
Audience retention – Where viewers tend to drop off or keep watching.
You don’t need to obsess over every stat. Just take them as feedback, as you’ll keep improving with experience.
Managing comments and community
Just below Analytics is the Community tab, which is where all your conversations happen. You’ll find new comments, replies, and anything that needs moderation. It’s a much simpler way of managing everything instead of hopping from one video to another.
From the community section, you can:
Reply to viewers
Pin a comment to the top
Like user comments to show appreciation
Delete or hide spam
I make a point of coming here often and replying to or liking user comments. I find it to be a key part of building trust, as it makes your viewers feel that there’s actually a real person behind the channel.
How to grow on YouTube
Most people tend to overthink this part and hope that something magically just takes off. I was actually part of “people.”
But over time, I’ve realized that what YouTube growth requires is consistency and making small improvements each time.
YouTube SEO basics
As much as it’s a video platform, YouTube is also a search engine. People type questions and content keywords just like they do on Google. Your job is to help the algorithm show your video to the right people.
Start with the essentials:
Title – Make it clear before it’s clever
Description – Explain what the video covers in plain language
Tags – Add a few relevant keywords and variations
Thumbnail – Ensure it’s readable and eye-catching.
Watch time – Try to keep viewers watching as long as possible.
The watch time is quite crucial for the algorithm, as it tells it that the video is actually good. A trick that works for me is starting with a teaser of what's coming, or even starting a story from the middle.
Posting consistency and audience trust
Nothing does more for growth than consistency. Your followers will know that they can come back now and then for new content, and the YouTube algorithm also likes to recommend consistent channels.
This doesn’t mean you need daily uploads. Once or twice a week is enough, just let it be consistent. You can choose specific days so that your viewers can know when to come back. Consistency builds trust, and trust leads to growth.
Downloading and repurposing YouTube content
At some point, you’ll likely want to download a video. It can be to watch it offline when traveling, or maybe to use parts of it in your own videos.
I initially spent a lot of time searching for how to download YouTube videos and trying lots of different “free” apps and addons, but the process doesn’t need to be complicated.
I now use Downie from Setapp as I don’t like the guesswork and limitations associated with downloading YouTube videos. It’s a powerful downloader that works with 1,200+ websites, so it also eliminates the need for a new downloader for other sites like DailyMotion, Instagram, or X.
Here’s how to download YouTube videos using Downie:
Copy the video URL
Open Downie
Click the + button on the bottom left side.
Downie starts the download automatically.
But beyond the download process itself, you also need to consider the copyright guidelines first.
Generally, saving videos for personal offline viewing won’t get you in trouble. But if you need to reuse a part of a video, ensure you get permission or use a video licensed under the Creative Commons license.
Final thoughts on how to use YouTube
Learning how to use YouTube is more about simply starting to use it. The platform is quite easy to use, as you can even watch without an account, but it’s good to start with one right away. If you’d like to be a creator, choose between a personal and brand channel, customize it, and upload your videos.
This will then put you on a growth journey where you need to ensure you are consistent and upload high-quality videos. After recording your videos, you can use Filmage Editor to enhance the quality by deleting unnecessary parts quickly and adding effects and transitions. It’s also great for adding external videos you download using Downie.
Both apps are available on Setapp, a superb platform that offers 250+ apps under a single subscription. You won’t even need to pay a cent as you can take advantage of Setapp’s 7-day free trial and check out any app you like.
FAQs
How do beginners use YouTube?
Learning how to use YouTube for beginners starts by watching videos and signing in with a Google account. You can then start liking videos and subscribing to channels you like. Eventually, you can create a YouTube channel and upload content if you want to be a creator.
Is YouTube free to use?
Yes, YouTube is free to use for both viewers and creators. You can even build a channel, upload content, and monetize it without paying a single cent.
How do I upload my first video?
Here’s how to upload videos on YouTube:
Sign in to YouTube.
Click the Create button or + icon.
Click Upload video.
Drag and drop your video file or select it from your computer.
Adjust video details.
Click Publish.
Ensure you set basics like the title, thumbnail, and description.
What is YouTube Studio used for?
YouTube Studio is the control panel for creating on YouTube. You can use it to upload videos, check analytics, respond to comments, and monetize your channel.
How long does it take to grow on YouTube?
Growth on YouTube varies for everyone. Some channels can get fans within weeks, but others will need to build steadily over months. Just ensure you are consistent and use creation best practices like clear thumbnails and titles.