How to remove unwanted objects from your photos with AI: Easy solutions found
There’s nothing more disheartening than noticing an unwanted object sticking out in your photo after you’ve taken it. The moment is gone, and you can’t go back to reshoot it.
Fortunately, you don’t have to be an editing wizard to fix your shoots! Let’s review a few proven methods and tools I tested to fix blemishes, remove logos, erase unwanted content, and more.
How to remove unwanted objects from a photo
If you wanted to erase something from a photo a few years ago, it could take you hours of painful Photoshop editing. I still remember manually selecting unwanted objects and then carefully clone stamping the backgrounds so it doesn’t appear like something was deleted at all.
Today, Photoshop includes a generative AI toolkit that can help you get rid of unwanted objects much faster. However, the steep learning curve of Photoshop and its power demands on your Mac are still there. Luckily, other AI-powered object user-friendly erasers can remove things from pictures and patch backgrounds for you easily.
Luminar Neo is a great example. This powerful photo editor features many AI-based tools for retouching, creating a bokeh effect, improving lighting conditions, and reducing noise. All these can be adjusted with simple sliders and don’t require specialized knowledge.
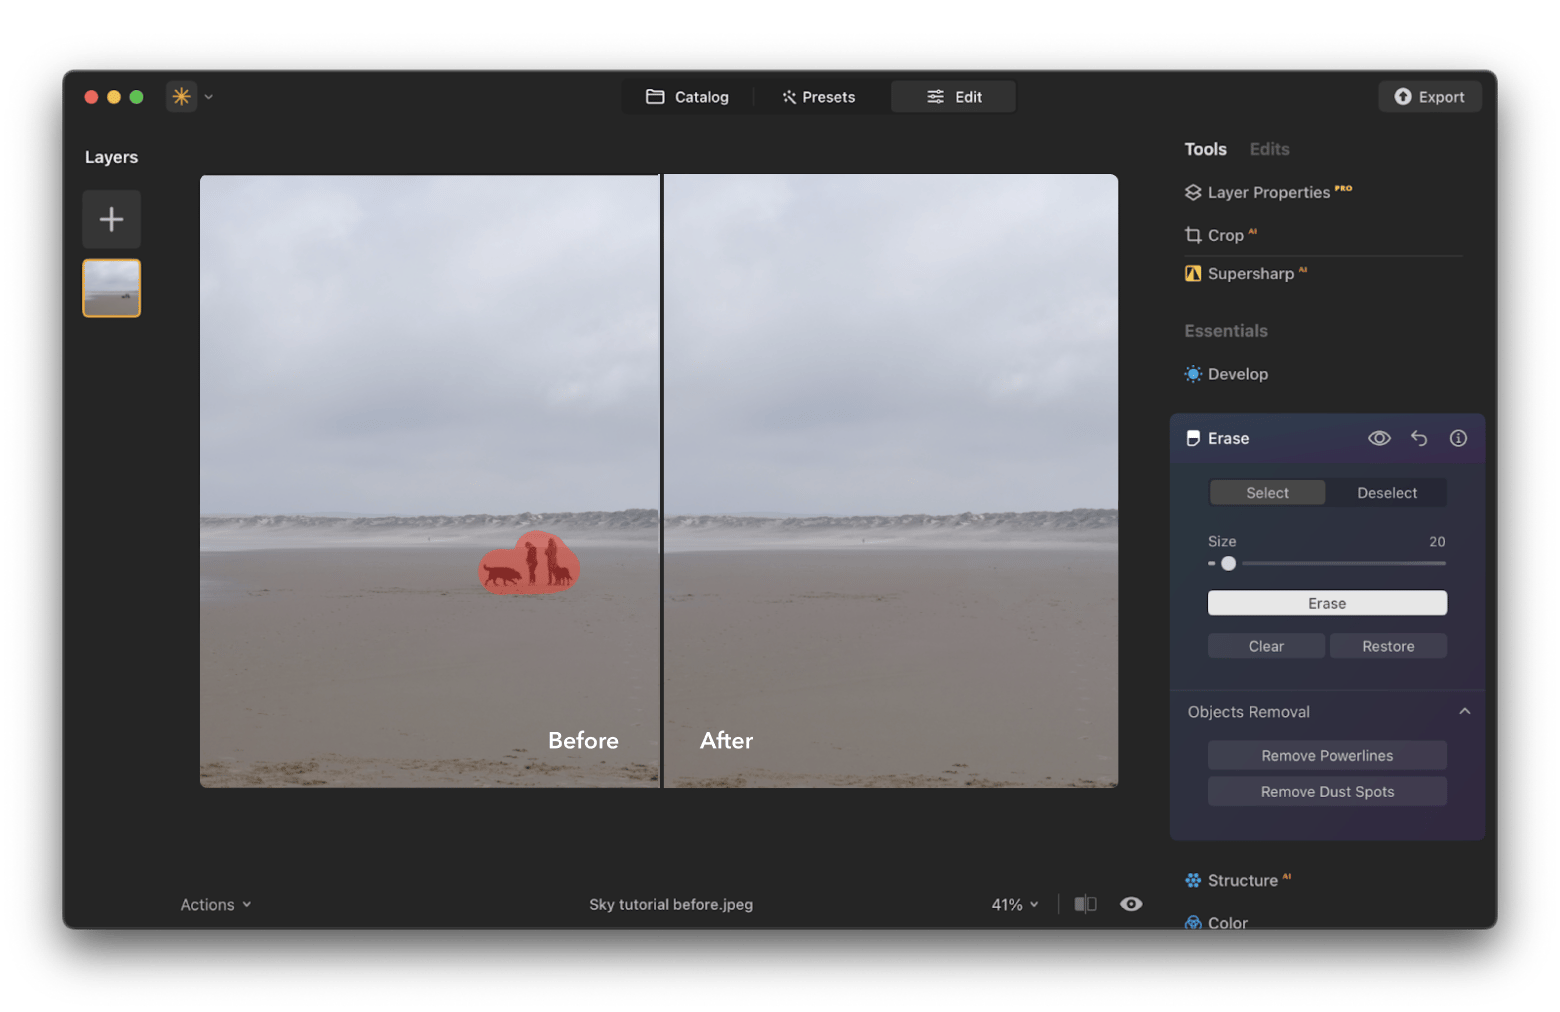
The AI objects removal in Luminar Neo works smoothly. You simply draw over the things you want to get rid of, and the app does all the heavy lifting for you.
Here’s how to remove an object from photos in Luminar Neo:
- Instal and open Luminar Neo on your Mac.
- Click Add Photos.
- Click the Edit tab at the top.
- Choose Erase from the Tools menu.
- Adjust the size of the brush with a slider.
- Paint over the object you want to remove.
- Click Erase.
Remove specific things from pictures using a Spot Healing Brush
You might notice that not all objects are easy to erase. Objects that are not in focus or have complex backgrounds are much more challenging to get rid of without leaving a trace. To solve this problem, traditional tools like Photoshop allow you to remove objects from photos using a Spot Healing Brush tool (sometimes called a Repair tool) that samples parts of an image in one spot and paints them over another at the same time.
Sounds complicated? Apps like TouchRetouch and CameraBag Pro make this process a breeze. Next, I’ll show you how.
How to remove things from pictures in TouchRetouch
TouchRetouch is a quick photo-editing tool for Mac that delivers great results in a few clicks. The app uses advanced content-aware algorithms to help you remove watermarks, blemishes, power lines, and whole objects.
Here’s how to remove something from a picture with TouchRetouch:
- Install and open TouchRetouch.
- Click Choose a file.
- Click Quick Repair at the top bar > Adjust the brush size.
- Click and drag the brush over the object you want to remove.
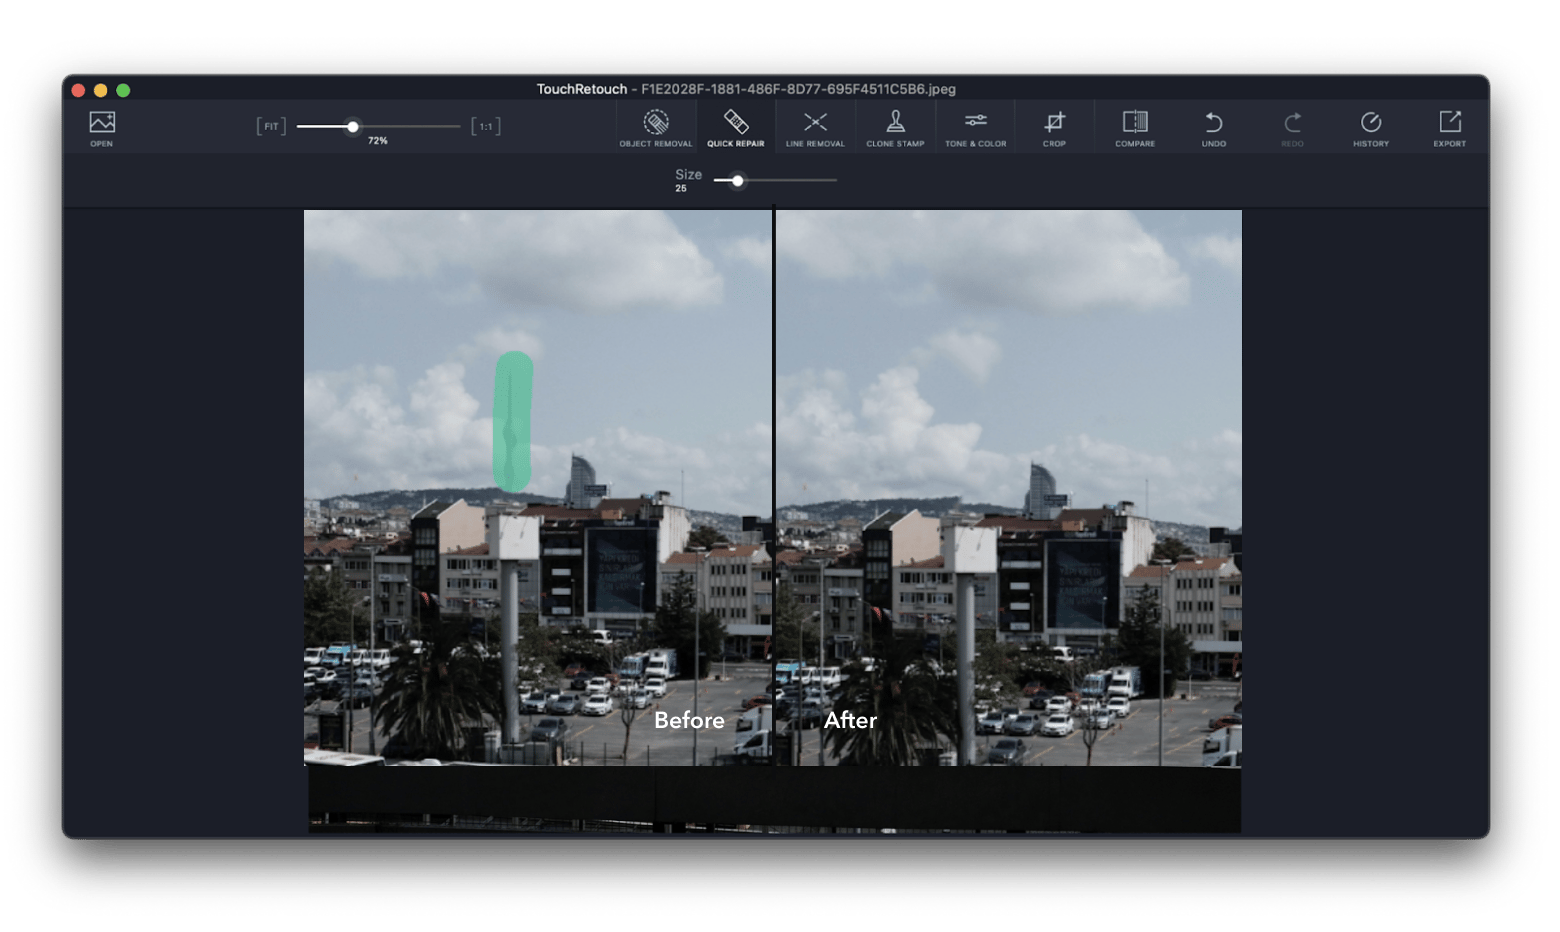
TouchRetouch isn’t just about removing objects. You can also color-correct your images on the spot with detailed controls over brightness, contrast, highlights, saturation, and more.
Plus, the app supports all the widely used image formats, such as JPG, TIFF, PNG, and even RAW, so you can easily edit files straight from your camera.
Another app to try that offers similar functionality for both photos and videos is CameraBag Pro.
How to erase something from a photo in CameraBag Pro
CameraBag Pro offers quick AI-powered photo and video editing without all the unintuitive hacks and settings of Photoshop and Premiere Pro. Adjustments are clearly broken down by categories, and all tools are easy to use. Plus, the app gives you more than 200 professionally created filters (e.g., film simulation, grain, log grading) to enhance your images in just a few clicks.
To remove unwanted objects from photos freely with CameraBag Pro:
- Install and open CameraBag Pro.
- Click Load Photo/Video.
- Click Spot Heal in the Adjustments panel.
- Press and hold Command and scroll to adjust the size of the brush.
- Click on the object's edges in the photo repeatedly to erase it.
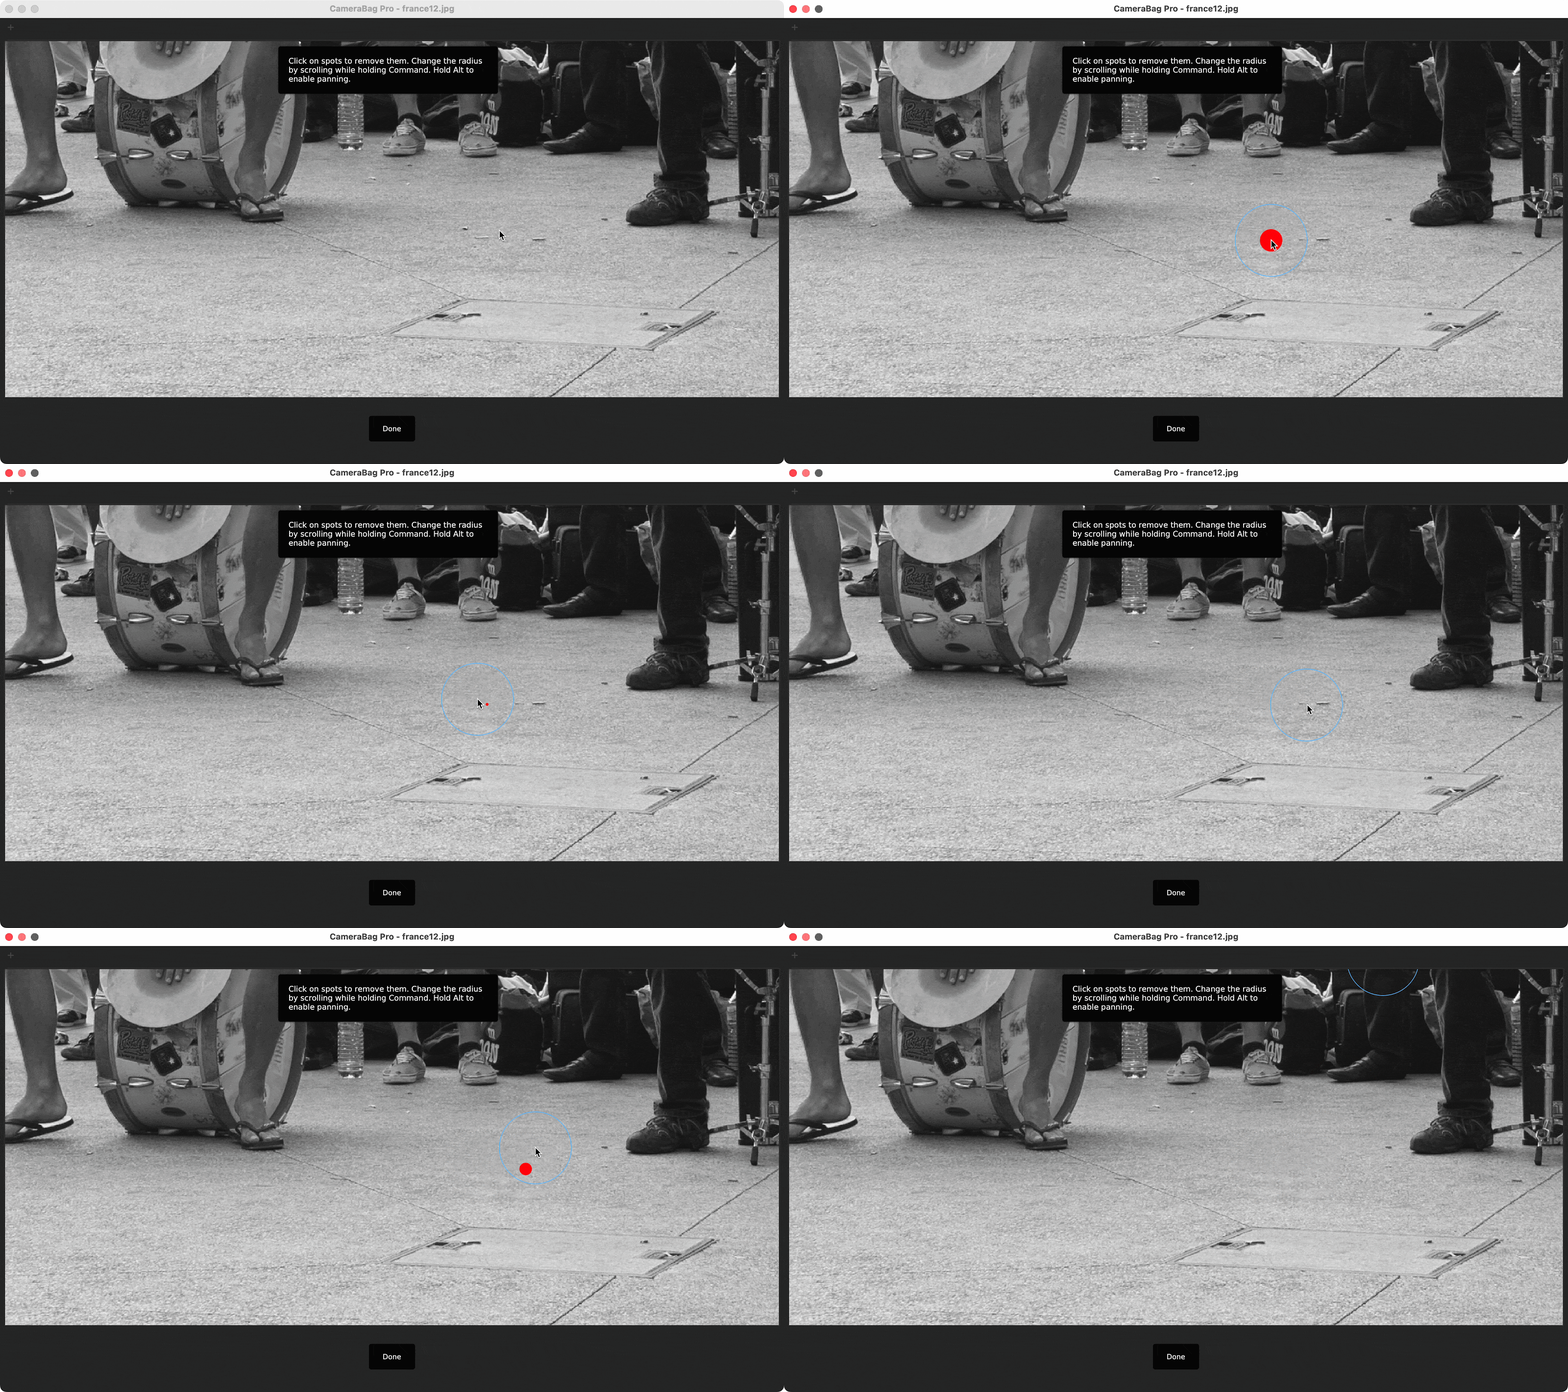
Unlike Quick Repair in TouchRetouch, Spot Heal doesn’t let you drag across the object you want to delete, which makes it great for specific adjustments, such as removing blemishes, bright spots, trash, and other small imperfections.
When it comes to AI, CameraBag Pro shines by running advanced AI-powered upscaling locally on your Mac and improving the quality of even the most cropped images.
All in all, CameraBag Pro offers a suite of tools comparable to Photoshop and other traditional tools for most users, but it’s much faster and easier to use. And it doesn’t require you to sit through multiple tutorial videos.
Use Retouch in Photos to remove unwanted objects for free
You might wonder whether the default Photos app on Mac has similar object-removing functionality. It does—it’s called Retouch.
To remove items from pictures with Retouch:
- Open your photo in the Photos app.
- Click Edit in the top-right corner > Retouch.
- Adjust the size of the brush.
- Brush over the unwanted object in your photo.
- Click Done.
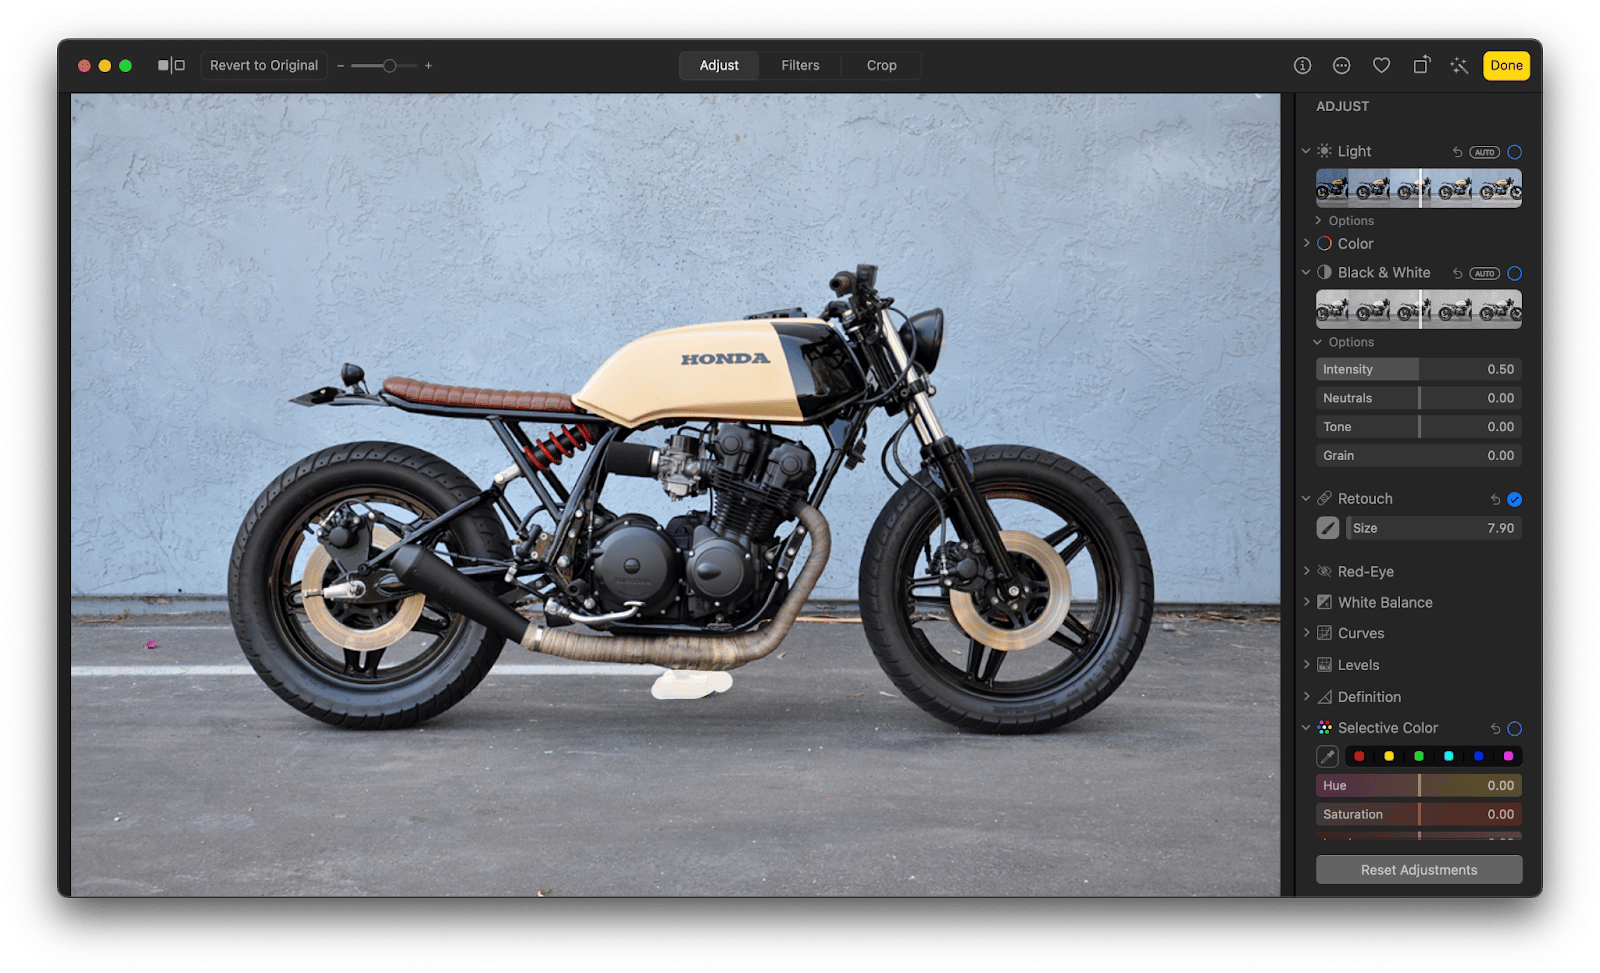
The Retouch tool can also help you delete undesired elements from photos. However, the difference between Photos and professional editing apps lies in the quality of the photo-editing engine used to process images, which tends to be more powerful in professional photo apps.
Is there an object eraser on iPhone?
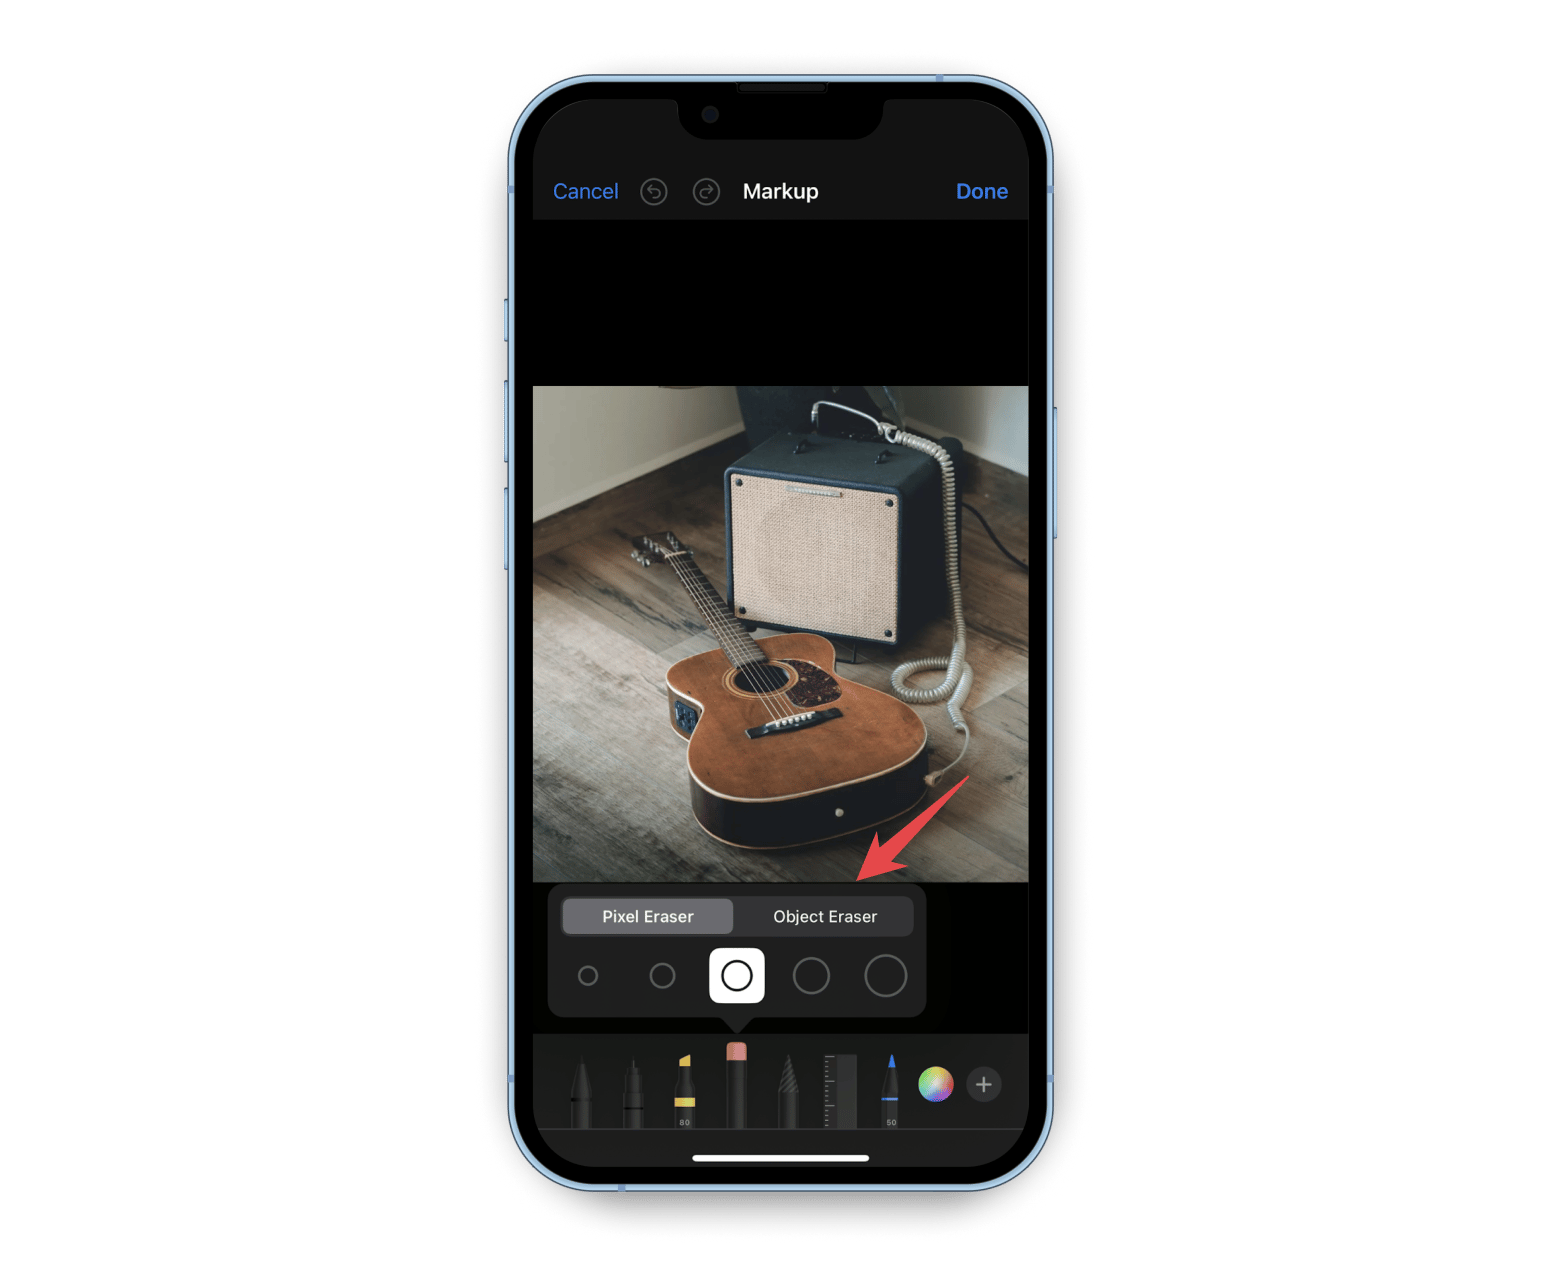
While iPhones have the Object Eraser tool installed by default as part of Markup, it doesn’t actually erase objects from photos. Instead, it erases objects or pixels added to the image by Markup tools. So, if you draw something on top of the image, for example, you can erase that with the Object Eraser.
Here’s how to remove drawings from a photo using Object Eraser:
- Open an image in Photos on your iPhone.
- Tap Edit.
- Tap Markup in the top bar.
- Tap on the eraser tool.
- Select Object Eraser.
- Tap on the object you want to get rid of.
Remove an extra object from a photo online
While it used to be that only desktop and mobile apps could provide powerful photo-editing features, today, you can do many of the same things online, thanks to tools like Canva.
Canva is an online platform offering everything from graphic design to photo-editing to illustration tools. The tool positions itself as an easy-to-use solution for anyone—no prior professional knowledge is required for most of its tools.
Using Magic Eraser in Canva, you can quickly remove photo timestamps or other details on your images and leave no trace. To do it, just click Edit image > Magic Eraser and drag the brush over unwanted objects to get rid of them.
Note: Make sure you completely trust the online services you upload your photos to and try to minimize the amount of sensitive information that might get backed up on remote servers due to potential security breach risks.
While Canva’s Magic Eraser is simple to use, its main drawback is the requirement for a pro subscription.
Choose the object eraser you like best. Final thoughts
Now, you know how to erase unwanted things from photos in a variety of ways.
If you’re not sure where to start, give Luminar Neo a try, and it will likely fix any unwanted object with AI-powered precision in seconds. TouchRetouch is another fast and convenient alternative for removing things you don’t need, and CameraBag Pro bundles object removal features with other photo- and video-editing capabilities.
Try these apps for free by signing up for a seven-day trial on Setapp—an app platform with more than 250 outstanding tools for Mac and iOS. Try every Setapp app at no cost today and discover a few new favorites!


