Slowdowns are usually temporary: A MacBook is often slow after an update for 24–72 hours while Spotlight, Photos, and iCloud reindex and sync. Keep it plugged in and give it time.
Find the cause first: Activity Monitor shows which apps are using your CPU, memory, and disk, and a quick Novabench test confirms where the bottleneck is.
Free up space and update apps:CleanMyMac clears system junk and updates or removes incompatible apps in one place.
Rein in CPU hogs and Wi-Fi issues:App Tamer throttles background apps, and WiFi Explorer finds weak signals and channel conflicts.
Get every fix in one subscription: CleanMyMac, App Tamer, WiFi Explorer, and Spotless all come with Setapp Membership. Try 300+ apps free for 7 days.
Is your MacBook slow after an update? That’s usually temporary: for the first 24–72 hours, macOS reindexes Spotlight and syncs Photos and iCloud in the background. If it’s still slow after that, the cause is most often low storage, CPU-heavy apps, or outdated apps. I hit this myself the day I installed macOS Golden Gate, so here’s how to find the cause and the fixes that got my speed back.
Here's what I've learned about getting things back to normal:
*Setapp is a curated platform for 300+ Mac, iOS, and web apps.
Why is my Mac slow after a macOS update?
A Mac usually slows down after a major update because macOS rebuilds its indexes and syncs data in the background for the first 24–72 hours. Spotlight, Photos, and iCloud all take part, and together they use extra CPU, memory, and storage.
Some apps also use more CPU until their developers update them for the new macOS version. On macOS Golden Gate, Intel-only apps still run through Rosetta 2, which can make them feel slower than native Apple silicon apps. The update itself also needs free storage plus extra temporary space during installation. Apple’s guide to freeing storage space on Mac has the current recommendations.
Once those background jobs finish, your Mac shouldn’t stay noticeably slower during everyday tasks. If it’s still slow after three days, try the fixes below.
Quick fixes to speed up a Mac that's slow after an update
First, give your Mac 24–72 hours to finish background indexing and syncing. Keep it connected to power when possible.
Find out what’s slowing your Mac down
Before trying other fixes, find the cause. Open Activity Monitor and check the CPU, Memory, Energy, and Disk tabs for demanding processes. Apple’s Activity Monitor guide explains what each view shows, and if one process won’t let go, here’s how to view and kill processes on Mac.
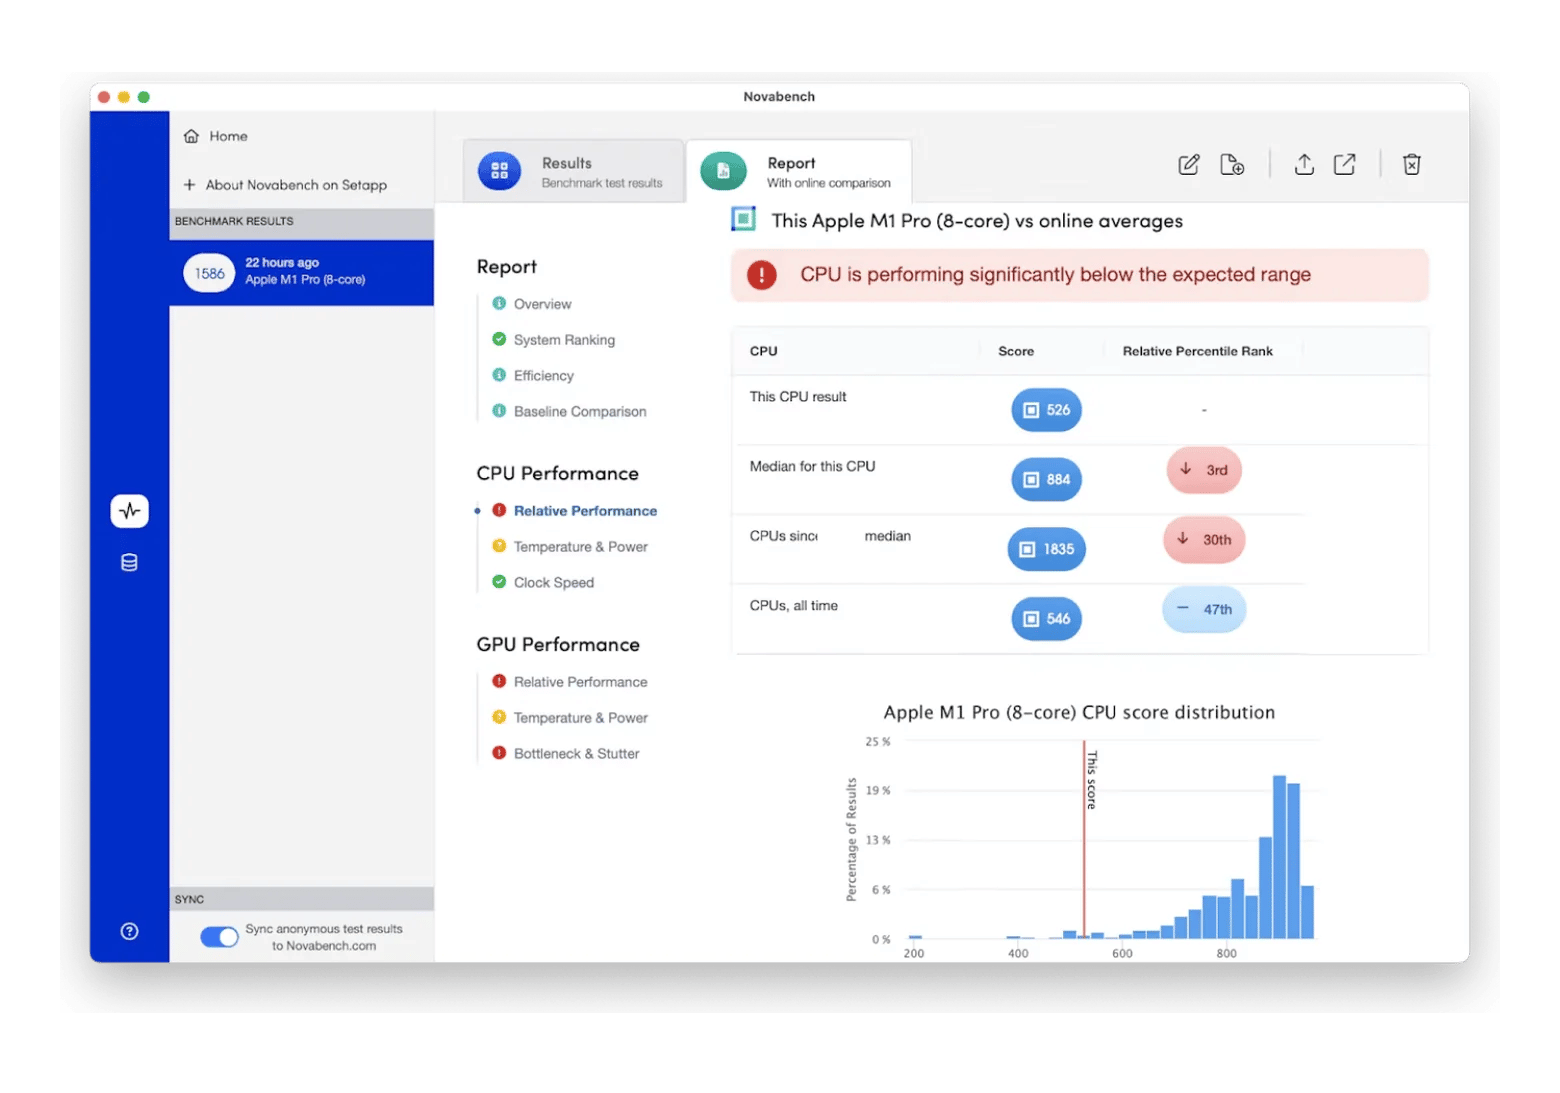
I also ran Novabench, a free benchmarking app, for a broader performance test. It reports on CPU, GPU, and disk performance.
How to run a performance test with Novabench:
Install and open Novabench.
Run the Benchmark Test to measure CPU, GPU, and disk speed.
Use the results to spot problem areas, such as slow disk performance.
The test takes only a few minutes and gives you a useful snapshot of your Mac’s performance. My results pointed to CPU performance, so I looked into background processes and managed my apps more carefully.
One of the first things I did when my Mac slowed down was check the available storage. My drive was almost full after the update, and a nearly full drive is one of the most common causes of a slow Mac.
You can review storage under System Settings > General > Storage, where macOS shows recommendations and the categories taking up space.
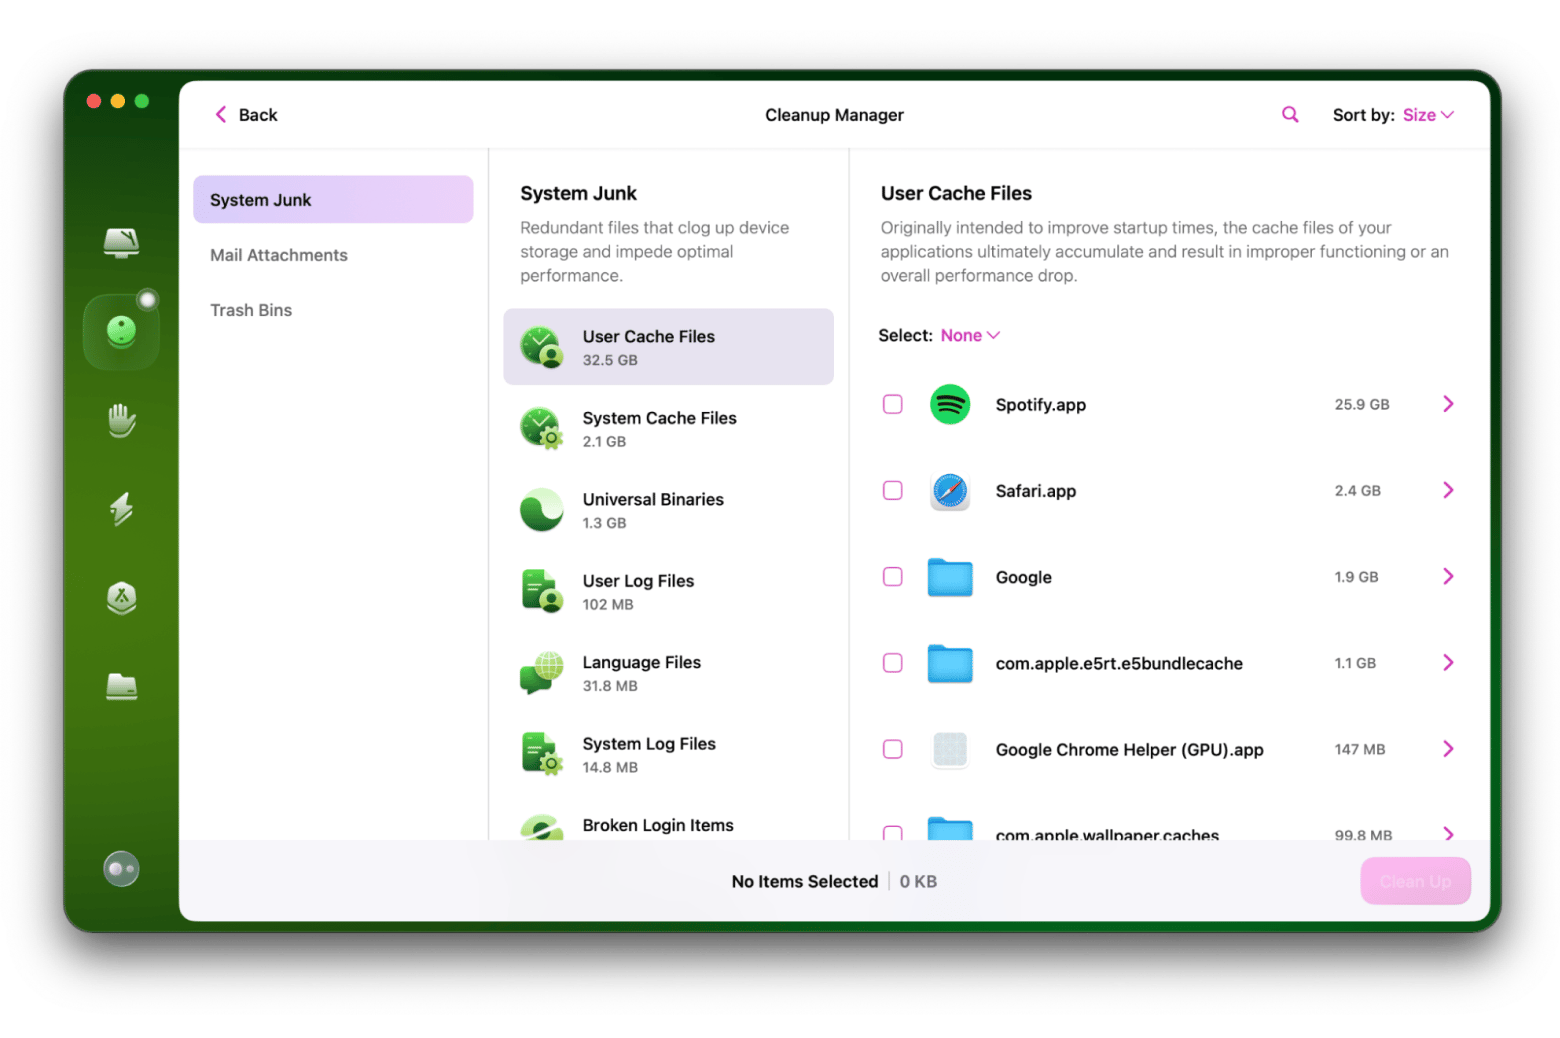
I used CleanMyMac to run a Cleanup scan. It cleared out outdated caches, system junk, and unneeded downloads, freeing up 5 GB, and my Mac immediately felt faster.
Here’s how to free up disk space using CleanMyMac:
Install and open CleanMyMac.
Click Cleanup in the sidebar.
Click Scan, then click Review All Junk.
Review System Junk and select the files you want to remove.
Click Clean Up.
I recently read Greg McKeown’s Essentialism: The Disciplined Pursuit of Less. It made me more minimalistic about what I store on my devices, because digital clutter tends to clutter my mind too. I now run a Cleanup every week.
If storage errors persist, open Disk Utility and run First Aid on your startup disk. First Aid checks for and repairs formatting and directory-structure errors. Follow Apple’s instructions for repairing a Mac storage device with Disk Utility.
Stop apps from opening at startup
I like convenience, so many of my apps open at startup: Slack for work, Notes, and a few others. A long list of startup apps slowed my Mac down, and trimming it made a clear difference.
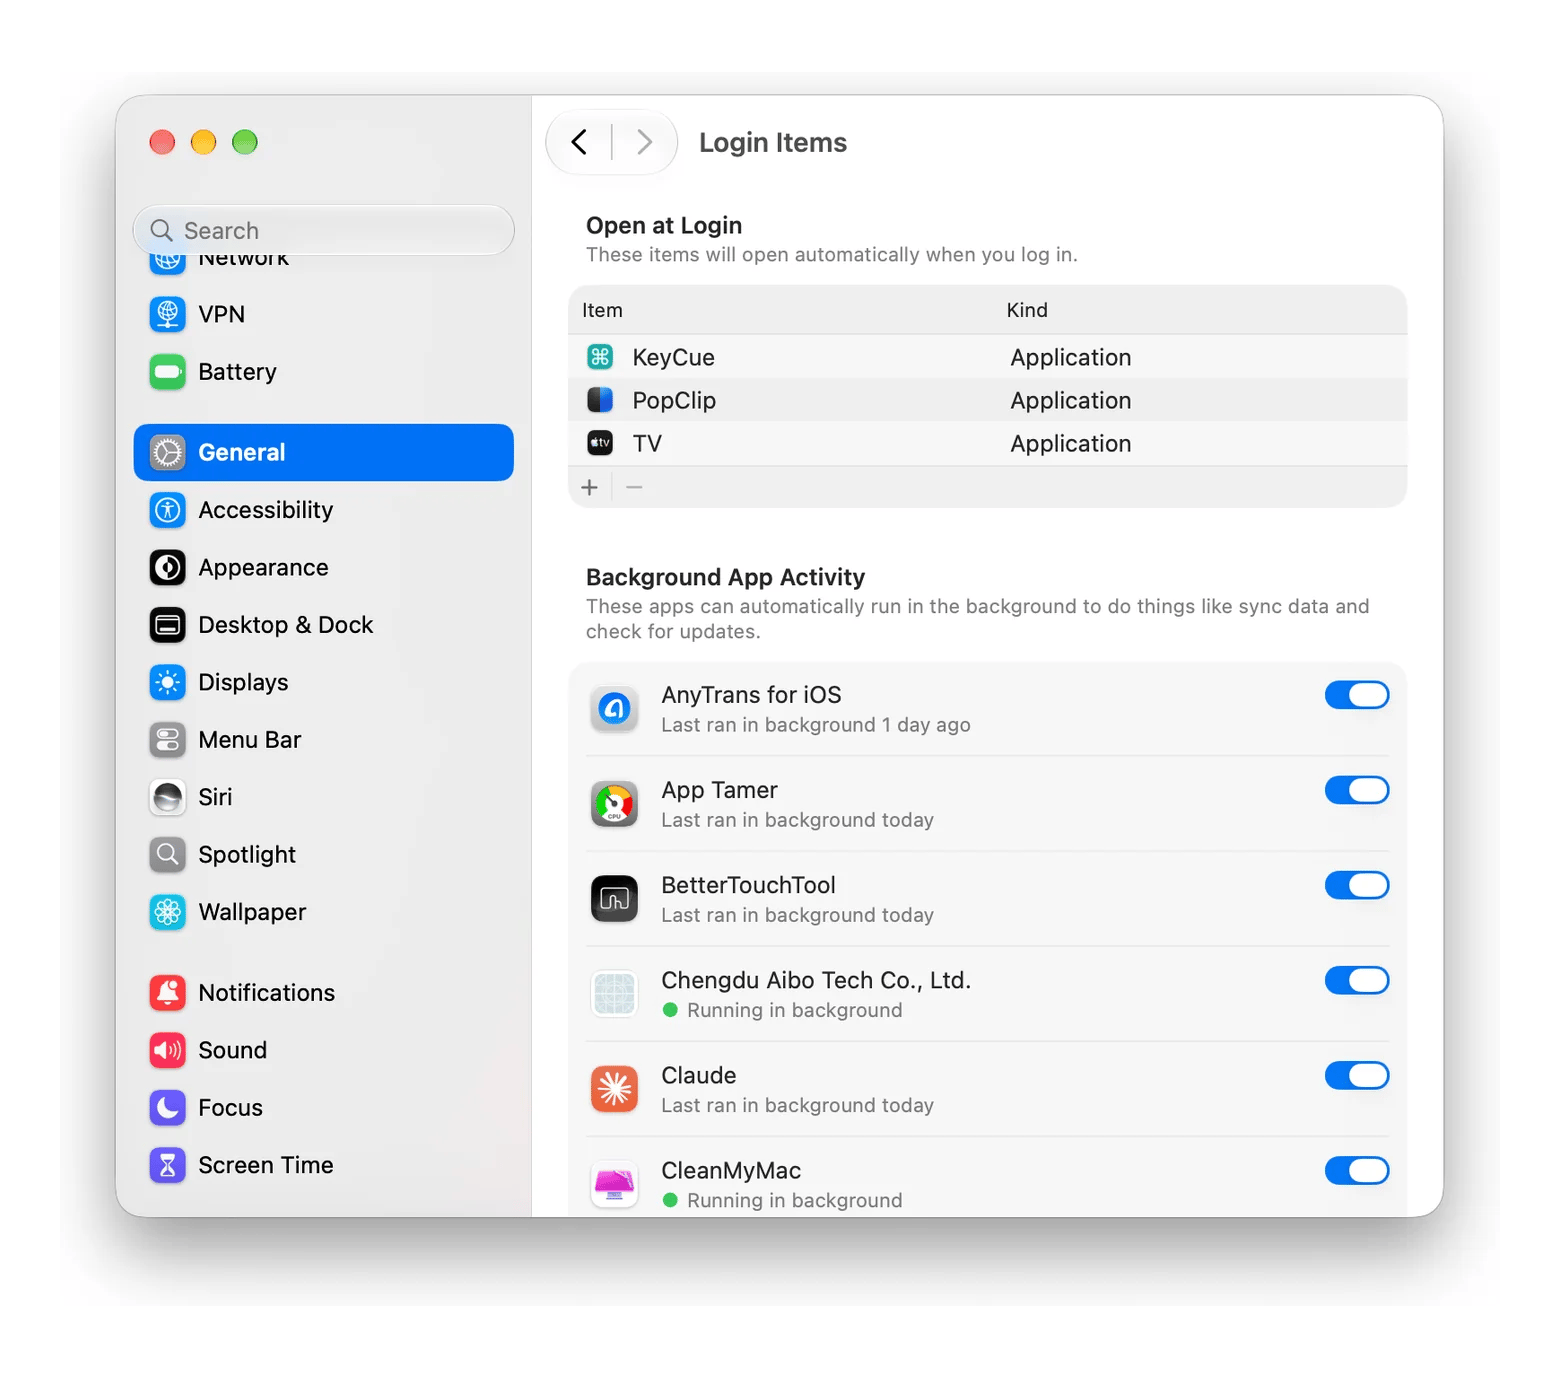
To remove startup apps, choose Apple menu > System Settings > General > Login Items & Extensions. Select an app you don’t need at startup, then click the Remove button (–).
After removing the apps I didn’t need, my Mac started up noticeably faster. I now keep only essentials, like my to-do list, in Login Items.
Tame CPU-hungry apps
After the update, I noticed my design software was using far more CPU than usual. Rather than quitting it, I decided to limit its background activity.
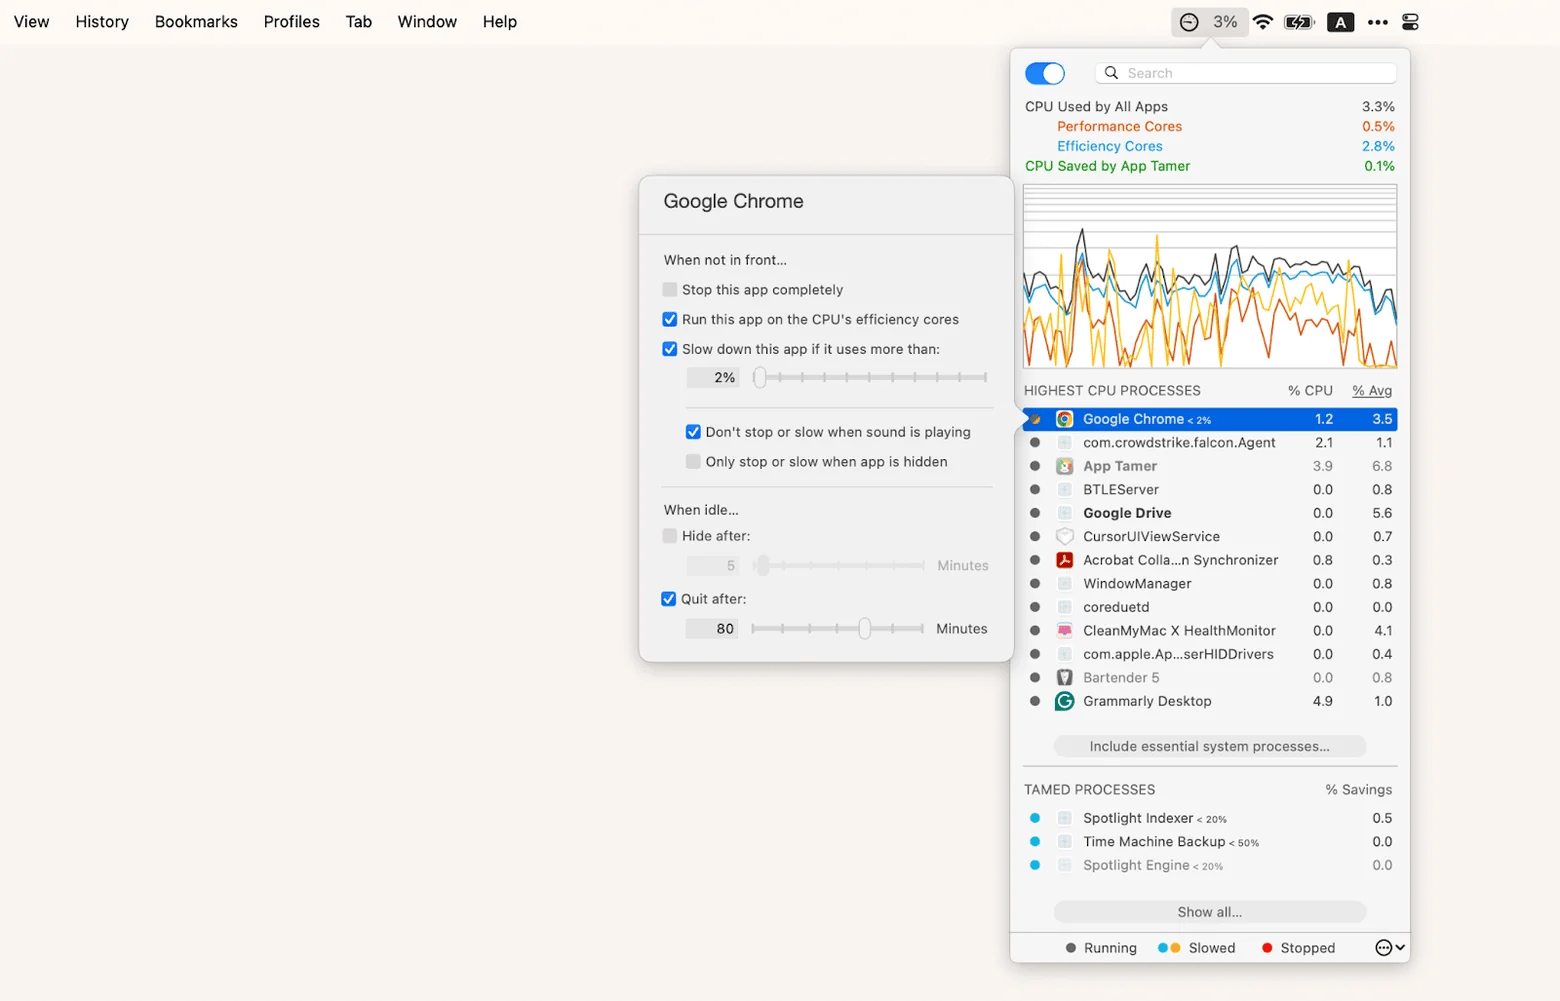
App Tamer helps reduce CPU usage by automatically slowing down apps that consume too much CPU when they’re idle in the background. You can also set a CPU usage threshold for specific apps, so App Tamer throttles them when they exceed that limit.
To set a CPU limit with App Tamer:
Install and open App Tamer.
Select the app you want to manage from the process list.
Enable the option to slow down the app when its CPU usage exceeds a specified percentage, then set your desired limit.
App Tamer slows the selected app when it exceeds your CPU threshold while running in the background. You can also configure it to stop an app completely when it’s idle.
Update or uninstall incompatible apps
Some older apps don’t work well with the latest macOS. If apps crash or run slowly after an update, compatibility is a likely cause. On Golden Gate, also check whether an app is still Intel-only, because those apps run through Rosetta 2 and usually have a faster Apple silicon version.
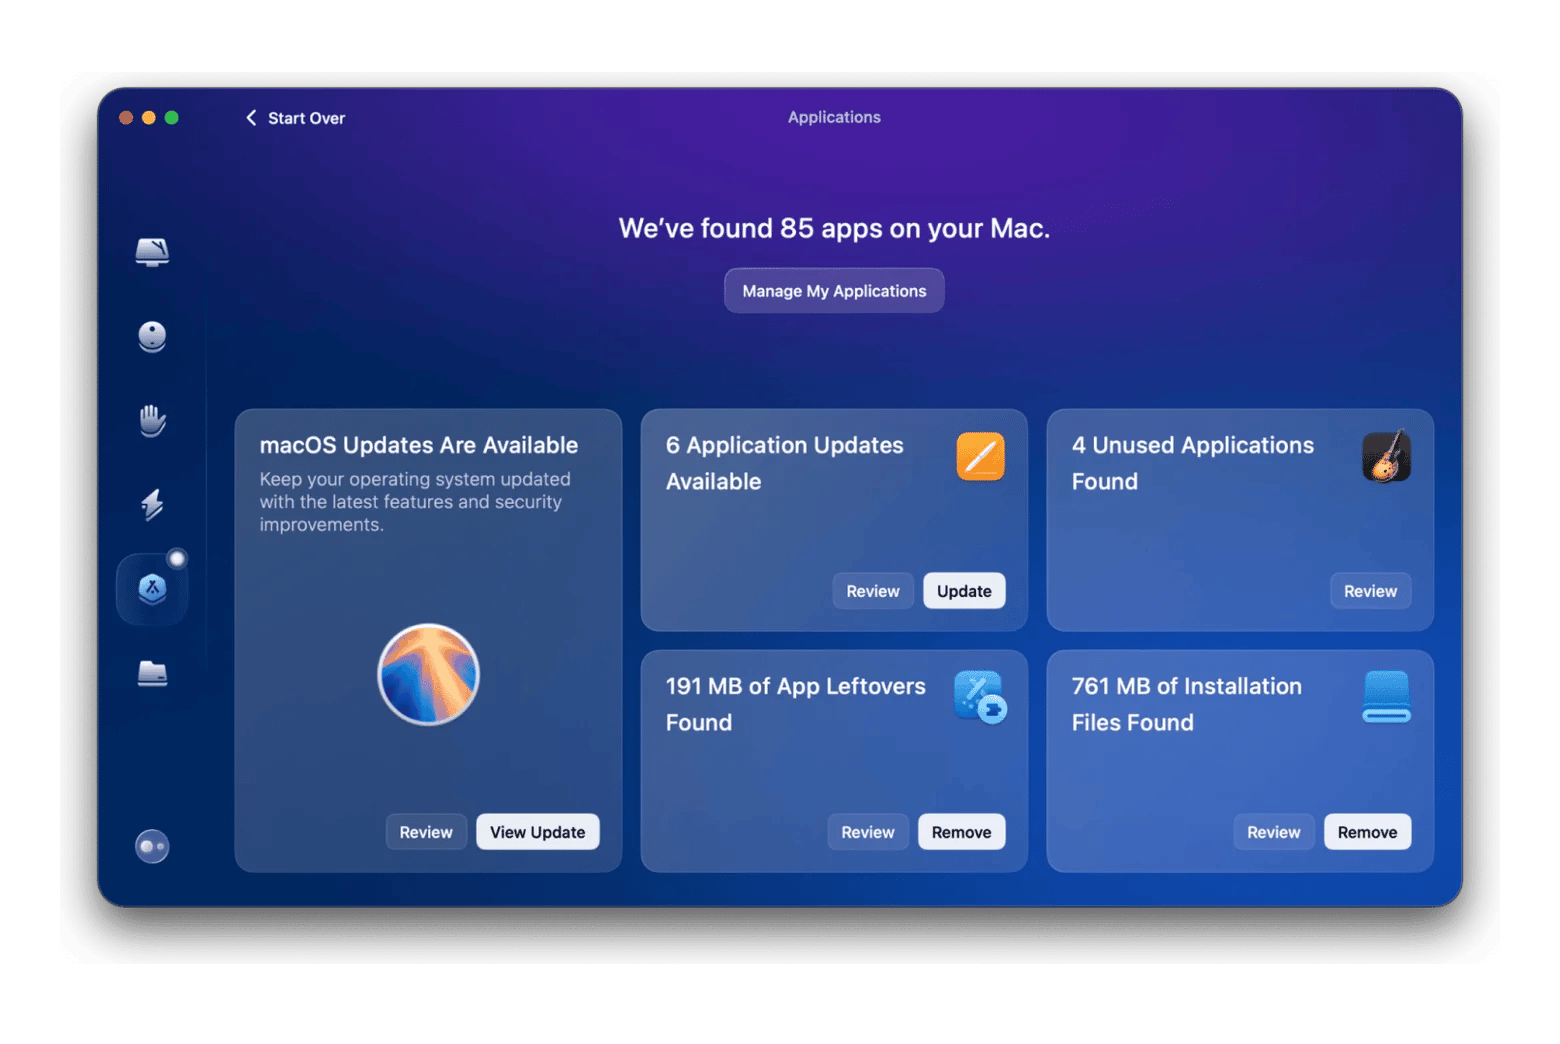
I use the Applications feature in CleanMyMac to handle updates and uninstalls in one place. It’s much faster than doing it app by app.
Here’s what I do:
Open CleanMyMac and click Applications.
Click Scan.
Review the results and follow the recommendations.
After updating my apps, I saw a big performance improvement. For the few apps without updates, I found alternatives.
Reduce visual effects
I love the animations in each new macOS release, but they can feel sluggish on older Macs. So I traded a little visual polish for a simpler interface.
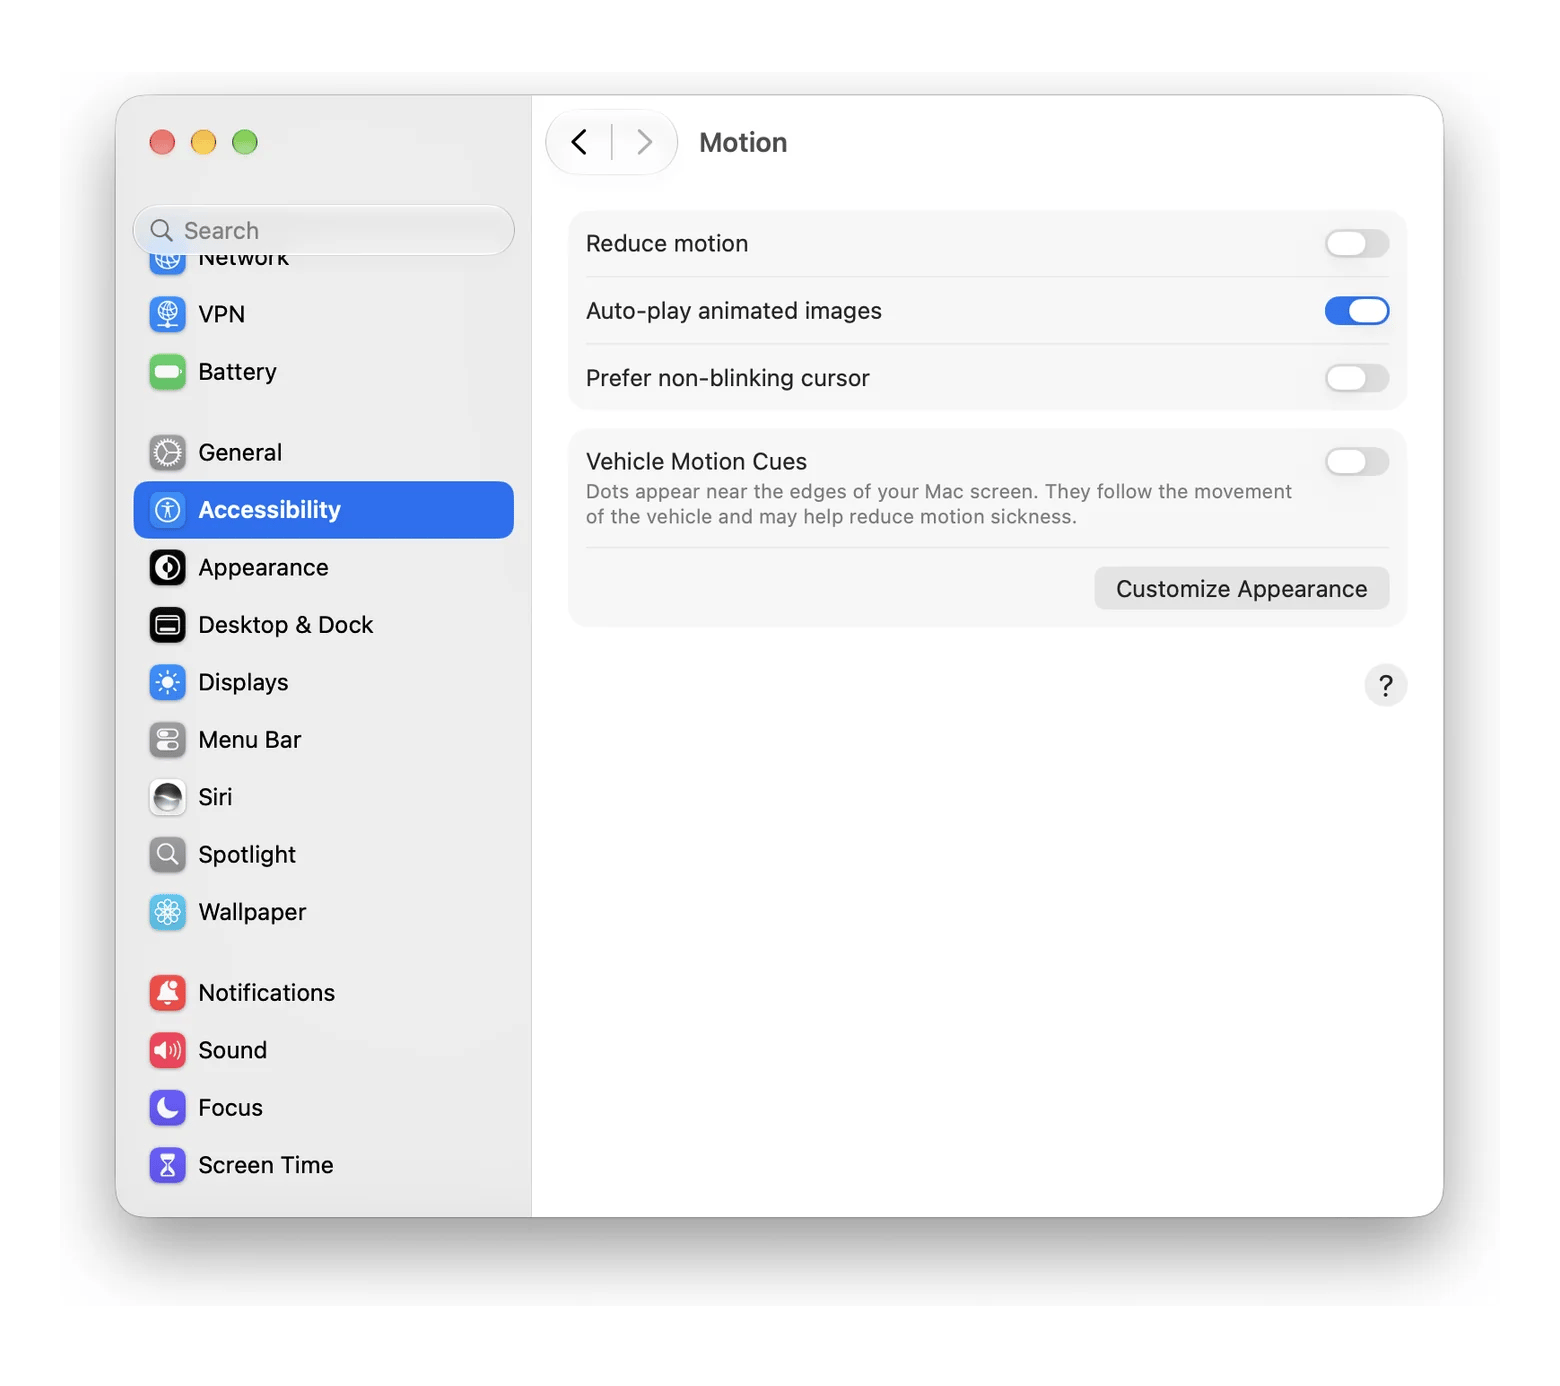
Go to System Settings > Accessibility > Motion and turn on Reduce Motion.
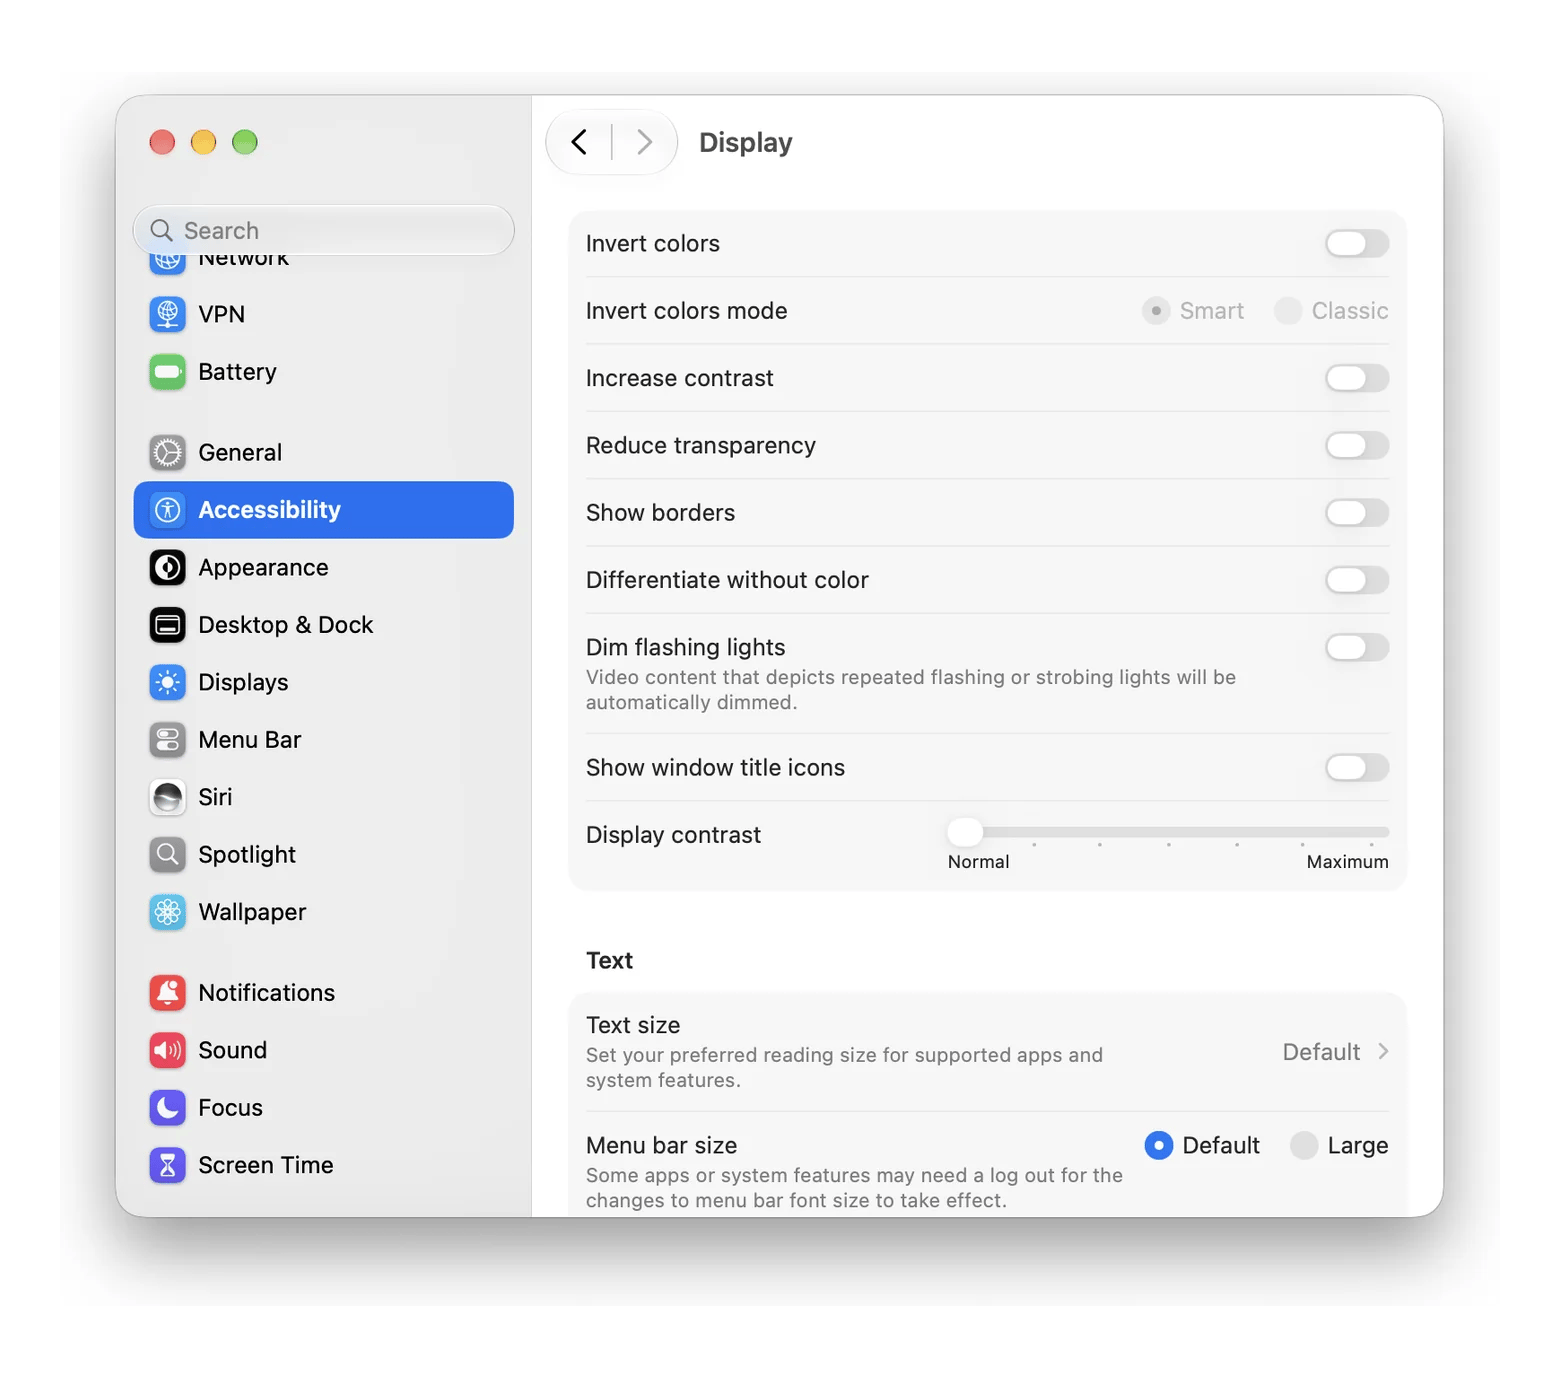
Then go to Accessibility > Display and turn on Reduce Transparency.
I noticed the difference right away. Window transitions felt snappier, and I didn't miss the visual effects as much as I expected.
Declutter your desktop
An overloaded desktop can make Finder slower, particularly when macOS has to generate previews for lots of files. Keeping only essential files and folders there also makes the desktop easier to navigate. The quickest built-in option is to Control-click the desktop and choose Use Stacks. This groups files by type, date, or tags without moving them into different folders.
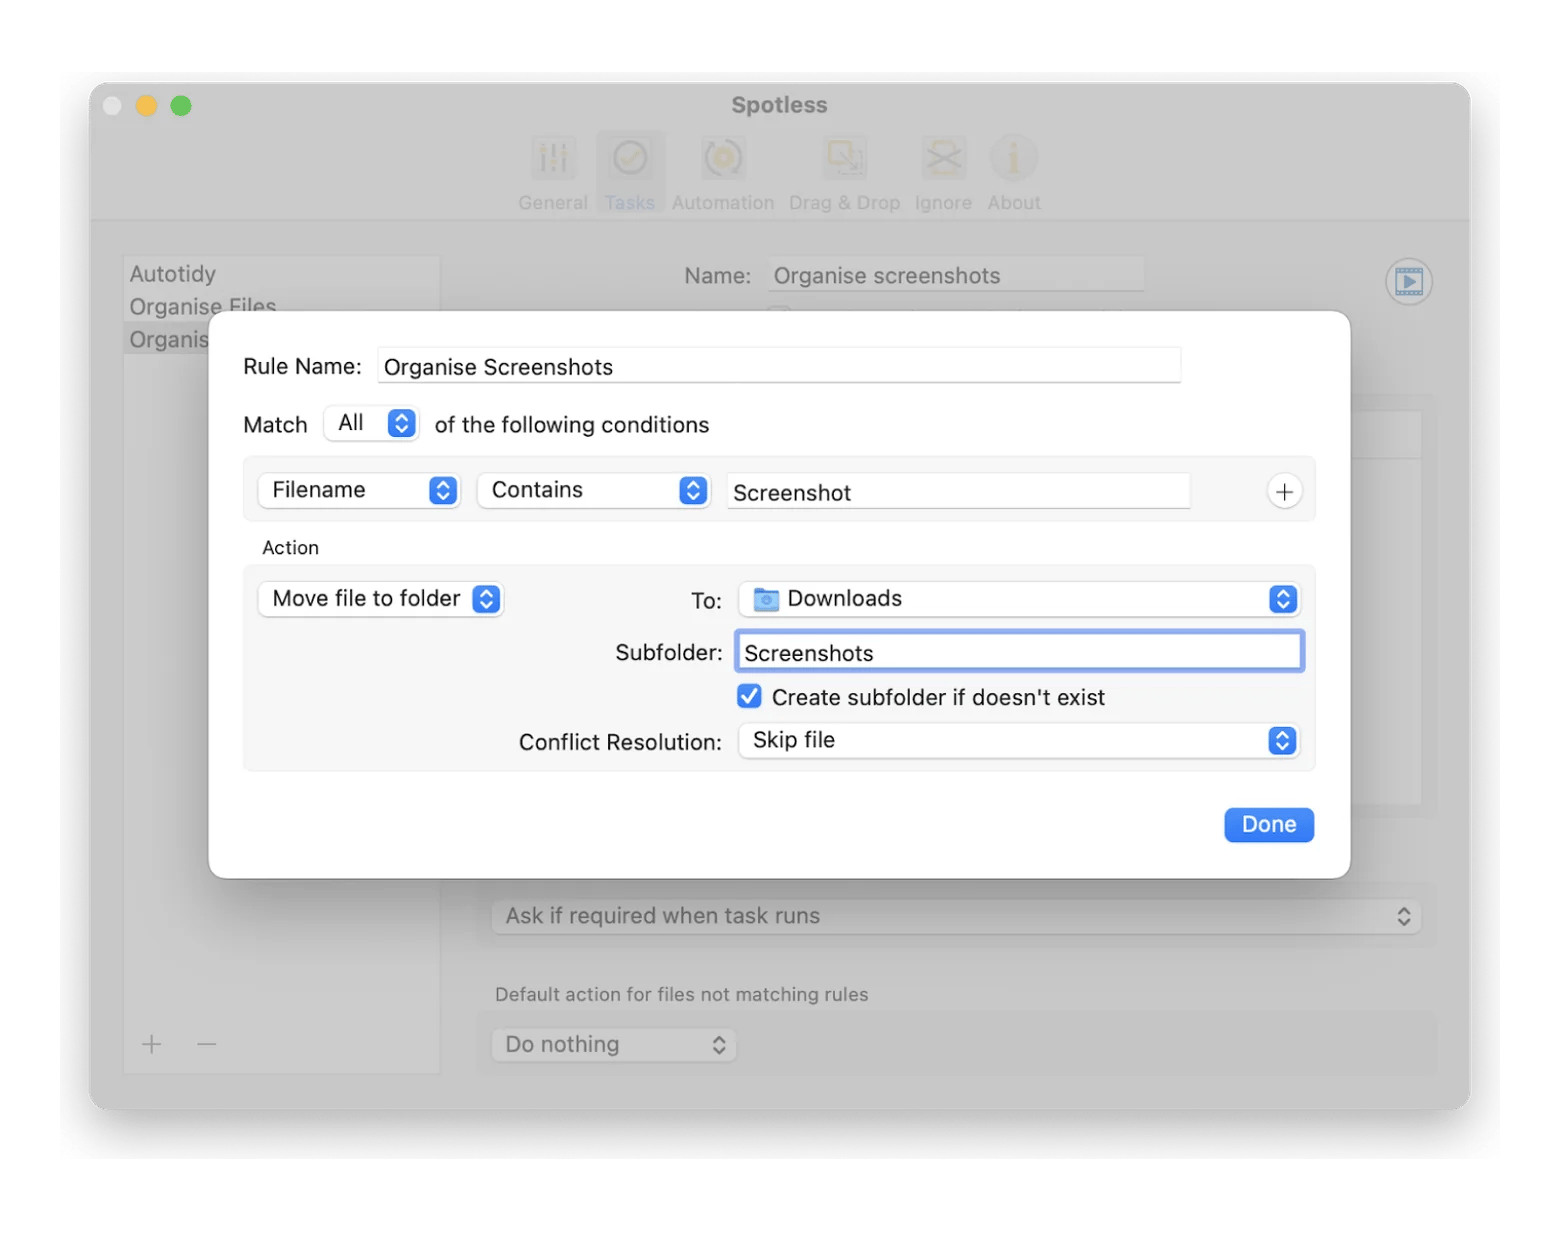
For ongoing cleanup, Spotless moves files based on rules you set and can run those cleanups on a schedule. For example, you can configure it to move new screenshots into a specific folder automatically.
To organize your files with Spotless:
Install and open Spotless.
Click the Spotless icon in the menu bar.
Click the menu button and choose Add/Edit Tasks.
Open the Tasks tab and click the + button to create a task.
Name the task and click the + button under File Processing Rules.
Configure your rules and click Done.
Here’s an example of the rules I set up for my screenshots:
Close browser tabs
I used to keep 30+ tabs open at all times, and it was slowing my Mac down. My browser consistently topped the CPU list in Activity Monitor.
Now I keep only the tabs I actually need open, and my Mac runs much more smoothly. It’s a small habit with a big effect, and closing tabs also frees up memory. If memory is your bottleneck, this roundup of RAM cleaners for Mac is worth a look.
Check your Wi-Fi connection
After updating, my internet was crawling too. Web pages took forever to load, apps that needed a reliable connection struggled, and standard speed tests didn’t explain why.
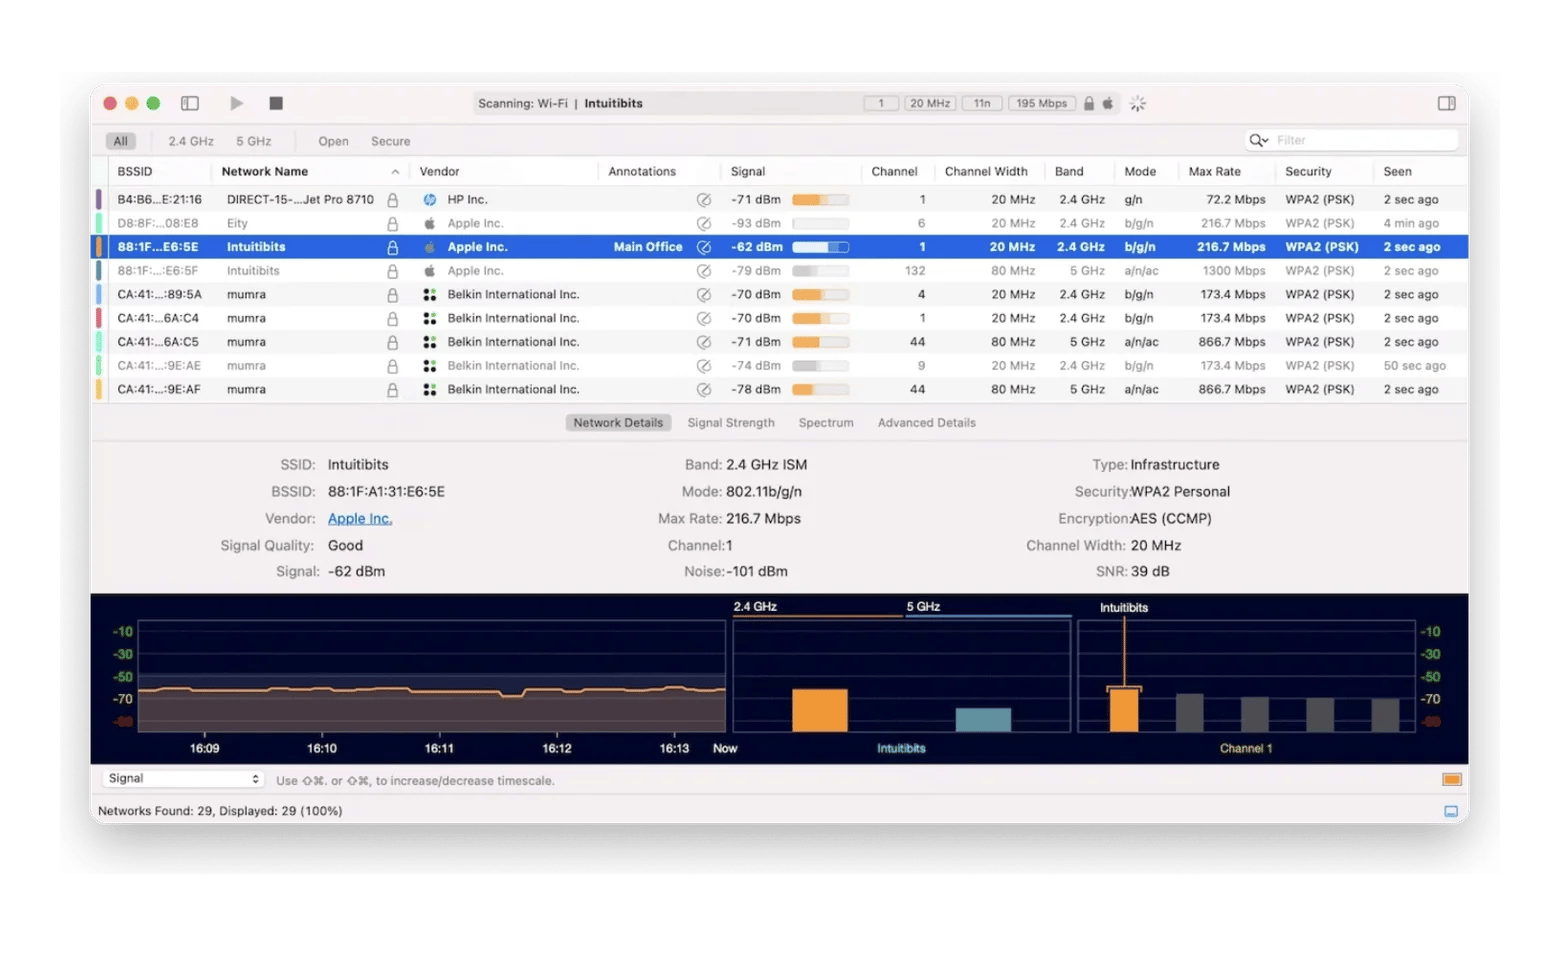
Then I tried WiFi Explorer. Unlike a speed test, it scans nearby Wi-Fi networks and shows each network’s signal strength and channel, so you can spot interference from neighboring networks.
The scan showed me exactly what was wrong with my connection. Now, whenever my MacBook lags online after an update, I run a WiFi Explorer scan first. If you want to compare tools, see this rundown of the best Wi-Fi analyzers for Mac.
Restart your Mac regularly
I’ll admit I’m bad at giving my Mac a proper rest. I close the lid at night and start working again the next morning.
Instead of relying only on sleep, restart your Mac every few days. Restarting clears temporary processes, releases memory, and lets pending system changes finish.
Restart your Mac and try safe mode if the slowdown continues
CleanMyMac removes clutter and keeps your apps up to date. App Tamer keeps demanding background apps under control, WiFi Explorer shows what’s slowing your network, and Spotless stops desktop clutter from building up again. All four are part of Setapp Membership, which gives you 300+ apps for Mac, iOS, and web. You can try it free for 7 days.
FAQ
Does updating a Mac make it slower?
Yes, temporarily. A Mac often runs slower for 24–72 hours after a major update while Spotlight, Photos, and iCloud reindex and sync data. Keep it plugged in and let those tasks finish. If it’s still slow after three days, check Activity Monitor, free storage with CleanMyMac, trim startup apps, and update incompatible apps.
Can my Mac be too old for macOS Golden Gate?
Yes. macOS Golden Gate runs only on Macs with Apple silicon (M1 or later) and MacBook Neo. Intel Macs stay on macOS Tahoe, the last version that supports them. Check Apple’s official macOS Golden Gate compatibility list before upgrading. Even a supported Mac can struggle with little free storage or outdated apps.
What problems can occur after updating to macOS Golden Gate?
The most common are temporary CPU spikes, shorter battery life, slower searches, app incompatibilities, and Wi-Fi drops. Background indexing usually settles within a few days. Update your apps, check Activity Monitor, free up storage, and install the latest maintenance update (currently macOS 27.2). For Wi-Fi issues, scan your network with WiFi Explorer.
How can I see what is slowing down my Mac after an update?
Open Activity Monitor from Applications > Utilities. Check the CPU and Memory tabs, then click a column heading to sort by usage. Look for apps or processes using unusually high resources. Quit only apps you recognize, and don’t force-quit unfamiliar macOS processes. To limit CPU-heavy apps automatically, use App Tamer.
How do I clean up my Mac after an update?
Go to System Settings > General > Storage and review Apple’s recommendations. Remove large downloads, unused apps, and files you no longer need. You can also use CleanMyMac to find system junk, outdated files, and app leftovers before you choose what to remove.
Fix Mac issues with Setapp
Get an ever-growing selection of troubleshooting apps.






 Best solution
 Best solution